
you wil find the orignal tutorial here
This tutorial is a personal creation.
Virginia works with PSP17
I work with PSP2018
but you can follow this tutorial with any other version of
PSP. Depending on the version of PSP you use, the results
might be slightly different

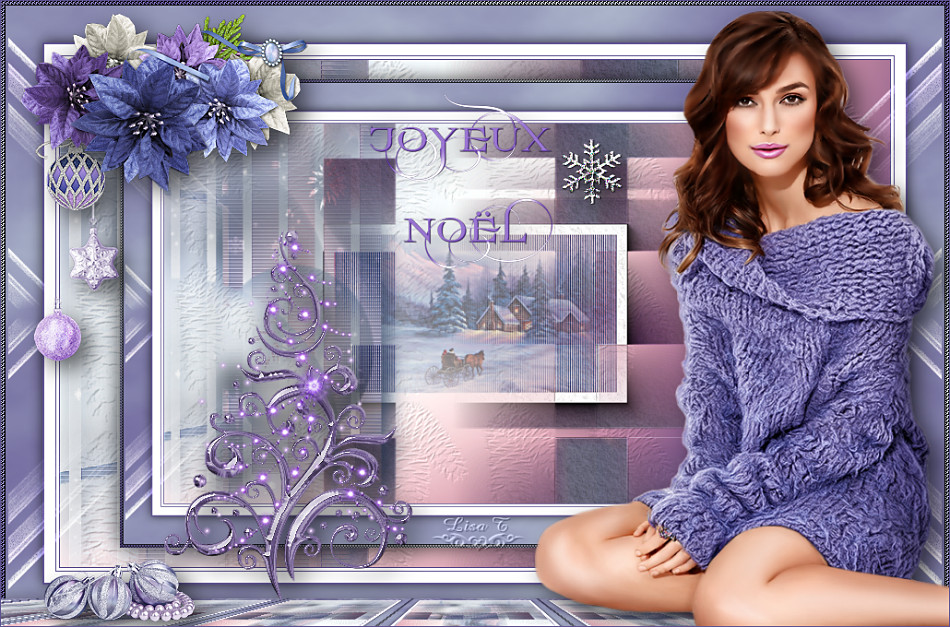
below is an animated version of this tutorial.
You will find the link to the explanations for this animation
at the end of this page.
Any resemblance with another one would be pure coincidence.
It is strictly forbidden to modify images, to change their
name or take off the matermarks,
To present them on your sites or blog,
To share them in groups,
to offer them in a bank of images, or to use them on lucrative
purposes.
Thank you to respect Virginia’ work and the tubers’ work.
Don’t hesitate to warn her if you have any trouble
with this tutorial.
some tubes were received in sharing groups
if you think one of them is yours, or not copyright free,
please let Virginia know
and a link to your site will be added
either she will delete it from the material provided if
you prefer

Hints & Tips
TIP 1 -> if you don’t want to
install a font -->open it in a software as « Nexus Font » (or
other font viewer software of you choice)
as long as both windows are opened (software and font),
your font will be available in your PSP
TIP 2 -> from PSPX4, in the later versions
of PSP the functions « Mirror » and « Flip » have
been replaced by -->
« Mirror » --> mirror -> mirror horizontal
« Flip » --> mirror -> mirror vertical
Material
tubes - mask - selections

the woman tube was created by Whitecrows (Vio)
landscape tube was created by Thafs

Please, copy / paste the mask into the folder « masks » of
PSP general folder if you want to obtain the same result
place the texture into the folder « textures » of
PSP general folder
Filters used
Adjust - Variations
* Alien Skin - Eye Candy 5 Impact et Textures
* AAA Filters - Textures
* AAA Frames - FotoFrame
* Carolaine and Sensibility - CS Texture
* Cybia - Screenworks
* CFM Tile Tools - Blend Emboss
* Mehdi
* Mura's Meister
* Render - import into Filters Unlimited
* Toadies - import into Filters Unlimited
* VM Extravaganza - import into Filters Unlimited
to download the filters, click on the banner below
Thank you very much to Janaly and Gigi for their kind permission

If you don’t know how to install filters into Unlimited
2, just click on the link below

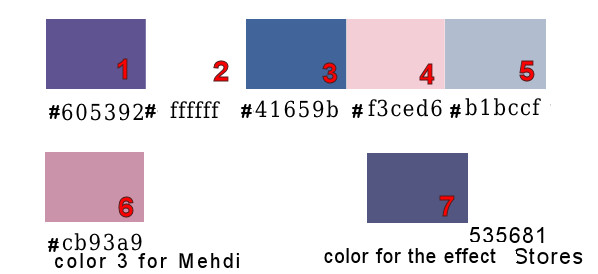
Colors used
Virginia these colors
Don't hesitate to change the colors and the blend mode
of the layers, and the shadows,
according to your tubes and images.
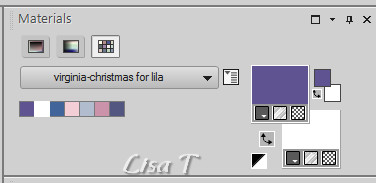
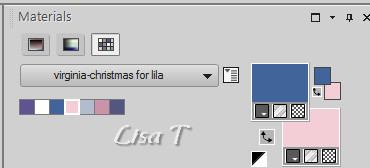
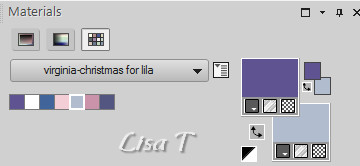
prepare the materials palette, color 1 as FG color and
White as BG color
Important
Open all images in PSP, duplicate them and close the originals.
(shift + key D)
always work with the copies
some tubes provided are not « visible » (in
order to reduce the weight of the material file)
click on visibility toggle of the layer to make it visible
again
use the pencil to follow the steps
hold down left click to grab it and move it

Realization
1
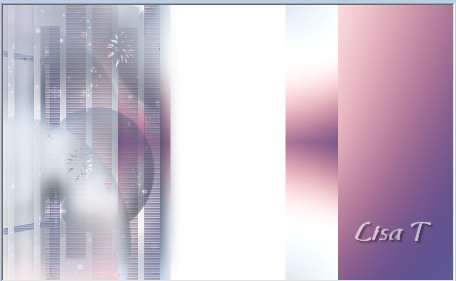
open a new transparent image 900 * 550 pixels
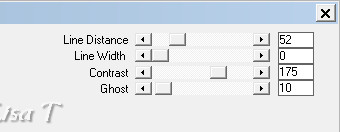
effects -> plugins -> Mehdi / Wavy Lab 1.1 / last
color box -> color 6
layers -> duplicate
image -> resize -> untick « resize all
layers » -> 80%
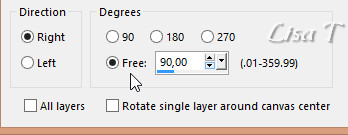
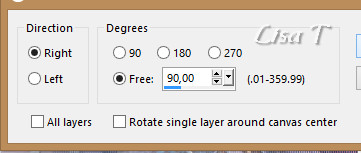
image -> free rotate
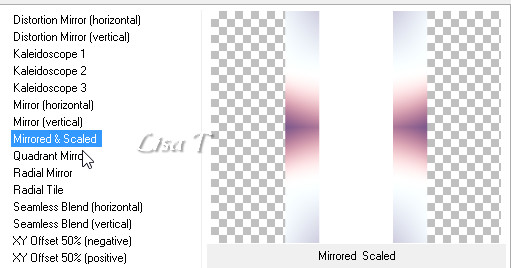
effects -> plugins -> Unlimited 2 -> Tile & Mirror
/ MPirrored & Scaled
2
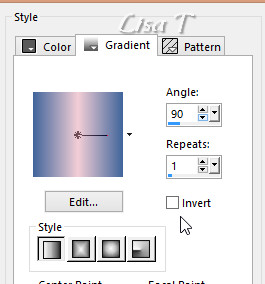
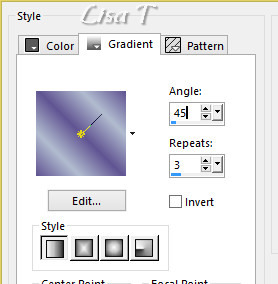
prepare colors 3 and 4 as FG and BG colors
then prepare a linear gradient into the FG box
layers -> new raster layer
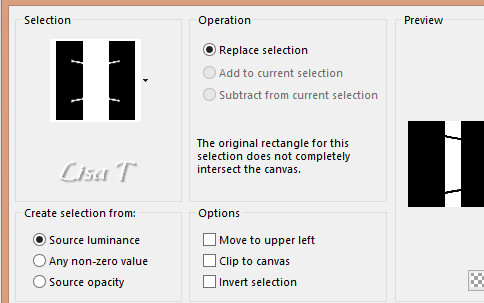
selections -> load/save selection -> from disk -> selection « sel_01_Lila_vir.PspSelection »
enable the Flood Fill tool

flood fill selection with the gradient
selections -> select none
effects -> plugins -> Carolaine and Sensibility /
CS-Texture
effects -> plugins -> Unlimited 2 -> VM Extravaganza
/ Shouting / default settings
3
layers -> load/save mask -> from disk
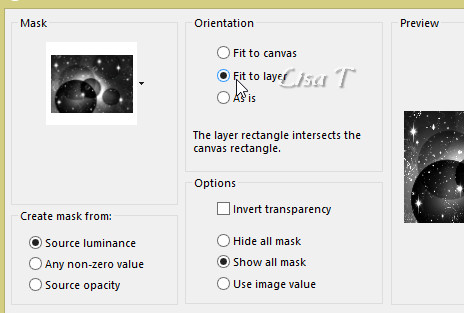
adjust -> sharpness -> sharpen
layers -> merge -> merge mask
effects -> image effects -> offset
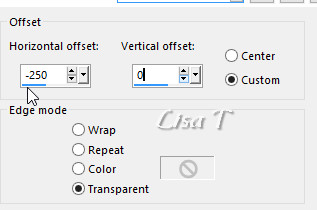
effects -> plugins -> FM Tile Tools / Blend Emboss
/ default settings
4
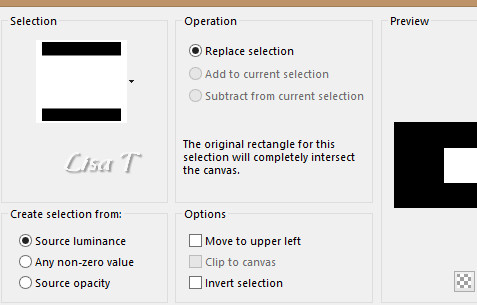
selections -> load/save selection -> from disk -> selection « sel_02_Lila_vir.PspSelection »
DELETE on your keyboard
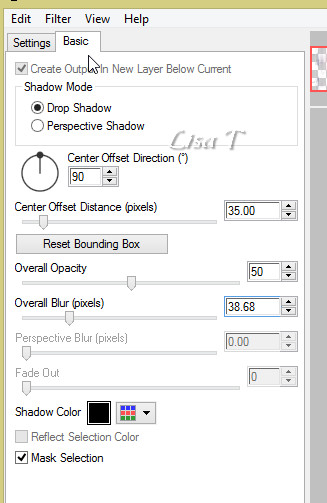
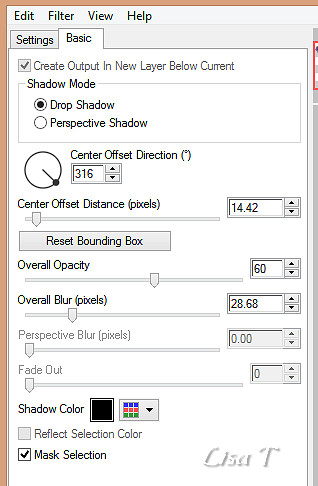
effects -> plugins -> Alien Skin Eye Candy 5-Impact
/ Perspective Shadow / settings’ tab-> Drop Shadow
Blurry
blend mode of the layer : darken
effects -> 3D effects -> drop shadow -> 2 / 3
/ 50 / 40 / color 1
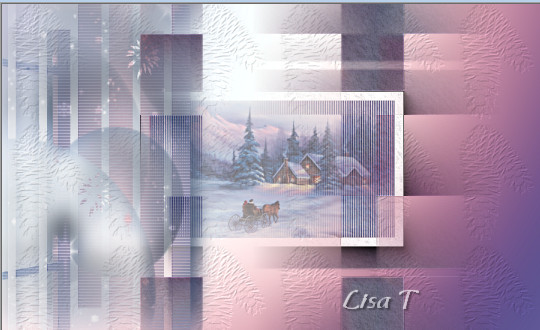
your work looks like this
5
highlight layer underneath ( copy of Raster 1)
selections -> load/save selection -> from disk -> selection « sel_01_Lila_vir.PspSelection »
DELETE on your keyboard
selections -> select none
effects -> plugins -> Unlimited 2 -> Toadies /
Weaver / default settings
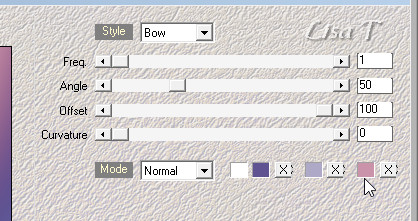
effects -> texture effects -> Blinds -> color
7
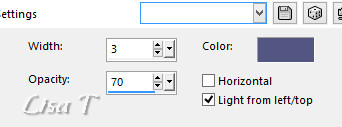
effects -> plugins -> AAA Frames / FotoFrame
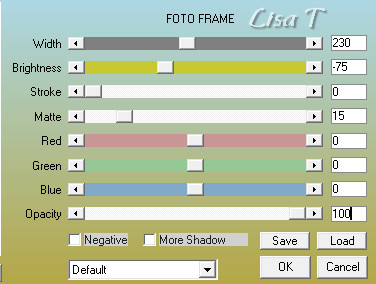
your work looks like this
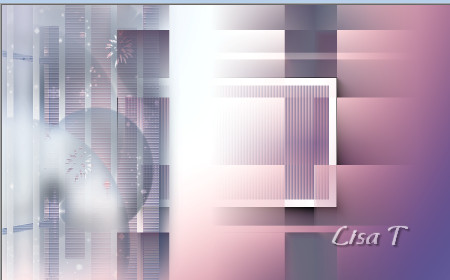
adjust -> sharpness -> sharpen
6
layers -> duplicate
effects -> plugins -> AAA Filters / Textures / default
settings
adjust -> sharpness -> sharpen more
7
selections -> load/save selection -> from disk -> selection « sel_03_Lila_vir.PspSelection »
open the landscape tube
image -> resize -> 45%
edit -> copy
back to your work
edit -> paste as new layer
selections -> invert
DELETE on your keyboard
selections -> select none
opacity of the layer : 45%
8
highlight Background layer (Raster 1)
effects -> texture effects -> Textures / with « natfl150 » texture
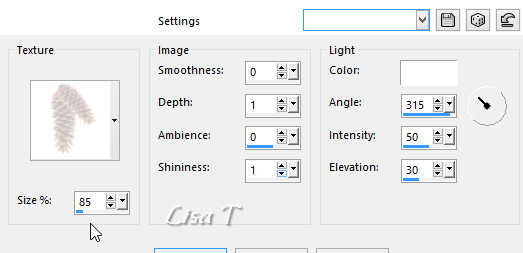
adjust -> sharpness -> sharpen more
your work looks like this
your layers palette looks like this
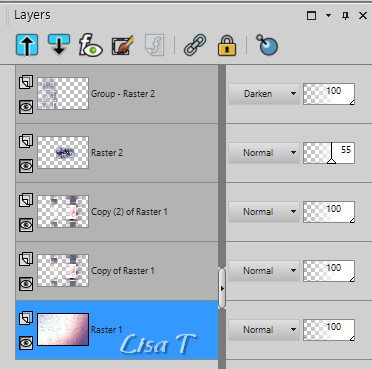
layers -> merge -> merge all (flatten)
9
materials palette -> set color 1 as FG color and White
as BG color
image -> add borders -> tick « symmetric » ->
1 pixel color 1
3 pixels white
1 pixel color 1
12 pixels white
2 pixels color 1
10
materials palette -> set color 5 as BG color
selections -> select all
image -> add borders -> tick « symmetric » -> 40
pixels white
selections -> invert
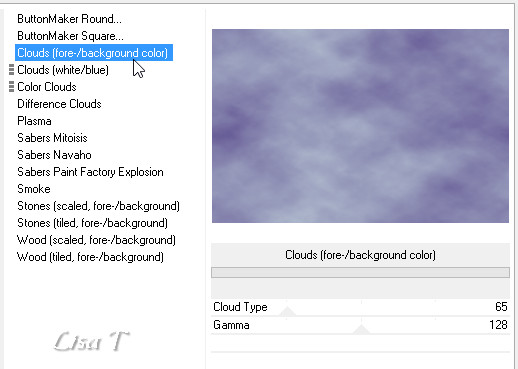
effects -> plugins -> Unlimited 2 -> Render /
Clours (Fore/Background color)
selections -> invert
effects -> 3D effects -> drop shadow -> 0 / 0
/ 70 / 20 / black
selections -> select none
11
copy / paste as new layer « deco_fond_lila »
the blend mode of this layer is « overlay »
image -> add borders -> tick « symmetric » -> 1
pixel black
12
materials palette -> prepare a linear gradient
selections -> select all
image -> add borders -> tick « symmetric » -> 4
pixels white
selections -> invert
flood fill selection with the gradient
effects -> plugins -> Cybia -> Screenworks / Close
knit

adjust -> sharpness -> sharpen
selections -> select none
13
layers -> duplicate
edit -> repeat « duplicate »
keep top layer highlighted
image -> resize -> 75%
effects -> 3D effects -> drop shadow -> 0 / 0
/ 70 / 30 / black
14
highlight layer below (copy of background)
image -> free rotate
effects -> plugins -> Mura’s Meister / Perspective
Tiling / height : 20
effects -> 3D effects -> drop shadow -> 2 / -3
/ 45 / 30 / black
layers -> merge -> merge visible
15
open « Victorian_Christmas(57) »
iumage -> resize -> 48%
copy / paste as new layer
enable the Pick Tool
hit the M key of your keyboard to disable the tool
adjust -> sharpness -> sharpen
effects -> plugins -> Alien Skin Candy 5-Impact -> Perspective
Shadow / Drop Shadow Blurry
16
copy / paste as new layer « Ornament -02-TS »
enable the Pick tool
effects -> plugins -> Alien Skin Candy 5-Impact -> Perspective
Shadow / Drop Shadow Blurry
layers -> arrange -> move down
17
highlight top layer
open « vio1096 » (woman)
select the layer already selected (modified by Vio - thank
you Vio)
image -> resize -> 94%
copy / paste as new layer
enable the Pick tool
effects -> plugins -> Alien Skin Candy 5-Impact -> Perspective
Shadow / (don’t modify the settings)
18
copy / paste as new layer « MS-Flake05 »
enable the Pick tool
effects -> plugins -> Alien Skin Candy 5-Impact -> Perspective
Shadow / (don’t modify the settings)
19
copy / paste as new layer « LA_deco christmas
tree silver.png »
enable the Pick tool
adjust -> hue and saturation -> colorize
effects -> plugins -> Alien Skin Candy 5-Impact -> Perspective
Shadow / (don’t modify the settings)
20
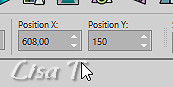
copy / paste as new layer « deco_sapin_lila.pspimage »
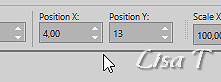
enable the Pick tool -> position X : 212 / position
Y : 254
effects -> plugins -> Alien Skin Candy 5-Impact -> Perspective
Shadow / (don’t modify the settings)
21
open « Angelica's Winter (58).png »
effects -> plugins -> Adjust / Variations
one click on « original »
one click on « more blue »
click on OK
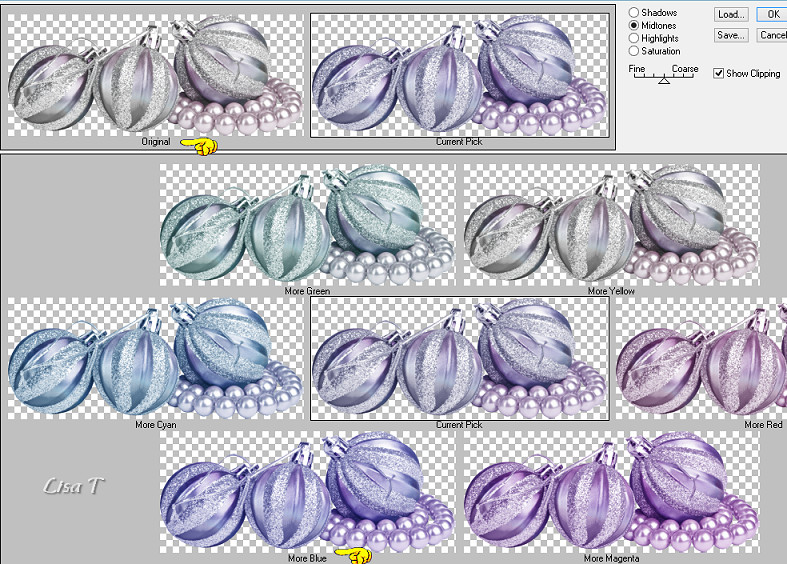
image -> resize -> 22%
copy / paste as new layer
enable the Pick tool
effects -> plugins -> Alien Skin Candy 5-Impact -> Perspective
Shadow / (don’t modify the settings)
22
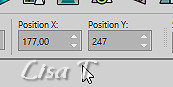
open « Joyeux Noel.pspimage »
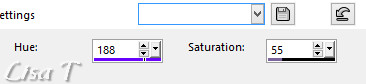
adjust -> hue and saturation -> colorize -> hue :
188 / saturation : 130
image -> resize -> 45%
copy / paste as new layer
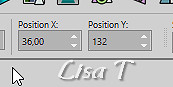
enable the Pick tool -> position X : 400 / position
Y : 101
effects -> 3D effects -> drop shadow -> 2 / 3
/ 35 / 35 / black
23
apply your watermark
image -> add borders -> 1 pixels color 1
image -> rezie -> tick « resizez all layers » -> 950
pixels (width)
If you want to create a snow animation you will find the
explanations

explanations made with with Animation Shop or Ulead Gif
Animator, in french and english
Don't hesitate to write to Virginia if you have any trouble
with her tutorial
Back to the boards of Virginia’s tutorials
board 1  board 2 board 2

|