
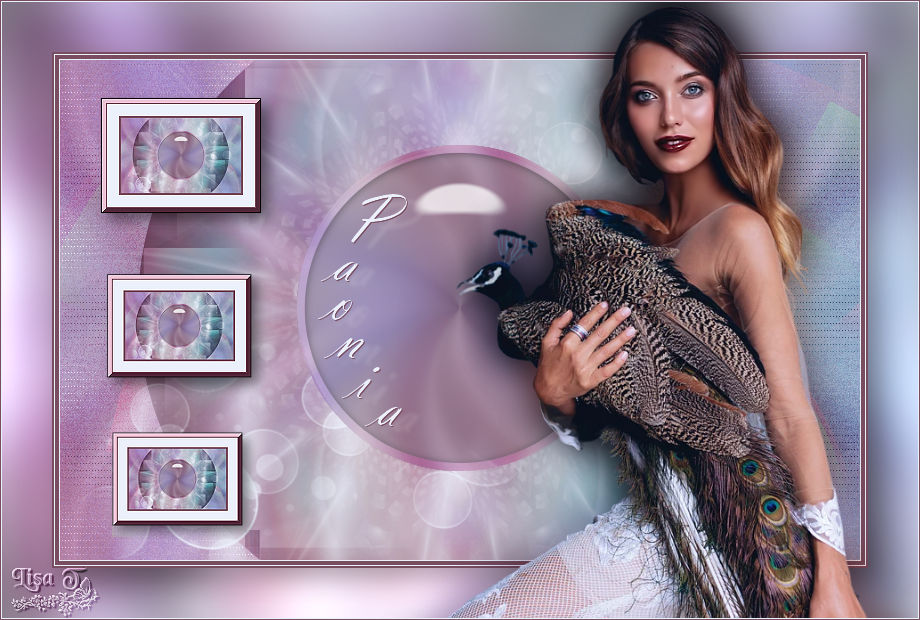
You will find the original tutorial here :

This tutorial is a personal creation.
Any resemblance with another one would be only pure
coincidence.
It is stricly forbidden to modify tubes, to change
their name or take off the matermarks,
To present them on your sites or blog,
To share them in groups,
to make a bank of images, or to use them on lucrative purposes.

Animabelle created this tutorial using PSP X9
but you can follow it with another version ; however,
the results might be slightly different
Thank you to respect Animabelle’s work and the tubers
work.
Don’t hesitate to warn me if you have any trouble
with this translation,
and I’ll try to fix the problem as quickly as I can


Material
tube - masks - palette - preset - selections

duplicate tubes and work with the originals
open the masks and minimize it to tray
double click on the preset to install (or import)
place the gradient into the folder Gradients of your
Corel PSP general folder
place the selections into the folder Selections of your
Corel PSP general folder
TIP 1 -> if you don’t
want to install a font -->
open it in a software as « Nexus Font » (or
other font viewer software of you choice)
as long as both windows are opened (software and font),
your font will be available in your PSP
TIP 2 -> from PSPX4,
in the later versions of PSP the functions « Mirror » and « Flip » have
been replaced by -->
« Mirror » --> image => mirror => mirror horizontal
« Flip » --> image => mirror => mirror vertical

Filters (plugins) used
Mehdi
Xero
L & K Landsiteofwonders
Alien Skin Eye Candy 5: Impact
Graphics Plus
-----------------------------------------
<ICNET Software> - Filters Unlimited 2.0
VM Natural
&<Bkg Kaleidoscope>
Andrew's Filters 25
Toadies
Buttons & Frames
thank you Renée Salon for sharing your plugins ‘ page

Use the pencil to follow the steps
hold down left click to grab it and move it
 |

1
prepare the material, masks and tube
save your work often
2
prepare all the colors in the materials palette
don’t hesitate to change the blend modes and opacities
of the layers if necessary
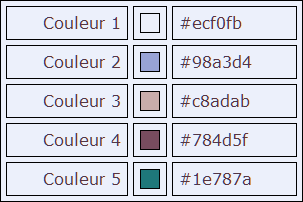
Animabelle chose these colors
3
prepare the gradient into the FG box of the materials palette
4
open a new transparent image 800 * 500 px
flood fill with the gradient
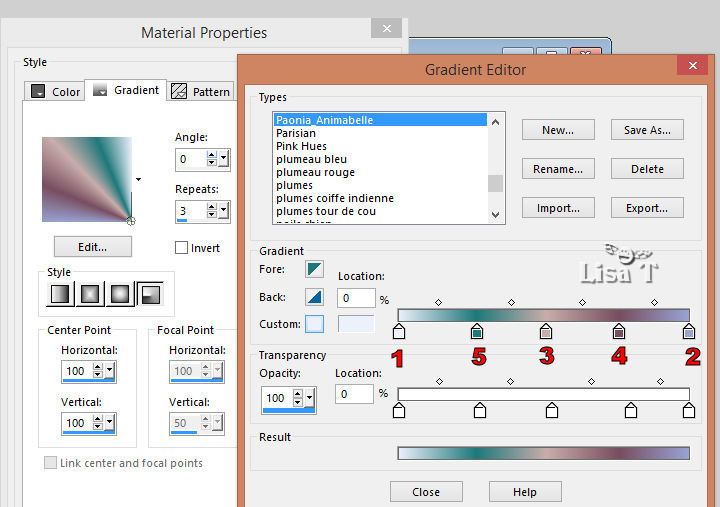
to change the colors of the gradient, follow this tutorial HERE
effects => plugins => Mehdi => Kaleidoscope
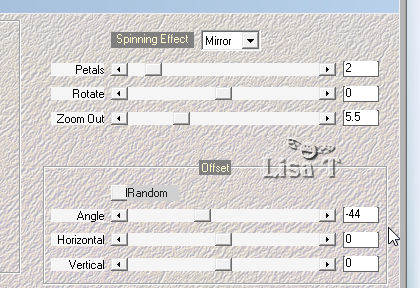
adjust => blur => gaussian blur / 25
5
layers => duplicate
effects => plugins => Mehdi => Sorting Tiles
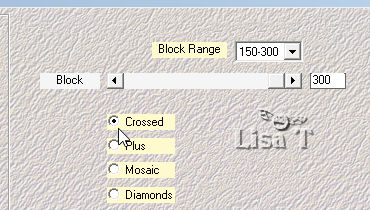
effects => plugins => Unlimited 2 => VM Natural
/ Weave Distortion
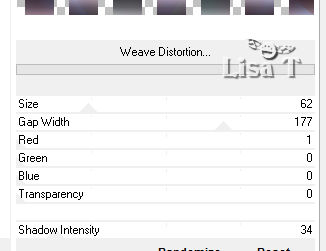
6
effects => distortion effects
=> wave

blend mode of the layer : lighten - opacity :
77%
adjust => bur => radial blur
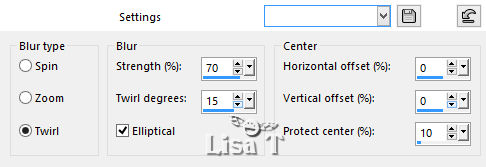
7
layers => duplicate
blend mode of the layer : lighten - opacity
: 28%
image => mirror => mirror horizontal
layers => merge => merge visible
effects => plugins => Unlimited 2 => &<Bkg
Kaleidoscope => 4 QFlip ZBottomL
layers => duplicate
effects => plugins => Unlimited 2 => &<Bkg
Kaleidoscope => Radial Mirror / default settings :
144 / 187
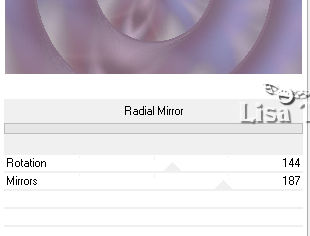
blend mode of the layer : overlay - opacity
: 30%
layers => merge => merge visible
8
selections => load / save selection => from disk
=> « sel1_Paonia_Animabelle »
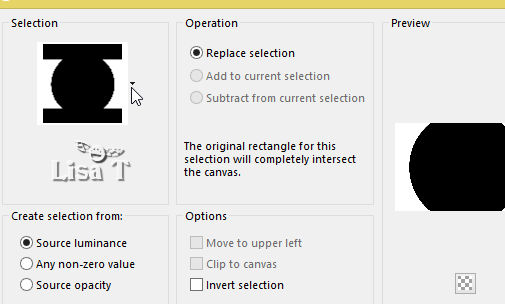
effects => plugins => Xero => Fuzzifier
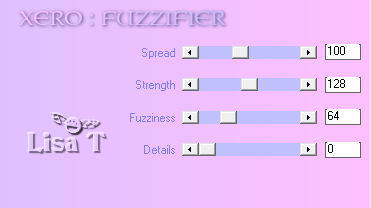
selections => promote selection to layer
9
effects => plugins => Unlimited 2 => Andrem’s
Filter 25 / Max Radials
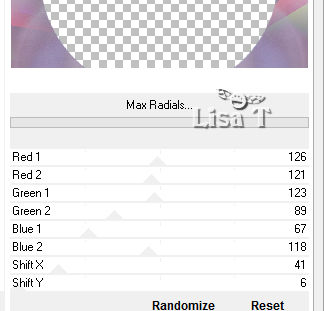
blend mode of the layer : soft light
effects => 3D effects => drop shadow => 0 / 0
/ 100 / 30 / color 4
drop the same shadow once more
layers => merge => merge down
10
selections => promote selection to layer
effects => plugins => L & K => L & K
Zitah
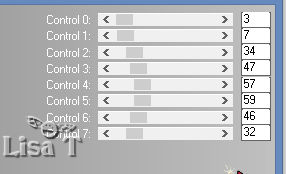
selections => select none
layers => duplicate
effects => plugins => Unlimited 2 => Toadies
=> Weaver / default settings
layers => arrange => move down
blend mode of the layer : multiply
11
highlight bottom layer
selections => load / save selection => from disk
=> « sel2_Paonia_Animabelle»
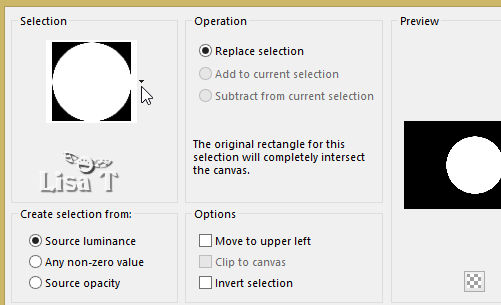
selections => promote selection to layer
layers => arrange => bring to top
layers => duplicate
adjust => blur => radial blur same settings
as before
layers => merge => merge down
12
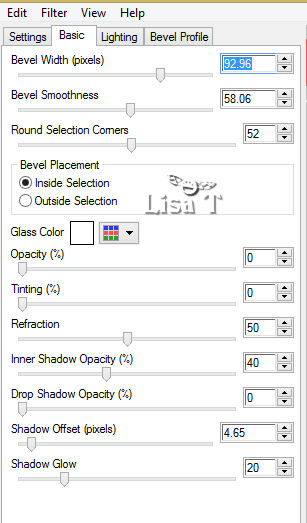
effects => plugins => Alien Skin Eye Candy 5 :
Impact / Glass
apply the preset provided
selections => modify => select selection borders
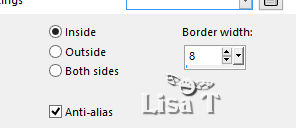
selections => promote selection to layer
blend mode of the layer : hard light
selections => select none
13
highlight middle layer
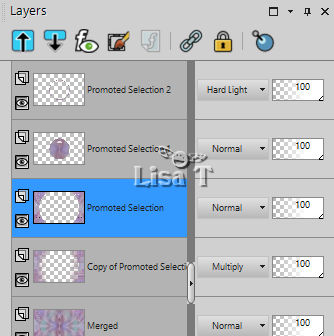
layers => new raster layer
flood fill with the gradient paonia with the following
settings
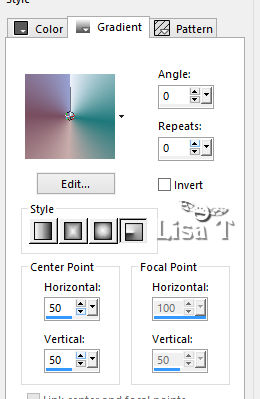
adjust => blur => gaussian blur / 25
blend mode of the layer : overlay - opacity
: 60%
14
layers => new raster layer
flood fill with color 1
layers => new mask layer => from image
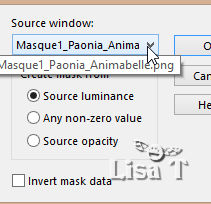
layers => merge => merge group
image => mirror => mirror horizontal
keep this layer highlighted
15
layers => new raster layer
flood fill with color 1
layers => new mask layer => from image
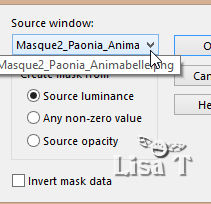
layers => merge => merge group
blend mode of the layer : lighten - opacity
: 48%
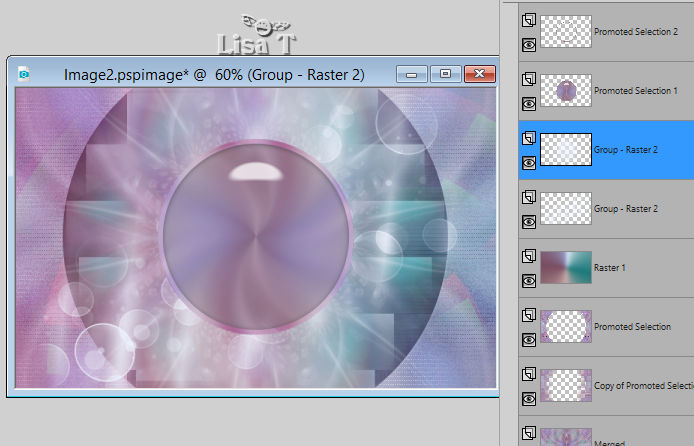
your layers palette and work look like this
16
edit => copy special => copy merged
edit => paste as new image
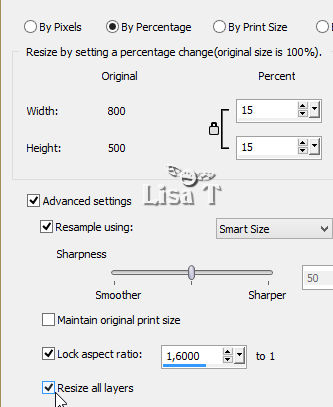
work with this image => image => resize => 15%
adjust => sharpness => high pass sharpen

17
image => add borders => tick « symmetric » => ...
2 px color 4
12 px color 1
6 px color 4
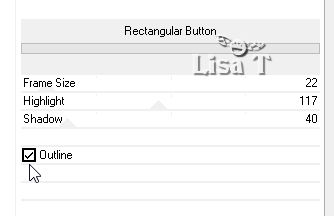
effects => plugins => Unlimited 2 => Buttons & Frames
/ Rectangular Button
adjust => sharpness => sharpen
edit => copy
18
badk to your main work
highlight top layer
edit => paste as new lyaer
enable the Pick tool with the following settings to move
this layer properly

hit the M key to disable the tool
effects => 3D effects => drop shadow => 8 / 8
/ 45 / 20 / black
19
layers => duplicate
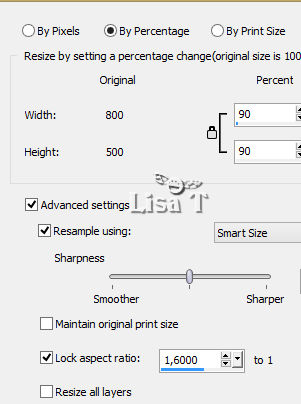
work with this image => image => resize => untick « resize
all layers » => 15%
adjust => sharpness => sharpen
effects => image effects => offset => -30 / -155
(tick « custom » and « transparent »)
layers => duplicate
work with this image => image => resize => untick « resize
all layers » => 90%
adjust => sharpness => sharpen
effects => image effects => offset => -30 / -155
(tick « custom » and « transparent »)
layers => merge => merge all (flatten)
20
image => add borders => tick « symmetric » => 1
px color 1
window => duplicate and set aside for the ultimate border
back to your main work
layers => new raster layer
selections => load / save selection => from disk
=> « sel3_Paonia_Animabelle»
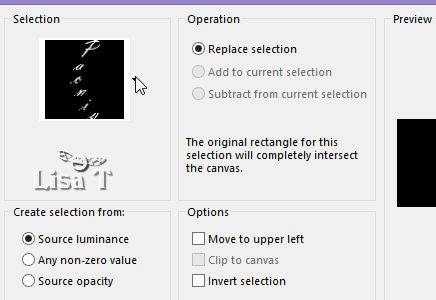
flod fill selections with color 1
selections => select none
effects => 3D effects => drop shadow => 1 / 1
/ 100 / 0 / color 4
effects => 3D effects => drop shadow => 6 / 16
/ 15 / 6 / white
21
enable the Pick tool => H : 259 / V : 135
layers => merge => merge all (flatten)
image => add borders => tick « symmetric » => ...
2 px color 4
1 px color 1
2 px color 4
22
selections => select all
image => add borders => tick « symmetric » => 50
px color 1
selections => invert
copy / paste into selection the image set aside in step
20
adjust => blur => gaussian blur / 220
effects => plugins => Graphic Plus / Cross Shadow
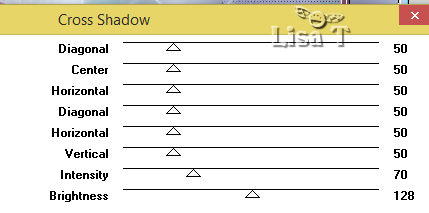
selections => invert
effects => 3D effects => drop shadow => 10 / 10
/ 30 / 35 / black
selections => select none
23
copy / paste as new layer the woman tube
move to lower right corner
layers => duplicate
highilight layer below
adjust => blur => guassian blur => 20
blend mode of the layer : multiply
image => add borders => tick « symmetric » => 1
px color 1
image => add borders => tick « symmetric » => 1
px color 4
24
layers => new raster layer
apply your signature or watermark
layers => merge => merge all (flatten)
file => export => jpeg optimized
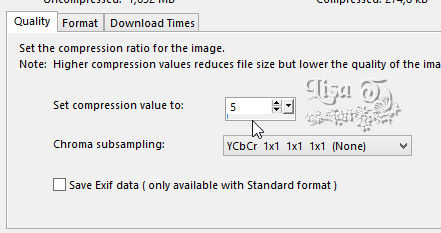

My creation with my tube
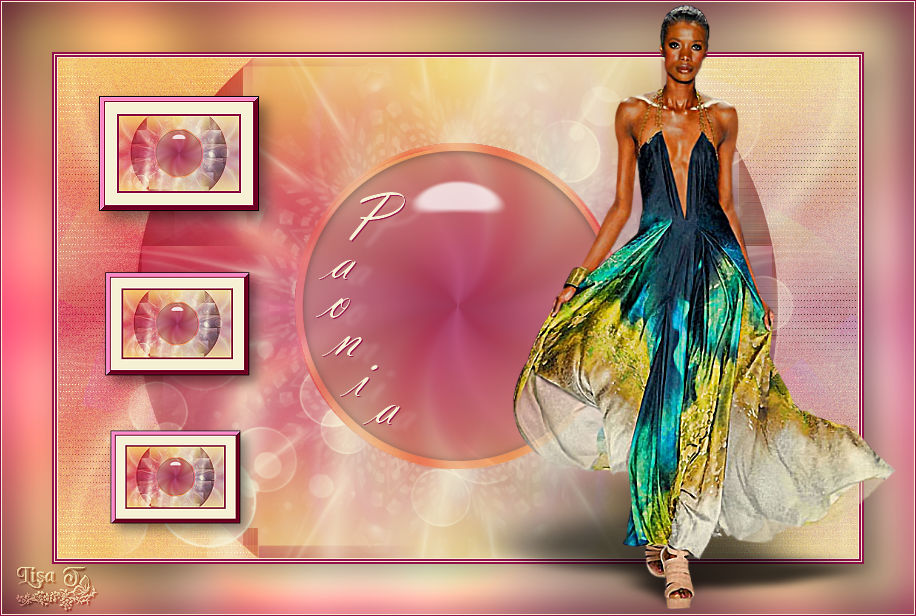
Don't hesitate to write to Animabelle if you have any
trouble with her tutorial
To be informed about her new tutorials, join her NewsLetter
on her Home page
If you create a tag (using other tubes than those provided)
with this tutorial
and wish it to be shown, send it to Animabelle !
It will be a real pleasure for her to add it to the gallery
at the end of the tutorial


back to the boards of Animabelle’s tutorials
board 1 board 2 board 2 board
3 board
3  board 4 board 4 

|