Venus

I am member of TWInc
This tutorial is protected


Conditions of use of the material provided
It is forbidden to modifiy, change the name, take off the watermarks or alter the tubes.
It is forbidden to share them in groups or offer them on your site, blog or forum.
If you want to use them to create a tutorial, you must ask the permission of the authors.
Matérial
mask Maelle Dreams (Sybel has the authorization to use it)
one tip brush
one landscape by Baziha
1 misted tube by Sybel
1 fractal image

Plugins
FM Tile Tools/Blend Emboss
Transparency/Eliminate Black
Xero/Improver
Graphic Plus/Cross Shadow
&<BKG Designers sf10>/Cruncher
Colors palette

color 1 --> #ffffff
color 2 --> #852ac4
color 3 --> #60bc6f
color 4 --> #263326

Use the paint brush to follow the steps
left click to grab it
 |

Realization
Step 1
Open all the material provides with PSP
duplicate them, close tho originals and work with the copies
minimize the mask
activate the landscape Fantasy (or another image of your choice, resized to 1000 pixels width)
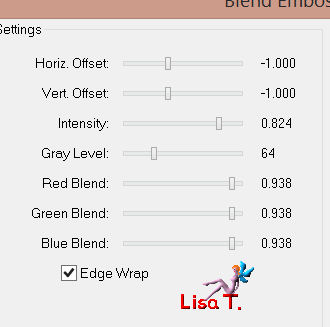
effects/plugins/FM Tile Tools/Blend Emboss

Step 2
activate the image “Fractal Art Flowering 43”
layers/promote background layer
effects/plugins/Transparency/Eliminate Black
edit/copy - back to your work - edit/paste as new layer
image/mirror
adjust/sharpness/sharpen
in the layers palette, set the opacity on 89%
Step 3
layers/new raster layer
paint with white
layers/new mask layer/from image/choose “Mask MD 016”

layers/merge/merge group
image/mirror
in the layers palette, set the opacity on 36%
adjust/sharpness/sharpen
Step 4
activate the mist “Venus”
edit/copy - back to your work - edit/paste as new layer
move it as shown on the final result
effects/plugins/Xero/Improver/ 10 / 10 / 10 / landscape
adjust/sharpness/sharpen
in the layers palette, set the opacity on 92%
Step 5
in the materials palette, set color 1 as foreground
activate the image “Sparkle Single Bold”
file/export/custom brush
give a name to your tip and clic OK
activate the paint brush tool, and choose your new tip

using the right click of your mouse, apply the brush 2 times at the bottom of the tag
(see final result)
image/add borders/check “symmetric”/2 pixels/white
Step 6
selections/select all
selections/modify/contract/2 pixels
effects/3D effects/buttonize

selections/select none
Step 7
image/add borders/check “symmetric” :
5 pixels color 2
2 pixels color 1
50 pixels with a contrasting color
select this border with the magic wand tool
in the materials palette, set color 4 as foreground and color 3 as background
and prepare a linear gradient

fill the selection with this gradient
effects/plugins/Graphic Plus/Cross Shadow/default settings
effects/plugins/&<BKG Designers sf10>/Cruncher

effects/edge effects/enhance
Step 8
selections/invert
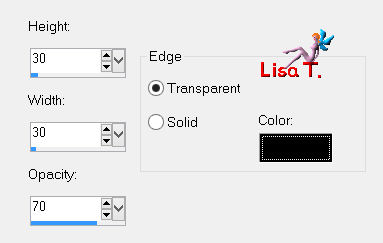
effects/3D effects/drop shadow

drop shadow again, changing the horizontal and vertical values for negative values (-10)
selections/select none
Step 9
image/add borders/check “symmetric”/2 pixels/black
Step 10
apply your signature
file/save as... type jpeg
image/resize/1000 pixels width

your tag is now finished
Thank you to have realized it

Don’t hesitate to write to Sybel or to me or to me 
if you have any problem
or if you want to show us your creation
It will be a real pleasure to present it at the bottom of this tutorial

Your Creations
creation Maria  de los Angeles de los Angeles

Création  Anne-Marie Anne-Marie

Back to the board of Sybel’s tutorials


|