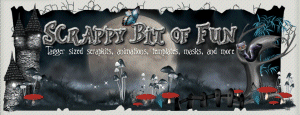
Mahasiah

you will find other creations, misted images, tutorials, on Sybel's Blog

Conditions of use of the material provided
It is forbidden to modifiy, change the name, take off the watermarks or alter the tubes.
It is forbidden to share them in groups or offer them on your site, blog or forum.
If you want to use them to create a tutorial, you must ask the permission of the authors.

Sybel has the permission of the creators to use their tubes, masks and decorations
Thank you to all of them.
Without their beautiful creations, no tutorials could be written.
Sybel uses PSPX6 to create her tags
I use PSPX8 to create my tags
but you can realized these tutorials with any other version of PSP
Matérial
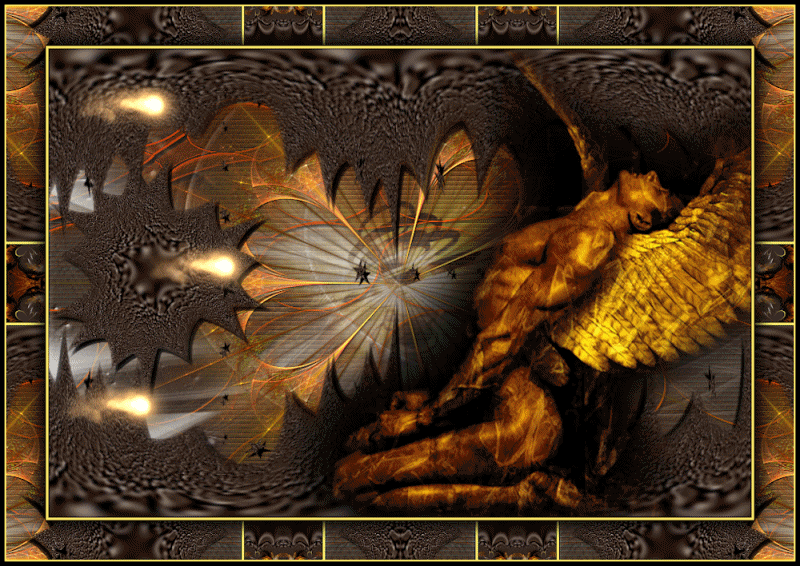
Mists landscape and angel (Carlos Quevedo) by Sybel
1 Mask found on the web
Mask & fractal by Bärbel
Animation by Simone

open all tubes
window/duplicate. Close the originals and work with the copies
open the masks and minimize them to tray
Plugins
user defined filter
blend emboss 5
Bkg Designer SF10 I
Nik Software - Color effex Pro 3.1
FM Tile Tools - Blend emboss
Flaming Pear - Flexify 2
Graphics plus - quick Tile II
Colors palette
foreground color -> color 1 -> #2b1b0e
background color -> color 2 -> #99814e
utilisez le pinceau pour suivre les étapes
clic gauche maintenu pour le déplacer

Realization
Step 1
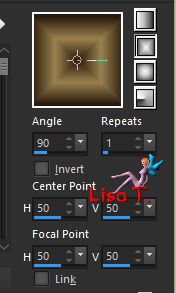
in the materials palette, prepare a rectangular gradient
Step 2
open a ne transparent raster layer 900 * 600 pixels
flood fill with the gradient
adjust/blur/gaussian blur/50
effects/texture effects/blinds/color #302f26

effects/edge effects/enhance
Step 3
set white as FG color
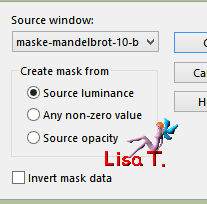
layers/new raster layer – flood fill white
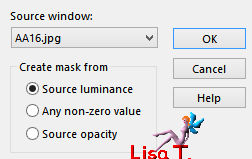
layers/new mask layer/from image
layers/merge/merge group
effects/user defined filter/emboss 5
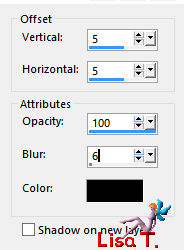
effects/3D effects/drop shadow
Step 4
copy/paste as new layer the misted landscape
image/resize/uncheck « all layers »/85%
move the layer slightly to the left
blend mode of the layer : hard light – opacity 64%
Step 5
layers/new raster layer
flood fill orange (translator’s note : I chose #ec6b16)
layers/new mask layer/from image
effects/user defined filter/emboss 5
layers/merge/merge group
effects/plugins/Nik software/Color Effex Pro 3.1
effects/3D effects/drop shadow
Step 8
new raster layer – flood fill white
layers/new mask layer/from image

layers/merge/merge group
Step 6
selections/select all
layers/new raster layer
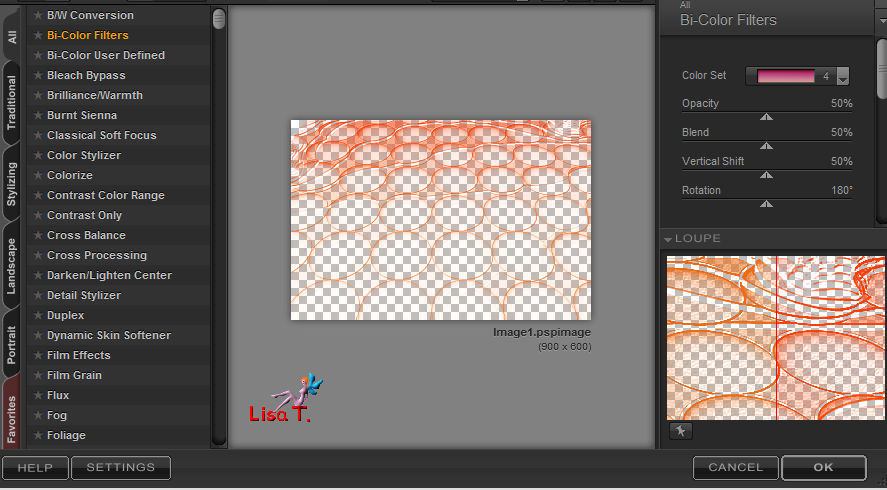
copy/paste into selection the fractal image
effects/plugins/FM Tile Tools/Blend Emboss

selections/select none
Step 7
copy/paste as new layer the decoration tube
layers/duplicate
effects/distortion effects/polar coordinates

move it upwards (see final result)
(translator’s hint : to move a layer upward very precisely
you must activate the Move tool, then hold down the shift key and press the up arrow of your keyboard
each time you hit this key, the layer goes upward
to make it move slower, hold down the Ctrl key instead of the shift key)
layers/duplicate – image/mirror/mirror vertical
layers/merge/merge down
activate Raster 4 and move it to the left (see final result)
activate the top layer again
Step 8
copy/paste as new layer the tube « celestial warrior »
move it to the right
Step 9
image/add borders/check « symmetric « -->
1 pixel black
3 pixels color #ffe769
1pixel black
50 pixels color #3b2d27
select the large border with the magic wand tool
effcts/plugins/Flaming Pear/Flexify 2

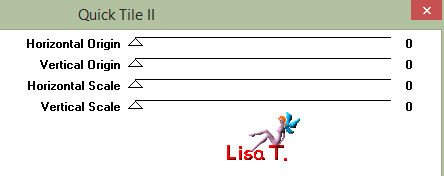
effects/plugins/Graphic Plus/Quick Tile II
adjust/sharpness/sharpen
selections/invedrt
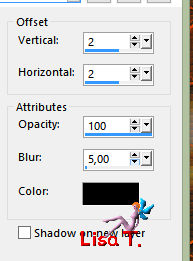
effects/3D effects/drop shadow

drop this shadow once more
selections/select none
image/add borders/check « symmetric « -->
2 pixels color #ffe769
6 pixels black
Step 10
apply your signature
resize to 1000 pixels width (or other)
Animation (optional)
Sybel uses UGA (translator’s note : I use the same software)
the animation used for this tag is provided in the material
apply the animtion where you want, as many times as you like
if you wish to use another animation, you will find very nice files on the site of Simone
your tag is finished
Thank you to have realized it
Don’t hesitate to write to Sybel

if you have any problem
or to send her your creations
It will be a real pleasure to present them at the end of this tutorial
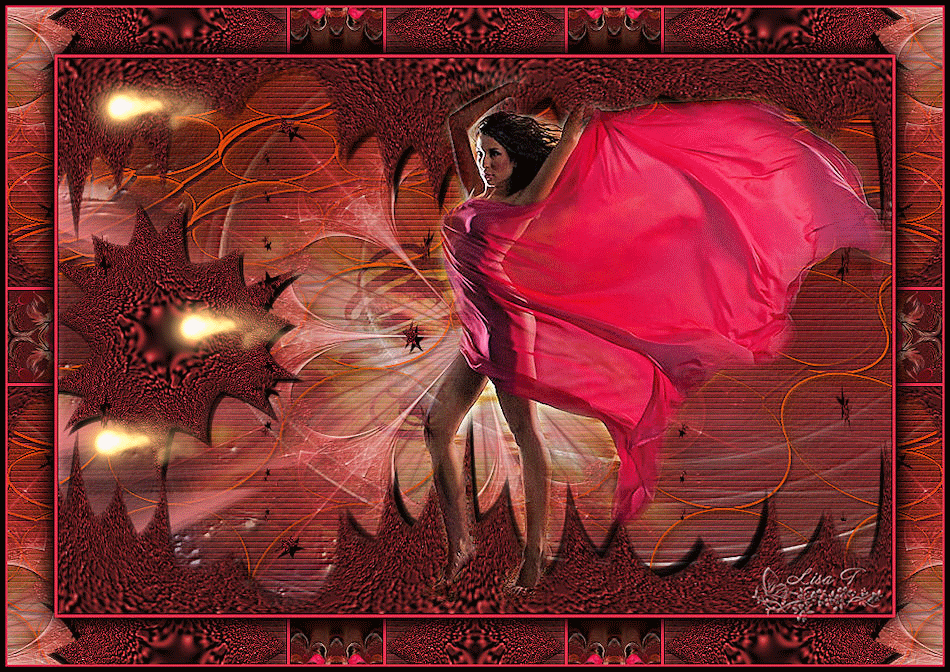
My version without the animation

My version with my tube
Everyman's  creation creation
Your Creations
Back to the board of Sybel’s tutorials
board 1  board 2 board 2

|