Magical

I am member of TWInc
This tutorial is protected

Conditions of use of the material provided
It is forbidden to modifiy, change the name, take off the watermarks or alter the tubes.
It is forbidden to share them in groups or offer them on your site, blog or forum.
If you want to use them to create a tutorial, you must ask the permission of the authors.

Matérial
2 tube by Nikita (fairy and book)

other tubes by Romiposer

download  material material

Plugins
FM Tile tools - Flaming Pear - Xero - Graphic Plus - Transparency
Colors palette
foreground color / color 1 / #9d93bb
background color / color 2 / #33150c
color 3 / # 2b2334

Use the paint brush to follow the steps
left click to brag it

Realization
Step 1
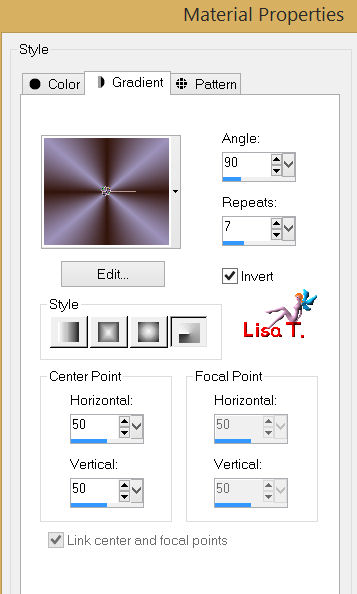
in the materials palette, prepare a linear gradient

Step 2
open a new transparent background layer, 900 X 600 pixels
fill with the gradient
Step 3
activate the tube “R11 magic wicca 00641”
edit/copy - back to your work - edit/paste as a new layer
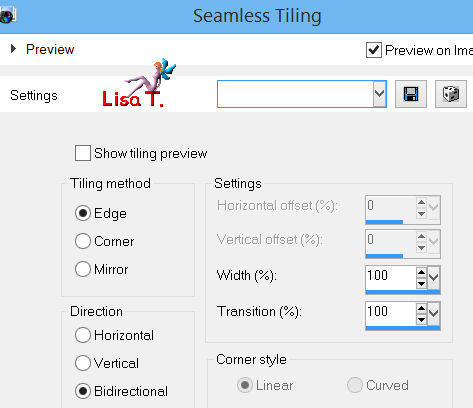
effects/image effects/seamless tiling
effects/distortion effects/ripple

in the layers palette, set the opacity on 23%
layers/merge/merge down
Step 4
activate the tube “1228506060-feerie”
edit/copy - back to your work - edit/paste as a new layer
place it in the upper right corner (see final result)
layers/duplicate
place the second layer in the upper left corner
layers/merge/merge down
in the layers palette, set the opacity on 36%
Step 5
activate the tube “R11 magical wicca 0641” once more
edit/copy - back to your work - edit/paste as a new layer
place it a litlle higher to the left
adjust/sharpness/sharpen
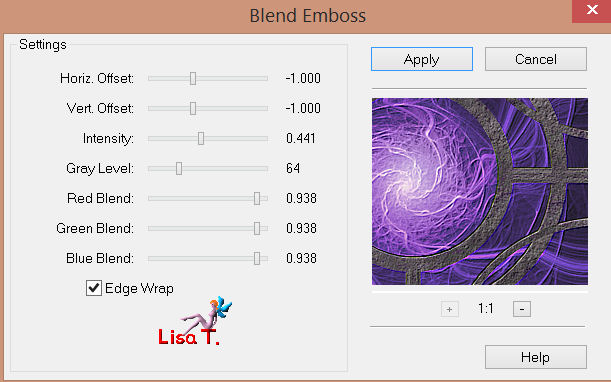
effects/plugins/FM Tile Tools/Blen Emboss
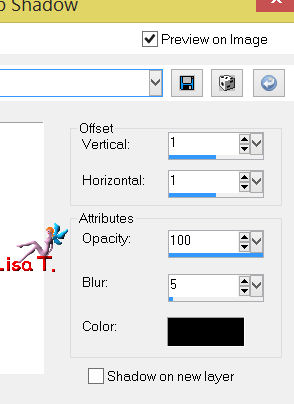
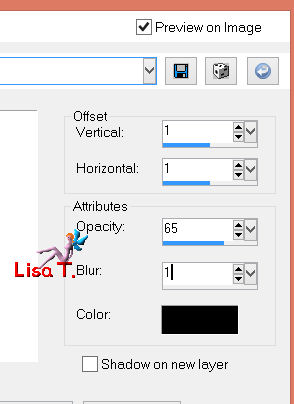
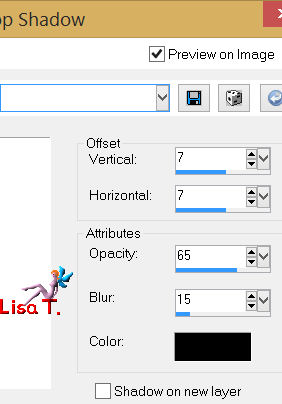
effects/3D effects/drop shadow
in the layers palette, set the opacity on 86%
Step 6
activate the tube “R11 magic wicca 0064”
edit/copy - back to your work - edit/paste as a new layer
image/resize/uncheck “resize all layers”/33%
place this tube exactlly in the middle of the previous wheel
adjust/brightness and contrast/brightness : 50 and contrast : 0
Step 7
activate the tube “carena in the forest 056”
edit/copy - back to your work - edit/paste as a new layer
image/resize/uncheck “resize all layers”/50%
layers/duplicate - image/mirror
place the 2 layers on the wheel as shown on the final result
layers/merge/merge down
adjust/sharpness/sharpen
effects/3D effects/drop shadow
in the layers palette, set the blend mode on “lighten”
Step 8
activate the tube “R11 dark N Dusty 001”
edit/copy - back to your work - edit/paste as a new layer
image/resize/uncheck “resize all layers”/70%
place the tube in front of the wheel, on the left (see result)
adjust/sharpness/sharpen
effects/3D effects/drop shadow
Step 9
layers/merge/merge visible
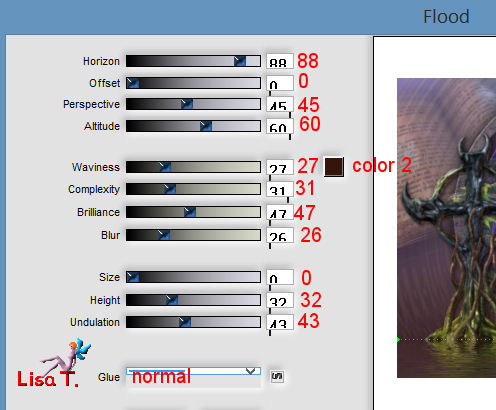
effects/plugins/Flaming Pear/Flood
Step 10
activate the tube “1228506055-feerie”
edit/copy - back to your work - edit/paste as a new layer
place this tube in front of the wheel on the right
effects/plugins/Xero/Improver/landscape/ 10 / 10 / 10
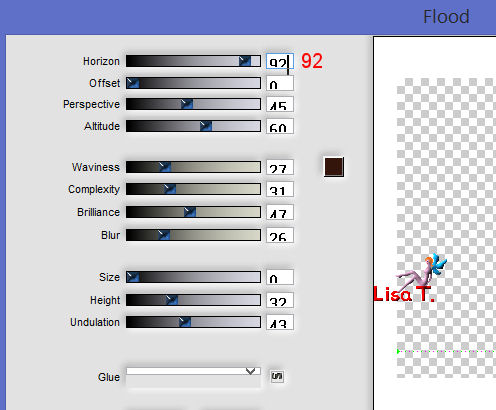
effects/plugins/Flaming Pear/Flood
Step 11
image/add borders/check symmetric/2 pixels/color 3
image/add borders/check symmetric/45 pixels/white
select this border with the magic wand tool (default settings)
in the materials palette, prepare a radial gradient
paint the selection with the gradient
effects/plugins/Graphic Plus/Cross Shadow (default settings)
selections/invert
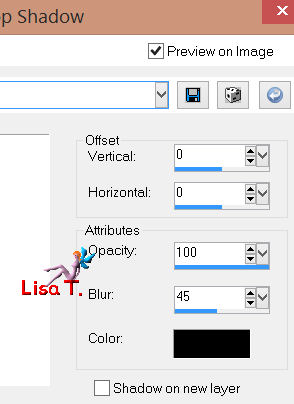
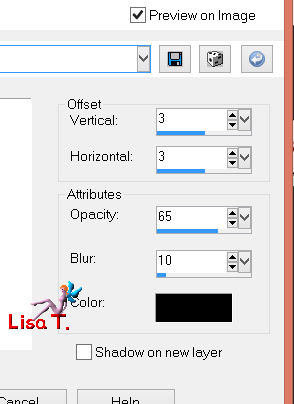
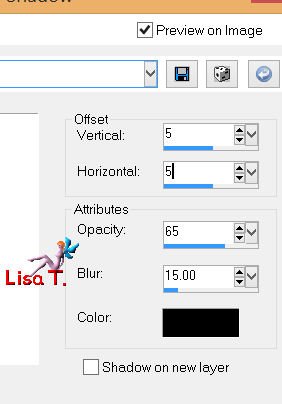
effects/3D effects/drop shadow
drop shadow again replacing (7) by (-7)
selections/select none
Step 12
activate the image “25b547850f6c9b6ef191aae”
layers/promote background layer
effects/plugins/Transparency/Eliminate Black
Step 13
edit/copy - back to your work - edit/paste as a new layer
move it so that you can to see clearly the chest of the fairy
in the layers palette, set the opacity on 55%
effects/edge effects/enhance
Step 14
activate the tube “carena in the forest 109”
edit/copy - back to your work - edit/paste as a new layer
move it on the rigt border
layers/duplicate - image/mirror
layers/merge/merge down
adjust/sharpness/sharpen
effects/3D effects/drop shadow
image/add borders/check “symmetric”/2 pixels/color 3
Step 15
apply your signature
iamge/resize/950 pixels width
save as … type jpeg

Your tag is now finished
Thank you for having realized it
do not hesitate to send your creation to sybel

she will be very glad to see it, and present it at the bottom of this tutorial
Your creations
Back to the board of Sybel’s tutorials


|