Gipsy

I am member of TWInc
This tutorial is protected


Conditions of use of the material provided
It is forbidden to modifiy, change the name, take off the watermarks or alter the tubes.
It is forbidden to share them in groups or offer them on your site, blog or forum.
If you want to use them to create a tutorial, you must ask the permission of the authors.
Matérial
Mask by Narah mask
tube « hearts » by Romiposer
Fractal Art Flowering
Mist character by Sybel

Plugins
Sapphire filtre 01 - Pluging 0082
FM Tile Tool - Blend Emboss
Transparency - Eliminate Black
Xero - Improver
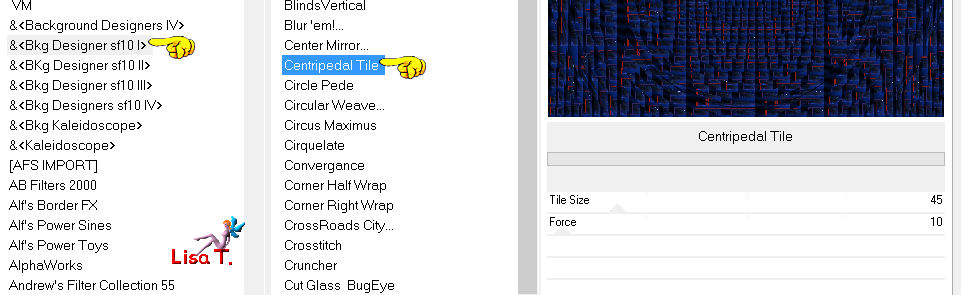
Bkg designer sf 10 I - Centripedal Tile
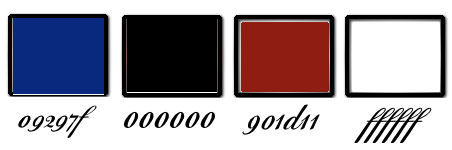
Colors palette
foreground color --> color 1 --> #09297f
background color --> color 2 --> #000000
color 3 --> #901d11
color 3 --> #ffffff
Use the paint brush to follow the steps
left click to grab it
 |
Realization
Step 1
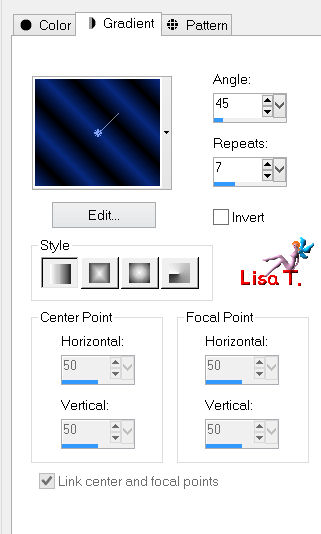
In the materials palette, prepare a linear gradient
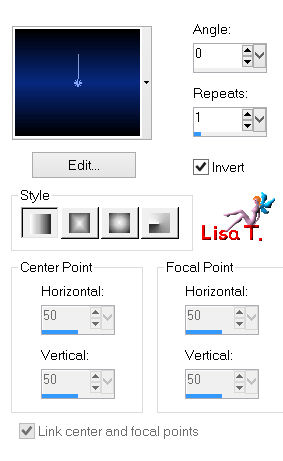
Step 2
open a new transparent raster layer 900 * 600 pixels
paint with the gradient
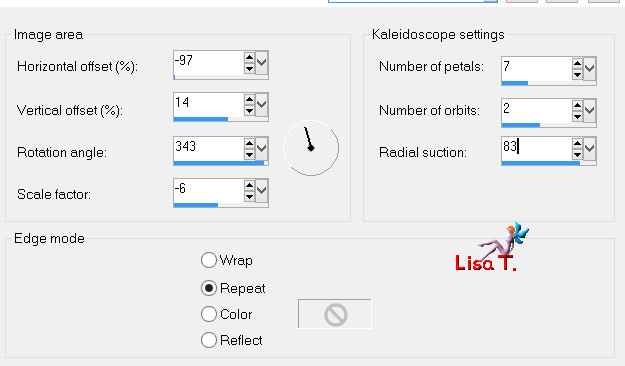
layers/duplicate
effects/reflection effects/kaleidoscope
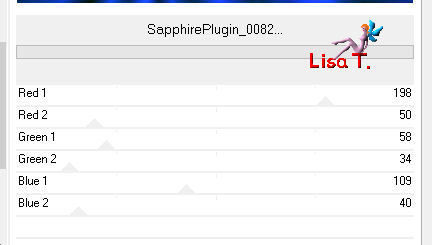
effects/plugins/Sapphire Filter 1/0082
effects/edge effects/enhance more
in the layers palette, set the blend mode on “overlay” and the opacity on 71%
Step 3
layers/new raster layer
selections/select all
activate the landscape “451670”
edit/copy - back to your work - edit/paste into selecitons
selections/select none
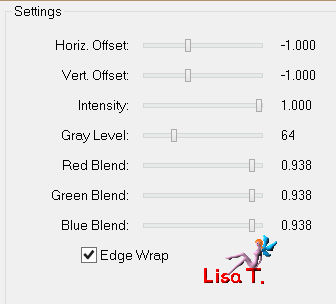
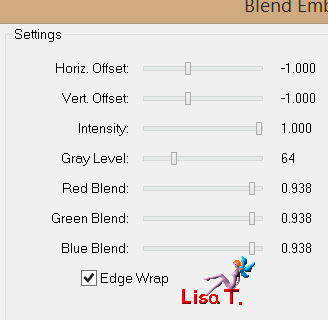
effects/plugins/FM Til Tools/Blend Emboss
in the layers palette, set the opacity on 85%
layers/arrange/move down
Step 4
layers/new raster layer
paint white
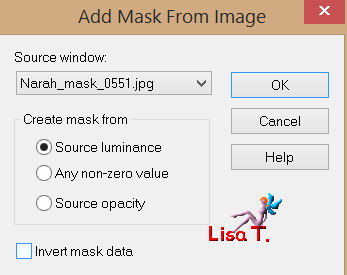
open the mask “Narah mask 0551” and minimize it
back to your work
layers/new mask layer/from image
effects/edge effects/enhance
layers/merge/merge group
in the layers palette, set the opacity on 86%
Step 5
in the layers palette, activate the top layer
selections/select all
layers/new raster layer
activate the image “fractal Art Flowering”
effects/plugins/Transparency/Eliminate Black
edit/copy - back to your work - edit/paste into selection
selections/select none
effects/plugins/FM Tile Tools/Blend Emboss
Step 7
activate the misted image “gipsy”, erase the signature
edit/copy - back to your work - edit/paste as new layer
move it as hown on the final result
effects/plugins/Xero Improver/ 10 /10 /10 /landscape
adjust/sharpness/sharpen
layers/duplicate
image/mirror
in the layers palette, set the blend mode on “lighten” and the opacity on 71%
move it as shown on the final result (you must see the eye)
Step 8
open the tube “R11 Splash it 2013 022”
edit/copy - back to your work - edit/paste as new layer
move it as shown on the final result
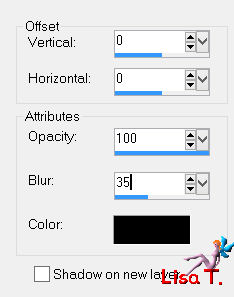
effects/3D effects/drop shadow
adjust/sharpness/sharpen
in the layers palette, set the blend mode on “hard light” and the opacity on 72%
Step 9
image/add borders/check “symmetric” ->
3 pixels color 3
2 pixels colr 1
3 pixels color 3
50 pixels color 4
select this border with the magic wand tool
in the materials palette, set colo 1 as foreground and color 2 as background
prepare a linear gradient
fill the selection with the gradient
effects/plugins/&>BKG Designers sf 10I/Centripedal Tile
adjust/sharpness/sharpen
selections/invert
effects/3D effects/drop shadow
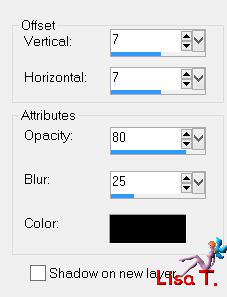
drop shadow again, replacing (7) by (-7)
selections/select none
Step 10
image/add borders/3 pixels/color 3
Step 11
apply your signature
Step 12
image/resize/1000 pixels
save as... type jpeg

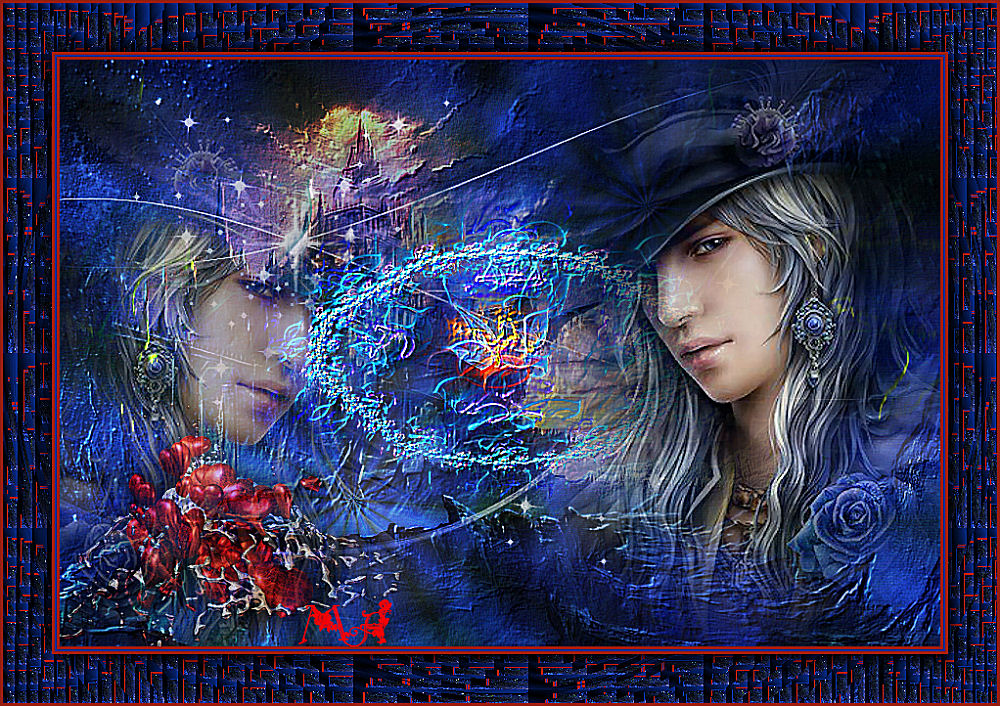
your tag is now finished
Thank you to have realized it
Don’t hesitate to write to Sybel

or to me
if you have any problem
or to send us your creations
It will be a real pleasure to present them at the end of this tutorial
Your Creations
Maria  Angeles Angeles
Maria  Angeles Angeles

Creation Annie Vandeginste
Back to the board of Sybel’s tutorials


|