FACE

I am member of TWInc
This tutorial is protected

Conditions of use of the material provided
It is forbidden to modifiy, change the name, take off the watermarks or alter the tubes.
It is forbidden to share them in groups or offer them on your site, blog or forum.
If you want to use them to create a tutorial, you must ask the permission of the authors.

Matérial
3 tube « decoration »
1 mask
1 mist « woman’s face » by Luz Cristina

open all tubes and the mask with PSP, and minimize them

Plugins
Xero/Abstractor and Improver
Simple/Quick Tile
FM Tile Tools/Blend Emboss
Nik Software/Color Efex Pro
Screenworks/Close knit
Mehdi/Sorting Tiles
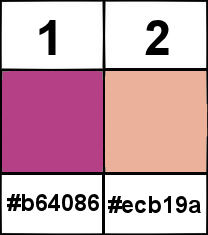
Colors palette
color 1 --> foreground color --> #b64086
color 2 --> background color --> #ecb19a

Use the paintbrush to follow the steps
Left Click to grab it

Realization
Step 1
open a new transparent background raster/ 800 X 650 pixels
in the materials palette, prepare a radial gradient/ 45/5
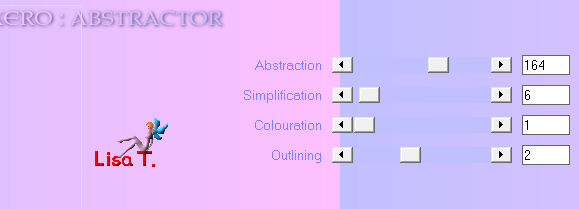
effects/plugins/Xero/Abstractor/
Step 2
effects/plugins/Simple/Quick Tile
effects/edge effects/enhance
effects/plugins/FM Tile Tools/Blend Emboss/default settiings
apply this effect once more with the same settings
layers/new raster layer/paint with color 2
Step 3
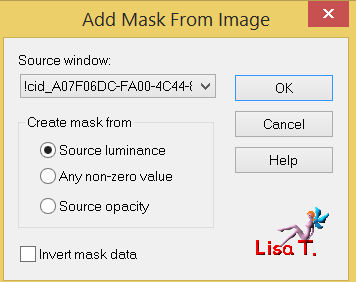
layers/new mask layer/from image
effects/edge effects/enhance
layers/merge/merge group
Step 4
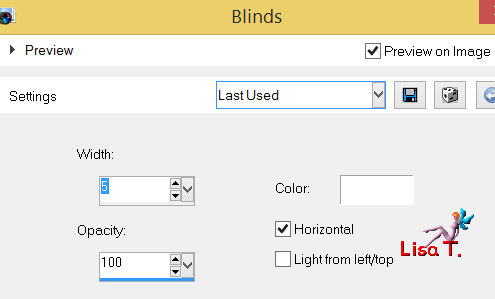
effects/texture effects/blinds
adjust/sharpness/sharpen
effects/3D effects/drop shadow/ 4 / 4 / 85 / 2 / black
Step 5
activate the tube “CFS-smgo-rusty chickenwire”
edit/copy - back on you work - edit/paste as a new layer
layers/arrange/move down
Step 6
activate the tube “SF-smgo-raindrops-01”
edit/copy - back on your work - edit/paste as a new layer
place it at the top of the tag (see final result)
effects/edge effects/enhance
effects/3D effects/drop shadow/ 2 / 2 / 85 / 3 / black
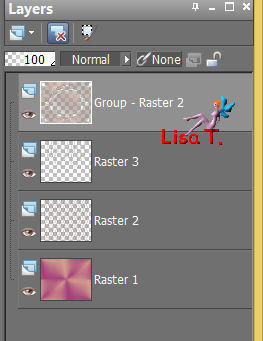
in the layers palette, activate the layer “Groupe-raster 2”
your layers palette is like this
Step 7
activate the tube “2324-luzcristina”
edit/copy - back on your wok - edit/paste as a new layer
place it as shown on the example
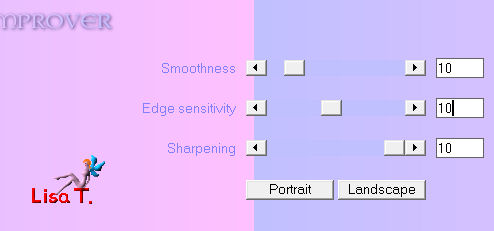
effects/plugins/Xero/Improver
Step 8
acitivate the tube “n231009”
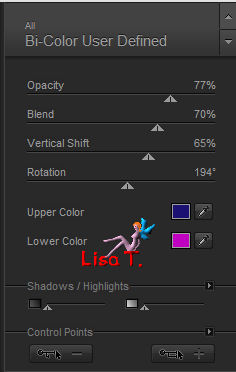
effects/plugins/Nik Software/Color Efex Pro
upper color --> #1b1173 / lower color --> #c000c0
edit/copy - back on your work - edit/paste as a new layer
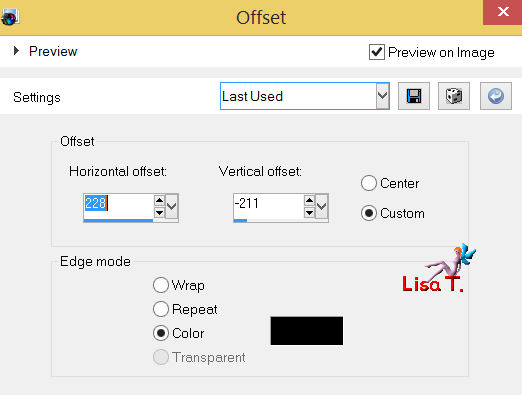
effects/image effects/offset
adjust/sharpness/sharpen
effects/3D effects/drop shadow/ 2 / 2 / 85 / 3 / black
layers/duplicate - image/mirror
layers/merge/merge down
Step 9
in the layers palette, activate “raster 1”
selections/select all
selections/modify/contract/8 pixels
selections/invert
Step 10
layers/new raster layer
layers/arrange/bring to top, and activate that layer
paint the selected border with color #0000ec
effects/plugins/Screenworks/Close knit
adjust/sharpness/sharpen
selections/invert
effects/3D effects/buttonize 60 / 60 / 80 / transparent/color #0000ec
selections/select none
apply your signature
layers/merge/merge all (flatten)

If you don’t want to animate your tag
save as... type JPEG.
Your tag is finished

If you want to realize the animation
ANIMATION
in the layers palette, activate "raster 1"
edition/copy special/copy merged
open Animation Shop
edit/paste as a new animation
back in PSP
effects/plugins/Mehdi/Sorting Tiles
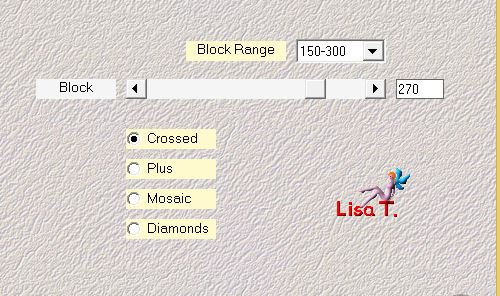
edit/copy special/copy merged
back in Animation Shop
edit/paste/paste after current frame
back in PSP
effects/plugins/Mehdi/Sorting Tiles/check Diamonds
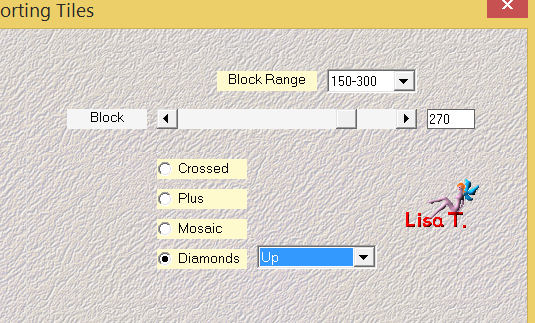
edit/copy special/copy merged
back in Animation Shop
edit/paste/paste after current frame
back in PSP
effects/plugins/Mehdi/Sorting Tilescheck Mosaic
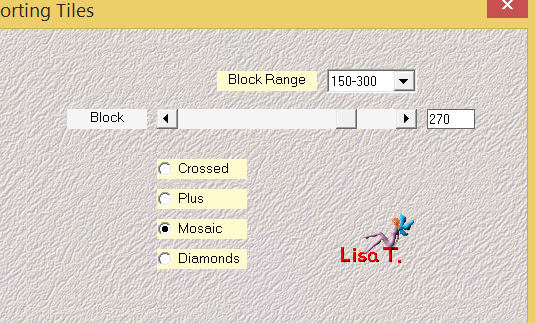
edit/copy special/copy merged
back in Animation Shop
edit/paste/paste after current frame
edit/select all
animation/frame properties/set the display time on 55
view/animation
if you are satisfied with the result --> file/save as ... type .gif
Your animated tag is finished
Thank you to have realized it

Don’t hesitate to write to Sybel

or to me

if you have any problem
or to send us your creations
It will be a real pleasure to present them at the end of this tutorial

Your creations
creation Everyman

Back to the board of Sybel’s tutorials
|