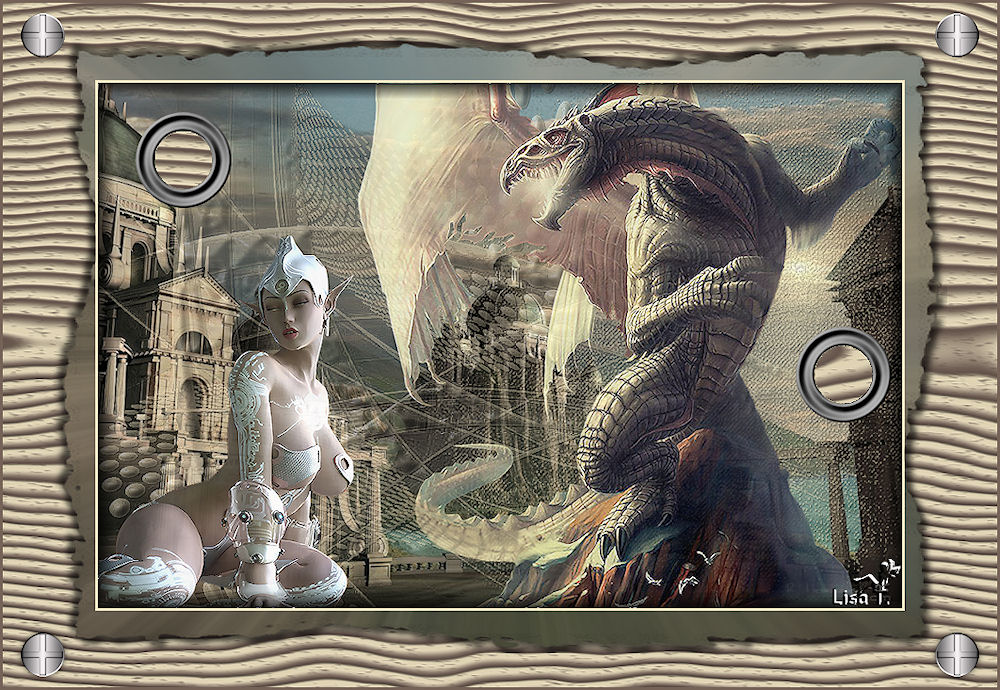
Dragon City
I am member of TWInc
This tutorial is protected

Conditions of use of the material provided
It is forbidden to modifiy, change the name, take off the watermarks or alter the tubes.
It is forbidden to share them in groups or offer them on your site, blog or forum.
If you want to use them to create a tutorial, you must ask the permission of the authors.

Matérial
1 mask by Jill
1 tube by Didier

1 tube by Devils Tube Group

1 picture “city”
2 tubes “vissybel” and “oeilletsybel” by Sybel

Plugins
Eye Candy 4000
Xero
Unlimited 2
Alien Eye Candy Textures
Colors palette
foreground color --> #faedca

Use the paint brush to follow the steps
Left Click to grab it


Realization
Step 1
open the picture “city”
or choose another picture you like (resize it to 950 pixels width, checking “lock aspect ratio”)
layers/promote background layer, if your picture is type jpeg...
Step 2
layers/new raster layer -> paint with foreground color
open the mask “Jillmask” and minimize it
layers/new mask layer/from image
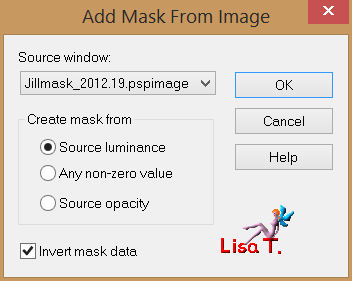
effects/edge effects/enhance
layers/merge/merge group
effects/plugins/Eye Candy 4000/Bevel Boss
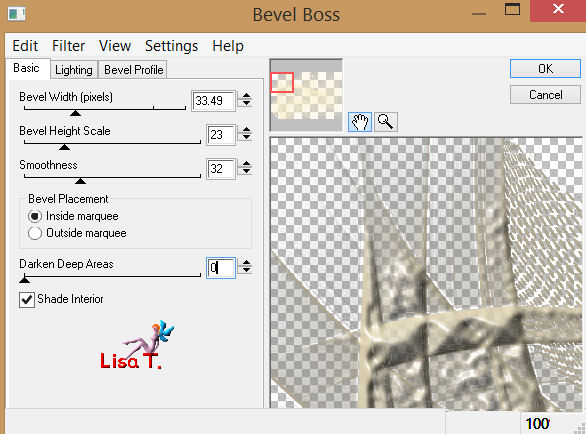
effects/3D effects/drop shadow
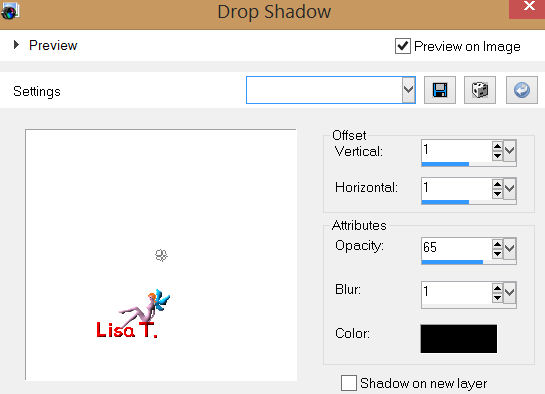
in the layers palette, set the opacity to 46%
adjust/sharpness/sharpen
Step 3
activate tht tube “dider_dragon_05_oct_2013”, edit/copy
back on your work, edit/paste as a new layer
image/resize/95% (uncheck “resize all layers”)
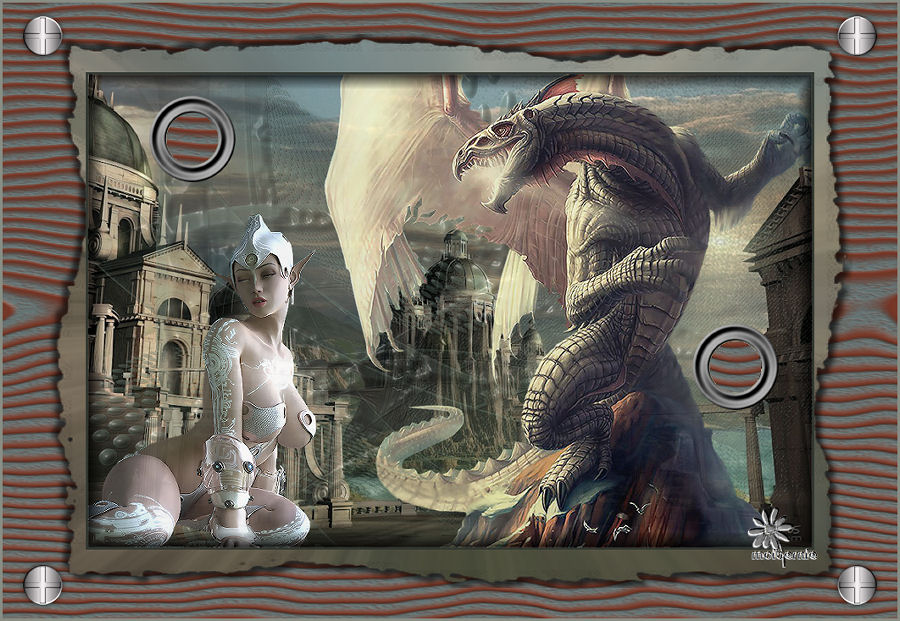
move the tube to the right as shown on the final result
in the layers palette, set the opacity on 81%
effets/plugins/Xero/Improver/ 10 / 10 / 10 / landscape
Step 4
activate the tube “cyberchick-1-0b7244”
edit/copy - back on your work - edit/paste as a new layer
image/resize/55% (uncheck “resize all layer”)
in the layers palette, set the opacity on 95%
effects/plugins/Xero/Improver/ 10 / 10 / 10 / landscape
adjust/sharpness/sharpen
move down to the left as shown on the example
Step 5
image/add borders/foreground color
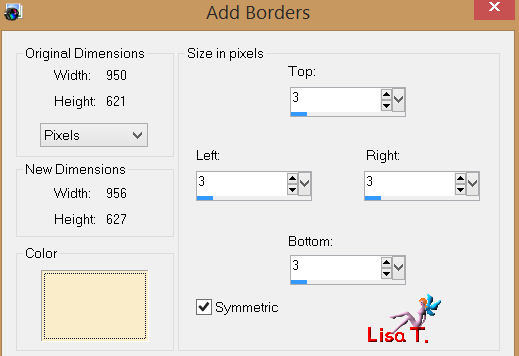
activate the magic wand Tool, default settings, and select that border
selections/invert
effects/3D effects/buttonize
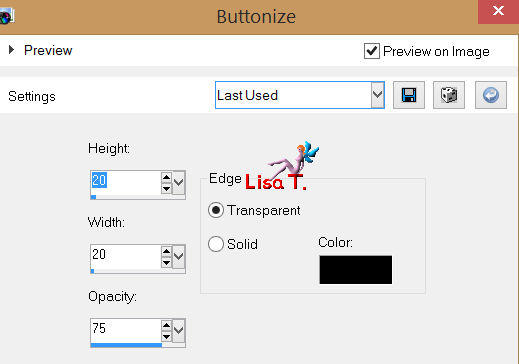
selections/select none
Step 6
image/add borders/choose a bright contrasting color
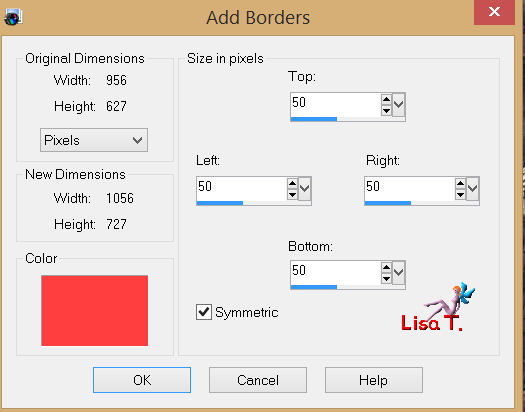
select this border with the magic wand
put this image aside, we will activate it again later
Step 7
activate the picture “city”
adjust/blur/radial blur
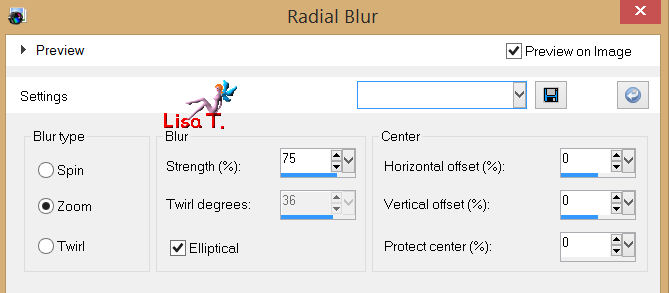
edit/copy
Step 8
activate the tag you put aside on step 6
edit/paste into selection
layers/promote background layer
effets/plugins/Unlimited 2/Edges Square/Square Edge 12
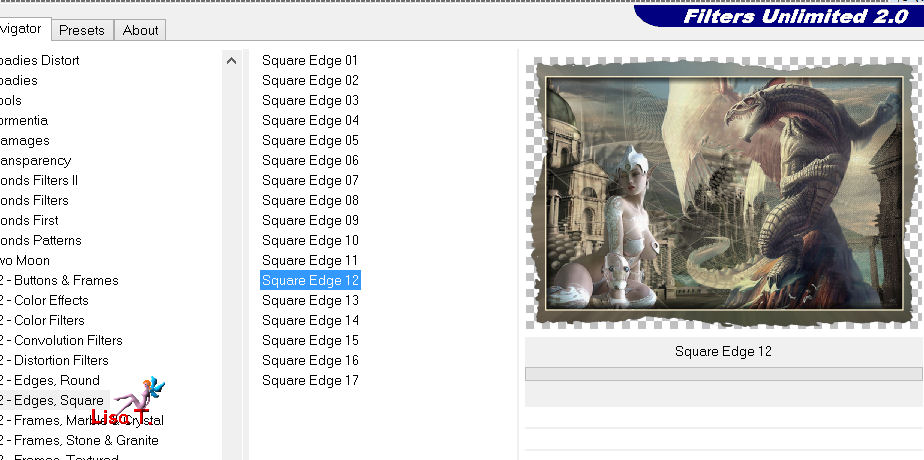
selections/select none
effcts/3D effects/drop shadow
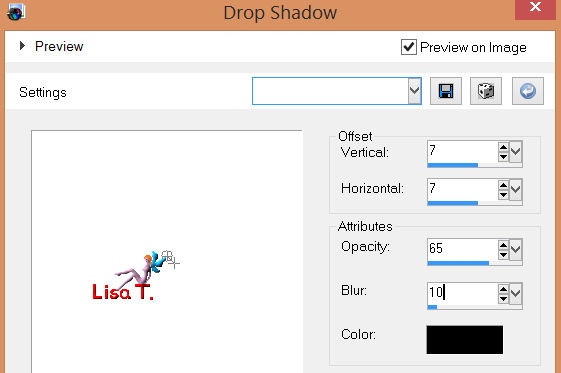
drop shadow again, changing 7 to -7
Step 9
layers/new raster layer
effects/plugins/Alien Skin Eye Candy Textures/Wood
in the “settings” tab, choose “rosewood”
in the “basic” tab, choose pulp color -> #faedca and bark color -> #766358
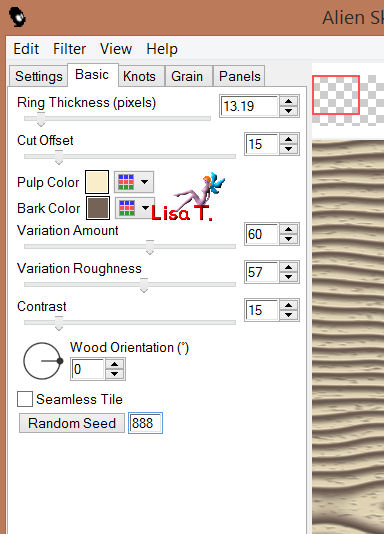
layers/arrange/move down
Step 10
in the layers palette, activate “raster 1”
image/resize/90% (uncheck “resize all layers”)
Step 11
activate the tube “oeilletsybel”
edit/copy - back on your work - edit/paste as a new layer
layers/duplicate
with the Move Tool (M), place the two eyelets as shown on the final result
in the layers palette, activate “copy of raster 3”
activate the magic wand tool , Mode “add (shift)” and select the inside of the eyelet
activate “raster 3”
with the magic wand tool (mode Add) select the inside of the eyelet
in the layers palette, close the visibility toggle of “raster 2”
layers/merge/merge visible
press the Delete key of your keyboard (or do edit/cut)
selections/select none
in the layers palette, open the visibility toggle of “raster 2”
Step 12
activate the tube “vissybel”
edit/copy - back on your work - edit/paste as a new layer
place it in the upper right corner (see example)
layers/duplicate - image/mirror
layers/merge/merge down
layers/duplicate
image/flip
layers/merge/merge down
effects/3D effects/drop shadow
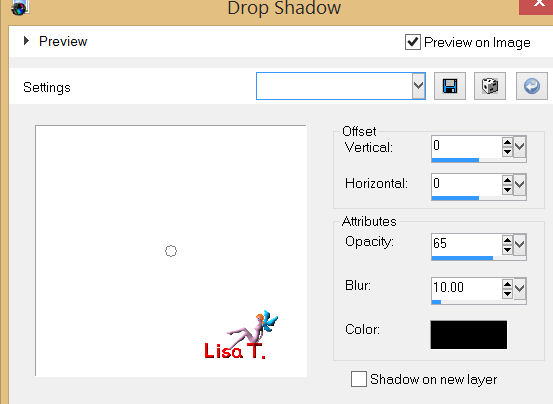
Step 13
image/add borders/color #766358
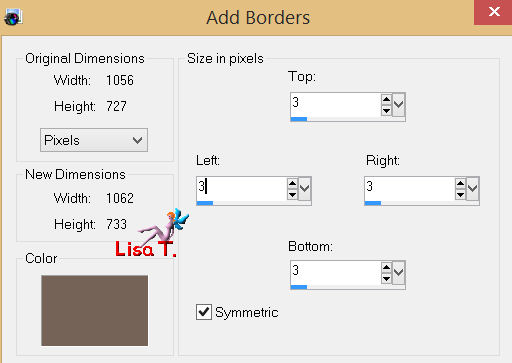
adjust/shrapness/sharpen
Step 14
apply your signature
layers/merge/merge all (flatten)
image/resize/950 pixels width
Your tag is now finished
Thank you to have realized it

Don’t hesitate to write to Sybel

or to me

if you have any problem
or to send us your creations
It will be a real pleasure to present them at the end of this tutorial

Your créations
Creation Bernie 
Back to the board of Sybel's tutorials


|