Beautiful Dream
I am member of TWInc
This tutorial is protected


Conditions of use of the material provided
It is forbidden to modifiy, change the name, take off the watermarks or alter the tubes.
It is forbidden to share them in groups or offer them on your site, blog or forum.
If you want to use them to create a tutorial, you must ask the permission of the authors.
Matérial
1 tube Coline

1 mask
Thank you Coline for this nice tube

Plugins
Flaming Pear/Flexify 2
Mura’s Meister/Copies
tramages/Accelerating Daisies
Xero/Improver
Graphic Plus/Cross Shadow
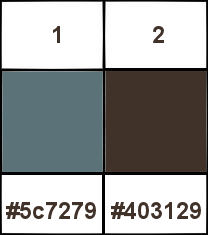
Colors palette
foreground color #5c7279
Background color #403129
Use the paint brush to follow the steps
Left click to grab it

Realization
Step 1
in the materials palette, prepare a radial gradient 45 / 5 / uncheck “invert”
Step 2
open a new transparent raster background 900 X 600 pixels
paint with the gradient prepared on step 1
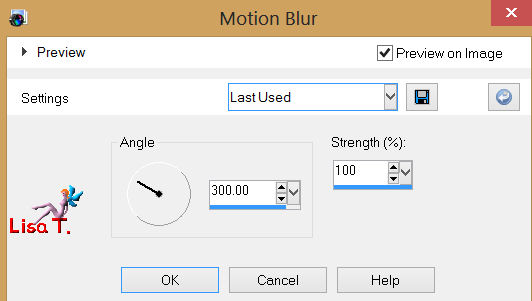
adjust/blur/motion blur/ 300 / 100
selections/select all
Step 3
open the tube “WinterWitch-by-jensingleton”
edit/copy – back on your work – edit/paste into selection
selections/select none
adjust/blur/gaussian blur/30
Step 4
layers/duplicate
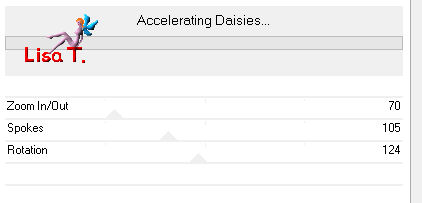
effects/plugins/Tramages/Accelerating Daisies 70 / 105 / 124 / 132
effects/edge effects/enhance
Step 5
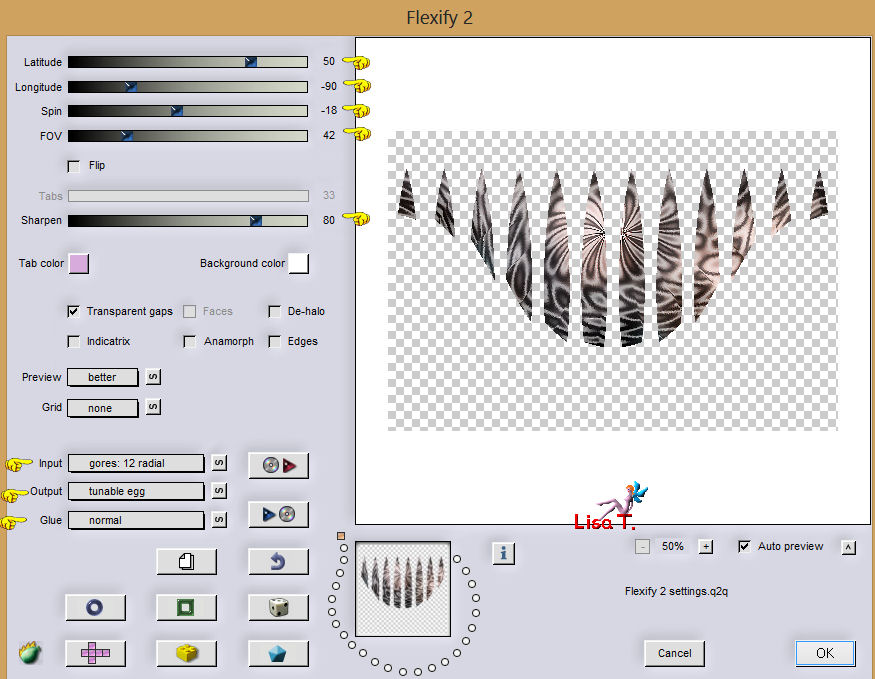
effects/plugins/Flaming Pear/Flexify 2
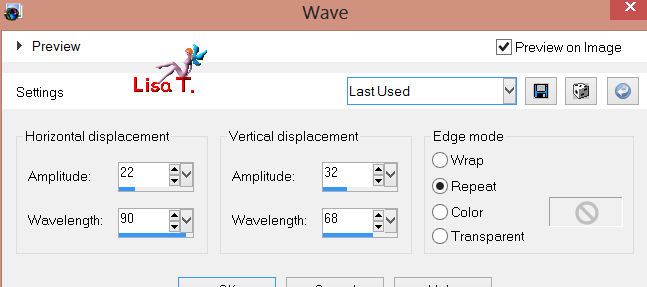
effects/distortion effects/wave
Step 6
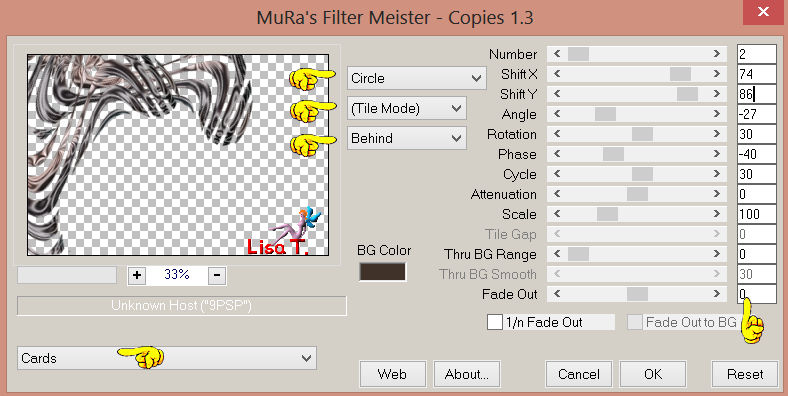
effects/plugins/Mura’s Meister/Copies/Cards
layers/duplicate – image/flip – image/mirror
layers/merge/merge down
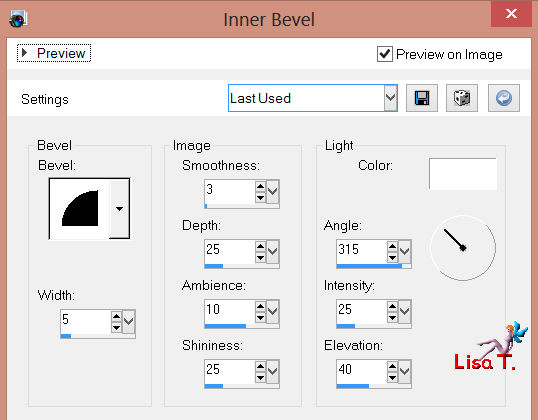
effects/3D effects/inner bevel
effects/3D effects/drop shadow/ 5 / 5 / 50 / 20 / black
Step 7
layers/new raster layer/paint in black
open the mask “maske 59” and minimize it
activate your work
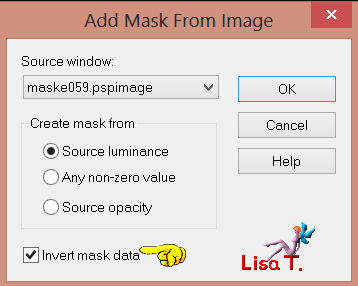
layers/new mask layer/from image
select “maske 59”
layers/merge/merge group
in the layers palette, set the opacity on 50
Step 8
activate the tube “WinterWitch-by-jensingleton”
activate the the free hand selection tool with the following settings

surround the face, following the lines outside the balls and the hands
selections/invert, and press the delete key of your keyboard
selections/select none
Step 9
image/resize/80%/uncheck “resize all layers”
edit/cut – back on your work – edit/paste as a new layer
if some lines or demarcations are still visible, use the eraser tool
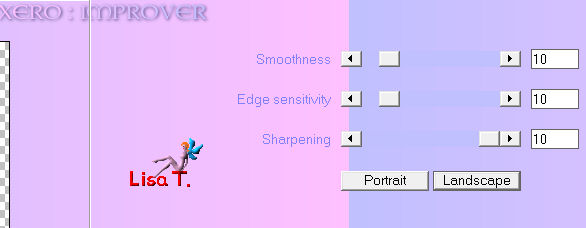
effects/plugins/Xero/Improver
Step 10
in the layers palette, activate the layer “raster 1”
selections/select all
layers/new raster layer
layers/arrange/bring to top
paint in black
Step 11
selections/modify/contract/2 pixels
press the delete key of your keyboard
paint with the gradient of step 1
selections/modify/contract/20 pixels
press the delete key of your keyboard
Step 12
selections/invert
effects/3D effects/inner bevel/as in step 2
selections/invert
paint in black
selections/modify/contract/1 pixel
press the delete key of your keyboard
selections/select none
Step 13
apply your watermark
If you don’t wish to add the animation, your tag is finished
layers/merge/merge all (flatten), and save your work as .... type jpeg
BUT
if you want to animate your tag, do not merge!!
in the layers palette, activate the layer “raster 1” (bottom layer)
edit/ copy special/copy merged
ANIMATION
open Animation Sop, and right click in the workspace, and paste as a new animation

back in PSP
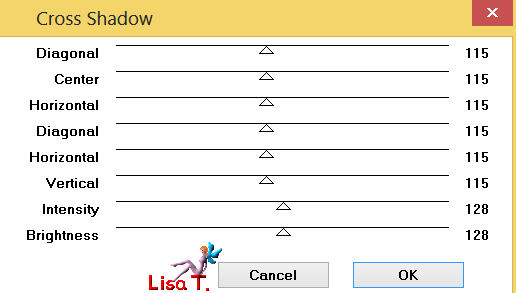
effects/plugins/Graphic Plus/Cross Shadow/default settings
edit/copy special/copy merged
back in Animation Shop
right click in your frame/paste after current frame
back in PSP
undo last command

effects/plugins/Graphic Plus/Cross Shadow
edit/copy special
back in animation Shop
right click in the second frame/paste after current frame
edit/select all (Alt + A)
animation/frame properties/set on 50
view/animation, to make sure everything is OK
file/save as.... type .gif
Your animated tag is finished
Thank you to have realized it

Don’t hesitate to write to Sybel

or to me

if you have any problem
or to send us your creations
It will be a real pleasure to present them at the end of this tutorial
Your  Creations Creations
Creation Just Sue
Creation Isy
Création Maria-Angeles
Back to the board of Sybel's tutorials


|