Adeline

Conditions of use of the material provided
It is forbidden to modifiy, change the name, take off the watermarks or alter the tubes.
It is forbidden to share them in groups or offer them on your site, blog or forum.
If you want to use them to create a tutorial, you must ask the permission of the authors.

Sybel has the permission of the creators to use their tubes, masks and decorations
Thank you to all af them.
Without their beautiful creations, no tutorials could be written.

Sybel used PSPX2 to create her tag
I used PSPX7 to create my tag
but it can be realized with any other version of PSP

Matérial
tube woman by Ana Ridzi
misted scene by Frankie
tube branch by Kimla
Tube garlic by Sussie M
Fractal de Bärbel (google image)
all links in the french version

open all tubes
window/duplicate. Close the originals and work with the copies

Plugins
Johann's filter 2 -- Aged Film, Chaos Dissolve, Focal Blur
Funhouse -- Zigzaggeratte
Xero -- Improver
Transparency -- Eliminate Black

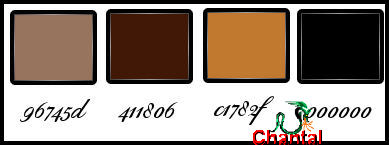
Colors palette
foreground color -> color 1 -> #96745d
background color -> color 2 -> #411806
color 3 -> # c1782f
color 4 -> 000000#

Use the pencil to follow the steps
left click to grab it
 |

Realization
Step 1
prepare a radial gradient
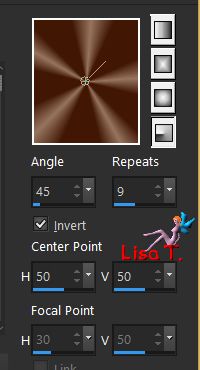
open a new transparent raster layer 900 * 600 pixels
fill with the gradient
adjust/blur/fgaussian blur/30
Step 2
selections/select all
copy/paste into seletion the misted scene
selections/select none
effects/plugins/Johann’s Filter/Aged Film
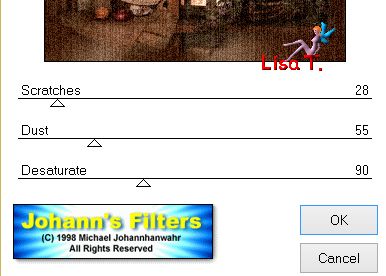
edit/copy
Step 3
effects/image effects/seamless tiling/default settings
effects/Funhouse/Zigzaggerate

copy/paste as new layer
image/resize/uncheck “resize all layers/85%
Step 4
activate the maggic wand tool with the following settings

select the transparent border
layers/new raster layer, fill with color 4 (black)
selections/modify/contract/2 pixels
hit the delete key of your keyboard
fill the selection with color 1
selections/modify/contract/4 pixels
hit the delete key of your keyboard
selections/modify/select selection borders
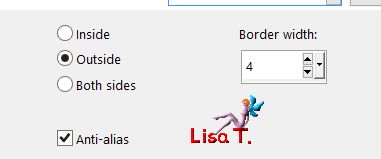
effects/3D effects/inner bevel
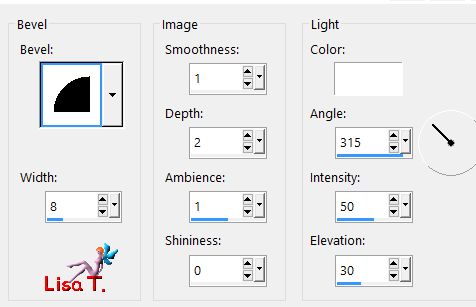
selecitons/select none
activate the magic wand tool with the following settings

select the inside of the frame
fill with color 4
selections/modify/contract/2 pixels
hit the delete key of your keyboard
effects/3D effects/cutout
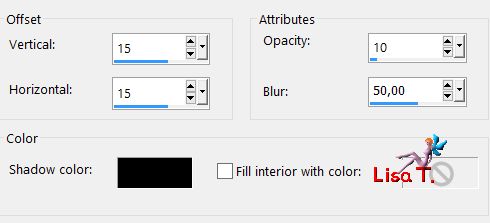
layers/duplicate
effects/3D effects/cutout
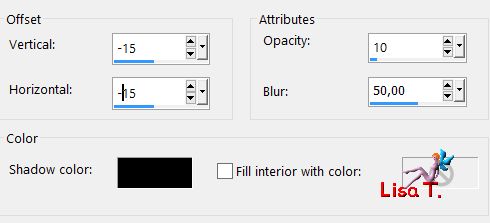
selections/select none
Step 5
image/add borders/check “symmetric”/2 pixels/color 4
image/add borders/check “symmetric”/4 pixels/color 1
selections/select all
selections/modify/contract/4 pixels
selections/invert
effects/3D effects/inner bevel as before
selections/select none
image/add borders/check “symmetric”/2 pixels/color 4
image/add borders/check “symmetric”/35 pixels/color 2
select this border with the magic wand tool
effects/plugins/Johann’s Filter/Chaos Dissolve
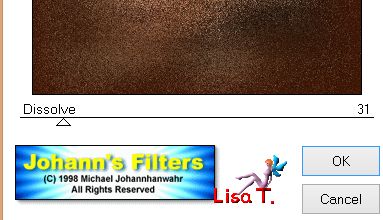
effects/edge effects/enhance
selections/invert
effects/D effects/drop shadow
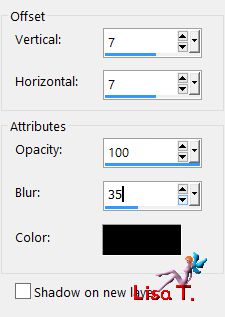
drop shadow again changing (7) by (-7)
selections/select none
Step 6
activate the fractal image (if you use another fractal, convert it to raster layer)
effects/plugins/Transparency/Eliminate black
copy/paste as new layer
image/resize/uncheck “resize all layers”/140%
move it as shown on the final result
opacity : 43%
effects/edge effects/enhance more
Step 7
copy/paste as new layer the character tube
image/resize/uncheck “resize all layers”/80%
move it to the right (see final result)
effects/plugins/Xero/Improver/landscape
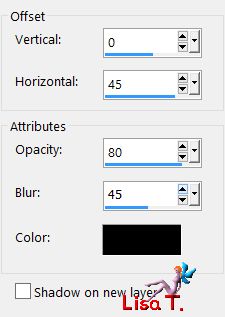
effects/ 3D effects/drop shadow
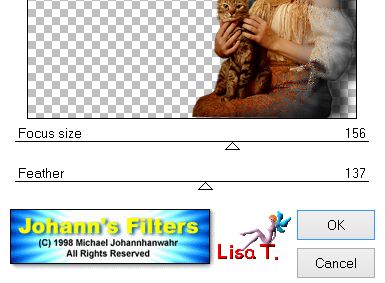
effects/plugins/Johann’s Filter/Focal Blur
Step 8
image/add borders/check “symmetric”/2 pixels/color 4
image/add borders/check “symmetric”/2 pixels/color 3
select this border with the magic wand tool
effects/texture effects/Straw Wall
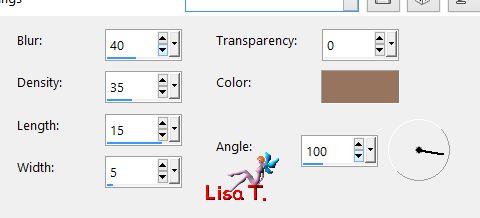
adjust/sharpness/sharpen
selections/select none
Step 9
copy/paste as new layer the tube of the branch
image/resize/uncheck “resize all layers”/50% (do that once more)
move it as shown on the final result
adjust/sharpness/sharpen
Step 10
copy/paste as new layer the tube of the garlic
image/resize/uncheck “resize all layers”/85%
move it as shown on the final result
adjust/sharpness/sharpen
Step 11
image/add borders/check “symmetric”/2 pixels/color 4
apply your signature
layers/merge/merge all (flatten)
image/resize/height 700 pixels

your tag is finished
Thank you to have realized it

Don’t hesitate to write to Sybel
 to Sybel to Sybel
or to me
 to Lisa T to Lisa T
if you have any problem
or to send us your creations
It will be a real pleasure to present them at the end of this tutorial

Your Creations
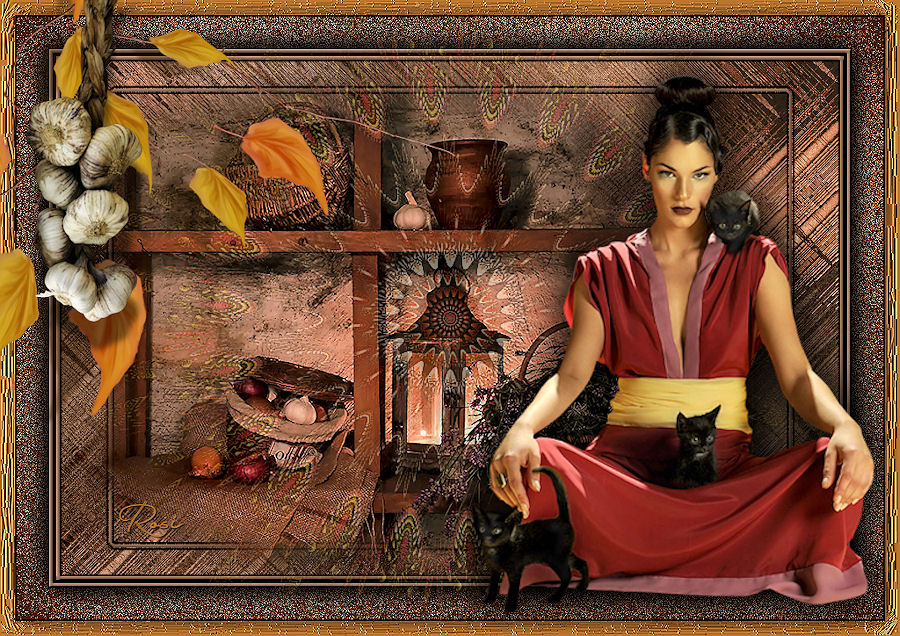
Created by Rosi
Creation Gerda 
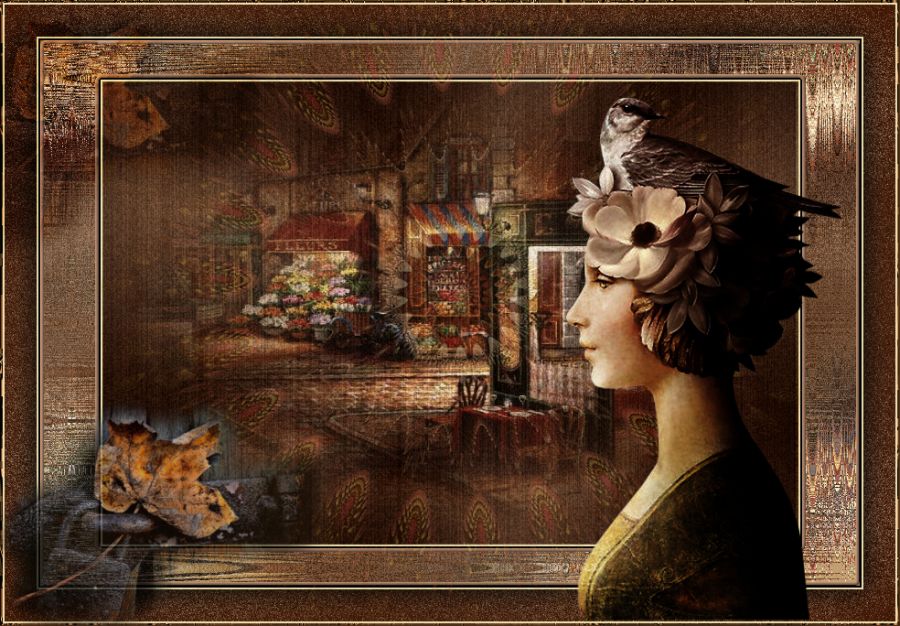

Back to the board of Sybel’s tutorials


|