Lysiane

I am member of TWInc
My translations are protected


Material
tubes - selections - 1 preset Eye Candy 5 Impact (Gradient Glow

Thank you to the tubers : Alies - Gabry - Nicole

Filters used
Eye Candy 5 Impact - AP01 Innovations - VM Stylize - Frishult - Mehdi - BKG Designers SF10I
Colors palette
color 1 -> foreground color -> #
color 2 -> background color -> #

Use the paint brush to follow the steps
left click to grab it
 |
Realization
open a new transparent raster layer 900 * 600 pixels
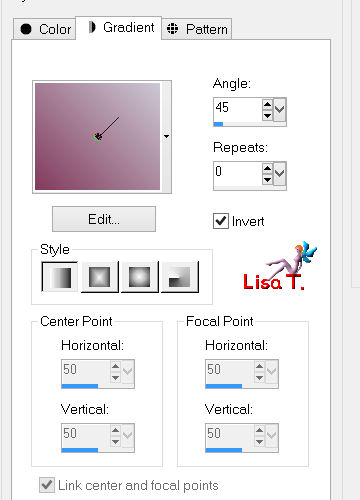
in the materials palette, prepare a linear gradient/ 45 / 0 / check “invert”
fill the layer iwth this gradient
selections/select all
layers/new raster layer
activate the tube “nicole femme 16 2014”
edit/copy - back to your work - edit/paste into selection
selections/select none
IMPORTANT : you MUST choose this tube to create this layer,
otherwise your result will not be the same as the one presented
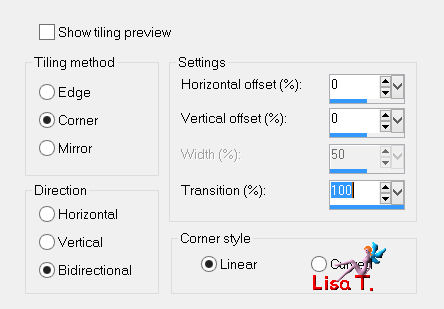
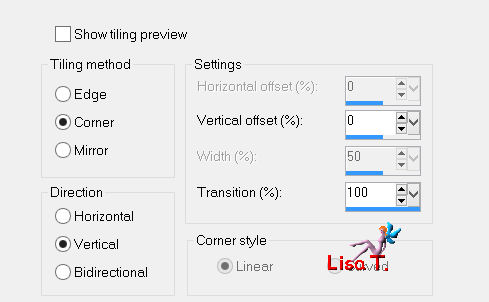
effects/image effects/seamless tiling
adjust/blur/gaussian blur/45
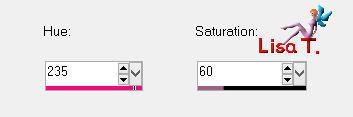
adjust/hue and saturation/colorize (colorize with your own colors if you changed them
use the dark color as base)
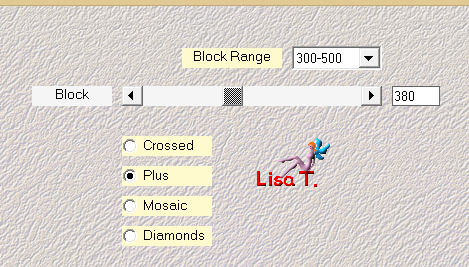
effects/plugins/Mehdi/Sorting Tiles
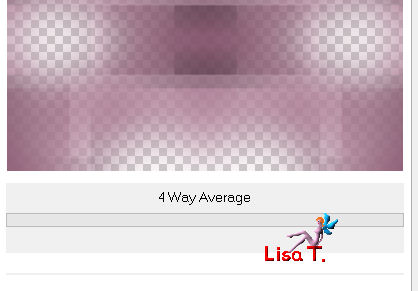
effects/plugins/&<Bkg Designers SF10 0I>/4 Way Average
effects/edge effects/enhance more
rename this layer “1”
layers/duplicate/rename this layer “2”
selections/load selection from disk/”Vivi 351”
make sure raster “2” is the active layer, and press the delete key of your keyboard
don’t deselect
in the layers palette, activate layer “1”
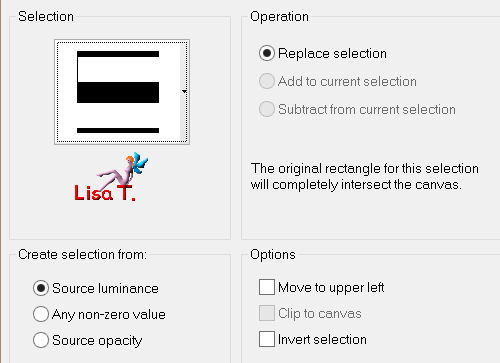
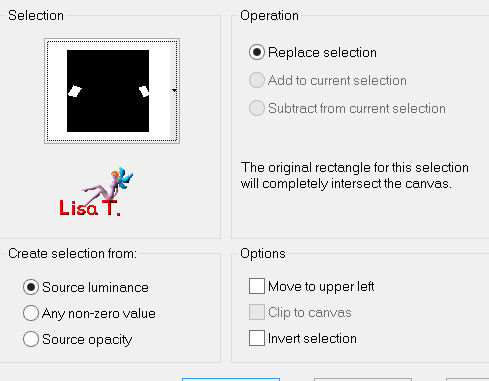
selections/promote selection to layer
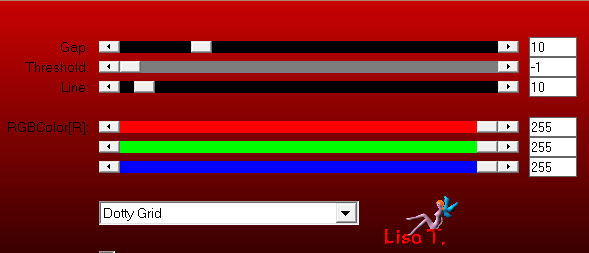
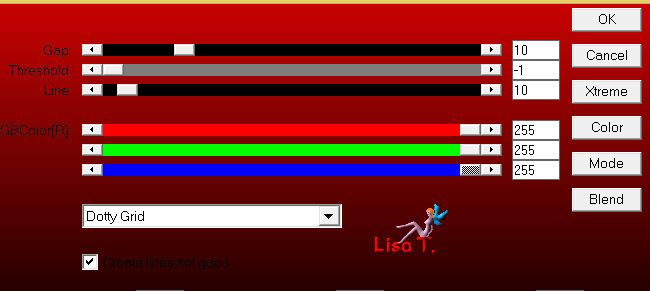
effects/plugins/AP 01 [Innovations]/Lines Silverlining/Dotty Grid
selections/select none
effects/image effects/seamless tiling as before (don’t change the settings still in the memory)
in the layers palette, activate raster “2”
layers/duplicate
in the layers palette, activate raster “2” again
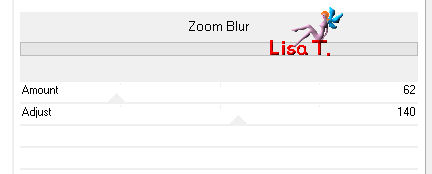
effects/plugins/VM Stylize/Zoom Blur
in the layers palette, set the blend mode on “overlay” (or other) and the opacity on 60%
your layers palette looks like this
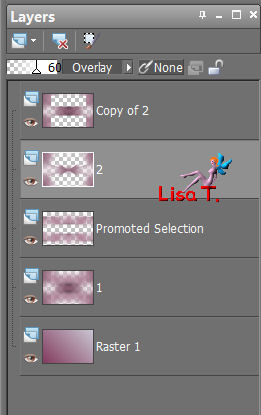
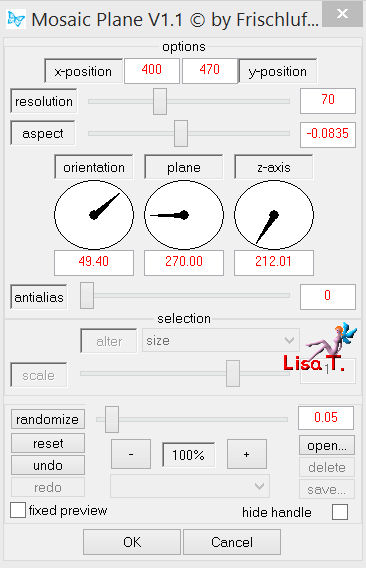
in the layers palette, activate the top layer (copy of 2)
effects/plugins/Frischluft/Mosaic Plane
if you connot apply this plugin, use the layer provided in the materials, and colorize it if necessary)
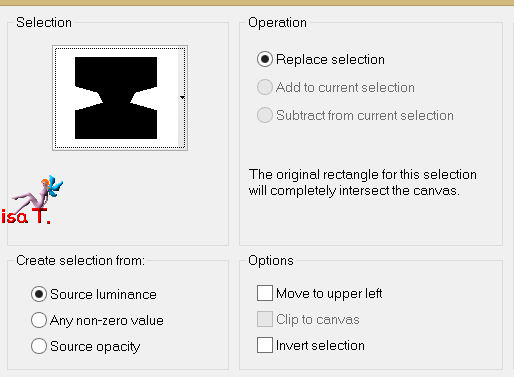
selections/load selection from disk/”Vivi 352”
press the delete key of your keyboard
selections/select none
layers/duplicate - image/mirror
layers/merge/merge down
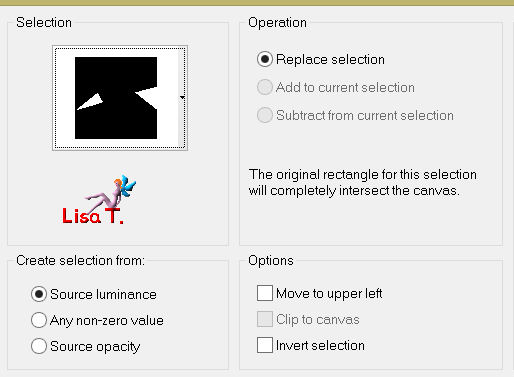
selections/load selection from disk/”Vivi 353”

press the delete key of your keyboard
selections/select none
in the layers palette, set the blend mode on “hard light” (or other) and the opacity on 80%
layers/new raster layer
selections/load selection from disk/”Vivi 354”
activate the tube “Nicole paysage Mist 2012”
edit/copy - back to your work - edit/paste into selection
in the layers palette, set the blend mode on “Luminance”
or “Luminance (legacy)” and the opacity on 100%
effects/plugins/Eye Candy 5 Impact/Glass/preset “Clear”
selections/select none
layers/new raster layer
selections/load selection/from disk/”Vivi 355”
effects/plugins/Eye Candy 5 Impact/Gradient glow/preset “vivi0214”
selections/select none
in the layers palette, set the blend mode on “Luminance (Legacy)” and the opacity on 55%
layers/merge/merge down (the small frame) and set the opacity on 60%
layers/merge/merge visible
activate the tube “Deco 1 Vivi”
edit/copy - back to your work - edit/paste as new layer
image/flip
effects/image effects/seamless tiling
activate the tube “Deco 2 Vivi”
edit/copy - back to your work - edit/paste as new layer
don’t move it
selections/load selection/from disk/”Vivi356”
press the Delete key of your keyboard
selections/select none
in the layers palette, set the blend mode on “screen” and the opacity on 100%
layers/merge/merge all (flatten)
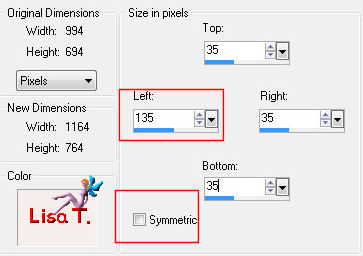
iamge/add borders/check “symmetric”/2 pixels/color 2
edit/copy
iamge/add borders/check “symmetric”/45 pixels/contrasting color
with the magic wand tool (default settings) select this border
edit/paste into selection (image in the clipboard)
adjust/blur/gaussian blur/25
effects/plugins/AP 01 [Innovations]/Lines Silverlining/Dotty Grid
selections/invert
effects/3D effects/drop shadow/ 0 / 0 / 100 / 35 / black
selections/select none
image/add borders/UNcheck “symmetric”/contrasting color
select this border with the magic wand tool/fill the selection with the gradient of the begining
effects/texture effects/mosaic-antique
selections/invert
effects/3D effects/drop shadow/ 0 / 0 / 80 / 35 / black
selections/select none
activate the tube “Alies 1VR894”
edit/copy - back to your work - edit/paste as new layer
move it as shown on the final result
effects/3D effects/drop shadow/ 15 / -20 / 40 / 30 / black
activate the tube “Gabry Fantaisie 664”
image/mirror
image/resize/50%
edit/copy - back to your work - edit/paste as new layer
move it opposite to the tube of the character (see example)
adjust/sharpness/sharpen
effects/3D effects/drop shadow/ 15 / -20 / 40 / 30 / black
actvate the tube “titre”
edit/copy - back to your work - edit/paste as new layer
move it as shown (or other place of your choice)
new layer for your signature
layers/merge/merge all (flatten)
image/add borders/check “symmetric”/2 pixels /color 2
resize if necessary, save as... type JPEG
thank you to have realized this tutorial
if you want Vivi to see your creation
she will be very glad to receive it and present it at the end of her tutorial

Back to the boards of Vivi’s tutorials
board 1  board 2 board 2

|