Emoticon

Material
tubes – selections - presets

Thank you to the tubers – Nara Pamplona and Logane

Filters used
BKG Kaleidoscope - Eye Candy 5 Impact - AAA Frames
Colors
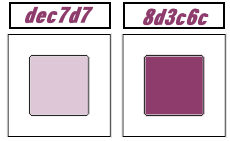
color 1 -> foreground color -> #dec7d7 (light color)
color 2 -> background color -> #8d3c6c (dark color)
Use the pencil to follow the steps
left click to grab it

translator’s note : I translated Vivi’s tutorial exactly as she wrote it
as I use my own colors and tubes to create my tag , I sometimes apply different settings
concerning this tutorial, I chose the same colors than Vivi
Realization
open a new transparent raster layer 90 ** 550 pixels
flood fill with color 2
layers/new raster layer
selections/load-save selection/from disk/selection « Vivi378 »
flood fill the selection with color 1
selections/load-save selection/from disk/ « vivi 378bis »
DELETE (hit the delete key of your keyboard)
selections/select none
layers/merge/merge visible
effects/reflection effects/feedback
effects/image effects/seamless tiling
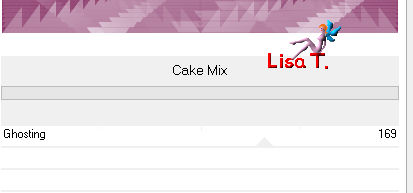
effects/plugins/BKG Kaleidoscope/Cake Mix/default settings
effects/image effects/seamless tiling
selections/load-save selection/from disk/ « vivi 379 »
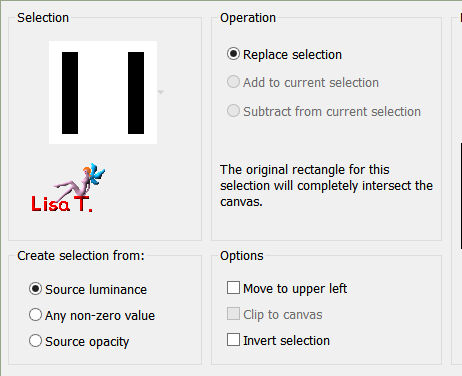
selections/promote selection to layer
copy/paste as new layer the tube « NaraPamplona 1472 »
image/resize/uncheck « all layers »/60%
move the tube inside the selection
selections/invert
DELETE
selections/invert
layers/merge/merge down
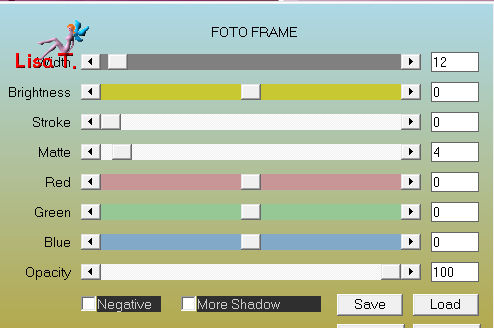
effects/plugins/AAA Frames/Fotoframe
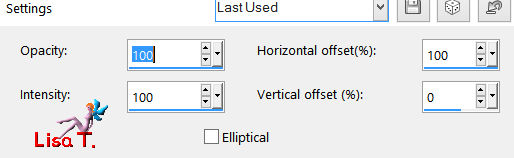
effects/geometric effects/perspective horizontal
promote floating selection to layer and select none
layers/duplicate
image/mirror/mirror horizontal and merge down
effects/plugins/Alien Skin Eye Candy 5 Impact/Extrude/preset « Vivi_portrait0615 »
activate the layer underneath (promoted selection)
effects/plugins/Alien Skin Eye Candy 5 Impact/Extrude/preset « Vivi2_portrait0615 »
apply the same effect one more
close the eye of the background layer and merge visible (the frames)
effects/3D effects/drop shadow/ 0 / 0 / 65 / 20 / black
layers/duplicate
image/resize/uncheck « all layers »/40%
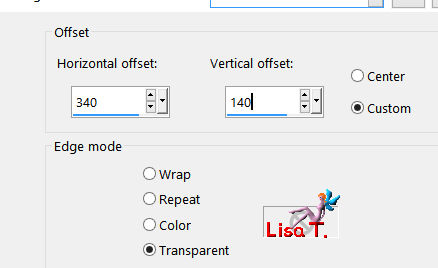
effects/image effects/offset
layers/duplicate
image/mirror/mirror horizontal
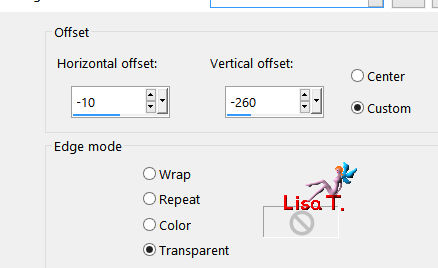
effects/image effects/offset
open the eye of the background layer
image/add borders/check « symmetric » -->
3 pixels color 1
3 pixels color 2
3 pixels color 1
selections/select all
image/add borders/75 pixels color 2
edit/copy - selections/invert
edit/paste into selection
adjust/blur/gaussian blur/25
promote the background layer to raster layer
edit/cut
layers/new raster layer
edit/paste into selection
effects/reflection effects/feedback
adjust/sharpness/sharpen more and select none
layers/duplicate – image/mirror/mirror horizontal
lower the opacity to 50% and merge down
layers/arrange/send to bottom
layers/duplicate
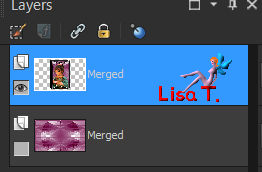
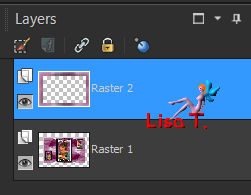
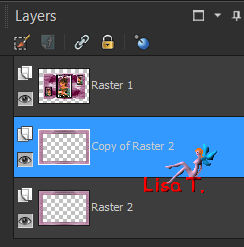
your layers palette looks like this
activate the top layer
effects/3D effects/drop shadow/ 0 / 0 / 65 / 20 / black
acitvate the middle layer (copy of raster 2)
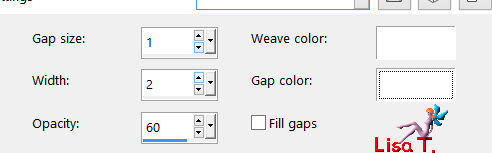
effects/texture effects/weave
activate the top layer (the frame) and merge down
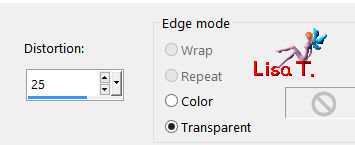
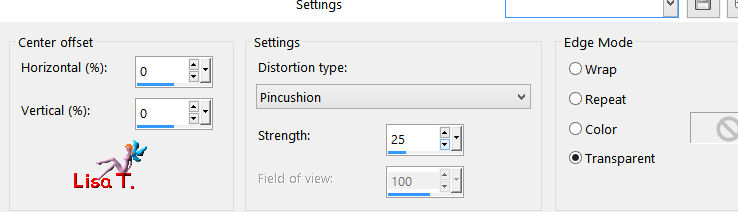
effects/distortion effects/lens distortion
effects/3D effects/drop shadow as before
copy/paste as new layer the decoration tube – resize and colorize it if necessary
drop a shadow of your choice
layers/merge/merge all
image/add borders -->
3 pixels color 2
3 pixels colro 1
3 pixels color 2
apply your signature, resize to your likings and save as... type jpeg
thank you to have followed this tutorial
Vivi will be very glad to receive your creation and present it at the end of her tutorial
don’t hesitate to send it to her

Back to the boards of Vivi’s tutorials
Board 2  Board 3 Board 3

|