Dreaming

I am member of TWInc
My translations are protected


Material
tubes - selections - preset Eye Candy 5 IMpact
open the tube with PSP
copy the selections, and paste them into the special folder “Selections” of “Py PSP Files”
double click on the preset to install it
OR
import into the plugin
Tahnk you to the tubers : Stephy Dream - Svb Syl - Msb


Filters used
AAA Frames - VM Toolbox - L&K Katharina - Eye Candy 5 IMpact - Toadies
Mehdi - BKG Kaleidoscope
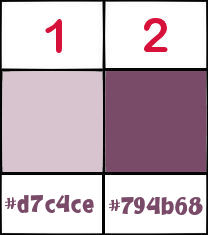
Colors palette
color 1 / foreground color / #d7c4ce
color 2 / background color / #794b68
you can use the paint brush to follow the steps
left click to grab it

Realization
in te materials palette, prepare a sunburst gradient with color 1 and 2
(light color as foreground, and dark color as background)
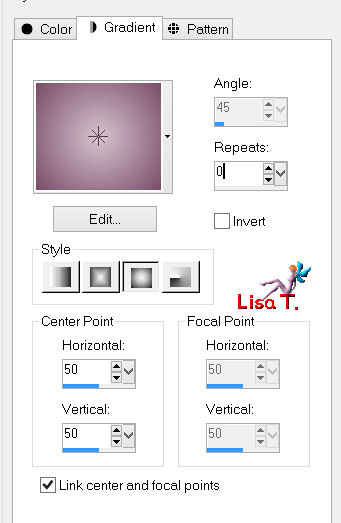
open a new transparent background raster 900 * 550 pixels
and fill with this gradient
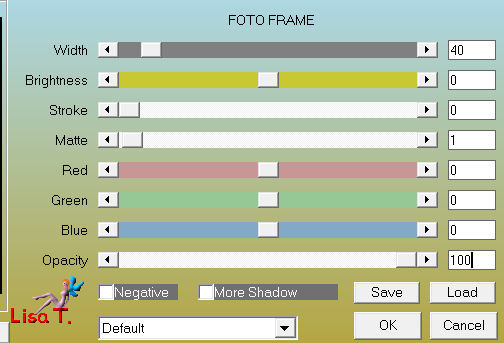
effects/plugins/AAA Frames/Foto Frame
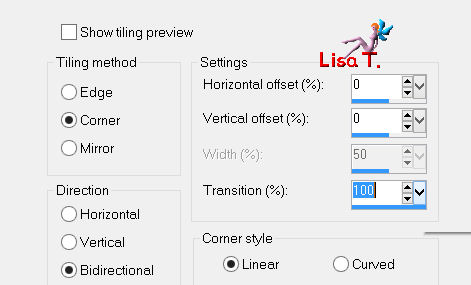
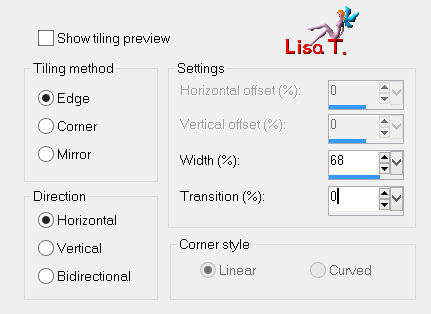
effects/image/effects/seamless tiling
layers/duplicate
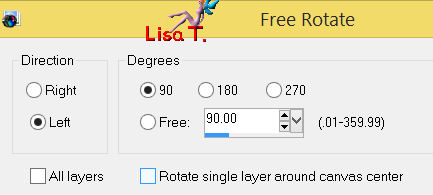
iamge/free rotate
image/resize/75%/uncheck “resize all layers”
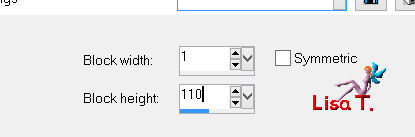
effects/distortion effects/pixelate
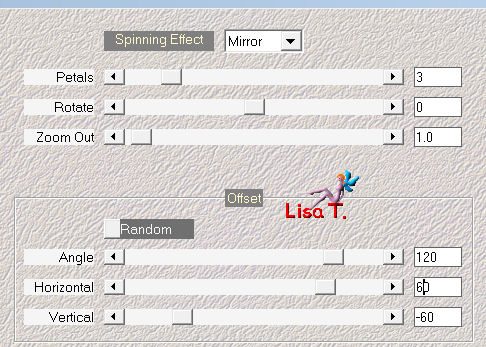
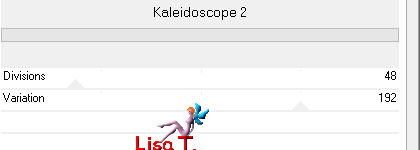
effects/plugins/Mehdi/Kaleidoscope 2.1 (3/0/1.0 and 120/60/-60)
effects/3D effects/drop shadow/ 0 / 0 / 30 / 50 / black
in the layers palette, activate the background layer
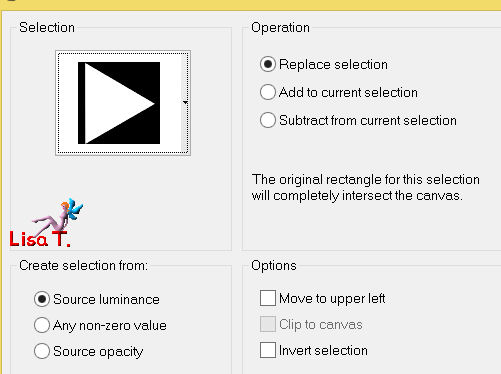
selections/load-save selection/from disk/selection “Vivi 345”
effects/texture effects/Mosaic-Antique

in the layers palette, activate the top layer
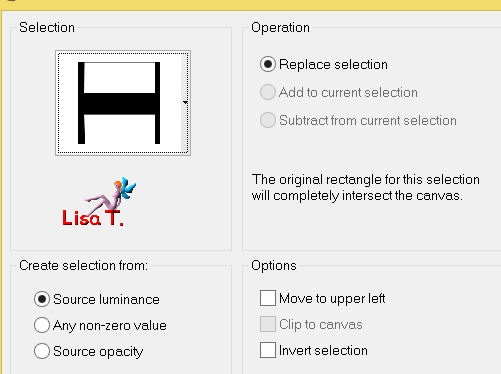
selections/load-save selection/from disk/selection “Vivi 346”
activate the tube “Stephy Dream 1013 53”
image/resize/65%/uncheck “resize all layers”
edit/coy - back to your work - edit/paste as new layer, and move it properly in the selection
selections/invert, and press the Delete key of your keyboard
layers/new raster layer
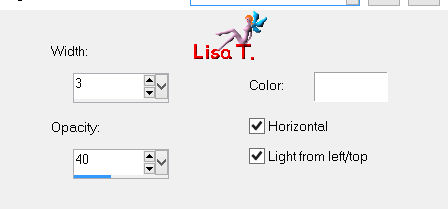
effects/plugins/Eye Candy 5 IMpact/Backlight/preset “Dreaming_Vivi”
selections/select none
adjust/sharpness/sharpen
in the layers palette, set the blend mode on Luminance (Legacy), opacity 100%
layers/merge/merge visible
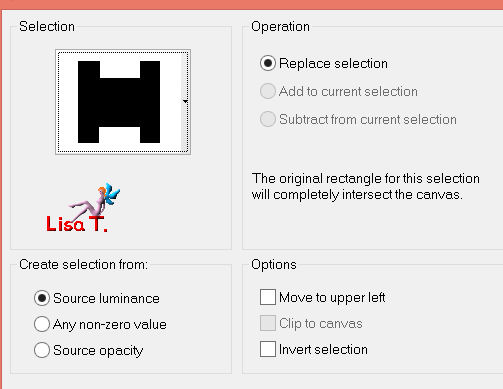
selections/load-save selection/from disk/selection “Vivi 347”
selections/promote selection to layer
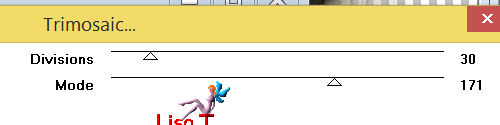
effects/VM Toolbox/Trimosaic
selections/select none
effects/3D effects/drop shadow/ 0 / 0 / 50 / 30 / black
in the layers palette, set the blend mode on “hard light” (or other) , opacity 100%
in the layers palette, activate the bottom layer (merged)
selections/load-save selection/from disk/selection “Vivi 348”
layers/promote selection to layer
selections/select none
effects/texture effects/blinds (white)
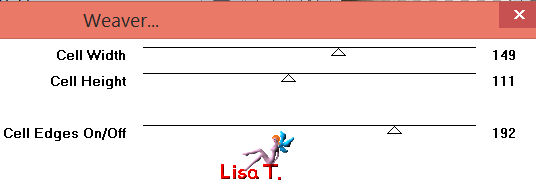
effects/plugins/Toadies/Weaver
layers/duplicate - image/flip
layers/merge/merge down
iamge/mirror
effects/image effects/seamless tiling
in the layers palette, set the blend mode on “hard light” and the opacity on 70%
adjust/sharpness/sharpen
in the layers palette, activate the bottom layer (merged)
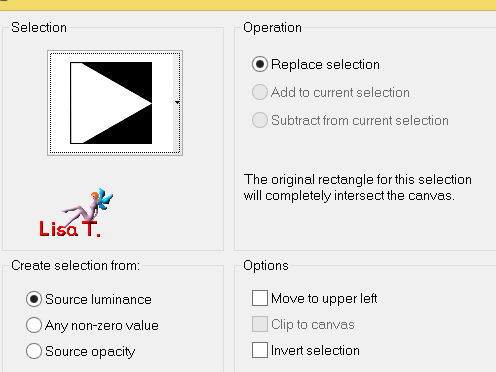
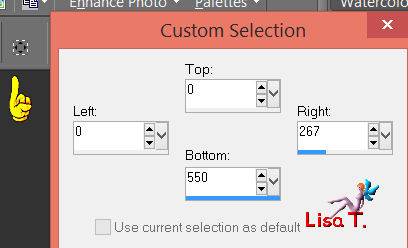
activate the Selection tool (rectangle), custom selection
selections/promote selection to layer
effects/plugins/BKG Kaleidoscope/kaleidoscope 2
selections/select none
in the layers palette, set the blend mode on “soft light”, opacity 100%
(or “overlay” or “opacity”, 65 / 70%)
layers/merge/merge all (flatten) selections/load-save selection/from disk/selection “Vivi 350”
effects/plugins/L&K Katharina
selections/select none
activate the tube “deco_vivi”, colorize it in the tones of the dark color
edit/copy - back to your work - edit/paste as new layer
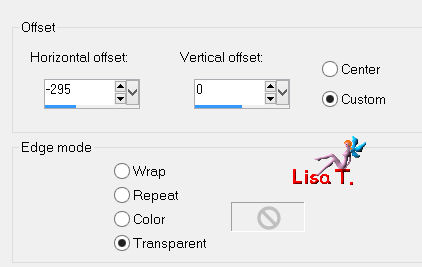
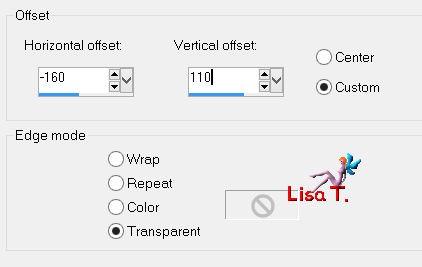
effects/image effects/offset
in the layers palette, set the blend mode on “screen” and the opacity on 75%
activate the tube “word art dreaming”
edit/copy - back to your work - edit/paste as new layer
move it to the left as shown
in the layers palette, set the blend mode on “luminance (legacy)”, opacity 100%
layers/merge/merge visible
image/add borders/check “symmetric”
2 pixels color 2
2 pixels color 1
2 pixels color 2
selections/select all
edit/COPY
image/add borders/55 pixels/contrasting color
selections/invert
edit/paste into selection
adjsut/blur/gaussian blur/30
selections/invert
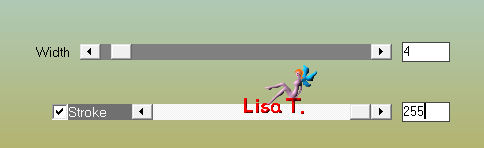
effects/3D effects/drop shadow/ 0 / 0 / 65 / 30 / black
selections/select none
activate the tube “Svb 700”
image/resize/85% - image/mirror
edit/copy - back to your work - edit/paste as new layer
move it to the right (see example)
adjust/sharpness/sharpen
effects/3D effects/drop shadow/ 11 / -15 / 37 / 23 / black
acitvate the tube “Msb Ball 2151301”, colorize it if necessary
edit/copy - back to your work - edit/paste as new layer
effects/image effects/offset
layers/new raster layer, apply your signature
layers/merge/merge all (flatten)
effects/plugins/AAA Frames/Transparent Frame
resize if necessary, save as... type JPEG
thank you to have realized this tutorial
if you want Vivi to see your creation
she will be very glad to receive it and present it at the end of her tutorial

if you want to receive Vivi’s new tutorials
join her newsletter

Back to the boards of Vivi’s tutorials
board 1  board 2 board 2

|