

 vous
trouverez les explications en français
au bas de cette page vous
trouverez les explications en français
au bas de cette page

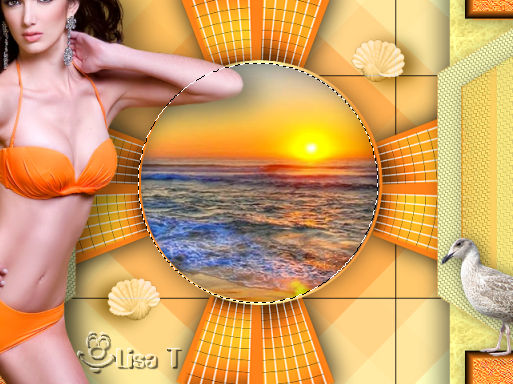
this tutorial is a complement to create an animation on
the original tag
click on Anya’s banner to see Virginia’s tutorial
(non-animated tag) translated into english
this tutorial was created with Animation Shop (AS)
Use the pencil to follow the steps
hold down left click to grab it and move it
 |
Material
WITH
"Animation Shop"
follow the original tutorial
at the end of step 25 of the tutorial, if you want to create
the animation
follow the steps from A to Q
A
highlight bottom layer
enable the selection tool -> circle
view -> rulers
draw a circle from the center of the round window
this center should be on the following coordinates -> H :
524 px / V : 349 px
B
selections -> promote selection to layer 3 times
rename these 3 layers « sea 1 » « sea
2 » « sea 3 » (from bottom
to top)
C
highlight « sea 1 »
effects -> plugins -> Eye Candy 4000 -> Jiggle
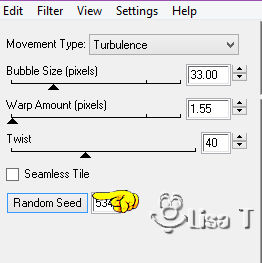
D
highlight « sea 2 »
effects -> plugins -> Eye Candy 4000 -> Jiggle
-> Click on Random Seed bottom left
E
highlight « sea 3 »
effects -> plugins -> Eye Candy 4000 -> Jiggle
-> Click on Random Seed bottom left
F
close the eye of « sea 2 » and « sea
3 »
G
apply your watermark or signature on a new layer
resize your ta -> tick « resize all layers « -> 980
px (width)
H
edit -> copy special -> copy merged
I
open Animation Shop
edit -> paste as new animation
J
back in PSP
close the eye of « sea 1 » and open
the eye of « sea 2 »
edit -> copy special -> copy merged
K
in Animation Shop
edit -> paste -> after current frame
L
back in PSP
close the eye of « sea 2 » and open the eye
of « sea 3 »
edit -> copy special -> copy merged
in Animation Shop
edit -> paste -> after current frame
M
edit -> select all
animation -> image property -> ask 35
N
edit -> COPY
in the animation, select the last frame (it is now circled
with red)
edit -> paste after current frame
in the animation, select the last frame again (it is now
circled with red)
edit -> paste after current frame
your animation has 9 frames
O
open the gif « flying birds »
edit -> select all
edit -> copy
P
go back to your tag -> edit -> select all
RIGHT click inside the first frame -> paste in the selected
frame (Ctrl + E)
your « flying birds » seem to be
hanging at the end of your cursor
find the right place for them and drop them with a left
click
Q
edit -> select all
animation -> image property -> ask 35
file -> save as... type .gif
thank you for following this tutorial
if you have any problem with it, don’t hesitate to
write to me

Animation à rajouter au tutoriel de Virginia (non-animé) : «Vue
sur la mer »
clic sur la bannière de Virginia pour accéder
au tutoriel original en français

les
explications qui suivent sont conçues pour
faire cette animation avec Animation Shop (AS)
utilisez ce crayon pour suivre les
étapes
clic gauche pour le saisir et le déplacer
|
materiel
Animation avec Animation Shop
suivre le tutoriel original jusqu’à la fin
de l’étape 25
puis pour terminer, remplacer les dernières étapes
par celles qui suivent
A
activer le calque du dessous
activer l’outil sélection -> cercle
affichage -> règles
dessiner un cercle partant du centre du hublot
ce centre devrait se trouver au point de rencontre des
repère H : 524 px / V : 348
px
B
sélections -> transformer la sélection
en calque 3 fois
renommez ces calques, de haut en bas -> « mer
1 » « mer 2 » « mer
3 »
C
activer « mer 1 »
effects -> modules externes -> Eye Candy 4000 -> Jiggle
(si vous trouvez de meilleurs réglages, n’hésitez
pas à les changer)
D
activer « mer 2 »
effects -> modules externes -> Eye Candy 4000 -> Jiggle
/ cliquez sur « randoom seed » en
bas à gauche
E
activer « mer 3 »
effects -> modules externes -> Eye Candy 4000 -> Jiggle
/ cliquez sur « randoom seed » en bas à gauche
F
fermer les yeux des calques « mer 2 » et « mer
3 »
G
appliquez votre signature sur un nouveau calque
calques -> redimensionner -> cocher « redimensionner
tous les calques » -> 950 px de largeur
H
edition -> copie spéciale -> copie avec
fusion
I
ouvrir Animation Shop
edition -> copier comme nouvelle animation
J
retour dans PSP
fermer l’oeil de « mer 1 » et
ouvrir l’oeil de « mer 2 »
edition -> copie spéciale -> copie avec fusion
K
dans Animation Shop
édition -> coller après l’image active
L
dans PSP
fermer l’oeil de « mer 2 » et ouvrir
l’oeil de « mer 3 »
edition -> copie spéciale -> copie avec fusion
dans Animation Shop
édition -> coller après l’image active
M
édition -> tout sélectionner
édition -> Copier
N
dans l’animation, sélectionner la dernière
image d’un clic de souris (elle s’entoure de
rouge )
édition -> coller après l’image active
dans l’animaiton sélectionner à nouveau
la dernière image
édition -> coller après l’image active
votre animaiton comporte maintenant 9 images, le même
nombre que l’animaiton des oiseaux
O
ouvrir l’animation « flying birds » fournie
édition -> tout sélectionner
édition -> copier
P
activer votre animation principale d’un clic sur
la barre horizontale
sélectionner la première image
édition -> tout sélectionner
(la première image est cerclée de rouge,
et l’ensemble est cerclé de bleu)
édition -> coller dans l’image sélectionnée
l’animation des oiseaux semble suspendue au bout
de votre curseur
choisissez l’emplacement, et libérez les oiseaux
d’un clic gauche
Q
éditon -> tout sélectionner
animation -> propriété de l’image
/ 35
fichier -> enregistrer sous... type .gif
merci d’avoir suivi ce petit tutoriel
n'hésitez pas à m'écrire si vous avez le moindre souci

|