Ophelia

you wil find the orignal tutorial here

This tutorial is a personal creation.
Virginia works with PSP12
I work with PSP18
but you can follow this tutorial with any other version of PSP

Any resemblance with another one would be pure coincidence.
It is stricly forbidden to modify images, to change their name or take off the matermarks,
To present them on your sites or blog,
To share them in groups,
to make a bank of images, or to use them on lucrative purposes.

Thank you to respect Virginia’ work and the tubers work.
Don’t hesitate to warn her if you have any trouble with this tutorial.
some tubes were received in sharing groups
if one of them is yours, or not copyright free, please let Virginia know
and a link to your site will be added
either she will delete it from the material provided if you prefer


Material
tubes – plugins – selections
if you want to use another tube, Virginia thinks it is better to choose it at the end
for a better harmony with you colors
the tube she chose for this tutorial was created by Merydesign
thank you to her for her nice work


Filters used
* Alien Skin - Eye Candy 5
* Alf's Border FX - (à importer dans Filters Unlimited)
* AP Lines
* DC Special - Stakker --> (before begining your work, be sure you have this plugin installed.
If not, it is provided in the material, import it into Unlimited 2 )
* Filters Unlimited
* FM Tile Tools
* Funhouse - Reverb --> (before begining your work, be sure you have this plugin installed.
If not, it is provided in the material, import it into Unlimited 2)
* Nik Color Effects
* Simple
* Toadies
* VM Extravaganza

to download the filters, click on the banner below
Thank you very much to Janaly and Gigi for their kind permission

If you don’t know how to install filters into Unlimited 2, just click on the link below


Colors used
Virginia uses these colors
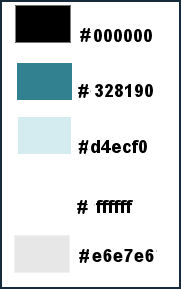
Don't hesitate to change the colors and the blend mode of the layers, and the shadows,
according to your tubes and images.

Important
Open all images in PSP, duplicate them and close the originals. (shift + key D)
always work with the copies
copy/paste selections into the special folder « selections » of « My PSP Files »
save your work often in case of a PSP crash

use the pencil to follow the steps
left click to grab it


prepare your material
Realization
Step 1
in the materials palette, set color 1 as Foreground color (FG)
and color 2 as BAckground color (BG)
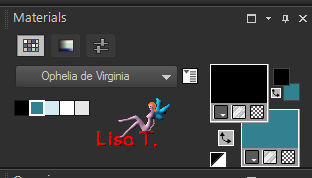
prepare a linear gradient
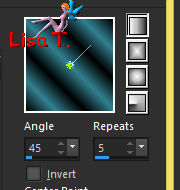
open a new transparent raster layer 900 * 600 pixels
flood fill with the gradient
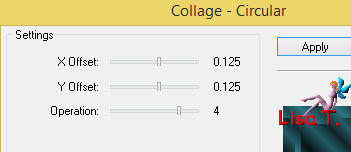
effects > plugins > FM Tile Tools > Collage Circular > default settings
Step 2
layers > duplicate
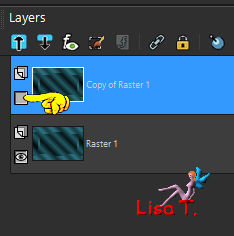
in the layers palette, close this layer
Step 3
activate « Raster 1 »
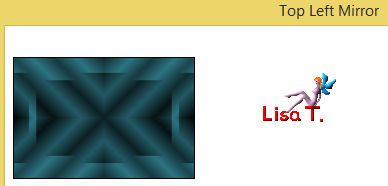
effects > plugins > Unlimited 2 > Simple > Top Left Mirror
layers > duplicate
effects > plugins > VM Extravaganza > Holidays in Egypt > 170 /118
Step 4
selections > load-save selection > from disk > selection « vir_sel_ophelia-01.PspSelection »
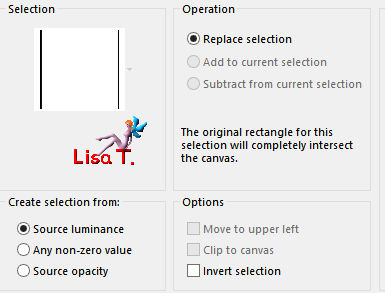
copy/paste as new image
save this image changing the name to « deco 01 » and minimize it to tray for a later use
back to your work > selections > select none
Step 5
selections > load-save selection > from disk > selection « vir_sel_ophelia-02.PspSelection »
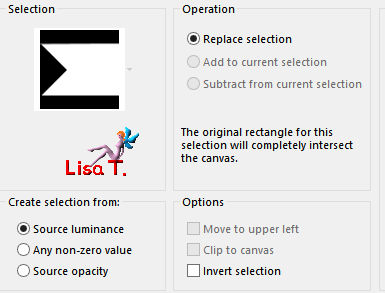
DELETE (press the Delete key of your keyboard)
selections > select none
edit > copy
Step 6
open a new transparent image 900 * 600 pixels
edit/paste as new layer
effects > plugins > Unlimited 2 > Simple > Zoom out and Flip
selections > load-save selection > from disk > selection « vir_sel_ophelia-03.PspSelection »
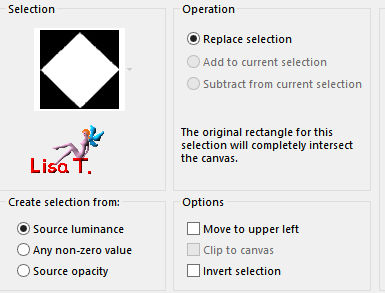
note : you might have to move the selection
to do that, activate the Move tool
press and hold the right click of your mouse, and move the selection
then you can surround the diamond shape properly
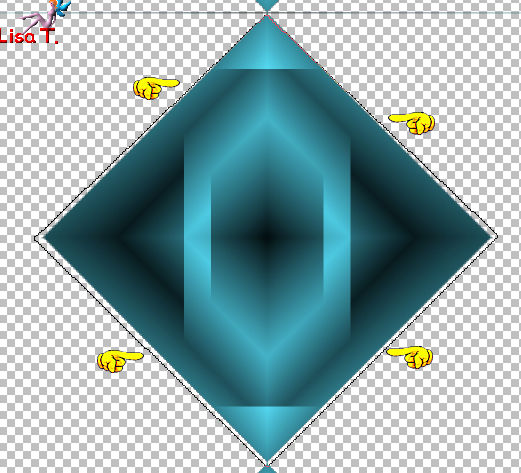
image > crop to selection
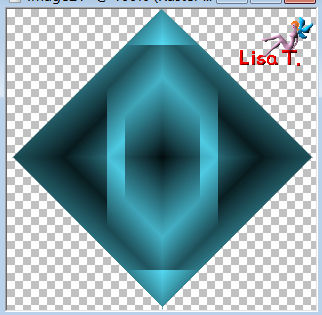
save this image changing the name to »deco 02 » and minimize it to tray for a later use
Step 7
back to your work
« copy of raster 1 » is the active layer
layers > duplicate – image > mirror > mirror horizontal
layers > merge > merge down
effects > 3D effects > drop shadow > -5 / 4 / 30 / 30 / black
drop shadow again > 5 / -4 / 30 / 30 / black
Step 8
activate « Raster 1 »
adjust > sharpness > sharpen more
Step 9
in the materials palette, set color 5 as BG color
activate the top layer (copy of Raster 1) and open the visibility
image > resize > uncheck « resize all layers » > 50%
effects > plugins > Toadies > What are You ?...

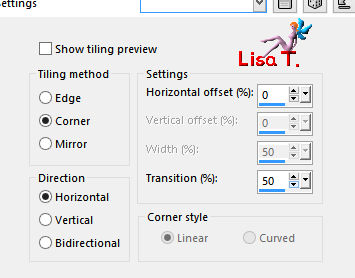
effects > image effects > seamless tiling
Step 10
selections > load-save selection > from disk > selection « vir_sel_ophelia-04.PspSelection »
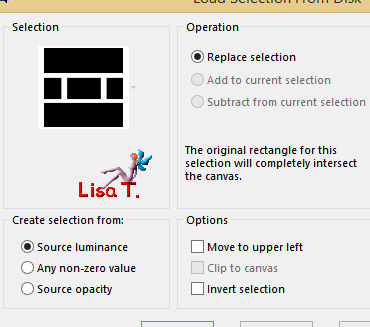
selections > promote selection to layer
selections > select none
Step 11
close the visibility of the top layer (promoted selection)
activate the layer underneath (copy of Raster 1)
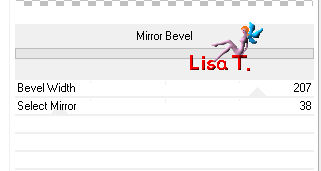
effects > plugins > Unlimited 2 > Alf’s Border Fx > Mirror Bevel
effects > plugins > AP Lines > Lines Silverlining
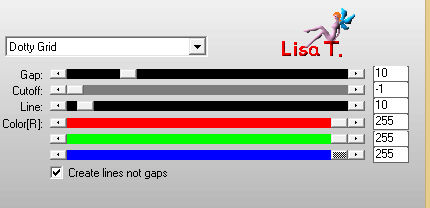
layers > arrange > move down
blend mode : Luminance (Legacy)
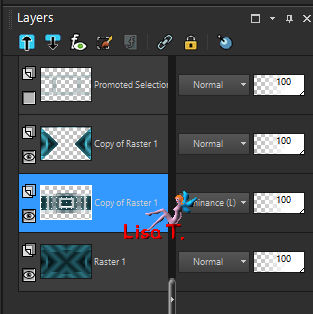
Step 12
selections > select all – selections > float – selections > defloat
selections > modify > select selection borders
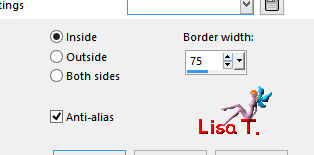
layers > new raster layer
flood fill with the BG color (right click) click once !!! otherwise it will be too « light »
selections > select none
effects > 3D effects > drop shadow > 2 / 3 / 50 / 80 / black
your work looks like this
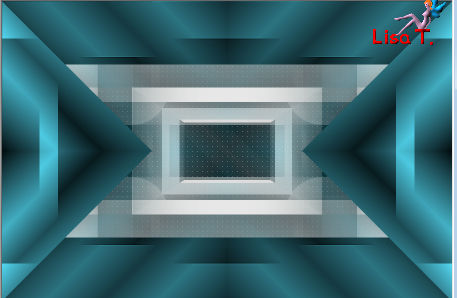
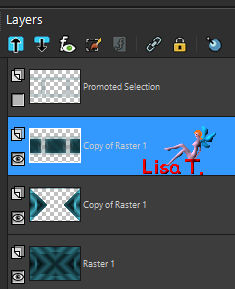
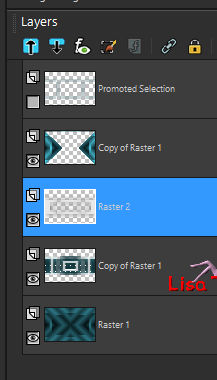
your layers palette looks like this
Step 13
activate the top layer and open the visibility
image > free rotate > left > 90°
image > resize > uncheck « resize all layers » > 70%
adjust > sharpness > sharpen
effects > geometric effects > spherize
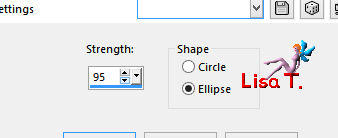
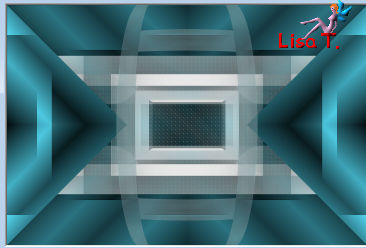
your work looks like this now
Step 14
selections > load-save selection > from disk > selection « vir_sel_ophelia-05.PspSelection »
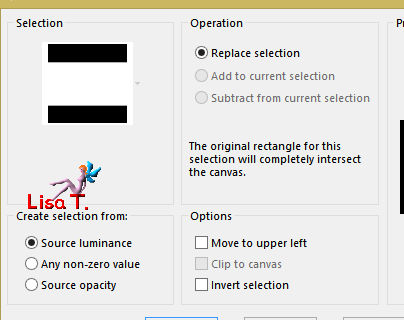
DELETE
selections > select none
blend mode of the layer : Overlay
Step 15
effects > plugins > Unlimited 2 > DC Special > Stakker
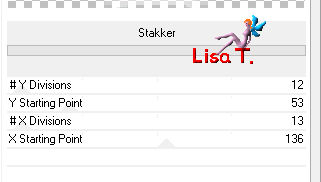
layers > arrange > move down 3 times (second from the bottom)
effects > 3D effects > drop shadow > 2 / 3 / 50 / 60 / black
your work looks like this
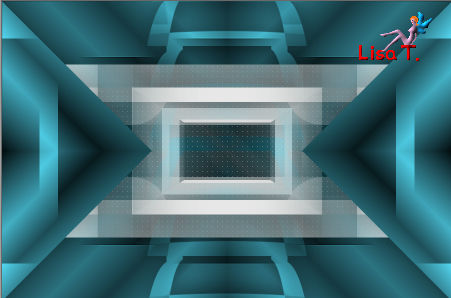
Step 16
activate the image set aside in step 4 (deco 01)
effects > plugins > Unlimited 2 > Simple > Top Left Mirror
edit/cut
back to your work
activate the top layer and paste as new layer
image > free rotate > left > 90°
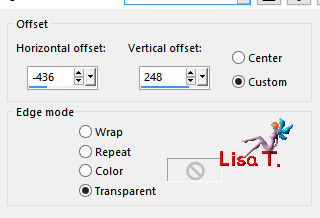
effects > image effects > offset
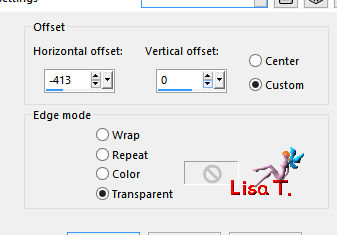
layers > duplicate – image > mirror > mirror horizontal
layers > merge > merge down
adjust > sharpness > sharpen
Step 17
effects > plugins > Alien Skin Eye Candy 5-Impact > Glass
in the « settings » tab choose « Clear »
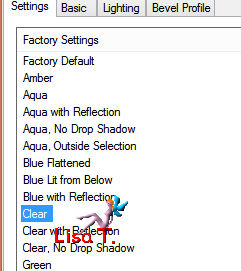
layers > duplicate
image > resize > uncheck « resize all layers » > 75%
once more : layers > duplicate
image > resize > uncheck « resize all layers » > 75%
layers > merge > merge all (flatten)
Step 18
in the materials palette, set color 4 as FG and color 2 as BG
prepare a linear gradient
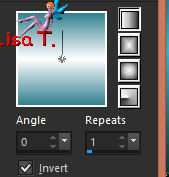
image > add borders > UNcheck « symmetric » >
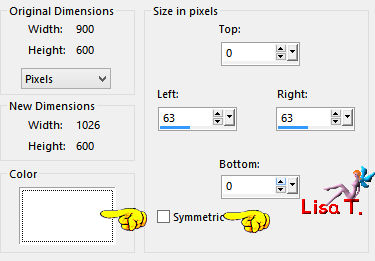
activate the magic wand tool

select the 2 white borders
layers > new raster layer
flood fill the 2 selections with the gradient
effects > texture effects > mosaic-glass
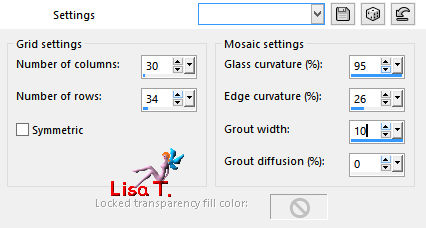
effects > plugins > Unlimited 2 > Simple > Top Left Mirror
effects > 3D effects > drop shadow > 2 / 3 / 50 / 60 / black
selections > select none
layesr > merge > merge all (flatten)
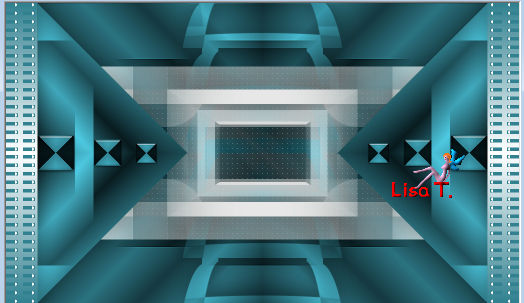
your work looks like this
Step 19
image > add borders > check « symmetric » > 1 pixels > color 2 (BG)
in the materials palette, set color 3 as FG color
image > add borders > 6 pixels > color 3
image> add borders > 1 pixel color 2 (BG)
Step 20
in the materials palette, set color 1 (black) as FG color
prepare a linear gradient
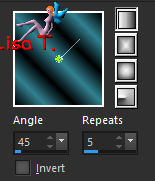
image > add borders > 40 pixels > white
select this borders with the magic wand tool
flood fill the selection with the gradient
effects > plugins > Unlimited 2 > Funouse > Reverb
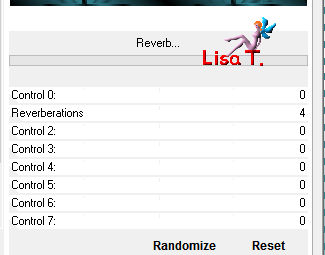
selections > invert
effects > 3D effects > drop shadow > 2 / 3 / 50 / 30 / black
drop shadow again, changing the settings -> -2 / -3 / 50 / 30 / black
selections > select none
Step 21
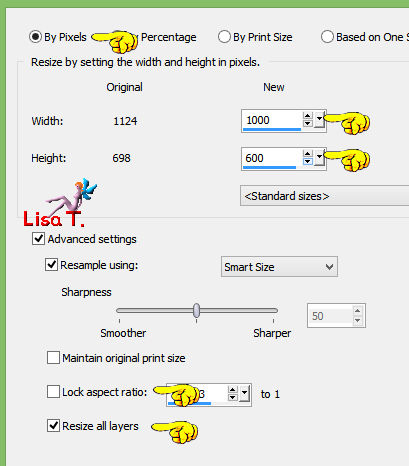
image > add borders > check « symmetric » > 1 pixel black
image > resize > uncheck «lock aspect ratio »
Step 22
activate the image « deco 02 » set aside in step 6
eidt > copy
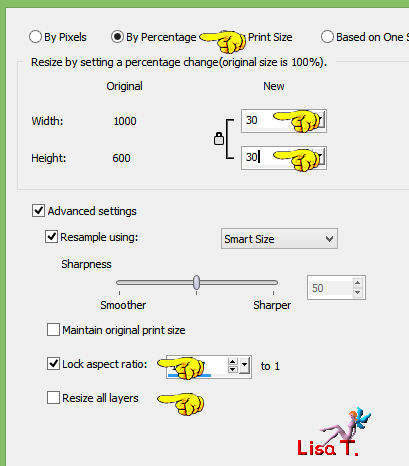
back to your work – edit > paste as new layer
image > resize > uncheck « resize all layers » > check «lock aspect ratio » > 30%
Step 23
effects > image effects > offset
effects > plugins > Unlimited 2 > Simple > Top Left Mirror
effects > 3D effects > drop shadow > 2 / 3 / 60 / 30 / black
layers > merge > merge visible
Step 24
effects > plugins > Nik Software > Color Effects Pro 3.0 > Bi-Color Filters
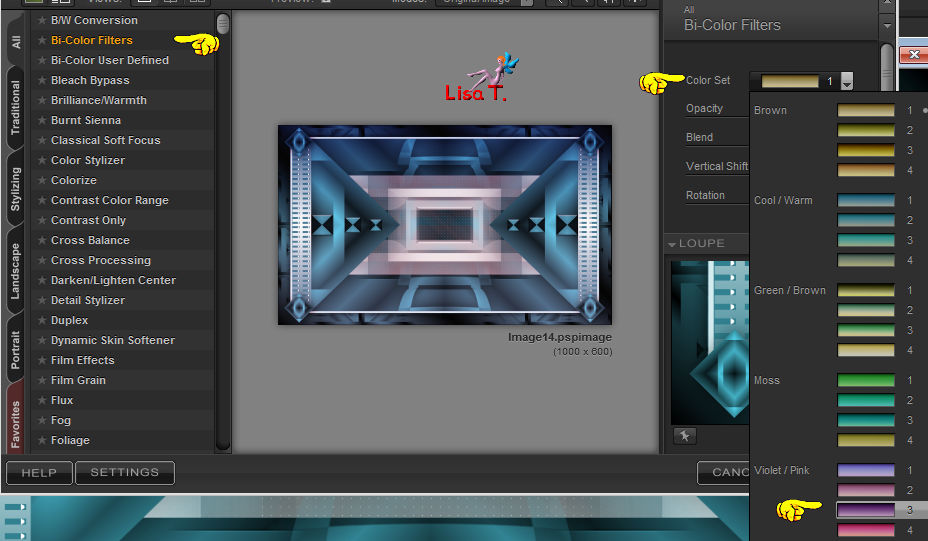
your work looks like this
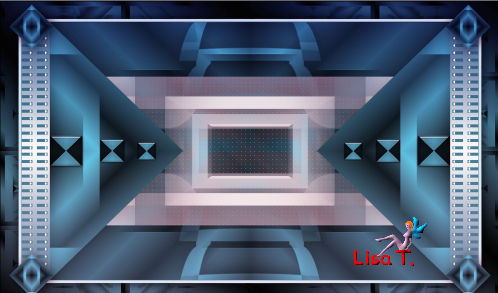
if you changed the colors, change the settings according to the result you wish
Step 25
cop/paste as new layer the woman tube
image > resize > uncheck « resize all layers » > 77%
effects > image effects > offset > H : 35 > V : -5 > check « custom » and « transparent »
effects > 3D effects > drop shadow > 8 / 10 / 60 / 30 / black
Step 26
apply your watermark
layers > merge > merge visible
adjsut > sharpness > unsharp mask

your tag is finished
resize it if necessary, save as... type jpeg

Don't hesitate to write to Virginia if you have any trouble with her tutorial


my tags with my tube (available on my site)
type .jpeg

type .gif (animated)

Back to the board of Virginia’s tutorials


|