On to the new year !
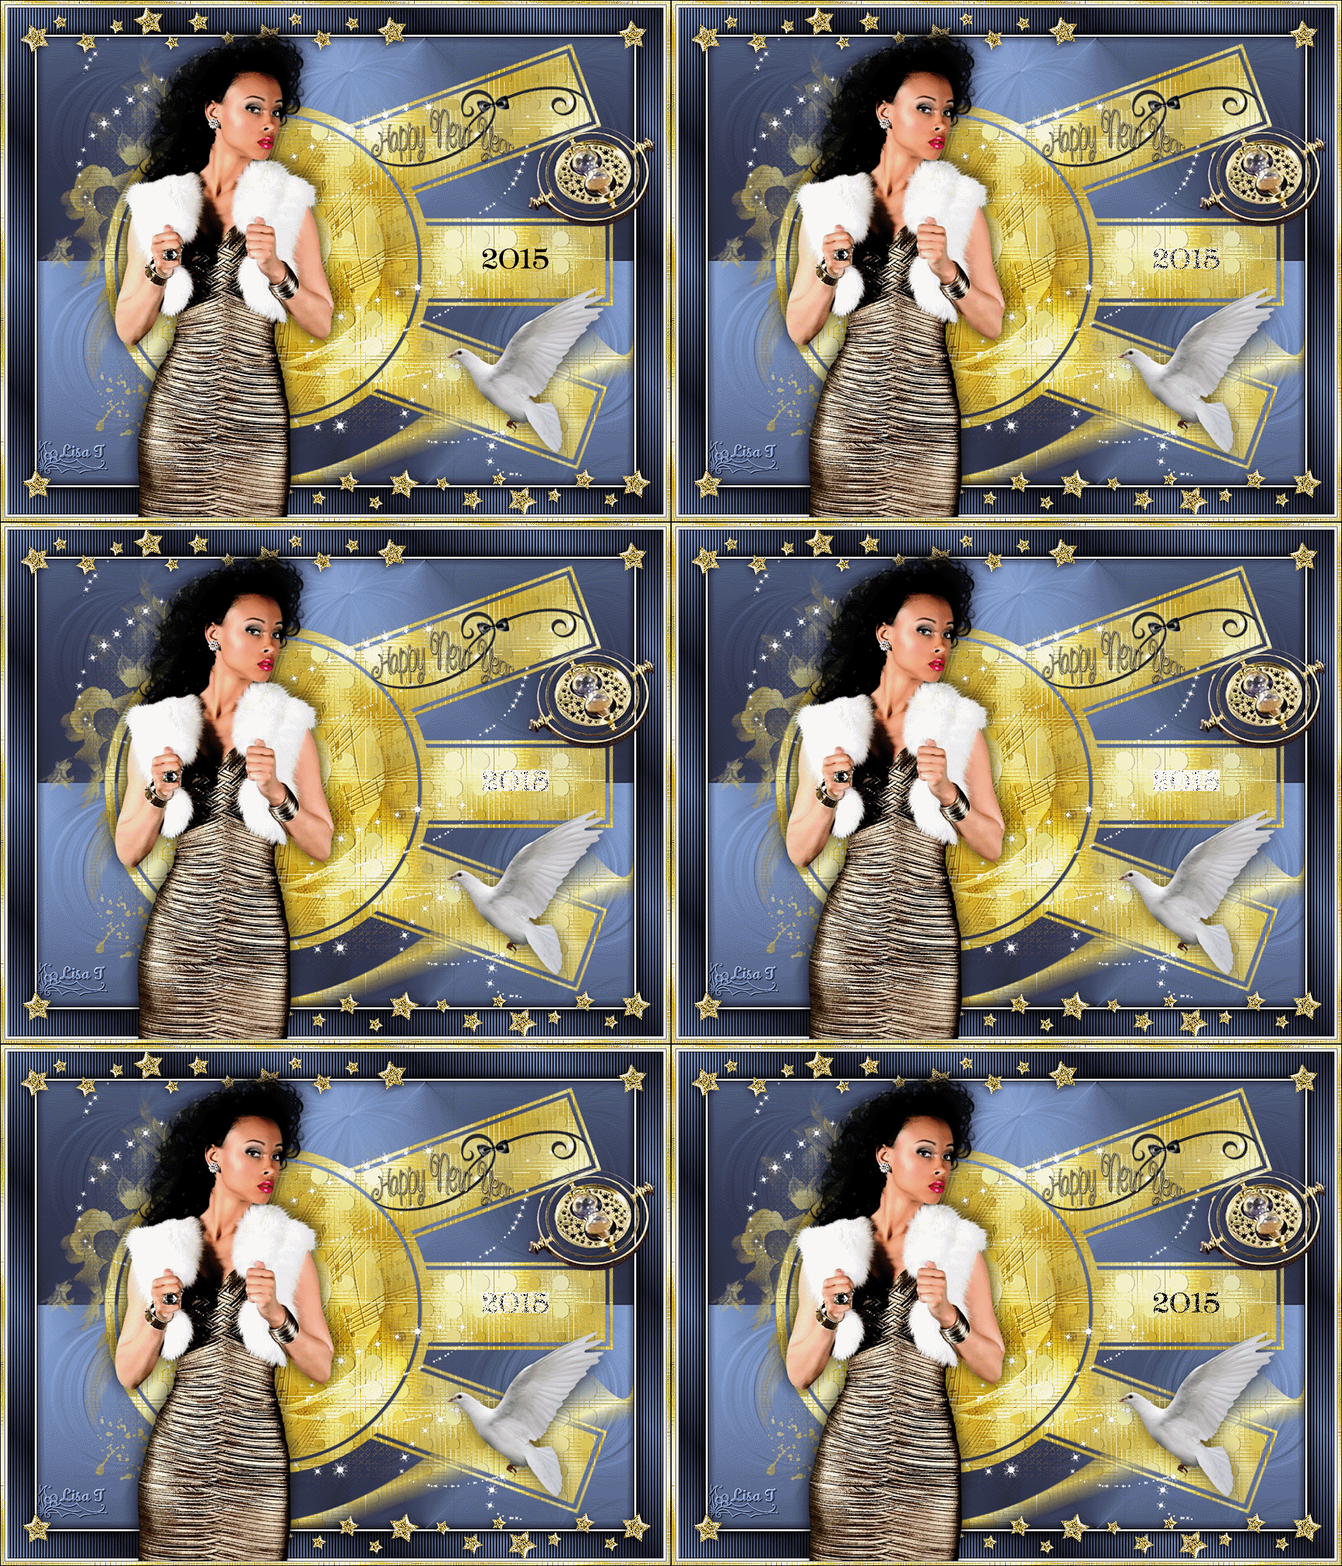
you wil find the orignal tutorial here

This tutorial is a personal creation.
Virginia works with PSP13
I work with PSP18
but you can follow this tutorial with any other version of PSP

Any resemblance with another one would be pure coincidence.
It is stricly forbidden to modify images, to change their name or take off the matermarks,
To present them on your sites or blog,
To share them in groups,
to make a bank of images, or to use them on lucrative purposes.

Thank you to respect Virginia’ work and the tubers work.
Don’t hesitate to warn her if you have any trouble with this tutorial.
some tubes were received in sharing groups
if one of them is yours, or not copyright free, please let Virginia know
and a link to your site will be added
either she will delete it from the material provided if you prefer


Material
tubes – decoration tubes – mask – texture – font
(if you have difficulties creating the animation, the .mng file is provided)
open the tile « NYtile_vir », make a copy of the tube – delete the matermark’s layer – minimize it to tray
tubes creators : Nikita Katrina Aclis
mask by Jill


Filters used
* FM Tile Tools
* Filters Unlimited
* Simple
* VM Extravaganza ( à importer dans Filters Unlimited)
* Jasc Animation Shop
to download the filters, click on the banner below
Thank you very much to Janaly and Gigi for their kind permission

If you don’t know how to install filters into Unlimited 2, just click on the link below


Colors used
Virginia used these colors
foreground color -> FG > color 1 -> #8aa6d8
background color -> BG -> color 2 -> #2b2b43
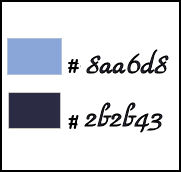
Don't hesitate to change the colors and the blend mode of the layers, and the shadows,
according to your tubes and images.

Important
Open all images in PSP, duplicate them and close the originals. (shift + key D)
always work with the copies
some tubes provided are not « visible » (in order to reduce the weight of the material file)
click on visibility toggle of the layer to make it visible again
open the mask, and minimize it to tray

Preparation
in the materials palette, prepare the 2 colors
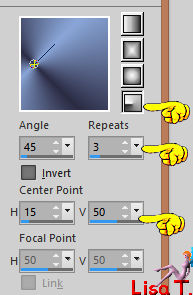
prepare a radial gradient
open the tile « NYtile_vir » and prepare it as « pattern » / angle 0 and scale 100
copy / paste the Texture 33 into the folder TExture of My PSP Files

use the pencil to follow the steps
left click to grab it


prepare your material
Realization
Step 1
open a new transparent raster layer 800 * 600 pixels
flood fill with the tile
layers > duplicate
effects > plugins > Unlimited 2 > VM Extravaganza > Vasarely > ( 60 / 100 / 0 / 0 / 0 / 0 / 0 )
with the magic wand tool

select teh the black part > DELETE
selections > select none
effects > 3D effects > dro shadow > 0 / 1 / 30 / 1 / black
layers > merge > merge visible
your work looks like this
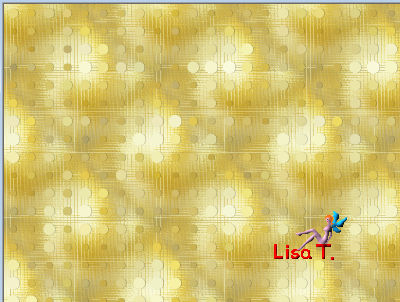
Step 2
in the materials palette, set the gradient as FG
layers > new raster layer
flood fill with the gradient
effects > edge effects > enhance more
layers > duplicate – image > mirror > mirror horizontal
opacity of the layer : 50%
layers > merge > merge down
adjust > sharpness > sharpen more
effects > plugins > Simple > Quick Tile > default settings
your work looks like this
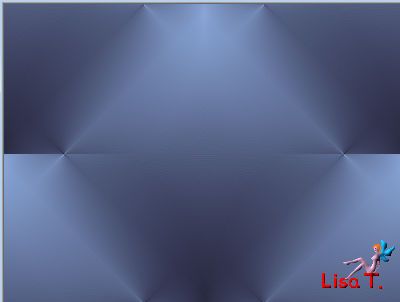
effects > texture effects > Texture (find the texture provided)
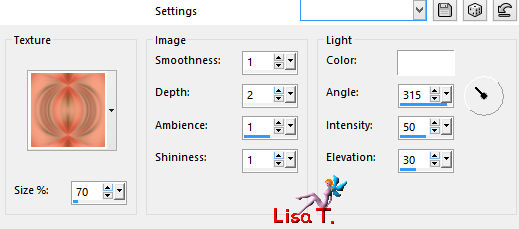
Step 3
layers > new mask layer > from image
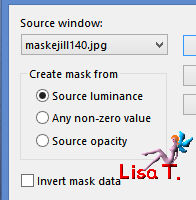
don’t merge group
selections > from mask
selections > float – selections > defloat
effects > image effects > page curl
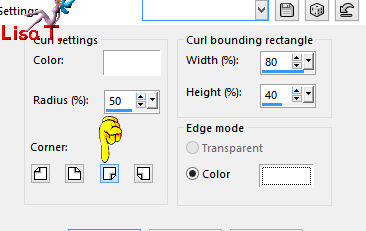
selections > select none
layers > merge > merge group
effects > 3D effects > drop shadow > 0 / 1 / 30 / 1 / black
your work looks like this
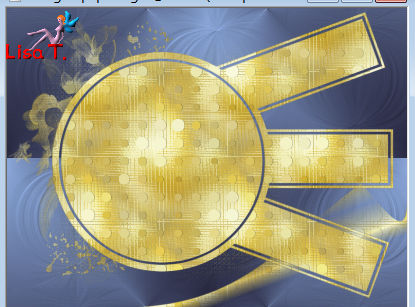
you can close the mask, you don’t need it anymore
Step 4
copy / paste as new layer the tube « Claire7799_HappyNewYear_doodle(2) »
don’t move it
adjust > sharpness > sharpen
Step 5
open the tube « 1220639800_divers » (the flower)
make sure the middle layer is the active layer
image > resize > 85%
copy / paste as new layer
move it like this

layers > arrange > ove down TWICE
blend mode of the layer : Overlay
effects > 3D effects > drop shadow > 3 / 2 / 50 / 15 / black
effects > plugins > FM Tile Tools > Blend Emboss > default settings
layers > merge > merge all (flatten)
Step 6
effects >3D effects > Butttonize > color 2
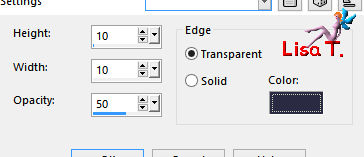
your work looks like this
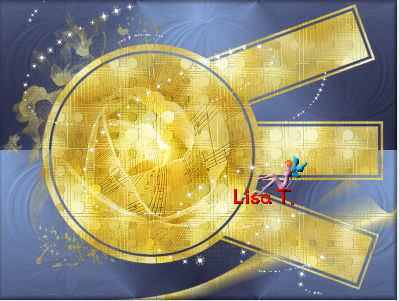
image > add borders > check « symmetric » ->
1 pixel black
2 pixels white
1 pixel black
Step 7
in the materials palette, prepare a linear gradient
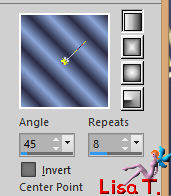
image > add borders > 35 pixels white
select this border with the magic wand tool and flood fill with the gradient
effects > texture effects > blinds
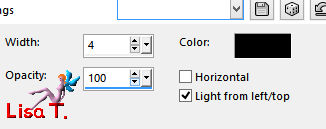
selections > invert
effects > 3D effects > drop shadow > -3 / 2 / 100 / 20 / black *** 3 / -2 / 100 / 20 / black
selections > select none
image > add borders > 1 pixel black and 3 pixels white
Step 8
open the tube « NFL-1_STARS » (stars)
image > rotate left
adjust > sharpness > sharpen
copy / paste as new layer
move it top left

layers > duplicate – image > mirror > mirror vertical - image > mirror > mirror horizontal
layers > merge > merge down
effects > 3D effects > drop shadow > 2 / -2 / 60 / 15 / black
Step 9
open the tube « colomba2 » (the bird)
image > resize > height : 230 pixels
copy / paste as new layer
move it bottom right
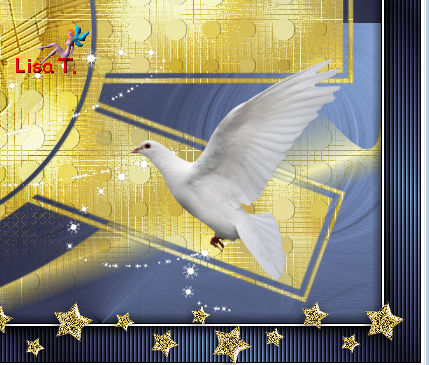
effects > 3D effects > drop shadow > 3 / 2 / 50 / 30 / black
Step 10
open the tube « eirene_ny_blogtrain_ep5 » (doodle)
image > resize > 30%
copy / paste as new layer
image > free rotate
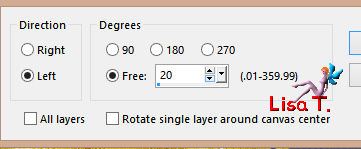
move it like that
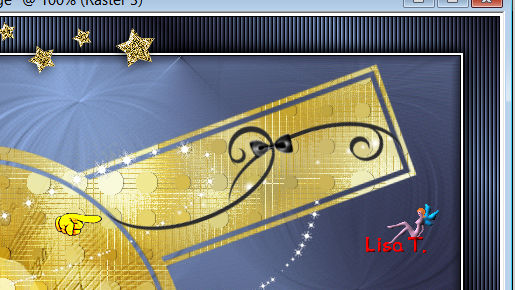
adjust > sharpness > sharpen
Step 11
open the tube « newyear_text » (wordart)
iamge > reisze > 50%
copy / paste as new layer
move it like that
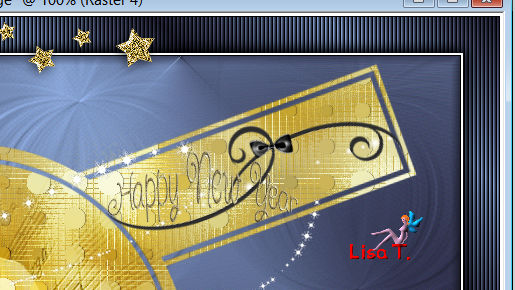
move the doodle slightly if necessary
effects >3D effects > drop shadow > 1 / 1 / 50 / 1 / black --> TWICE
Step 12
open the tube « DBK AA ModelB-105 » (woman)
image > resize > height : 710 pixels
copy / paste as new layer
effects > image effects > offset
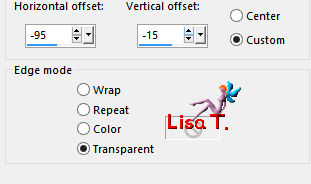
translator’s note : I moved this tube slightly more to the left, to see the effects of the flower
effects > 3D effects > drop shadow > -6 / -3 / 60 / 30 / black ** 2 / 3 / 40 / 25 / black
layers merge > merge visible
Step 13
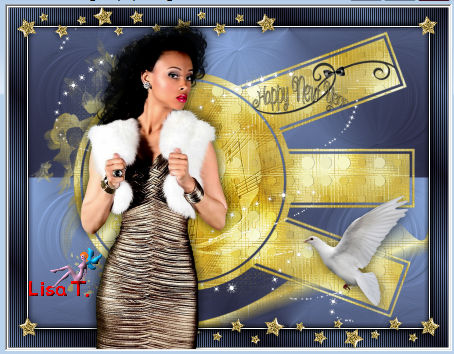
copy / paste as new layer the tube « NY_star » (star)
move it on the top right corner
layers > duplicate
move it on the bottom left corner
layers > merge > merge down
effects > 3D efects > drop shadow > -3 / 2 / 60 / 25 / black
your work looks like this
Step 14
copy / paste a enw layer the tube « Time_turner » (clock)
move it to the right
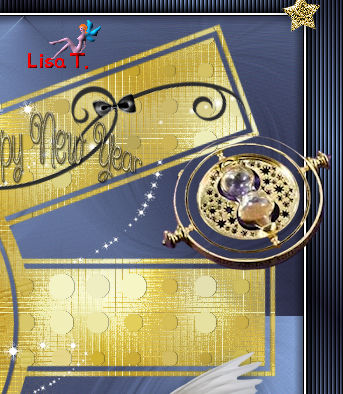
effects >3D effects > drop shadow > -1 / 1 / 30 / 15 / black
layers > merge > merge visible
Step 15
apply your watermak
layers > merge > merge all (flatten)
image > add borders > 1 pixel black
in the materials palette, FG -> « pattern » tab
image > add borders > 5 pixels > white
select this border
flood fill the selection with the pattern
effects > edge effects > enhance
selections > select none
image > add borders > 1 pixel black
image > resize > width : 700 pixels
Step 16
The Animation
in the materials palette, close the FG, and set the BG -> black
open the police provided « AmpirDeco.ttf » and minimize it
(this way to use the police is not possible with newest versions of PSP, you’ll have to install it)
into PSP
open a new transparent raster layer 200 * 75 pixels
text tool

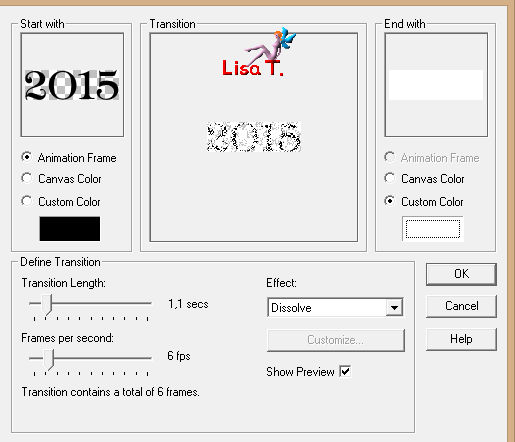
write : 2010 (or another number of course – year ending !)
layers > convert to raster layer
objects > align > center in canvas
edit > copy
Step 17
into Animation Shop
edit > paste as new animation
effects > insert image transition
Step 18
into PSP
in the layers palette, close the eye of the layer 2010
layers > new vector layer with the text toll and write 2011 (or another number : new year !)
layers > convert to raster layer
object > align > center in canvas
edit > copy
Step 19
into animation Shop
edit > paste after current image

edit > select all
Step 20
into PSP
activate the tag – edit > copy
back into Animation Shop
edit > paste as new animation
Step 21
the animation « 2010-2011 » has 8 frames
your tag must have 8 frames too
so -> edit > copy and -> paste after current frame 7 times (shift+Ctrl+L -> 7 times)
now you have 8 frames
Step 22
activate the animation « 2010-2011 »
edit > copy
back to the tag animation – select all frames
make sure you are clicking in the first frame
edit > paste into selected frame
move it like this and left click

Step 23
click on the first frame to select it
animation > frame properties > 10
Step 24
select the last frame (8)
animation > frame properties > 500
Step 25
select frames 2 to 7 (click on frame 2 > press and hold the Shift key > click on frame 7 > release)

animation > frame properties > 40
edit > copy
select the last frame (8)
edit > paste after current frame
animation > reverse frames
now your animation contains 14 frames
save as.... type gif

Don't hesitate to write to Virginia if you have any trouble with her tutorial


Back to the board of Virginia’s tutorials


|