Miami Blue
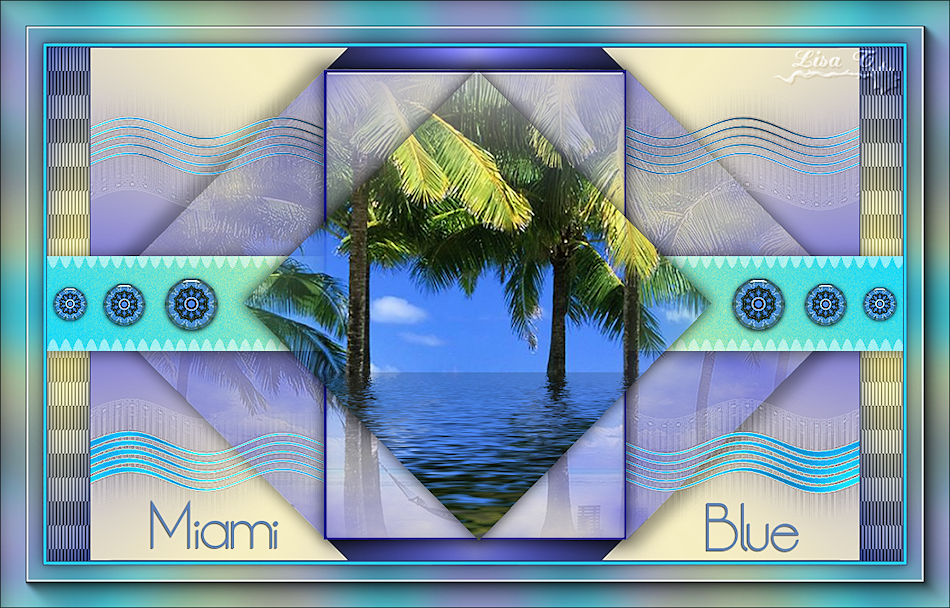
you wil find the orignal tutorial here

This tutorial is a personal creation.
Virginia works with PSP12
I work with PSP18
but you can follow this tutorial with any other version of PSP

Any resemblance with another one would be pure coincidence.
It is stricly forbidden to modify images, to change their name or take off the matermarks,
To present them on your sites or blog,
To share them in groups,
to make a bank of images, or to use them on lucrative purposes.

Thank you to respect Virginia’ work and the tubers work.
Don’t hesitate to warn her if you have any trouble with this tutorial.


Material
Tube – Sélections - Mask – colors Palette – Police - plugins

Tubes
the landscape tube was created by Luna – Thank you Niza
the mask was created by Sharlimar

Filters used
to download the filters, click on the banner below
Thank you very much to Janaly and Gigi for their kind permission

* AAA Frames
* Alien Skin - Eye Candy 5 Impact
* AFS Import (à importer dans Filters Unlimited)
* Bkg Kaleidoscope (à importer dans Filters Unlimited)
* Filters Unlimited
* Filters Factory B et C (à importer dans Filters Unlimited)
* Flaming Pear Flood
* Graphics Plus
* Mura's Meister - Cloud
* Simple
* VM Extravaganza

Colors used
Virginia chose 6 colors

Don't hesitate to change the colors and the blend mode of the layers, and the shadows,
according to your tubes and images.

Important
Open all images in PSP, duplicate them and close the originals. (shift + key D)
always work with the copies
some tubes provided are not « visible » (in order to reduce the weight of the material file)
click on visibility toggle of the layer to make it visible again

use the paint brush to follow the steps
left click to grab it


prepare your material
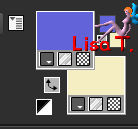
choose 2 colors in the landscape tube
Virginia chose colors 1 and 2 as foreground and background colors
save your work as often as possible
Realization
Step 1
open a new trasparent raster layer 900 *** 600 pixels
effects/plugins/Mehdi/Wavy Lab 1.1
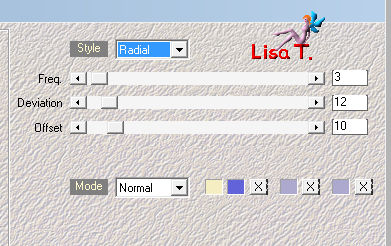
adjust/blur/gaussian blur/25
Step 2
layers/duplicate
effects/plugins/VM Extravaganza/Holidays in Egypt

effects/plugins/Unlimited 2/Bkg Designers Sf10 IIIVMT Instant Tile
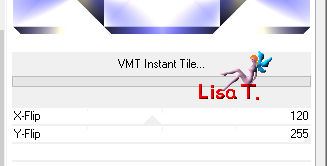
Step 3
activate the bottom layer
selections/load selection from disk/selection «sel_vir_mb_00.PspSelection»/click «load»
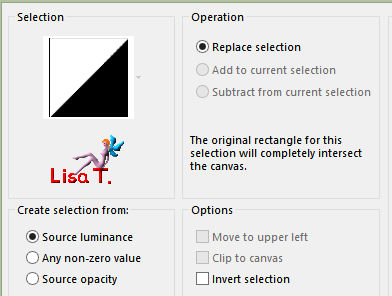
selections/promote selection to layer
selections/select none
layers/arrange/bring to top
effects/plugins/Simple/Top Left Mirror
effects/plugins/Unlimited 2/|AFS IMPORT]/Square Border 02
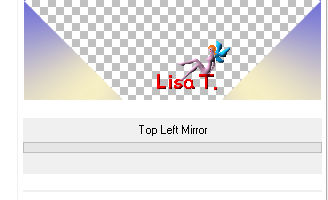
adjust/sharpness/sharpen
Step 4
copy the tube «lunapaisagem4694.pspimage » (landscape)
selections/load selection from disk/selection «sel_vir_mb_01.PspSelection»/click «load»
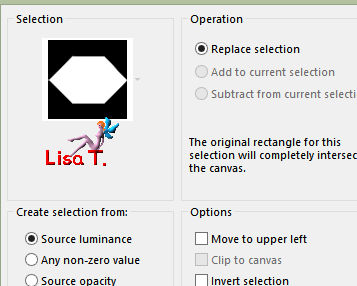
layers/new raster layer
edit/paste into selection
selections/select none
Step 5
selections/load selection from disk/selection «sel_vir_mb_02.PspSelection»/click «load»
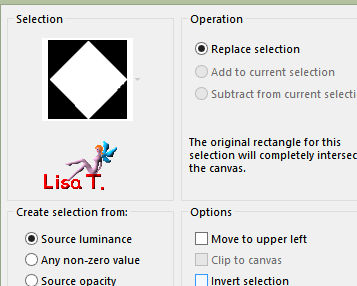
selections/promote selection to layer
*****************
note : Virginia did not have to resize or move the landscape
bu if you need to do that, here is how to proceed :
activate your tube
edit/copy – back to your work –edit/paste as new layer
move it properly into the selection
selecions/invert, and hit the delete key of your keyboard
keep the selection active
*************************
effects/plugins/Flaming Pear/Flood
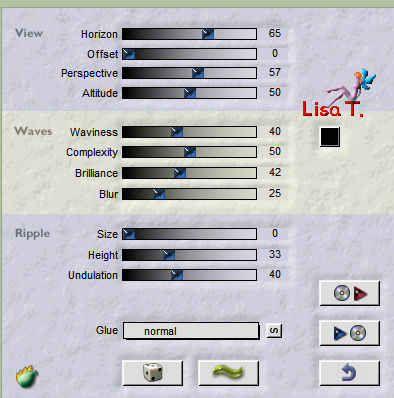
if you find the result too dark, modify the setting of « brilliance »
effects/3D effects/drop shadow/ 0 / 0 / 80 / 25 / black
selections/select none
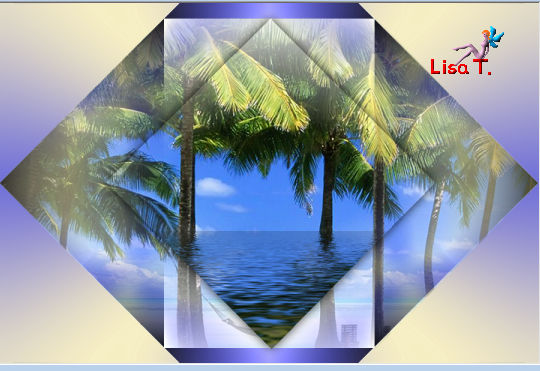
your work looks like this
Step 6
activate the layer underneath « Raster 2 » (landscape)
layers/duplicate
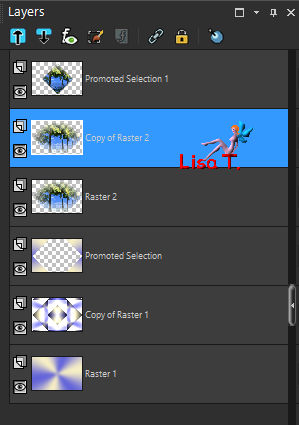
selections/load selection from disk/selection «sel_vir_mb_01.PspSelection»/click «load»

effects/plugins/Mura’s Meister/Clouds
make sure colors 1 and 2 (FG and BG) appear properly
if not, click on « reset colors »
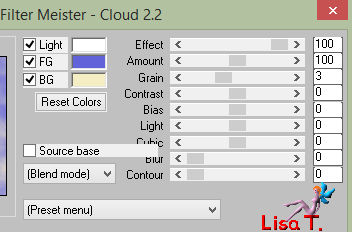
selections/select none
effects/3D effects/drop shadow/ 10 / 10 / 35 / 25 / black
drop a new shadow changing (10) by ( -10)
selecitons/select none
layers/arrange/move down
Step 7
activate the layer above (Raster 2 – landscape)
selections/load selection from disk/selection «sel_vir_mb_03.PspSelection»/click «load»
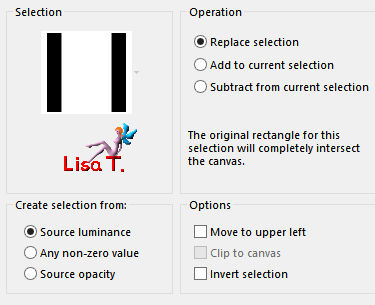
selections/promote selection to layer
effects/plugins/Unlimited 2/Graphic Plus/Instant Frame
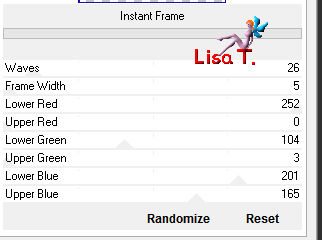
note : if you chose another landscape, change the settings to find the color you like
effects/plugins/Alien Skin Eye Candy 5 Impact/Glass
in the settings tab, choose « Clear, no drop shadow »
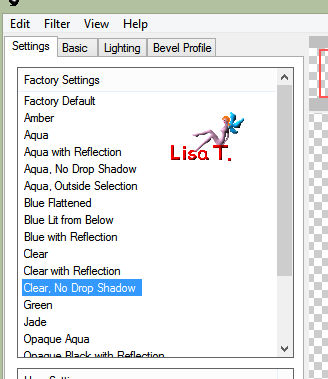
effects/3D effects/drop shadow/ 0 / 0 / 80 / 25 / black
selections/select none
activate the layer underneath (Raster 2 – landscape)
set the opacity of the layer on 30% (modify this setting if necessary)
effects/edge effects/enhance
Step 8
activate the layer « copy of Raster 1 »
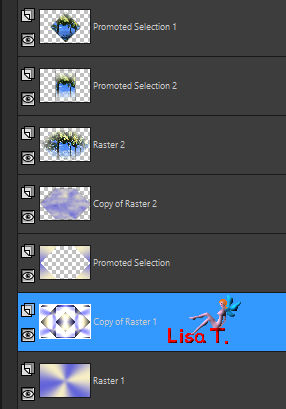
selections/load selection from disk/selection «sel_vir_mb_04.PspSelection»/click «load»
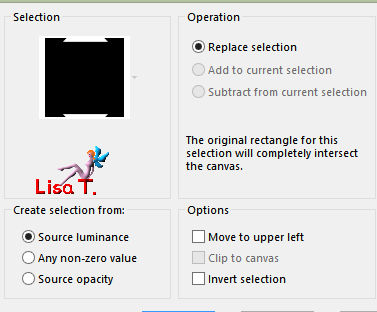
effects/texture effects/blinds/color 4

selections/select none
Step 9
in the materials palette, set color 3 as FG color
activate the top layer
layers/new raster layer
activate the flood fill tool

flood fill the new layer with FG color
open the mask and minimize it to tray
layers/new mask layer/from image
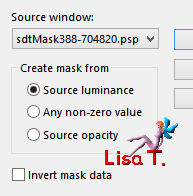
adjust/sharpness/sharpen
layers/merge/merge group
Step 10
image/resize/uncheck « all layers »/80%
effects/image effects/seamless tiling
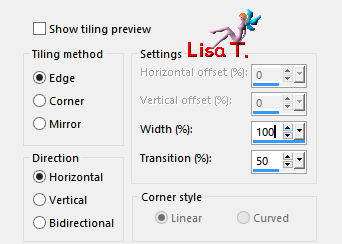
effects/distortion effects/wave

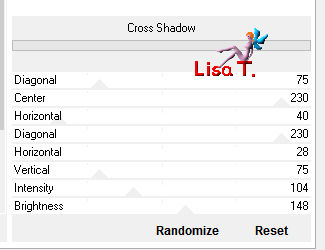
effrects/plugins/Unlimited 2/Graphic Plus/Cross Shadow
Step 11
selections/load selection from disk/selection «sel_vir_mb_03.PspSelection»/click «load»
DELETE (hit the delete key of your keyboard)
selections/select none
effects/edge effects/enhance
effects/3D effects/drop shadow/ 2 / 2 / 30 / 40 / black
move this layer « Raster 3 » above Raster 2
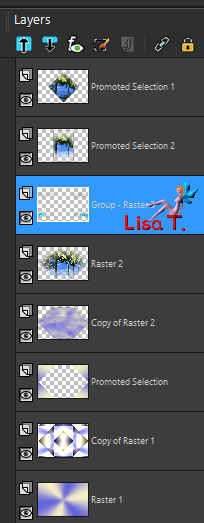
your work looks like this
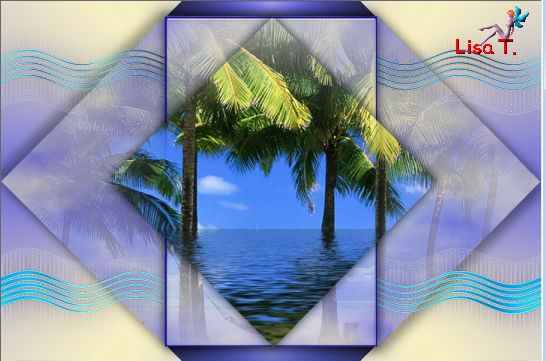
Step 12
in the materials palette, set color 4 as FG color, and color 5 as BG color
activate the top layer (promoted selection 1)
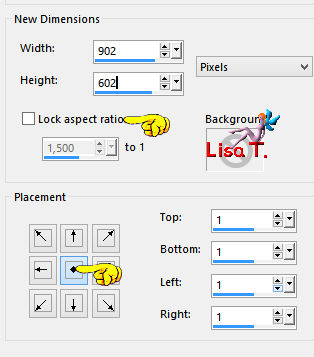
image/canvas size/uncheck « lock aspect ratio » - width 902 – height 602
clic on the middle button
layers/new raster layer

flood fill hte layer with FG color
layers/arrange/send to bottom
Step 13
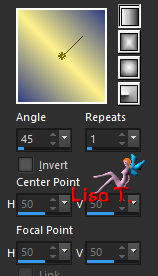
in the materials palette, prepare a linear gradient / angle 45 / repeat / 1 /uncheck « invert »
image/canvas size/uncheck « lock aspect ratio » / width 10002 / height 602 (unchanged)
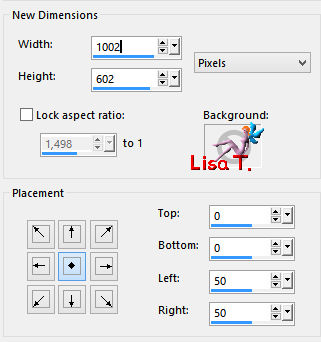
activate the magic wand tool/check « outside »

select the right border
layers/new raster layer
flood fill with the FG gradient
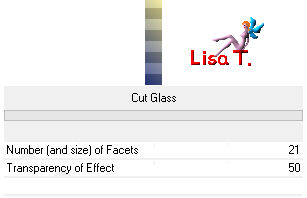
effects/plugins/Filter Factory B/Cut Glass
selections/select none
Step 14
layers/duplicate
image/mirror/mirror horizontal
layers/merge/merge down
layers/duplicate
effects/3D effects/cutout/color 4
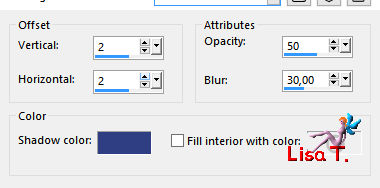
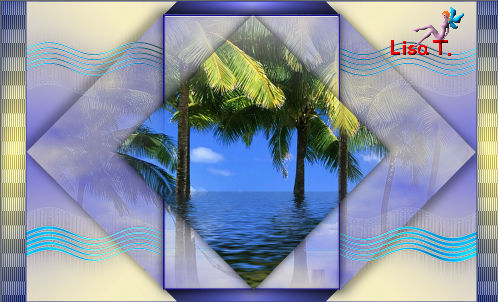
your work looks like this
Step 15
in the materials palette, set color 6 as FG color
don’t change the FG gradient - you might have to check « invert » according to your colors)
activate the top layer
layers/new raster layer
selections/load selection from disk/selection «sel_vir_mb_05.PspSelection»/click «load»
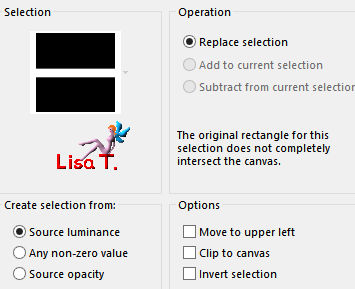
flood fill with the FG gradient
effects/texture effect/mosaic glass
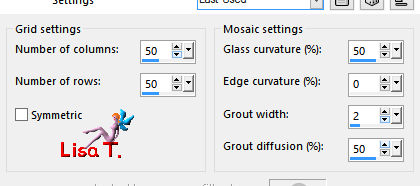
adjust/sharpness/sharpen more
selections/select none
Step 16
effects/plugins/Ulimited 2/Filter Factory C/Flutewaves
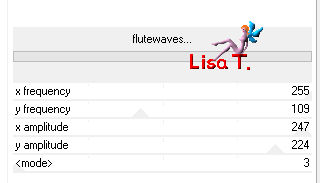
note :the effects color might be different according to the version of PSP you use
don’t worry
you may deicde to set white as BG color too (see in Virginia’s second result)
layers/arrange/move don
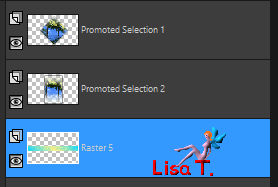
effects/3D effects/drop shadow/ 2 / 3 / 60 / 3 / black
Step 17

note : The effect obtained at this step will depend on the choice of your landscape tube
if the result does not suit you, change the settings of the Kaleidoscope effect
or use the variant below
variant
choose a decoration tube
copy/paste as new layer, on the right part of the ribbon

colorize if necessary, then follow steps 18 and 19,
don’t apply the effect « Glass » (see the second result of Virginia)

activate the top layer
layers/new raster layer
selections/load selection from disk/selection «sel_vir_mb_06.PspSelection»/click «load»
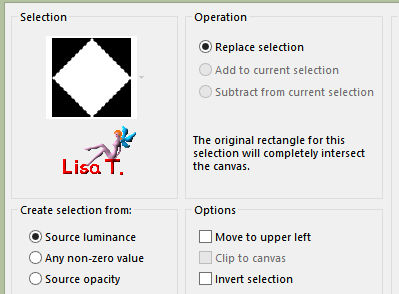
copy/paste into selection the tube « lunapaisagem4694.pspimage »
adjust/sharpness/sharpen
effects/reflection effects/kaleidoscope
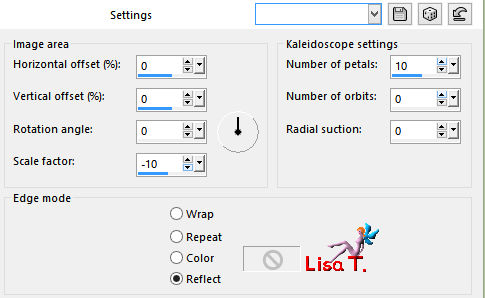
selections/select none
adjust/sharpness/sharpen
effects/plugins/Alien Skin Eye Candy 5-Impact/Glass/settings : « Clear »
adjust/sharpness/sharpen
Step 18
layers/duplicate
image/resize/uncheck « all layers »/80%
effects/image effects/offset/ H : 145 / V : 0 /custom / transparent
adjust/sharpness/sharpen
your work looks like this
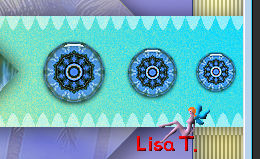
Step 20
layers/merge/merge down TWICE
layers/duplicate
image/mirror
layers/merge/merge down
effects/3D effects/drop shadow/ 0 / 0 / 40 / 10 / black
layers/merge/merge all (flatten)
your work looks like this
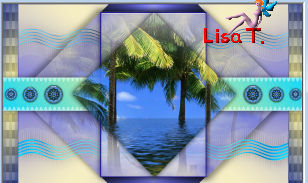
Step 21
in the materials palette, set color 6 as BG color
image/add obrders/check « symmetric » -->
1 pixel FG color
3 pixels BG color
1 pixels FG color
edit/COPY
Step 22
image/add borders/50 pixels white
select the white border
edit/paste into selection
effects/reflection effects/kaleidoscope/same settings as before
adjust/blur/gaussian blur/25
effects/plugins/AAA Frames/Fotoframe
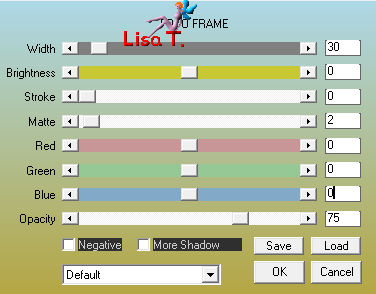
selections/invert
effects/3D effects/drop shadow/ 0 / 0 / 60 / 20 / black
selections/select none
Step 23
copy/paste as new layer the tube « miami_blue.pspimage » (text)
effects/image effects/offset/ H : 0 / V : -260
adjust/hue and saturation/colorize
(hue : your FG color value, saturation as you like)
here is Virginia’s choice

effects/3D effects/drop shadow/ 1 / -1 / 60 / 1 / black
Step 24
apply your signature
layers/merge/merge visible
resize your tag to 950 pixels width

your tag is finished
layers/merge/merge all (flatten)
save your work as... type jpeg

Don't hesitate to write to Virginia if you have any trouble with her tutorial


My tag with my misted landscape
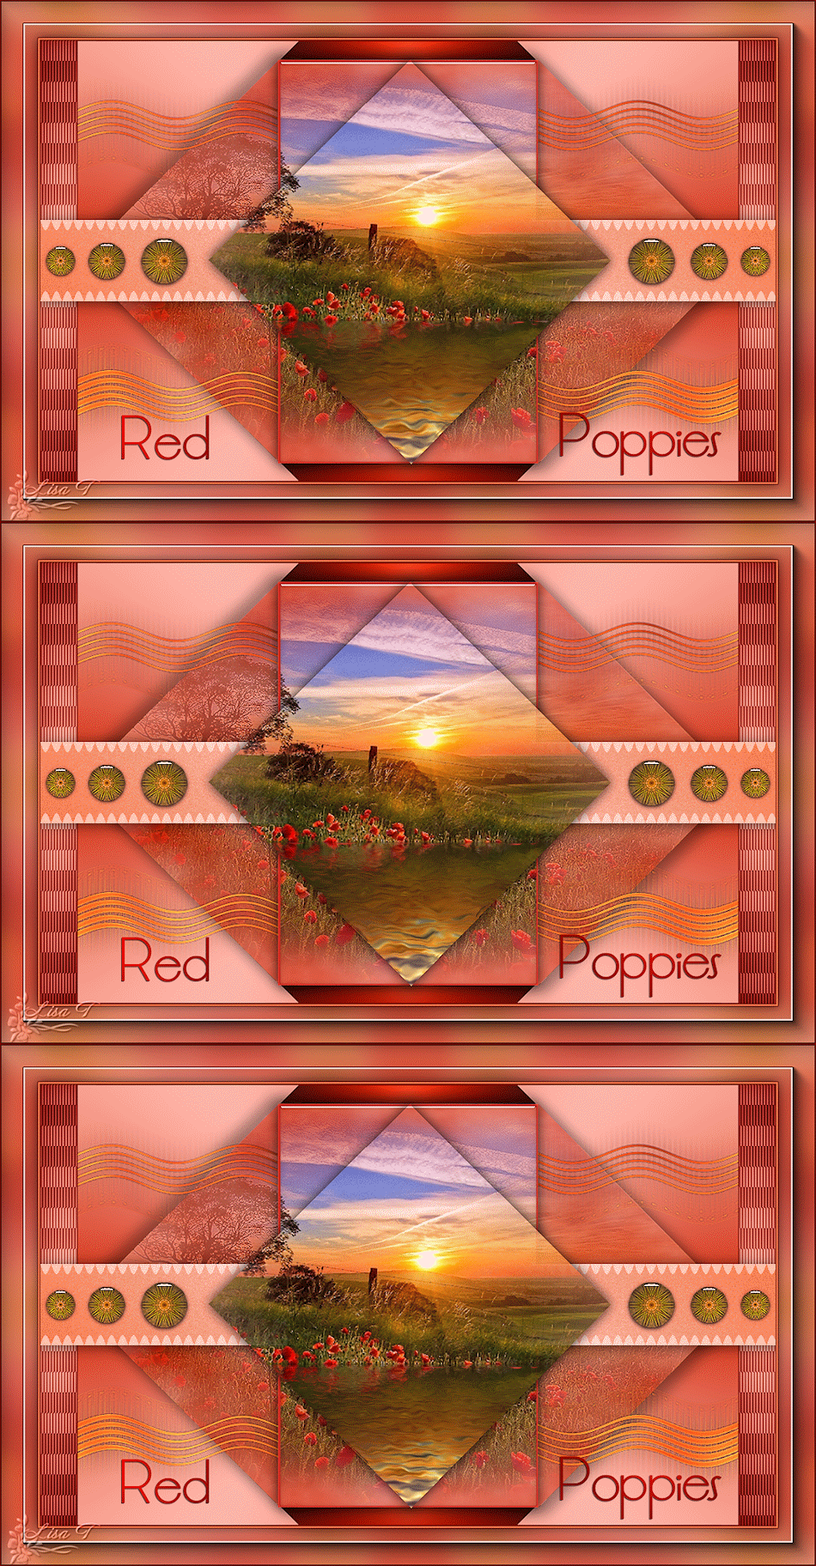

Gallery
created by ▼ Birte


Back to the board of Virginia’s tutorials


|