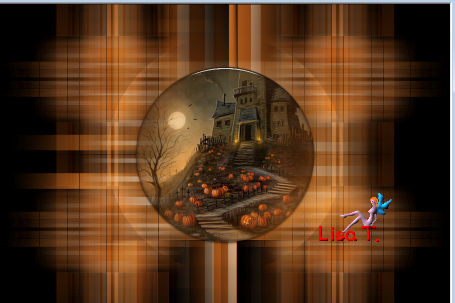
Halloween night has eyes !
you wil find the orignal tutorial here

This tutorial is a personal creation.
Virginia works with PSP17
I work with PSP18
but you can follow this tutorial with any other version of PSP
Any resemblance with another one would be pure coincidence.
It is stricly forbidden to modify images, to change their name or take off the matermarks,
To present them on your sites or blog,
To share them in groups,
to make a bank of images, or to use them on lucrative purposes.
Virginia uses the scripts -> « image_mirror » and « image_flip » of the previous versions of psp
if you want to install these scripts and you are using psp14 – 15 or 16
click on Linette’s banner (Crealine Graphics)

Thank you to Linette for her permission to use her tutorial
Thank you to respect Virginia’ work and the tubers work.
Don’t hesitate to warn her if you have any trouble with this tutorial.

Material
tubes – selections – text – animation – color palette
in the material, Virginia provides a folder named « calques FF2 et après picture in picture »
it contains the result you must obtain in step 2 if you do not have the preset Flaming Pear
and in step 4 -> after applying the effect « picture in picture »
according to the version of PSP and the version of Filters Unlimited you use, the result might be different, and it is important, for the rest of the tutorial, to obtain the same as Virginia

Filters used
* Alien Skin - Eye Candy 5
* AAA Frames
* Carolaine and Sensibility (CS Textures)
* Bkg Designer sf10 II - import in Filters Unlimited
* Filters Unlimited 2.3
* Filter Factory H - Gridmin - import in Filters Unlimited
* Flaming Pear - Flexify 2 - 275 (download the presets on Flaming Pear’s site)
* Graphics Plus
* Italian Editors Effects - importer in Filters Unlimited
* Mehdi - Seamless Border 2 (make sure you have the latest version of this filter, it is provided in the material)
* Mura's Meister
* Simple
to download the filters, click on the banner below
Thank you very much to Janaly and Gigi for their kind permission

If you don’t know how to install filters into Unlimited 2, just click on the link below

Colors used
Virginia uses these colors
Don't hesitate to change the colors and the blend mode of the layers, and the shadows,
according to your tubes and images.
Important
Open all images in PSP, duplicate them and close the originals. (shift + key D)
always work with the copies
some tubes provided are not « visible » (in order to reduce the weight of the material file)
click on visibility toggle of the layer to make it visible again
open the masks, and minimze them to tray
copy/paste selections into the special folder « selections » of « My PSP Files »
Tubes
the woman tube was created by Butterfly. Thank you to her

the landscape tube was created by Hélène, thank you to her
the cat tube was created by Molly
some tubes were received in sharing groups
if one of them is yours, or not copyright free, please let Virginia know
and a link to your site will be added
either she will delete it from the material provided if you prefer
it is strictly forbidden to erase the watermarks, to rename the tubes
to share them without the permission of the authors
thank you to respect their work
use the pencil to follow the steps
left click to grab it

prepare your material
Realization
implementation
open all the tubes and duplicate them
close the originals and work with the copies
copy / paste the selections into the folder « selections » of My PSP Files
in the materials palette, prepare the colors
set color 1 as foreground (FG) color and color 2 as background (BG) color
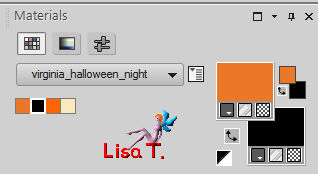
prepare a radial gradient > 0 / 3 / « invert » checked
save your work often
Step 1
open a new transparent raster layer 900 * 600 pixels
flood fill with the gradient
Step 2
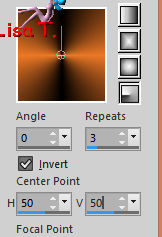
effects > plugins > Flaming Pear > Flexify 2

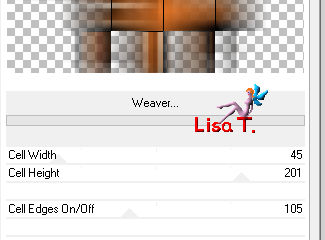
effects > plugins > Unlimited > Toadies > Weaver
Step 3
layers > duplicate
image > mirror > mirror vertical
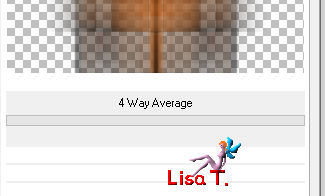
effects > plugins > Unlimited > Simple > 4 Way Average
adjust > sharpness > sharpen
Step 4
« copy of Raster 1 » is the active layer
effects > plugins > Italian Editors Effects > Picture in Picture
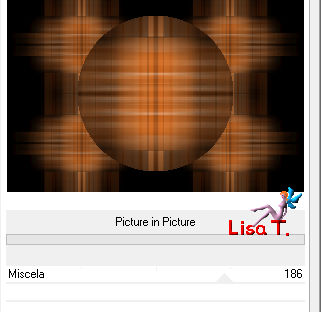
(if you don’t have the same result, tha layer corresponding to this step is provided in the material)
layers > arrange > send to bottom
activate the top layer (Raster 1) and adjust the blend mode to « Screen »
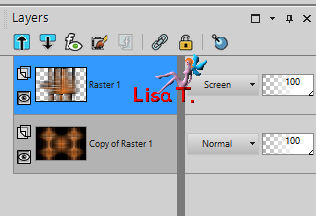
layers > merge > merge visible
Step 5
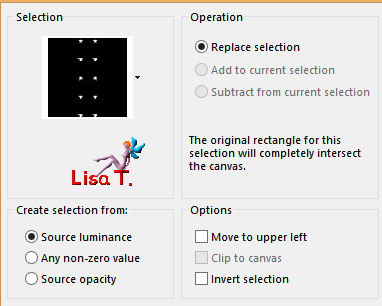
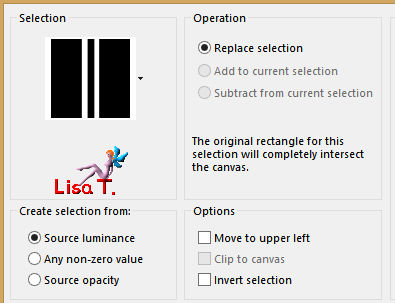
selections > load-save selection > from disk > selection « vir_sel_hal01.PspSelection »
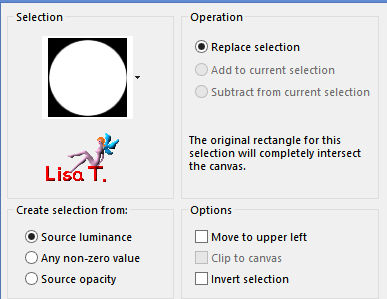
selections > promote selection to layer
keep the selection active
Step 6
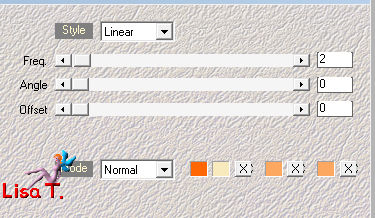
in the materials palette, prepare a new gradient (linear)(45 / 1)
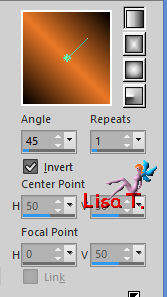
layers > new raster layer
with the flood fill tool
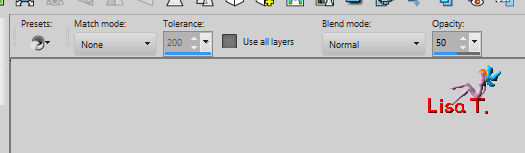
flood fill the new layer – (don’t forget to reset the opacity of the tool on 100%)
selections > modify > contract > 5 pixels
keep the selection active
Step 7
copy / paste as new layer the landscape tube (erase the watermark)
don’t move it
selections > invert
DELETE (press the delete key of your keyboard)
layers > merge > merge down
selections > select none
Step 8
image > resize > uncheck « all layers » > 78%
effects > plugins > Alien Skin Eye Candy 5 IMpact – Galss > setting « Clear »
your work looks like this
Step 9
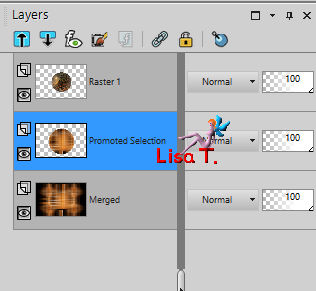
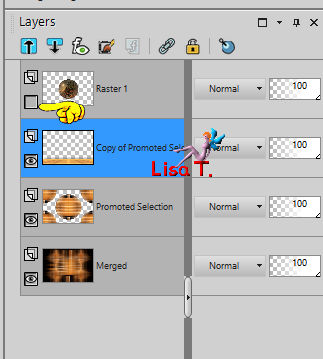
your layer palette looks like this
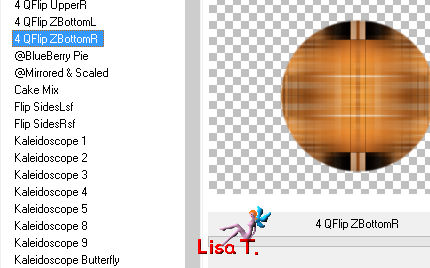
effects > plugins > Unlimited > Bkg Kaleidoscope > 4QFlip ZBottomR
effects > plugins > Carolaine and Sensibility > CS Textures
effects > image effects > seamless tiling
your work looks like this

Step 10
layers > duplicate (the active layer is « copy of promoted selection »)
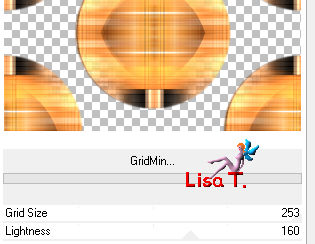
effects > plugins > Unlimited > Filter Factory H > Grid Min
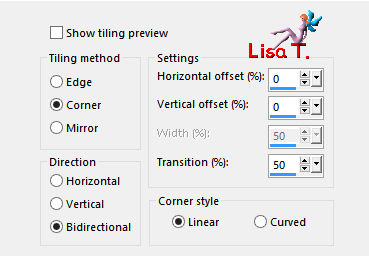
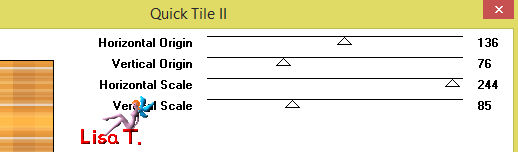
effects > plugins > Graphic Plus > Quick Tile II
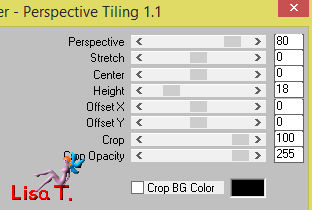
effects > plugins > Mura’s Meister > Perspective Tiling
effects > 3D effects > drop shadow > -14 / 17 / 30 / 40 / black

Step 11
close the visibility of the top layer
activate the layer below
layers > merge > merge visible
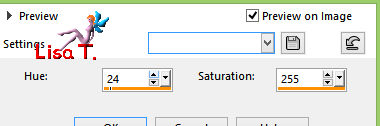
adjust > hue / saturation / lightness

open the visibility of the top layer
Step 12
in the materails palette, set color 3 as FG color
acitvate « Raster 1 »
layers > new raster layer
selections > load-save selection > from disk > selection « vir_sel_hal02.PspSelection »
flood fill the selection with the FG color
selections > select none
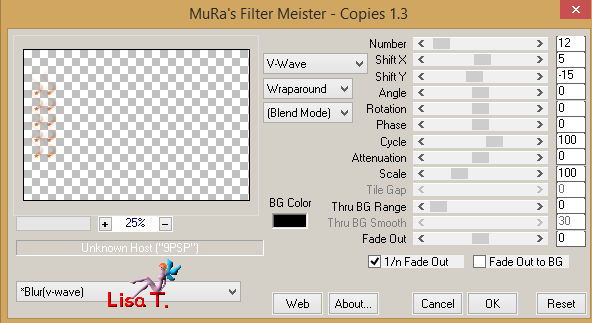
effects > plugins >Mura’s Meister > Copies
layers > duplicate – image > mirror > mirror horizontal
layers > merge > merge down
effects > plugins > Alien Skin Eye Candy 5 Impact > Perspective Shadow
Step 13
in the materials palette, prepare a sunburst gradient

layers > new raster layer
selections > load-save selection > from disk > selection « vir_sel_hal03.PspSelection »
flood fill the selection with the gradient
selections > select none
effects > edge effects > enhance
layers > duplicate – image > mirror > mirror horizontal
layers > merge > merge down
effects > plugins > Alien Skin Eye Candy 5 Impact > Persepctive Shadow
layers > merge > merge all (flatten)
Step 14
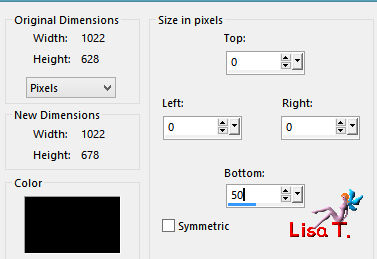
image > add borders > check « symmetric » -->
1 pixel black
12 pixels white
1 pixel black
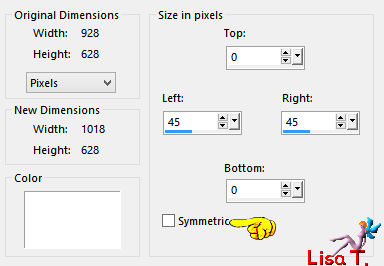
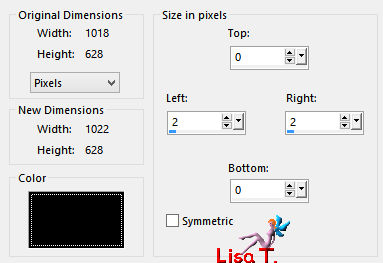
image > add borders > uncheck « symmetric »
Step 15
in the materials palette, set color 3 as BG color, and color 4 as FG color
layers > promote background layer
with the magic wand tool

select the 2 large white borders (on each side of the tag)
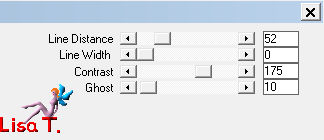
effects > plugins > Mehdi > Wavy Lab 1.1
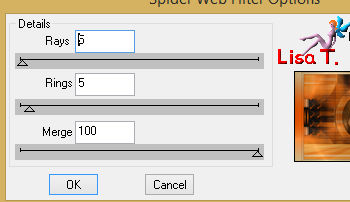
effects > plugins > DSB Flux > Spiderweb
effects > edge effects > enhance
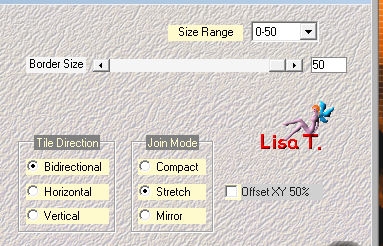
effects > plugins > Mehdi > Seamless Border 2
selections > invert
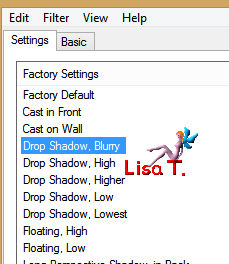
effects > 3D effects > drop shadow --->
5 / 5 / 50 / 30 / black * -5 / -5 / 50 / 30 / black
selections > select none
Step 16
image > add borders > black
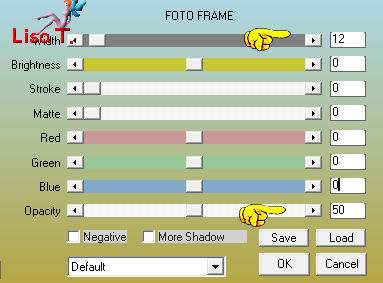
effects > plugins > AAA Frames > Foto Frame
Step 17
image > add borders
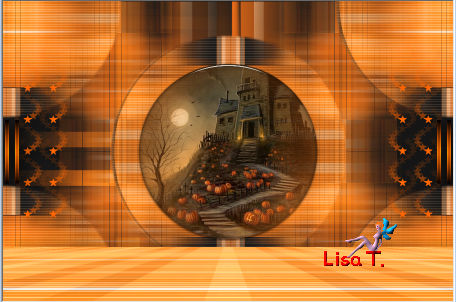
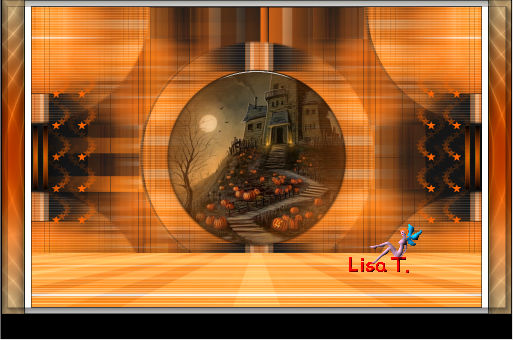
your work should look like this
Step 18
open the pumpkins tube
keep the selection active
adjust > hue and saturation > colorize
selections > select none
edit > copy
back to your work - paste as new layer
image > resize > uncheck « all layers « > 70%
effects > image effects > offset > H : -175 / V : -158
effects > 3D effects > drop shadow > -5 / -3 / 50 / 30 / black
Step 19
copy / paste as new layer the tube « ojosmuñeca »
image > resize > 70%
effects > image effects > offset > H : -315 / V : 260
effects > 3D effects > drop shadow > 2 / 3 / 60 / 30 / black
layers > duplicate - image > mirror > mirror horizontal
layers > merge > merge down
set the blend mode on « Luminance (Legacy) » and the opactiy on 30%
Step 20
copy / paste as new layer the witch tube
image > resize > 88%
effects > image effects > offset > H : 225 / V : 30
effects >3D effects > drop shadow > -14 / 17 / 50 / 40 / black
if you chose another tube, adapt the shadow
Step 21
copy / paste the text tube
effects > image effects > offset > H : 30 / V : -315
effects > 3D effects > inner bevel
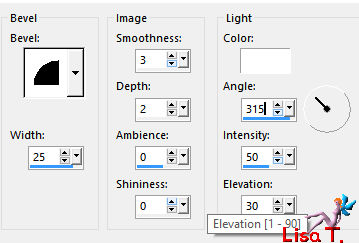
translator’s note : I wrote the english text using these settings > font size : 50 pixels / kerning : 125 /BG color N°3
Step 22
copy / paste as new layer the tube of the « yellow eyes » cat
image > resize > 55%
effects > image effects > offset > H : -430 / V : -260
effects > 3D effects > drop shadow > -2 / 3 / 30 / 40 / black
Step 23
apply your atermark
layers > merge > merge visible
image > resize > check « resize all layers » > width : 950 pixels
if you don’t want to animate your tag, save as... type jpeg
Animation (optional)
Step 24
in PSP, copy your tag
open Jasc Animation Shop (AS)
edit > paste as new animation
step 25
open the animation « animation_oeil_shadowed_vir.pspimage »
this animation contains 8 frames
your tag must have the number of frame
activate your tag, copy / paste after current frame
edit > select all – edit > duplicate you now have 4 frames
edit > select all – edit > duplicate
you have 8 frames
edit > propagate paste
Step 26
activate the eyes animation > edit > select all – edit > copy
Step 27
back to your tag (make sure all frames are selected)
you must see frame 1

edit > paste into selected frame
the animation seems to « hang » at the end of the mouse cursor
Click the place where you want to put this animation
Virginia choose to place it on pumpkin on the right of the group
view your animation
if you want to change the place, click on the « undo » arrow
and choose another place
Step 28
now we will adjust the speed of the animation
edit > select all
animation > property of the frame > 200
file > optimization wizard > next > customize > optimized median cut
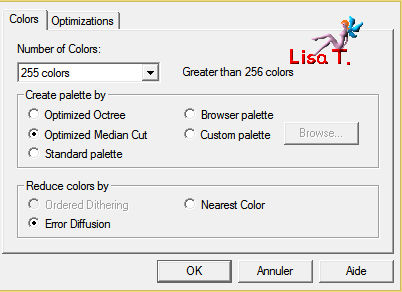
this setting is better with orange colors
if you changed the colors, try « optimized octree »
Don't hesitate to write to Virginia if you have any trouble with her tutorial
Back to the board of Virginia’s tutorials


|