

you wil find the orignal tutorial here

This tutorial is a personal creation.
Virginia works with PSP19
I work with PSP20 Ultimate
but you can follow this tutorial with any other version of PSP

Any resemblance with another one would be pure coincidence.
It is stricly forbidden to modify images, to change their name or take off the matermarks,
To present them on your sites or blog,
To share them in groups,
to make a bank of images, or to use them on lucrative purposes.

Thank you to respect Virginia’ work and the tubers work.
Don’t hesitate to warn her if you have any trouble with this tutorial.
some tubes were received in sharing groups
if one of them is yours, or not copyright free, please let Virginia know
and a link to your site will be added
either she will delete it from the material provided if you prefer


Supplies
Tubes – decoration tubes - Texture – color Palette - selection
Place the supplies and selection into the dedicated folders of « Corel PSP » general folder
All tubes provided were created by Virginia


Filters used
AAA Frames - FotoFrame
DSB Flux - Bright Noise
It@lian Editors Effects - à importer dans Filters Unlimited
Mehdi - Wavy Lab 1.1
Mura's Seamless - Emboss at alpha
Paper Textures - ce filtre se trouve dans la base I.C.Net de Filters Unlimited
Simple - Blintz
VanDerLee - Unplugged

Thank you very much Renée Salon for sharing with us your plugins page


Colors used
Virginia chose these colors
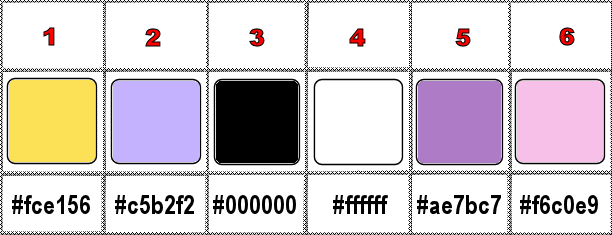
Don't hesitate to change the colors and the blend mode of the layers, and the shadows,
according to your tubes and images.

Important
Open all images in PSP, duplicate them and close the originals. (shift + key D)
always work with the copies to preserve original files
TIP 1 -> if you don’t want to install a font -->
open it in a software as « Nexus Font » (or other font viewer software of you choice)
as long as both windows are opened (software and font), your font will be available in your PSP
TIP 2 -> from PSPX4, in the later versions of PSP the functions « Mirror » and « Flip » have been replaced by -->
« Mirror »has become --> image => mirror => mirror horizontal
« Flip » has become --> image => mirror => mirror vertical

use the pencil to follow the steps
hold down left click to grab and move it


prepare your material
Instructions
Prepare your work
prepare the materials palette, color 1 & 2 as FG and BG colors
don’t forget to save your work as often as possible
to avoid the inconvenience of an untimely PSP shutdown
Step 1
open a new image => transparent => 950 * 600 px
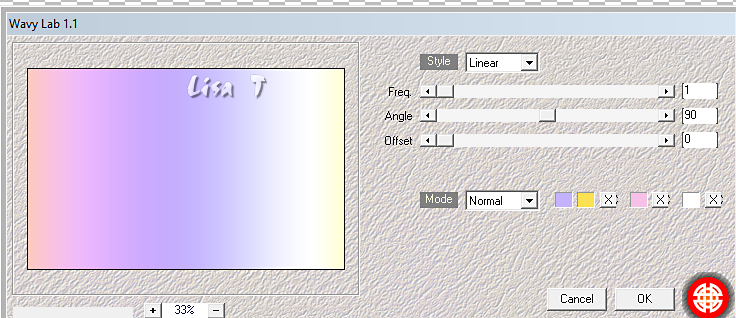
effects => plugins => Mehdi => Wavy Lab 1.1 => colors 2 / 1 / 6 / 4
Note : if you'd like a different color harmony than mine,
I suggest you start the tutorial with the same colors as mine
then colorize the result obtained at the end of Step 1 before continuing the tutorial
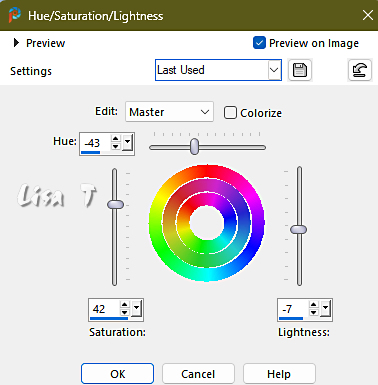
adjust => hue and saturation => Hue/saturation/lightness
for instance….
2
effects => plugins => VanDerLee => Unplugged-X (wavemaker)
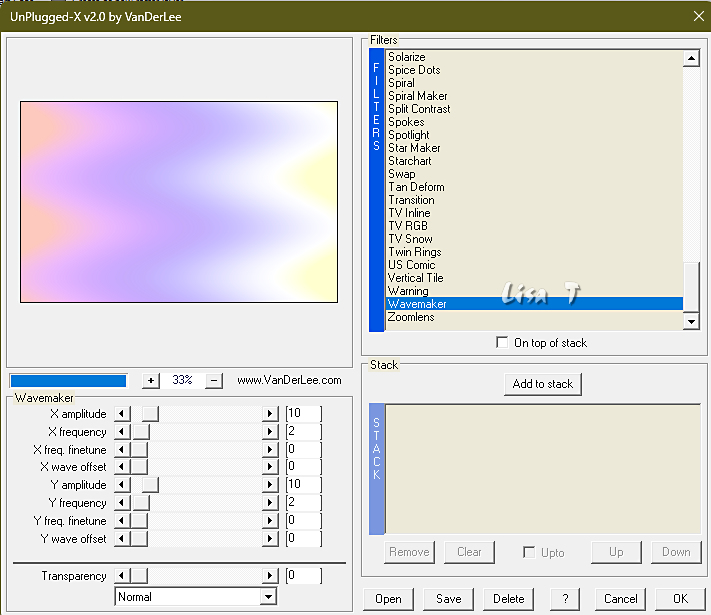
3
layers => duplicate
effects = > plugins => It@lian Editors Effects / Raggi di Luce
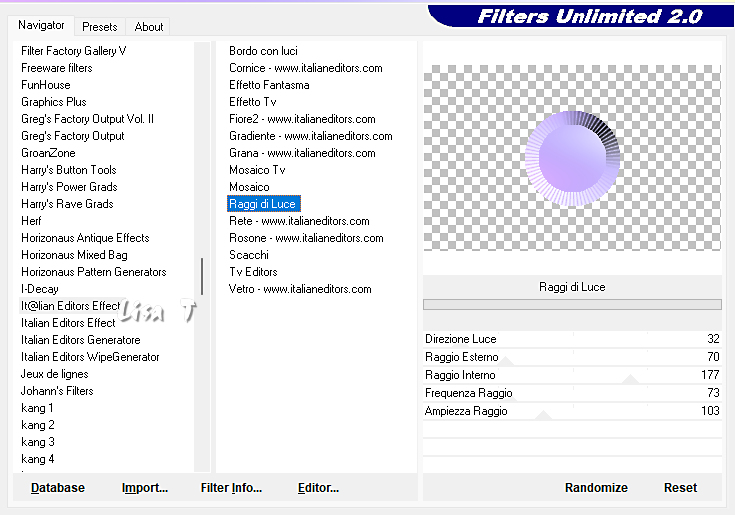
4
image => resize => untick « resize all layers » => 95%
edit => cut
edit => paste as new image => save this image and rename « Raggi »
set aside for a later use (minimize to tray is a good method to find this image when you need it)
you’ll need it in step 16
5
Back to your main work
Using the right click, delete the transparent layer
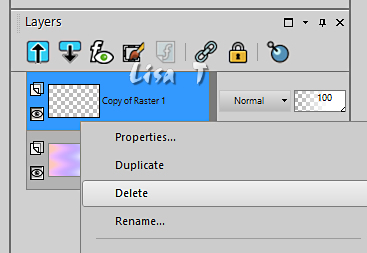
6
Raster 1 is the working layer now
layers => duplicate
effects => plugins => Unlimited 2 => Paper Textures / Striped Paper, Fine
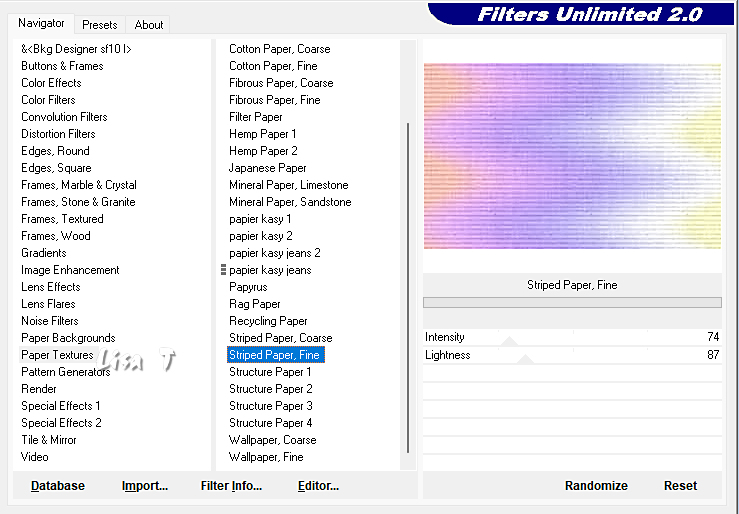
7
effects => plugins => Unlimited 2 => Simple => Blintz / default settings
edit => « repeat Blintz »
8
layers => duplicate
image => mirror => mirror vertical
opacity of the layer : 50%
layers => merge => merge down
adjust => sharpness => sharpen more
your work looks like this
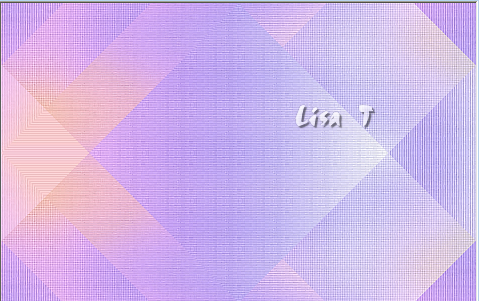
9
effects => plugins => AAA Frames => Foto Frame
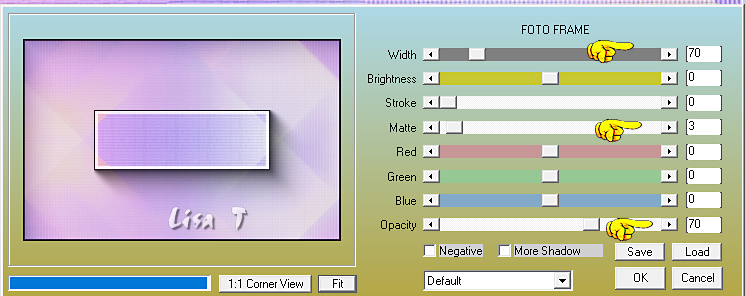
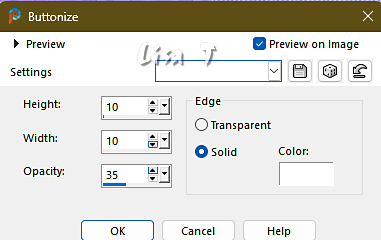
effects => 3D effects => Buttonize
10
image => resize => untick « resize all layers » => 85%
effects => 3D effects => drop shadow => 0 / 0 / 50 / 20 / black
11
Highlight top layer
effects => plugins => DSB flux => Bright Noise
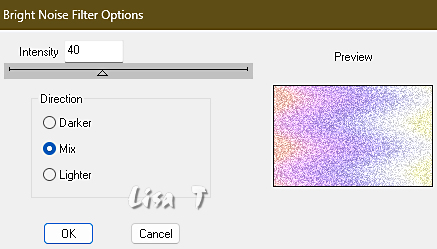
adjust => sharpness => sharpen
edit => repeat « adjust => sharpness => sharpen »
your work looks like this
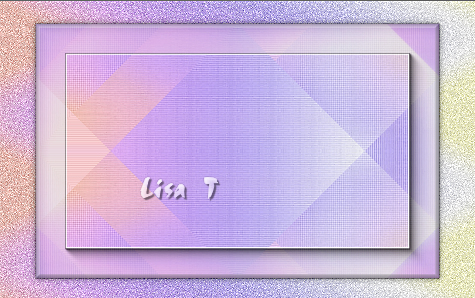
12
Highlight top layer
copy / paste « deco01_PDP_Vir.png » as new layer
blend mode of the layer : Soft Light
effects => 3D effects => drop shadow => 0 / 0 / 60 / 20 / black
edit => repeat « drop shadow » (same settings)
13
copy / paste « deco02_PDP_Vir.png » as new layer
don’t move it
blend mode of the layer : Hard Light
14
copy / paste « oeufs_PDP_Vir.png » as new layer
don’t move it
your layers palette looks like this
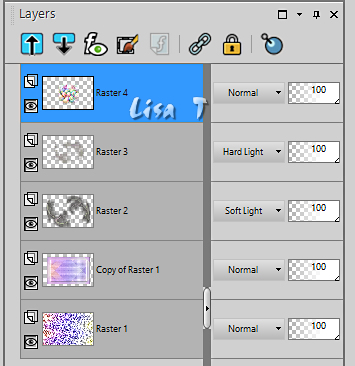
15
effects => plugins => Mura’s Seamless => Emboss at Alpha => default settings
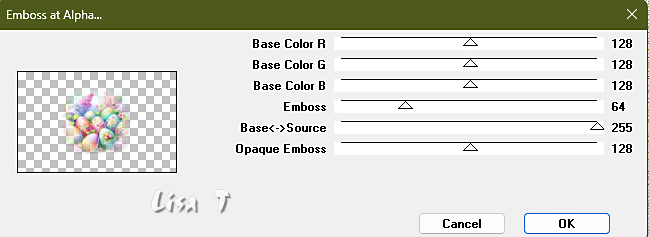
oppacity of the layer => 46%
layers => merge => merge visible
16
copy / paste « Raggi » as new layer (image set aside in step 4)
17
effects => geometric effects => Cylinder / Horizontal / 50%
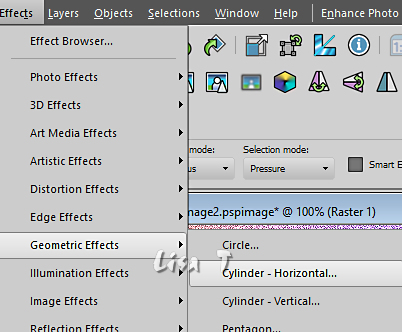
18
image => resize => untick « resize all layers » => 75%
adjust => sharpness => sharpen
enable the Pick tool with the following settings, to move the layer acurately => position X : 12 / position Y : 144
hit the « M » key of your keyboard to disable the tool
your work looks like this
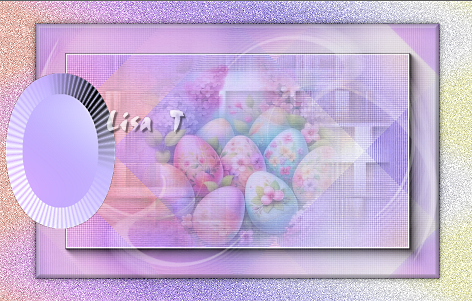
19
layers => new raster layer
selections => load-save selection => from disk => selection # 1
flood fill selection with color 1
keep selection active
20
selections => modify => contract => 5 px
hit the DELETE key of your keyboard
keep selection active
21
Open « oeufs_PDP_Vir.png » (opacity 100%)
image => resize => tick « resize all layers » => 75%
adjust => sharpness => sharpen
copy / paste as new layer on your main work
22
close the eye of bottom layer (to see better what you are doing)
top layer is highlighted
move the layer inside the selection this way
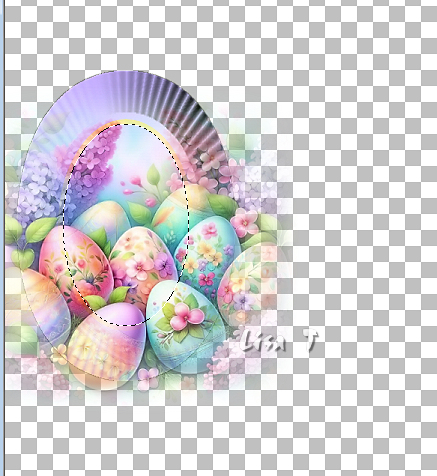
keep selection active
23
selections => invert
hit the DELETE key of your keyboard
selections => select none
24
top layer is highlighted
copy / paste « deco03_PDP_Vir.png » as new layer
enable the Pick tool with the following settings, to move the layer acurately => position X : 53 / position Y : 194
hit the « M » key of your keyboard to disable the tool
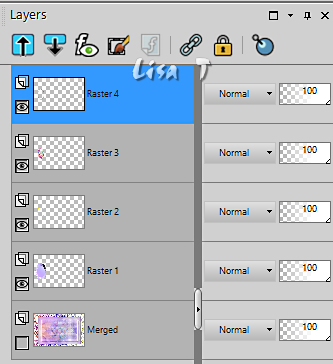
25
layers => merge => merge visible
open the eye of bottom layer
26
top layer is highlighted
effects => 3D effects => drop shadow => 0 / 0 / 50 / 30 / black
your work looks like this
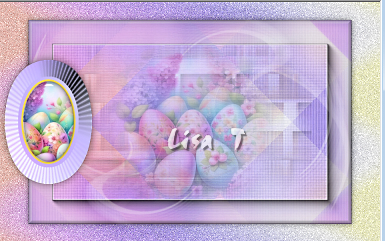
27
copy / paste « noeud_PDP_Vir.png » as new layer
enable the Pick tool with the following settings, to move the layer acurately => position X : 30 / position Y : 0
layers => arrange => move down
28
Highlight top layer
copy / paste « jonquille_Vir.png » as new layer
effects => 3D effects => drop shadow => 0 / 0 / 50 / 30 / black
enable the Pick tool with the following settings, to move the layer acurately => position X : 98 / position Y : 130
effects => 3D effects => drop shadow => 0 / 0 / 50 / 30 / black
layers => merge => merge all (flatten)
29
image => add borders => tick « symmetric » => ...
1 px black
1 px color 4 (white)
selections => select all
30
set color 5 as FG color into the materials palette
image => add borders => tick « symmetric » => 35 px color 5
selections => invert
effects => plugins => AAA Frames => Foto Frame
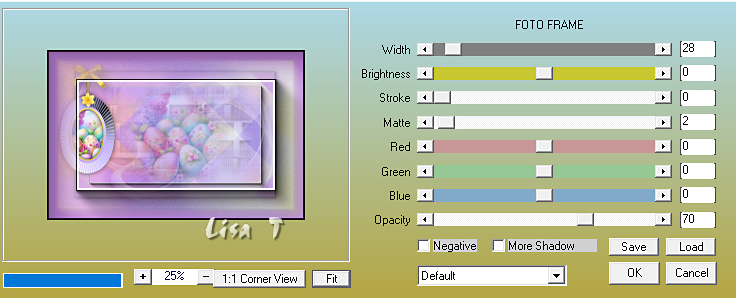
keep selection active
31
selections => invert
effects => 3D effects => drop shadow => 0 / 0 / 60 / 10 / black
selections => select none
32
copy / paste « cadre _dentelle_PDP.png » as new layer
image => add borders => tick « symmetric » => 1 px color 5
33
open « florju_springbunnies_elmt (37).png » as new layer (duck)
image => resize => UNtick « resize all layers » => 40%
edit => cut
back to your main work
edit => paste as new layer
enable the Pick tool with the following settings, to move the layer acurately => position X : 177 / position Y : 443
effects => 3D effects => drop shadow => 2 / 3 / 60 / 30 / black
34
open « CV_Princesse_paques_vir.png » as new layer (girl)
erase the watermark
image => resize => tick « resize all layers » => 75%
edit => copy
back to your main work
edit => paste as new lyer
enable the Pick tool with the following settings, to move the layer acurately => position X : 470 / position Y : 17
effects => 3D effects => drop shadow => 2 / 18 / 30 / 40 / black
35
Copy / paste « texte_PDP_paques.png » as new layer (text) as new layer
enable the Pick tool with the following settings, to move the layer acurately => position X : 242 / position Y : 165
effects => 3D effects => drop shadow => 2 / 5 / 50 / 10 / black
36
apply your watermark and Virginia’s watermark
image => resize => tick « resize all layers » => 950 px width
layers > merge > merge all (flatten)
adjust => sharpness => unsharp mask
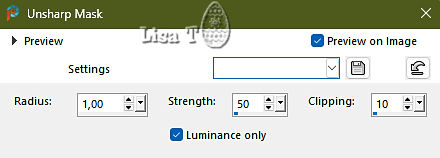
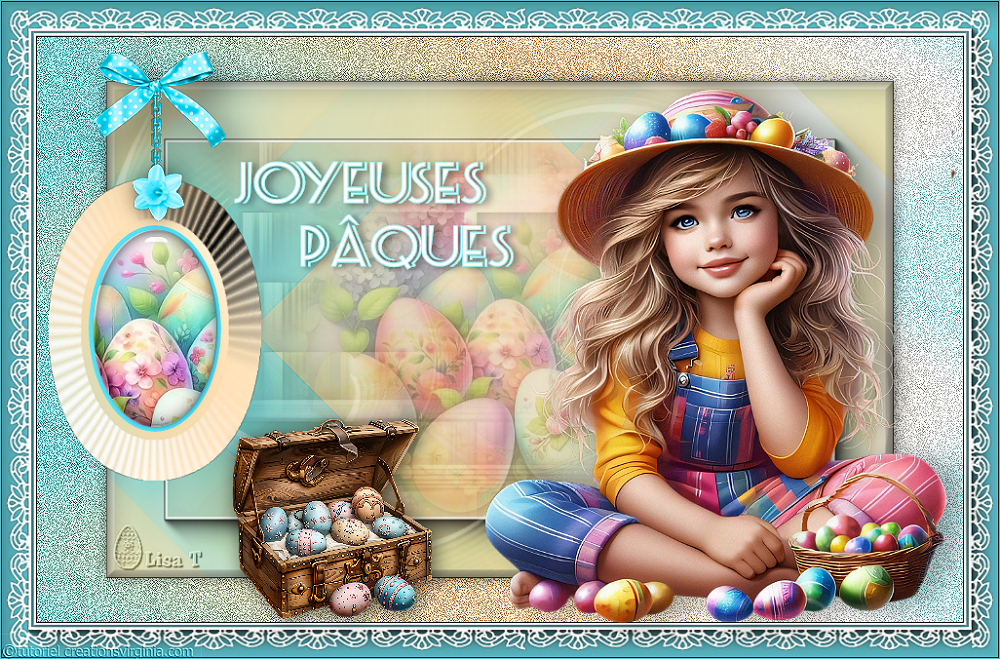
your tag is finished. Resize if necessary
save as... type jpeg

my tag with my tubes
Don't hesitate to write to me if you have any trouble with this tutorial
If you create a tag (using other tubes and colors than those provided) with this tutorial
and wish it to be shown, send it to me
It will be a real pleasure for me to add it to the gallery at the end of the tutorial


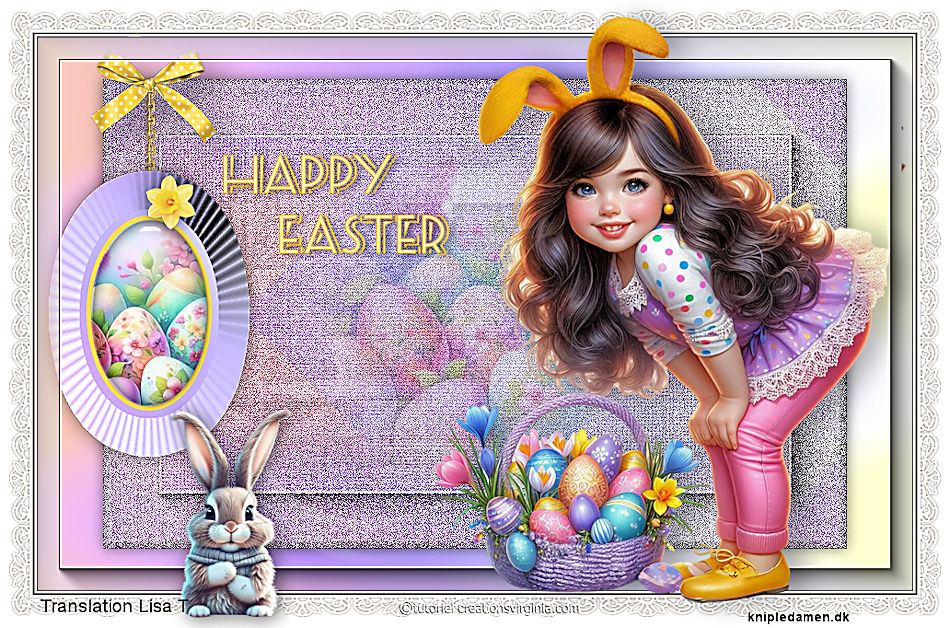
created by ▼ Birte

back to the boards of Virginia ’s tutorials
20 tutorials on each board
board 2 => 
at the bottom of each board you will find arrows allowing you to navigate from one board to another


|