

you wil find the orignal tutorial here

This tutorial is a personal creation.
Virginia works with PSP19
I work with PSP20
but you can follow this tutorial with any other version of PSP

Any resemblance with another one would be pure coincidence.
It is stricly forbidden to modify images, to change their name or take off the matermarks,
To present them on your sites or blog,
To share them in groups,
to make a bank of images, or to use them on lucrative purposes.

Thank you to respect Virginia’ work and the tubers work.
Don’t hesitate to warn her if you have any trouble with this tutorial.
some tubes were received in sharing groups
if one of them is yours, or not copyright free, please let Virginia know
and a link to your site will be added
either she will delete it from the material provided if you prefer


Supplies
Tubes - decorations - Mask - Brush - Texture - Selections - Pattern – Color Palette
Place texture, pattern and selections into the dedicated folders of « Corel PSP » general folder
Open the mask and minimize to tray


Filters used
AAA Frames
Alienskin EyeCandy 5 - Impact
Filters Factory D – import into Filters Unlimited
FM Tile Tools - Blend Emboss
Mehdi - Wavy Lab 1.1
Mura's Seamless - Blend emboss
Toadies - What are you ?...

Thank you very much Renée Salon for sharing with us your plugins page


Colors used
Virginia chose these colors
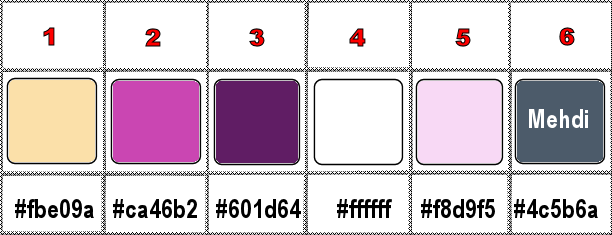
Mehdi colors
I advise you to keep Virginia’s choice of colors 3 (white) and 6 for the Mehdi filter.
Don't hesitate to change colors and blend modes of the layers, and the dropped shadows,
according to your tubes, images and preferences.

Important
Open all images in PSP, duplicate them (shift + key D) and close the originals.
always work with the copies to preserve original files
TIP 1 -> if you don’t want to install a font -->
open it in a software as « Nexus Font » (or other font viewer software of you choice)
as long as both windows are opened (software and font), your font will be available in your PSP
TIP 2 -> from PSPX4, in the later versions of PSP the functions « Mirror » and « Flip » have been replaced by -->
« Mirror »has become --> image => mirror => mirror horizontal
« Flip » has become --> image => mirror => mirror vertical

use the pencil to follow the steps
hold down left click to grab and move it


prepare your material
Instructions
Prepare your work
prepare the materials palette, color 1 & 2 as FG and BG colors
don’t forget to save your work as often as possible
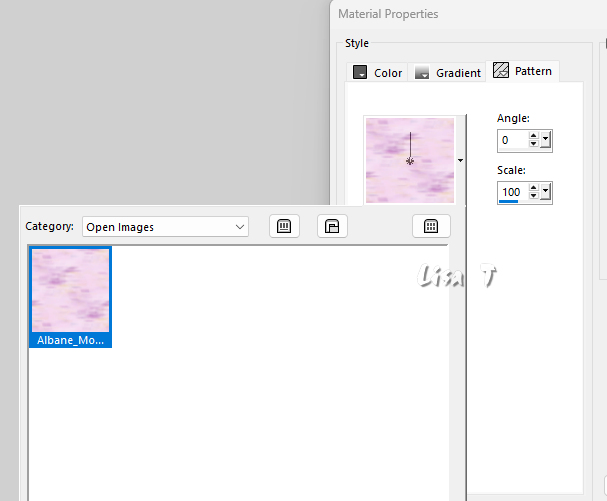
Prepare the configuration of « Albane_motif»
save your work often in case PSP crashes
Step 1
open a new image => transparent => 900 * 550 px
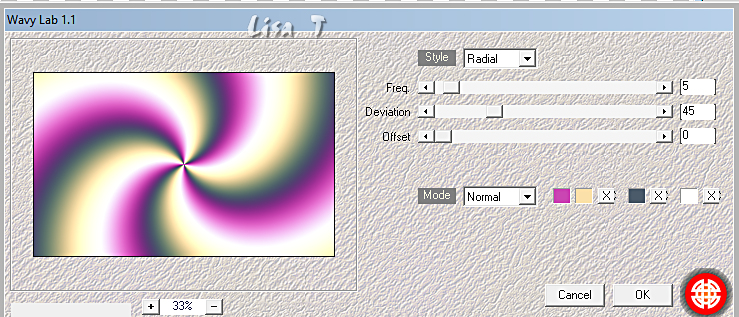
effects => plugins => Mehdi => Wavy Lab 1.1 => colors 2 / 1 / Mehdi 03 / 4
2
adjust => blur => gaussian blur => 25
effects => plugins => Unlimited 2 => Filter Factory Gallery D / Confetti Mirror / default settings
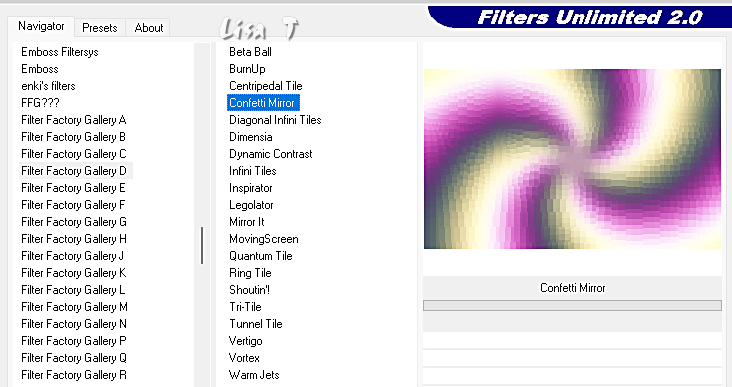
effects => edge effects => enhance
3
layers => duplicate
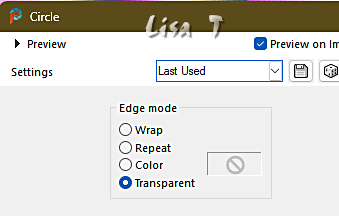
effects => geometric effects => Circle
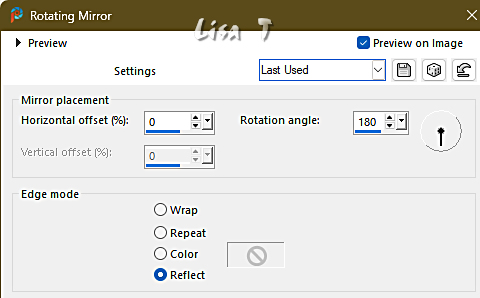
effects => reflection effects => rotating Mirror
your tag should look like this
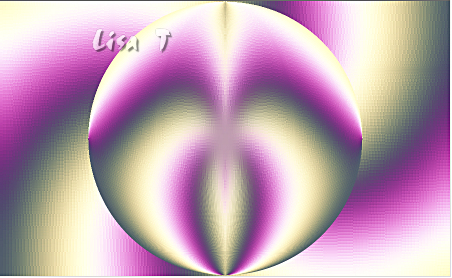
4
image => resize => untick « resize all layers » => 75%
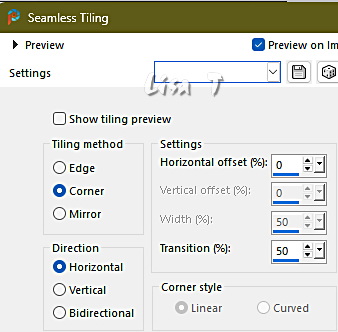
effects => image effects => seamless tiling
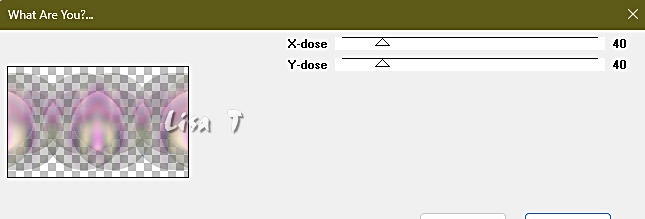
effects => plugins => Toadies => What Are You ?...
5
blend mode of the layer : Screen
effects => edge effects => enhance
effects => 3D effects => drop shadow => 0 / 0 / 60 / 30 / black
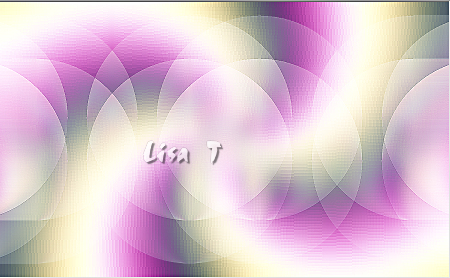
your tag should look like this
6
effects => plugins => Mura’s Seamless => Emboss at Alpha => default settings => apply TWICE

layers => merge => merge visible
7
set color 3 as FG color into the materials palette
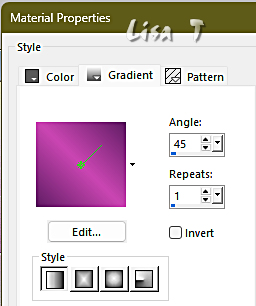
prepare a linear gradient in materials palette
layers => new raster layer
enable the Flood Fill Tool

flood fill layer with this gradient
8
layers => new mask layer => from image
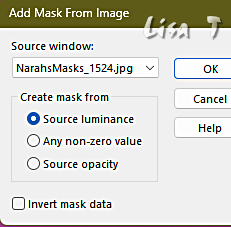
layers => merge => merge group
effects => plugins => Mura’s Seamless => Emboss at Alpha => default settings
9
selections => load-save selection => from disk => selection # 1
effects => 3D effects => drop shadow => 0 / 0 / 60 / 30 / black
selections => select none
10
selections => load-save selection => from disk => selection # 2
selections => promote selection to layer
selections => modify => contract => 5 px
effects => 3D effects => drop shadow => 0 / 0 / 60 / 30 / black
keep selection active
11
Click on the tab « gradient »in the materials palette, choose « Pattern»
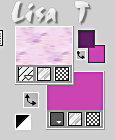
selections => modify => contract => 3 px
layers => new raster layer
flood fill selection with the pattern
keep selection active
your layers palette and tag look like this
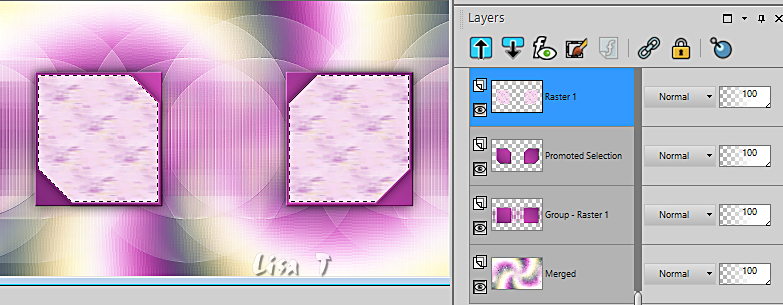
12
Top layer is highlighted
effects => 3D effects => Inner Bevel
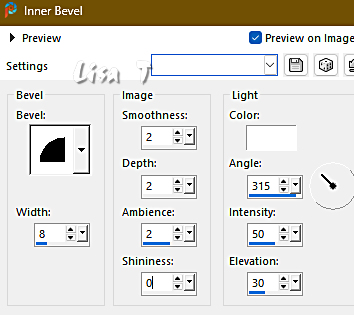
selections => select none
13
Highlight bottom layer
copy / paste « Albane_deco01.png » as new layer
blend mode of the layer : Luminance (Legacy)
opacity => 80%
your layers palette and tag look like this
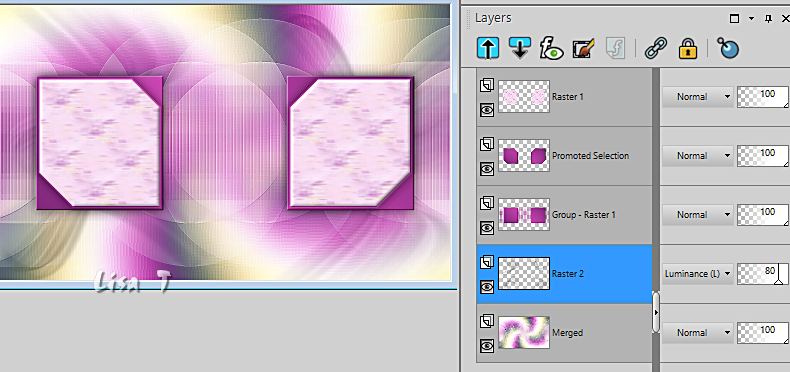
layers => merge => merge all (flatten)
14
set color 4 as FG color into the materials palette
image => add borders => tick « symmetric » => ...
1 px color 2
15 px color 4
1 px color 2
edit => copy
selections => select all
15
35 px any contrasting color
selections => invert
keep selection active
16
layers => promote background layer
edit => paste into selection
effects => distortion effects => Pixelate
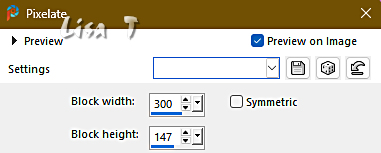
effects => User Defined Filter => Emboss 3
adjust => sharpness => sharpen
keep selection active
17
selections => invert
effects => 3D effects => drop shadow => 0 / 0 / 60 / 30 / black
selections => select none
18
image => add borders => tick « symmetric » => ...
1 px color 2
5 px color 4
1 px color 3
19
set color 5 as BG color in the materials palette
prepare a linear gradient in the materials palette
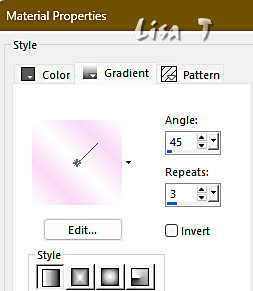
image => add borders => tick « symmetric » => 45 px color 4
20
enable the Magic Wand Tool

select the 45 px border with the Magic Wand tool
flood fill selection with the gradient
keep selection active
21
effects => texture effects => texture
choose texture « Corel_15_022.bmp » (name « Hatch Lump» in the list)
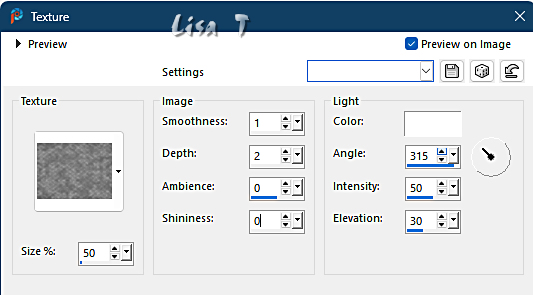
keep selection active
22
adjust => sharpness => sharpen
effects => plugins => AAA Frames => Foto Frame
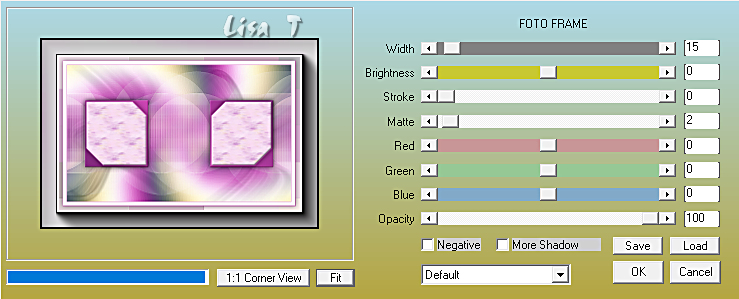
selections => invert
effects => 3D effects => drop shadow => 0 / 0 / 50 / 30 / black
selections => select none
23
layers => duplicate
image => resize => untick « resize all layers » => 10%
adjust => sharpness => sharpen
enable the Pick tool with the following settings, to move the layer acurately => position X : 70 / position Y : 70
hit the « M » key of your keyboard to disable the tool
24
effects => plugins => Alien Skin Eye Candy 5 Impact / Glass
settings tab => clear
basic tab =>…
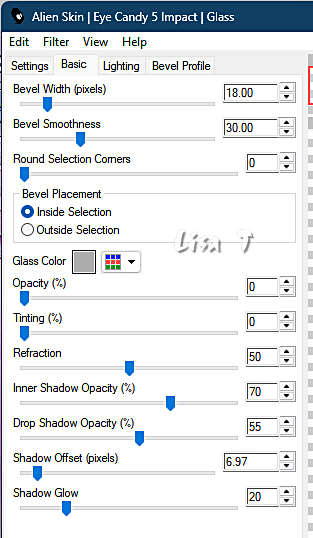
layers => duplicate
image => mirror => mirror horizontal
image => mirror => mirror vertical
layers => merge => merge down
effects => 3D effects => drop shadow => 0 / 0 / 50 / 30 / black
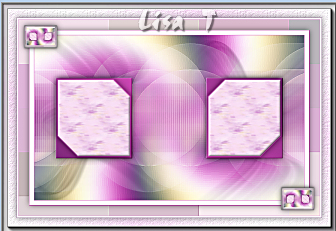
your tag shoul look like this
25
set color 2 as FG color in the materials palette
copy / paste « Albane_deco02 » as new layer
don’t move it
26
selections => select all / selections => float / selections => defloat
layers => new raster layer
flood fill layer with color 2
effects => plugins => Alien Skin Eye Candy 5 Impact / Glass / same settings as previously
effects => edge effects => enhance
selections => select none
27
copy / paste « Albane_deco03 » as new layer
enable the Pick tool with the following settings, to move the layer acurately => position X : 184 / position Y : 538
blend mode of the layer : Luminance (Legacy) … or other
effects => 3D effects => drop shadow => 0 / 0 / 50 / 30 / black
28
copy / paste « Albane_deco04 » as new layer
enable the Pick tool with the following settings, to move the layer acurately => position X : 811 / position Y : 106
blend mode of the layer : Luminance (Legacy) … or other
effects => 3D effects => drop shadow => 0 / 0 / 50 / 30 / black
29
copy / paste « Albane_deco05 » as new layer
enable the Pick tool with the following settings, to move the layer acurately => position X : 228 / position Y : 260 adjust => hue and saturation => colorize => 211 / 121
effects => 3D effects => drop shadow => 0 / 0 / 50 / 30 / black
Note: depending on your choice of character tube, you could duplicate this layer, then :
Image - Mirror - Horizontal Mirror + drop shadow in memory
30
copy / paste « aigenbycaz_pasteltulipsgirl18.png » as new layer
erase the watermark
image => resize => untick « resize all layers » => 65%
effects => image effects => offset => H : 35 / V : -15 / tick « custom » and « transparent »
effects => 3D effects => drop shadow => -10 / 20 / 55 / 50 / black
31
set color 3 as FG color in the materials palette
layers => new raster layer
enable the Brush Tool and choose the Brush provided

apply with color 3 (one or two click according to your color)
32
effects => plugins => FM Tile Tools / Blend Emboss / default settings
33
apply your watermark
layers > merge > merge all (flatten)
34
image > resize > 950 px width
adjust => sharpness => unsharp mask
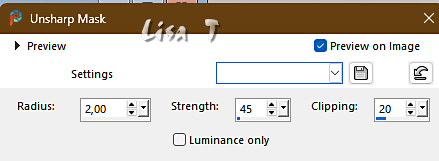
your tag is finished
save as... type jpeg

Don't hesitate to write to me if you have any trouble with this translation

Don’t hesitate to send me your creations
It will be a real pleasure for me to present them in the gallery below

My tag with a tube created by Nadège
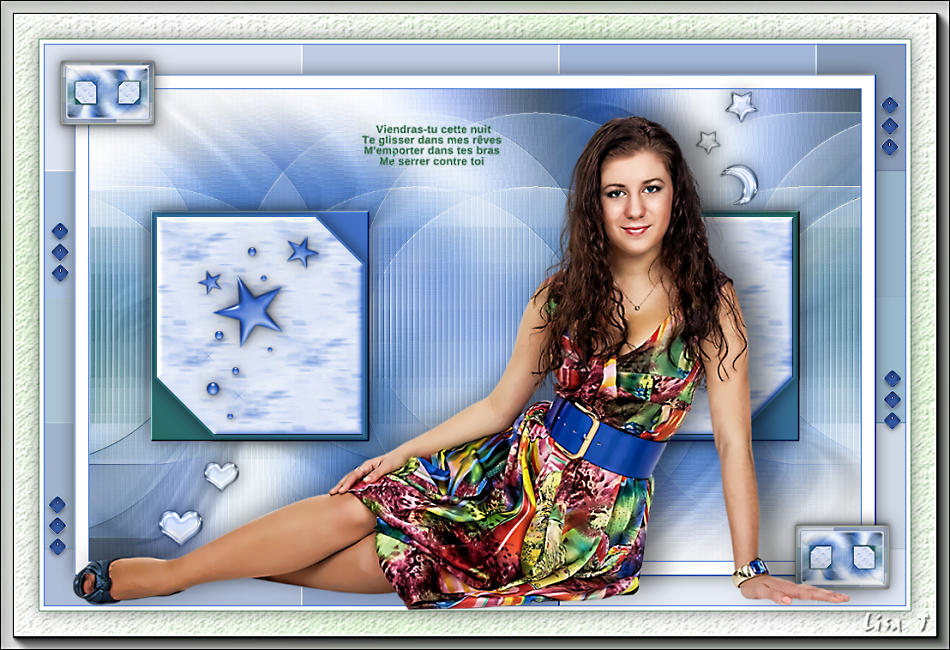


created by ▼ Birte
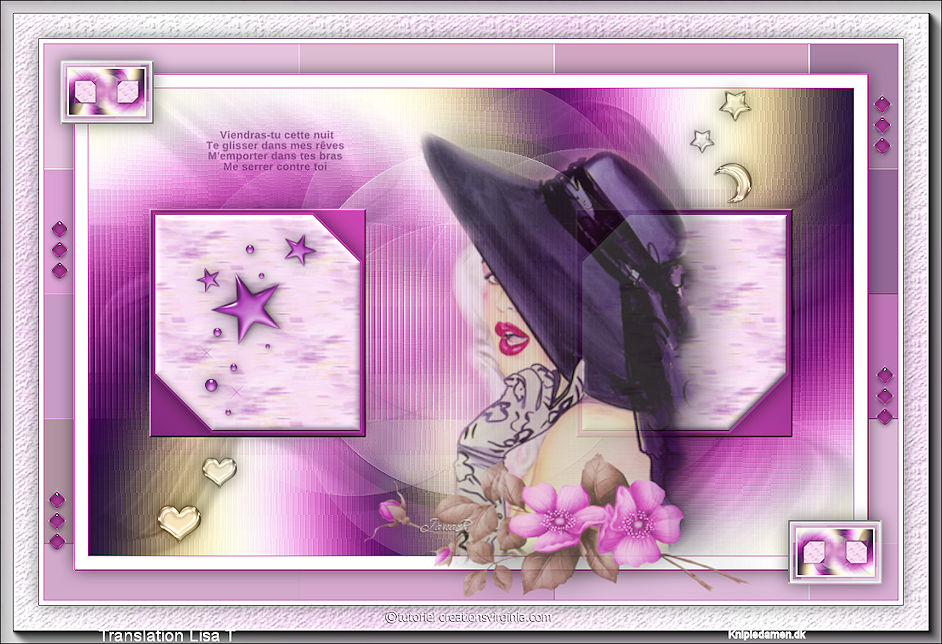

Back to the board of Virginia’s tutorials
 2 2
At the bottom of each board, you will find arrows allowing you to navigate from one board to another one


|