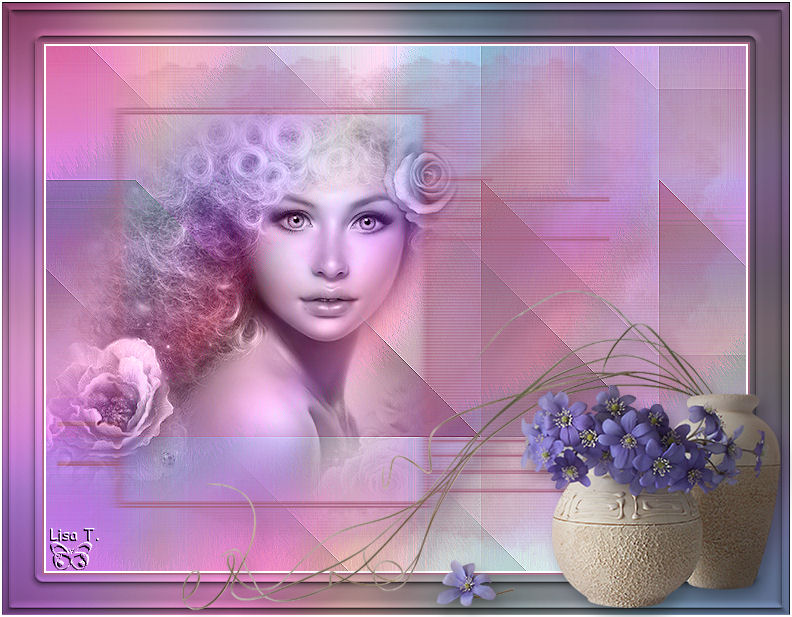
Tutorial Tag Typhaine
I'm member of Tutorial Writers Inc

Original can be found HERE

I work with PSP12, but you can follow this tutorial with another version of PSP
Conditions of use of the elements and tubes provided
It is forbidden to modifiy or change the name, take off the watermark or alter the tubes.
It is forbidden to share them in groups, or offer them on your blog, site or forum.
If you want to create a tutorial with them, please ask the author’s permission.
Filters Used
Filter Factory Gallery A -> add it in Unlimited
Italian editors effect -> add it in Unlimited
Carolaine and sensibility
All filters here

Material -> 2 tubes, one background

Mask creation.tine_masque081 ->
Tube -> 458_beauty_with_roses is made by MTFP
Tube -> kTs_Luiza_Gelts28 is made by Katussia
Background fond_typhaine is made by Tine

Preparing your material
Open the tubes in PSP, duplicate and close the originals
Open the mask and reduce it.
Use the paintbrush to follow the steps

|
Step 1
File / open -> fond_typhaine
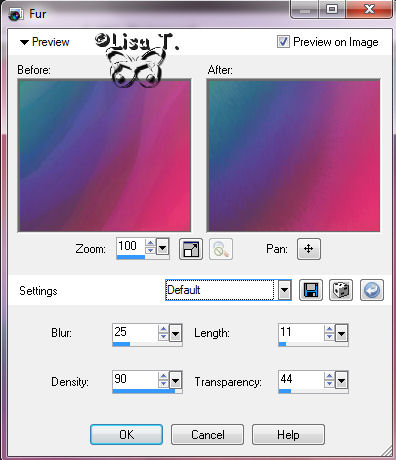
Effects / texture effects / fur
Adjust : default
Effects / plugins / Unlimited / Filter factory gallery A -> Holidays in Egypt -> size 191
Effects / plugins / Unlimited / Itali@n Editors Effects -> Effetto Fantasma
Sposta- X =65 sposta –Y=130
Effects / edge effects / enhance
Step 2
Window / duplicate
Put aside this background, you will use it later
Back on the tag
Layers / new raster layer
Foreground color -> #a8627f
Flood fill tool -> fill with the foreground color
Step 3
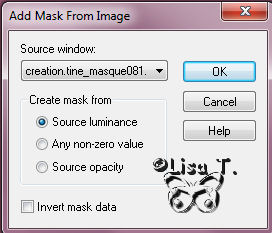
Layers / new mask layer / from image
Find -> creation.tine_masque081
Stay on the raster mask
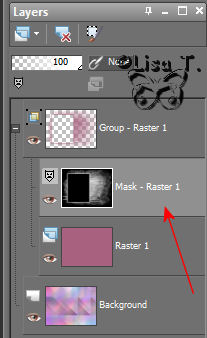
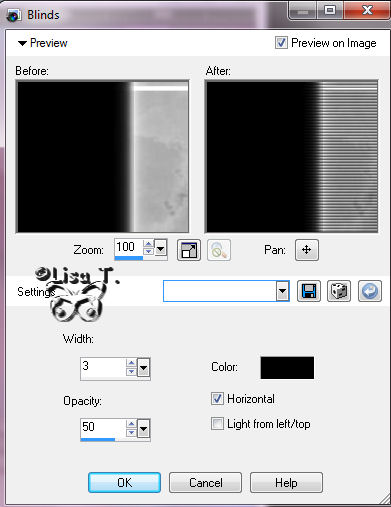
Effects / texture effects / blinds
Layers / merge / merge group
Step 4
Activate the tube -> mtfp_458_beauty_with_roses
Edit / copy -> back on the tag -> edit / paste as a new layer
Image / resize to 70%
Disable ->resize all layers
Effects / image effects / offset
Horizontal offset : -188
Vertical offset : 10
Enable custom and transparent
Layers / blendmode -> luminance (legacy)
Step 5
Image / add borders / 2 pixels / white color / enable symmetric
Put color #ad81ca in foreground
Image / add borders / 2 pixels / foreground color / enable symmetric
Image / add borders / 40 pixels / white color / enable symmetric
Step 6
Magic wand tool -> select the large white border
Activate the background image you put aside in step 2
Edit / copy -> back on the tag -> edit / paste into selection
Adjust / blur / gaussian blur -> radius 20
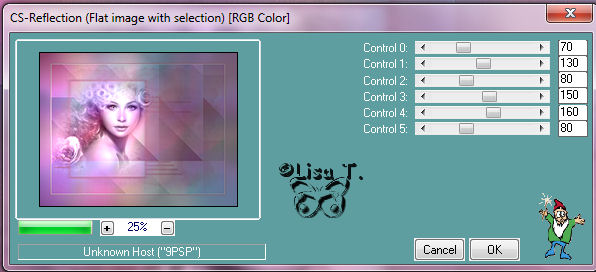
Efects / plugins / Carolaine and sensibility -> CS-reflexion
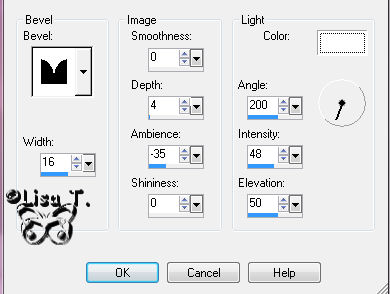
Effects / 3D effects / inner bevel
Selections / select all
Image / add borders / 2 pixels / white color / enable symmetric
Selections / select none
Step 7
Activate the tube -> kTs_Luiza_Gelts28
Edit / copy -> back on the tag -> edit / paste as a new layer
Image / mirror
Effects / image effects / offset
Horizontal offset -> 85
Vertical offset -> -142
Enable custom and transparent
Effects / 3D effects / drop shadow
Layers / merge / merge all (flatten)
Your tag is now finished ! Thank your for having realized it
Don’t forget your signature
File / save file as -> type JPEG
Tine would be very glad to see your creation, and add it in her gallery with your permission.
Don't hesitate to send it to her

And here is my try with my tubes.

Back to the Home page

Back to the boards of Tine's tutorials
board 1  board 2 board 2

|