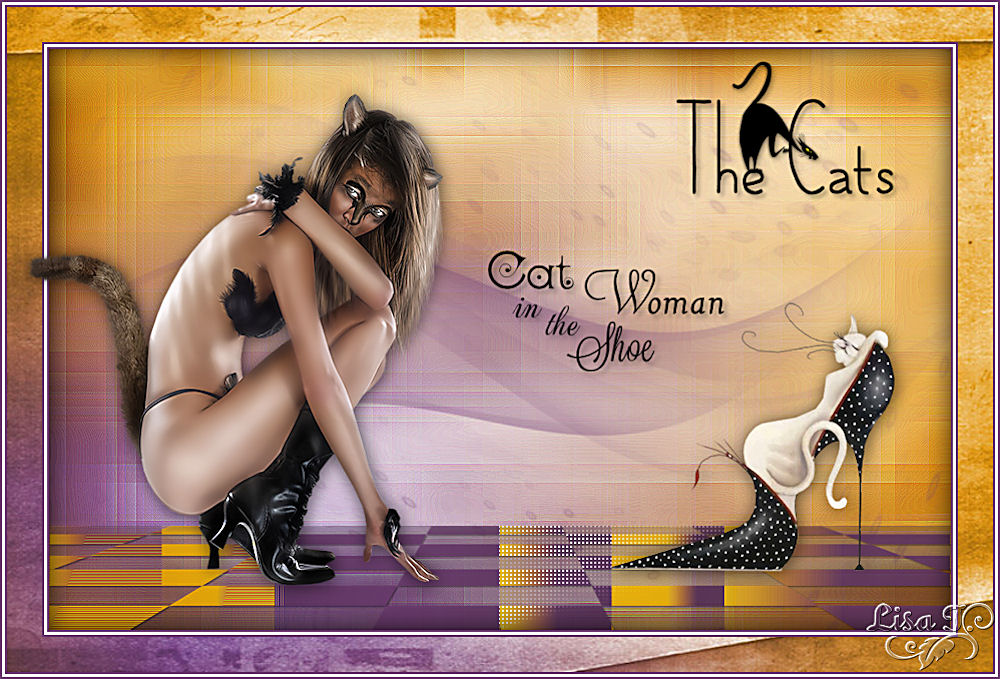
The cats
The original tutorial can be found HERE

Conditions of use of the material provided
It is forbidden to modifiy, change the name, take off the watermarks or alter the tubes.
It is forbidden to share them in groups or offer them on your site, blog or forum.
If you want to use them to create a tutorial, you must ask the permission of the authors.
Material
1 alpha layer (it seems empty, but.. it contains 2 selections and 2 masks registered on the alpha channel)
1 color palette (open it and prepare the colors in the materials palette)
2 tubes : duplicate them, close the originals, work with the copies
1 font : HopefulGiraffe-Demo
1 image background
1 WordArt text and 1 text

the tube « femme féerique cat woman » was created by Animabelle
you are not allowed to use it for another purpose. It is provided for this only tutorial
the tube « cat in shoe » was created by Yoka

the worArt tubes and the text were created by Tine
the backgroune image was found on the net
Thank you to the tubers
Filters Used
Psychosis/Streaker -> to import in Unlimited 2
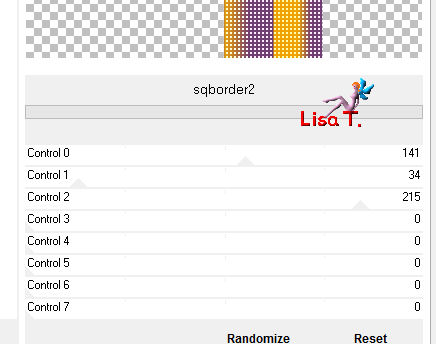
Forest AFS/sqborder2 -> to import in Unlimited 2

Colors
color 1 -> foreground color -> #f0a300
color 2 -> background color -> #703e73
color 2 -> #ffffff (white)
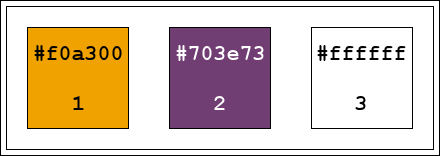
use the dropper tool to install the colors directly in the materials palette
color 1 : left click
color 2 : right click
Use the pencil to follow the steps
left click to grab it
 |
Realization
Step 1
activate the alpha layer « cats_alpha »
window/duplicate (Shift + D)
close the original, and work with the copy
Step 2
selections/select all
activate the background image
edit/copy - back to your work - eidt/paste into selection
selections/select none
Step 3
adjust/blur/gaussian blur/20
effects/plugins/Unlimited 2/Psychosis/Streaker

Step 4
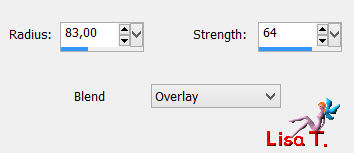
adjust/sharpness/unsharp mask/sharp focus

adjust/sharpness/high pass sharpen/ 83 / 64 / overlay
effects/edge effects/enhance
Step 5
layers/new raster layer
activate the flood fill tool and fill with color 2
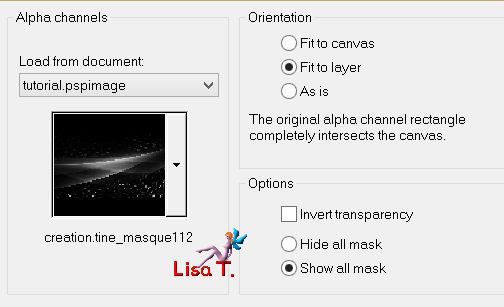
layers/load/load mask from alpha channel/mask « creation.tine_masque112 »
layers/merge/merge group
Step 6
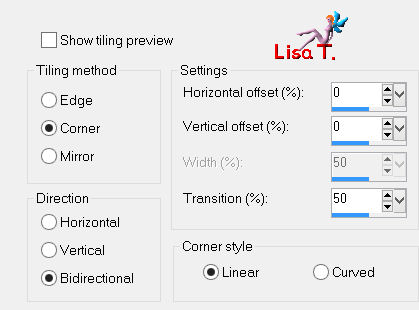
effects/image effects/seamless tiling

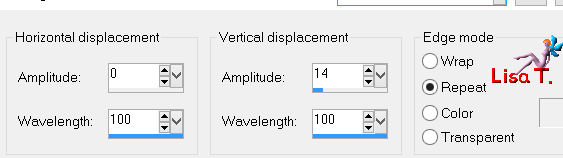
effects/distortion effects/wave
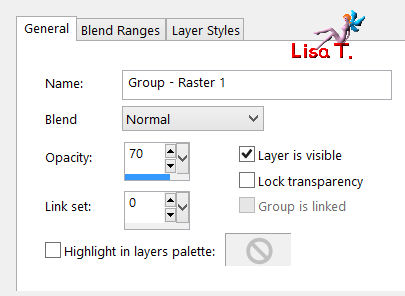
layers/properties/opacity on 70%
layers/merge/merge visible
Step 7
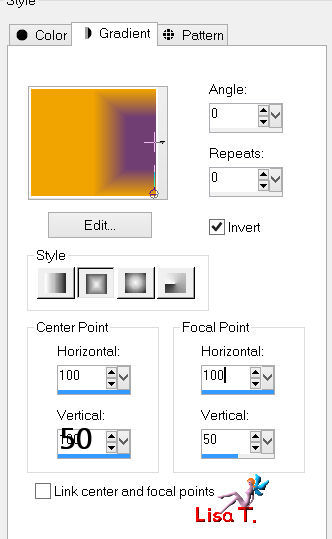
in the materials palette, prepare a rectangular gradient/ 0 / 0 / check « invert »
center point : H->100 V->50
focal point : H->100 V->50
Step 8
layers/new raster layer
activate the flood fill tool and fill with the gradient
effects/edge effects/enhance more (apply this effect twice)
Step 9
edit/copy
selections/load selection from alpha channel/selection « tine_cats1 »
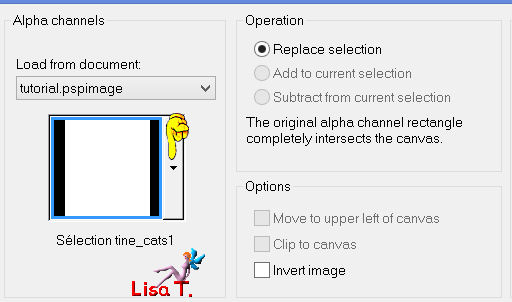
edit/paste into selection
selections/select none
Step 10
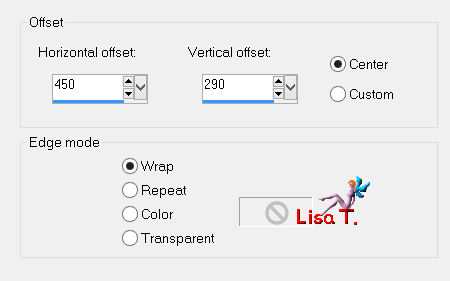
effects/image effects/offset/check wrap and center
edit/copy
selections/load selection from alpha channel/selection « tine_cats2 »
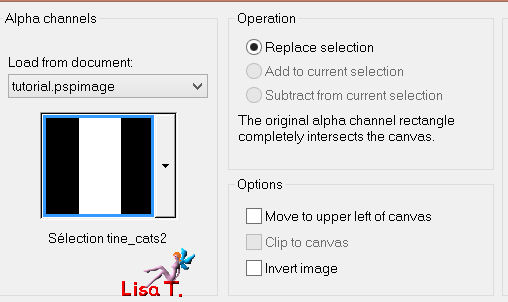
edit/paste into selection
selections/promote selection to layer
selections/select none
Step 11
effects/plugins/Unlimited 2/Forest AFS/sqborder2/default settings
effects/image effects/seamless tiling/default settings
layers/merge/merge down
adjust/shrapness/high pass sharpen
Step 12
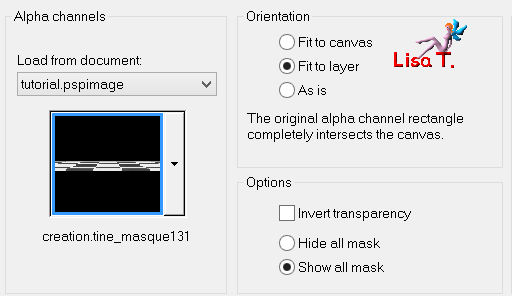
layers/load mask from alpha channel/mask « creation.tine_masque131 »
layers/merge/merge group
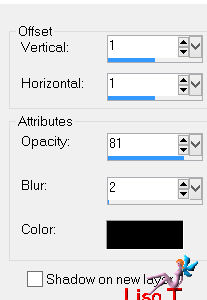
effects/3D effects/drop shadow/ 1 / 1 / 81 / 2 / black
Step 13
selections/select all
image/add borders/check « symmetric » ->
2 pixels color 2
3 pixels color 3 (white)
2 pixels color 2
35 pixels color 3
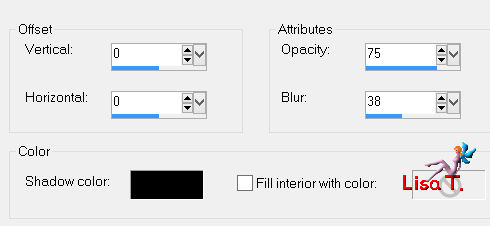
effects/3D effects/cutout/ 0 / 0 / 75 / 38 / black
Step 14
activate the maggic wand tool, select the large border
activate the background image
edit/copy - back to your work - edit/paste into selection
selections/select none
Step 15
image/add borders/check « symmetric » ->
2 pixels color 2
3 pixels color 3 (white)
2 pixels color 2
Step 16
activate the tube « 14_tube_feerique_animabelle »
edit/copy - back to your work - edit/paste as new layer
effects/image effects/offset
check « custom » and « transparent »

effects/3D effects/drop shadow/ 1 / 1 / 63 / 23,19 / black

Step 17
activate the tube « Yoka-Cat-in-shoe-280714 »
edit/copy - back to your work - edit/paste as new layer
image/mirror
effects/image effects/offset

effects/3D effects/drop shadow/ 1 / 1 / 63 / 19 / 23,19 / black
Step 18
you can choose between the text tube and/or the tube 2 WordArt
edit/copy - back to your work - edit/paste as new layer
arrange the tubes according to your liking
a font is provided in the material folder to allow you to write your own text, with your colors
layers/merge/merge all (flatten)
Your tag is now finished.
Thank you to have realized it
Don’t forget to sign and save file as… type JPEG
Don’t hesitate to send your creations to Tine

It will be her pleasure to show them in the gallery at the bottom of the tutorial page
Don’t forget to indicate her your name and the adress of your blog or site if you have one
If you want to receive Tine’s Newsletter, don’t hesitate to subscribe

My tag with Bel Scrap Elements

Back to the boards of Tine’s tutorials
Board 1  Board 2 Board 2

|