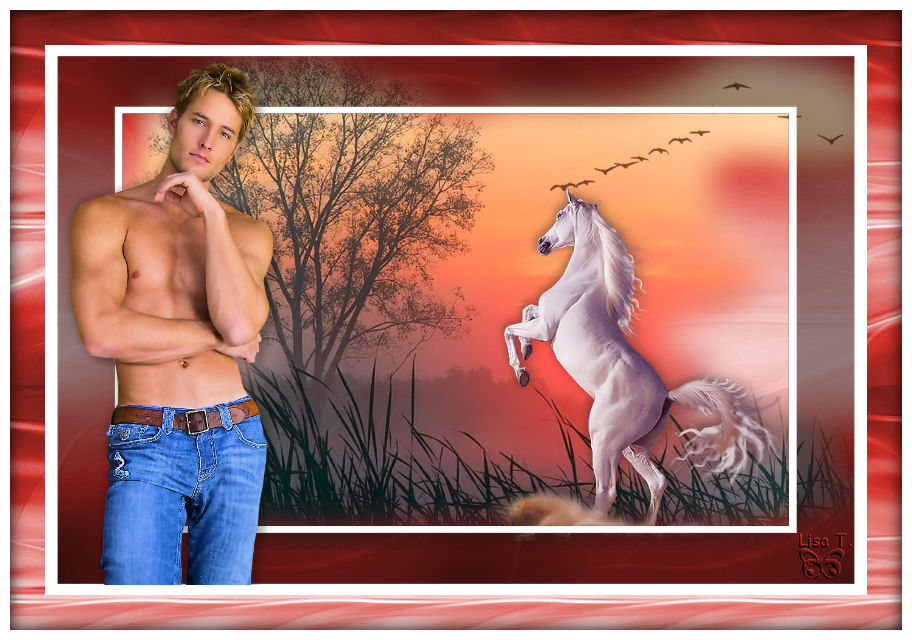
TAG The bird

I'm member of Tutorial Writers Inc

original tutorial , click on the banner below


Conditions of use of elements and tubes supplied
It is forbidden to modify or change the name, to take off the watermark or alter the tubes.
It is forbidden to share them in groups or to offer them on your site, blog or forum.
If you want to use them to create your tutorials, ask for the authorization to the authors.
Filter used :
none
Material
To download click HERE
3 tubes ;open them in your psp, duplicate them and close the originals.
Always work with copies!!
1 background-->fond_The bird
1 pattern-->motif_the bird. Open it in PSP and reduce it.
1 frameà Corel_09_019. Copy and paste in the Frame File of your PSP
The landscape tube is made by Karine Dreams HERE
The Swan tube is made by Guismo HERE
The bird tube is made by Gerry-->her group HERE
The background and pattern are made by Tine.
The frame is included in PSP software.
This tutorial is made with PSP 11. But I use PSP 12
The screen shots of my translation are made with PSP 12.
Use the paintbrush to follow the steps
Grab it with the left click of your mouse

|
Step 1
Put in the background of the material properties the pattern “motif_the bird”, angle 0 and scale 100

File-->open-->the background “fond_The bird”
Step 2
Activate the tube
Edit-->copy-->back on the tag-->edit-->paste as a new layer
Image-->resizeà 80%-->disable : resize all layers
Effects-->image effects-->offset

Step 3
Activate the tube Calguisswan24112011
Edit-->copy-->back on the tag-->edit--> paste as a new layer
Effects-->image effects-->offset
Horizontal : 48 vertical : 29
Enable : custom and transparent
Step 4
Activate the tube “Gerry-Dieren_50_bird_23_november_2008”
Edit-->copy-->back on the tag-->Edit-->paste as a new layer
Effects-->image effects-->offset
Horizontal : -244 vertical : -27
Enable custom and transparent
Step 5
Layers-->merge -->merge down
Effects-->3D effects-->drop shadow color : black

Drop shadow once more with these parameters :
Vertical and horizontal : -3
Opacity : 20 blur : 10 color : black
Step 6
Image-->picture frame
Find the frame Corel_09_019 (or transparency 02 using previous versions of PSP)
Enable - - >frame canvas and frame outside of the image

Layers-->arrange-->move down
Layers-->merge-->merge all (flatten)
Step 7
Selections-->select all
Selections-->modifiy-->contract : 10 pixels
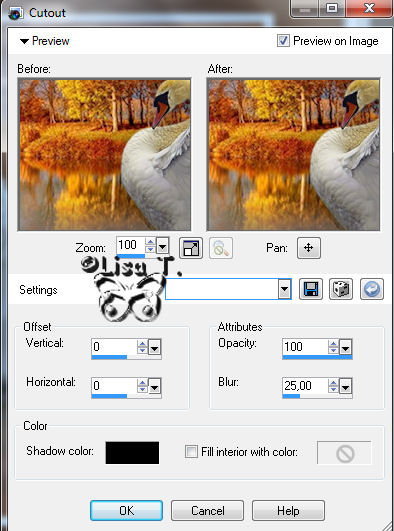
Effects-->3D effects-->cutout-->shadow color black
Selections-->select none
Step 8
Image--> add borders-->35 pixels-->color black, enable symmetric
Magic wand tool-->select the black border
Flood fill tool-->apply the pattern “motif_the bird”
Selections-->select none
Step 9
Image-->add borders-->10 pixels-->color white-->enable symmetric
Selections-->select all
Selections-->modifiy-->contract-->10 pixels
Effects-->3D effects--> cutout
Same parameters as on step 7-->shadow color : black
Selections-->select none
Your TAG is now finished.
Thank you for choosing it
Don’t forget your signature, and save file as… - - >type jpeg
Don’t hesitate to send your work to Tine

I will be very glad to see it, and present it in the gallery at the bottom of the page of the original tutorial
if you do so, leave her your name, and the adress of your site or blog if you have one.
Here is the tag with Tine's tutorial, using with my tubes
Back to the Home page

Gallery
created by ▼ Birte

Back to the boards of Tine's Tutorials
board 1
 board 2
