Spring Bouquet

The original tutorial can be found HERE


Conditions of use of the material provided
It is forbidden to modifiy, change the name, take off the watermarks or alter the tubes.
It is forbidden to share them in groups or offer them on your site, blog or forum.
If you want to use them to create a tutorial, you must ask the permission to the authors.
Material
2 Tubes - 1 Image - 1 font---> flower1 - 1 Alpha layer

open all tubes, duplicate them and close the originals. Work with the copies
copy/paste the presets into the folder of the plugin (or double click on it)
Thank you to the tubers
Filters Used
Penta.com / Color dot ---> import in Unlimited –
VM Intant Art / Tripolis ---> import in Unlimited –

I use PSPX7, but this tutorial can be realized with another version
Use the paintbrush to follow the steps
left click to grab it

Realization
Step 1
open the alpha layer (this layer seems yo be empty, but it contains a selection and a mask saved on the alpha channel)
window/duplicate (Shift + D)
close the original and work with the copy
Step 2
selections/select all
copy/paste into selection the « image fond »
selections/select none
Step 3
adjust/blur/gaussian blur/38
layers/duplicate
selections/load selection from alpha channel/choose « bouquet.printemps.tine »

edit/cut
selections/select none
Step 4
activte the bottom layer (alpha layer)
effects/plugins/Unlimited 2/Penta.com/Color Dot

activate the layer above (alpha layer)
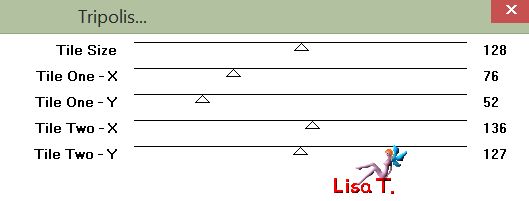
effects/plugins/VM Instant Art/Tripolis/default settings
effects/edge effects/enhance more
Step 5
layers/duplicate
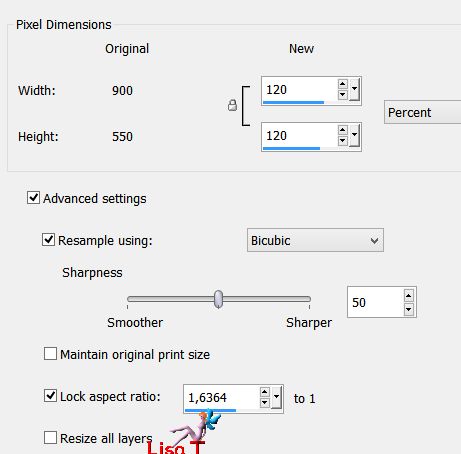
image/resize/uncheck « resize all layers »/120%
layers/arrange/move down
Step 6
layers/duplicate
image/resize/uncheck « resize all layers »/120%
layers/arrange/move down
Step 7
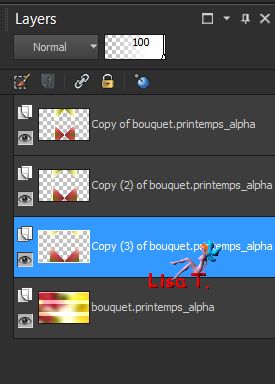
your layers palette looks like this
Step 8
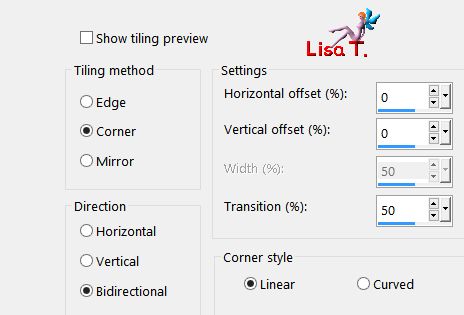
effects/image effects/seamless tiling/default settings
Step 9
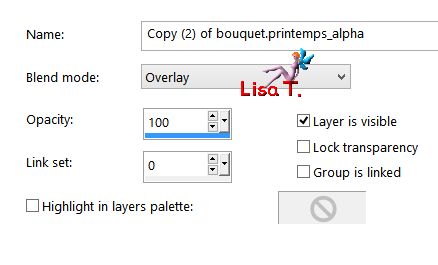
activate the layer above (copy 2 of alpha layer)
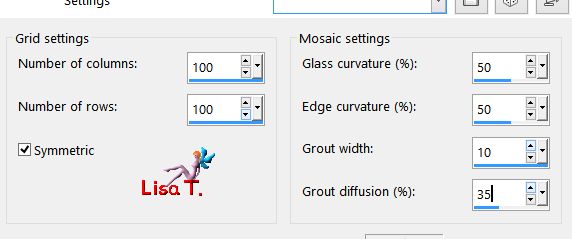
effects/texture effects/mosaic glass
layers/properties/blend mode : « Overlay »
Step 10
activate the top layer (copy of apha layer)
layers/properties/blend mode « lighten »
Step 11
activate the bottom layer (alpha layer)
in the materials palette, set white as foreground color
layers/new raster layer and flood fill white
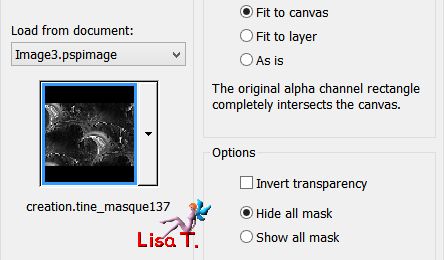
layers/load mask from alpha channel/choose « creation.tine_masque137 »
layers/merge/merge all (faltten)
Step 12
copy/paste as new layer the tube « libellulegraphisme_femme147 »
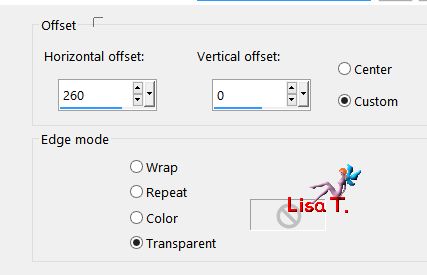
effects/image effects/offset
effects/3D effects/drop shadow/ 0 / 0 / 50 / 20 / black
layers/merge/merge visible
Step 13
edit/copy
layers/new raster layer
activate the text tool

write « Spring (hit Enter) Bouquet (hit Enter)»
of course you can write another text of your choice
edit/paste into selection
selections/select none
Step 14
effects/3D effects/inner bevel

effects/3D effects/drop shadow/ 2 / 2 / 40 / 7 / black
place it where you like
Step 15
copy/paste as new layer the tube « deco »
effects/image effects/offset/ -300 / 0 / check « personal » and « transparent »
effects/3D effects/drop shadow/ 2 / 2 / 40 / 7 / black
Step 16
choose a dark color in your tubes or background color, set as background color
Tine chose #b92b4c
image/add borders/check « symmetric » -à
1 pixels BG color
15 pixels FG color (white)
1 pixels BG color
25 pixels FG color
1 pixel BG
Your tag is finished.
Thank you for following this tutorial
Don’t forget to apply your signature (to avoid plagiarism) and save file as… type JPEG
Don’t hesitate to send your creations
to me

It
will be my pleasure to show them in the gallery at the
bottom of this translation
Don’t forget to indicate me your name and the adress
of your blog or site if you have one

created by Birte

If you want to receive Tine’s Newsletter, subscribe
to her newsletter

my tag with my tubes

Back to the boards of Tine’s tutorials
Board 1  Board 2 Board 2

|