Tag Sonia
I'm member of Tutorial Writers Inc

I use PSP12. Tine used PSP11 to create this Tutorial
screen captures are made with PSP12
Conditions of use of the material provided
It is forbidden to modifiy, change the name, take off the watermarks or alter the tubes.
It is forbidden to share them in groups or offer them on your site, blog or forum.
If you want to use them to create a tutorial, you must ask the permission of the authors.

Filters used

Simple (insert it in Unlimited 2)
PENTA Toy Camera 2 (in the material folder)
peculiarity of PENTA.com : you can insert it in Unlimited 2 , except for Toy camera 2 !
Create a new folder, name it Penta.com Toy camera 2,
place the "Toy camera 2"inside
then put this folder in your Plug-ins folder of your PSP Files.
Material
3 tubes (watch, woman's face, goldy screw-head)
a picture of a landscape

Use the paintbrush to follow the steps
Grab it with the left click of your mouse

|
Step 1
open the tubes and the picture with PSP, duplicate them and close the originals
Step2
prepare a sunburst gradient/repeats 0/enable invert
foreground color #932704 and background color #faf8d6
Step 3
open a new image 645 X 445 pixels, enable transparent
flood fill tool -> fill with the gradient prepared on step 2
Step 4
activate the landscape image -> edit/copy
back to the tag -> edit/paste as a new layer
layers -> properties : opacity 56
layers/merge/merge all (flatten)
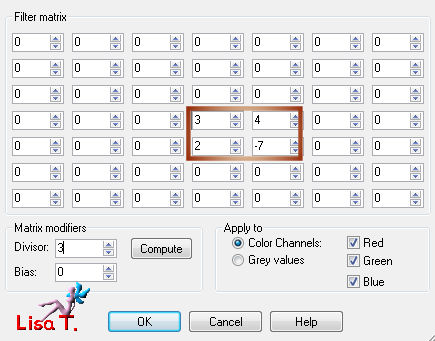
effects/user defined filter
Step 5
activate the woman's face tube
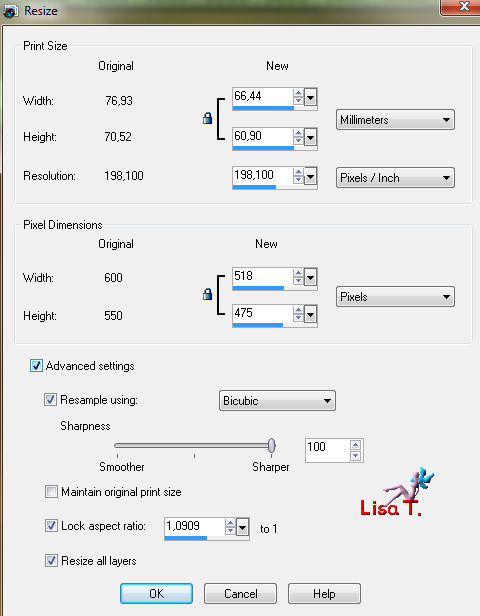
image/resize -> height 475 pixels
resample using : bicubic
edit/copy -> back to the tag -> edit/paste as a new layer
position it towards the right (see model)
adjust/color/fade correction -> amount of correction : 45
Step 6
activate the tube of the watch
edit/copy -> back to the tag -> edit/paste as a new layer
position it above on the left (see model)
layers/properties -> opacity : 50
layers/merge/merge all (flatten)
Step 7
selections/select all
effects/3D effects/cutout
vertical & horizontal : 3/opacity : 50/blur : 12
black color/disable interior color
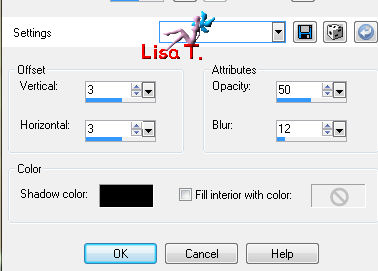
use cutout effect once more with vertical & horizontal : -3
selections/select none
Step 8
image/add borders/1 pixel/foreground color/enable symmetric
image/add borders/25 pixels/white color/enable symmetric
open the gradient -> linear style -> angle : 135 -> repeats : 0
magic wand tool

select the white border
flood fill tool -> fill with the gradient
effects/textures effects/mosaic-glass -> default settings
adjust/sharpness/sharpen
selections/select none
Step 9
activate the tube of the screw-head
edit/copy -> back to the tag -> edit/paste as a new layer
position it in the left upper corner (see model)
effects/plugins/Unlimited 2/simple -> top left mirror
layers/merge/merge all (flatten)
effects/plugins/Penta.com -> Toy camera 2
layers/merge/merge all (flatten)

Your tag is now finished.
Thank you for having realized it
Don’t forget to sign and save file as… type JPEG
Don’t hesitate to send your creations to Tine
It will be her pleasure to show them in the gallery at the bottom of the tutorial page
Don’t forget to indicate her your name and the adress of your blog or site if you have one
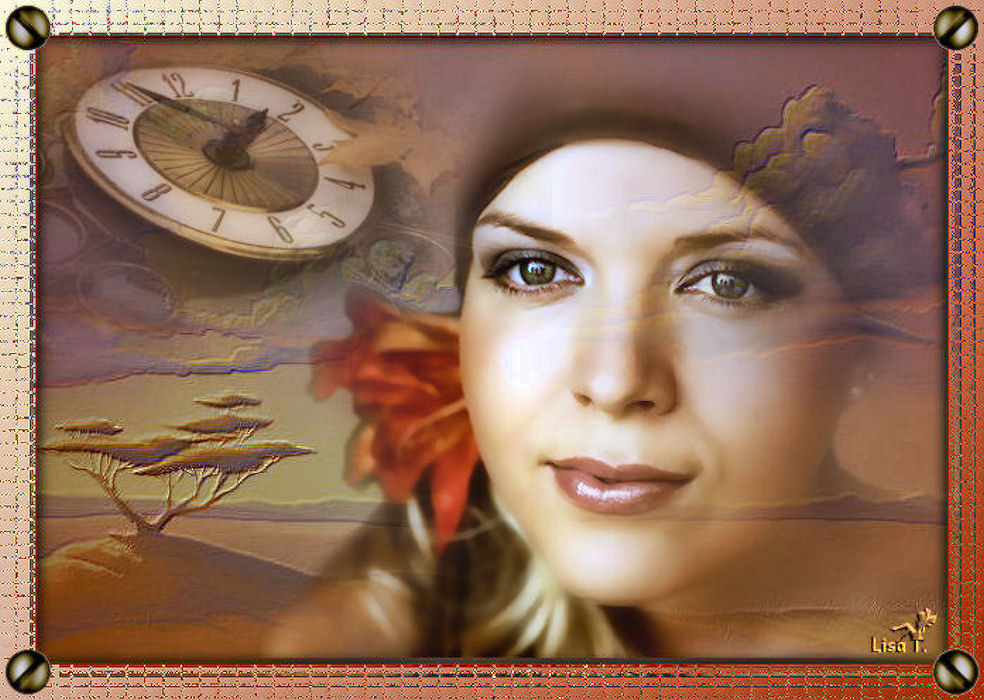
And here is my try with my tubes

Back to the boards of Tine's tutorials
board 1   board 2 board 2 

|