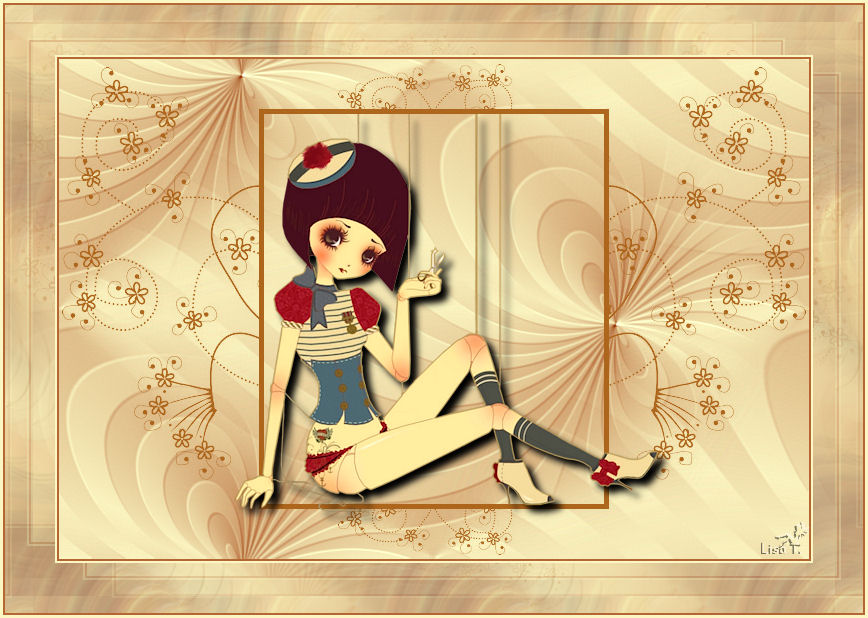
Tag Puppet
I'm member of Tutorial Writers Inc

I use PSP12. Tine used PSP11 to create this Tutorial
screen captures are made with PSP12
Conditions of use of the material provided
It is forbidden to modifiy, change the name, take off the watermarks or alter the tubes.
It is forbidden to share them in groups or offer them on your site, blog or forum.
If you want to use them to create a tutorial, you must ask the permission of the authors.

Filters used
Filter DSB flux
Filter Flaming Pear Flexify version 130
Filter Unlimited 2
You can find these filters HERE

Material
1 tube - one preset PSP

1 mask "creation.tine_masque034"
HERE
The tube "The Navy Doll"comes from ©4th-of-May
The preset was created by Tine
Get ready !
*Open the tube , duplicate it and close the original
**Open the mask and reduce it
***copy the preset "relief accentué_Tine"
and paste into the folder "default parameters" of your PSP files
Use the paintbrush to follow the steps
Grab it with the left click of your mouse

|
Step 1
Prepare your material palette with
Foreground color #b46735
background color #fcf6c2
create a linear gradient -> angle 145 and repeats 1
Step 2
file/new -> 750 X 500 pixels -> foreground color
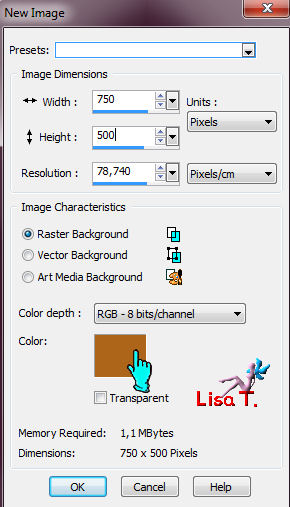
layers/new raster layer
flood fill tool -> use the gradient prepared on step 1
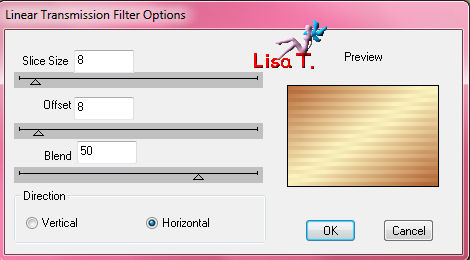
Step 3
effects/plugins/DSB flux -> linear transmission
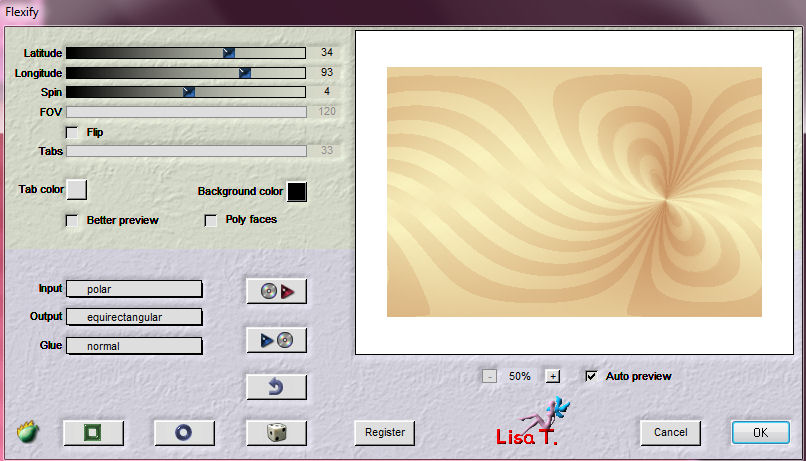
effects/plugins/Flaming Pear -> Flexify
effects/image effects/seamless tiling -> default parameters
effects/User defined filter -> settings "relief accentué_Tine"

Step 4
layers/new mask layer/from image -> find "masque_tine_tag.marionnette"
layers/merge/merge group
Step 5
activate the tube "The Navy Doll"
eraser tool -> erase the watermark
image/resize -> 65%
edit/copy -> back to the tag -> edit/paste as a new layer
Step 6
effects/image effects/offset
horizontal offset -> 13
vertical offset -> 12
enable custom and transparent
eraser tool -> erase the threads coming out and on the frame
use the zoom if necessary
before
after

effects/3D effects/drop shadow
vertical and horizontal -> 7
opacity -> 100
blur -> 10
black color
Step 7
creating the tile
file/new -> 350 X 400 pixels -> transparent
flood fill tool -> use the gradient
selections/select all
activate the tube "The Navy Doll"
edit/copy -> back to the tile -> edit/paste into selection
selections/select none
adjust/blur/radial blur

effects/image effects/seamless tiling -> default parameters
effects/User defined filter -> settings -> "Relief accentué_Tine"
install this tile as background pattern in the materials palette -> angle 0 -> scale 100
Step 8
image/add borders/2 pixels/foreground color/enable symmetric
image/add borders/2 pixels/background color/enable symmetric
image/add borders/50 pixels/black color/enable symmetric
magic wand tool -> use the pattern created on step 7 (right click)
Step 9
keep the selection active
effects/plugins/Unlimited 2/special effects 1 -> shiver
horizontal 34 and vertical 30
selections/select none
image/add borders/2 pixels/foreground color/enable symmetric
image/add borders/3 pixels/background color/enable symmetric
Your tag is now finished.
Thank you for having realized it
Don’t forget to sign and save file as… type JPEG

Don’t hesitate to send your creations to Tine

mail to Tine
If you have any trouble with this tutorial, don't hesitate to write to Tine or to me
mail to Lisa T
It will be her pleasure to show them in the gallery at the bottom of the tutorial page
Don’t forget to indicate her your name and the adress of your blog or site if you have one
And Here is my try with my tubes

Back to the boards of Tine's tutorials
board 1   board 2 board 2 

|