Precious
Nature
The original tutorial can be found HERE
Conditions of use of the material provided
It is forbidden to modifiy, change the name, take off the
watermarks or alter the tubes.
It is forbidden to share them in groups or offer them on
your site, blog or forum.
If you want to use them to create a tutorial, you must ask
the permission to the authors.

Material
3 Tubes
1 Selection (copy / paste into the folder »selections » of
Corel PSP genera folder)
1 Preset Flexify 2 (leave it into the material folder)

duplicate tubes and work with the copies
tube by CAL - Word Art by Jewel : Thank
you

Filters Used
Mehdi / Sorting Tiles -
- Flaming Pear / flexify 2 (version 266) -
- Carolaine and Sensibility / CS_LDots -
- AAA Frames / Texture Frame -
Unlimited 2.0
- Simple / Half Wrap & Top Left Mirror -
- Graphics Plus / Cross Shadow -


translator’s note
I use PSPX9 to create my tag and write my translation
but this tutorial can be realized with another version
according to the version of PSP you use, the results might
be slightly differents
don’t hesitate to change the blend modes of the layers
according to your tubes and colors

Use this pencil to follow the steps
hold down left click to grab it and move it


Realization
1
open a new transparent layer 900 * 550 pixels
2
selections -> select all
3
open tube « CAL-1024-062816 »
minimize it to tray for a later use oin step 31
4
copy / paste into selection
5
selections -> select none
6
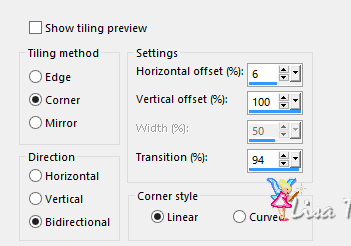
effects -> image effects -> seamless tiling / side
by side
7
layers -> duplicate
8
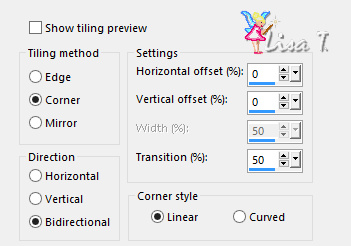
effects -> image effects -> seamless tiling / default
settings
9
layers -> merge -> merge all (flatten)
10
layers -> duplicate
11
layers -> view -> current only
12
adjust -> blur -> radial blur-> zoom / 50 / -50
/ 0 / 10

13
effects -> plugins -> Mehdi / Sorting Tiles
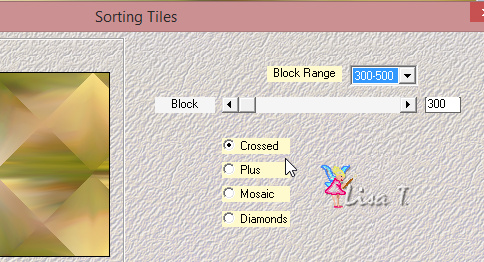
14
effects -> edge effects -> enhance more
15
layers -> duplicate
16
effects -> plugins -> Flaming Pear / Flexify 2
load the preset provided with the material
in case of problems with this preset, here are the settings
->
-21 / -47 / -67 / 89 / 33 / 30 / Input : equirectangular
/ Output : Mercator cross / Glue : Normal
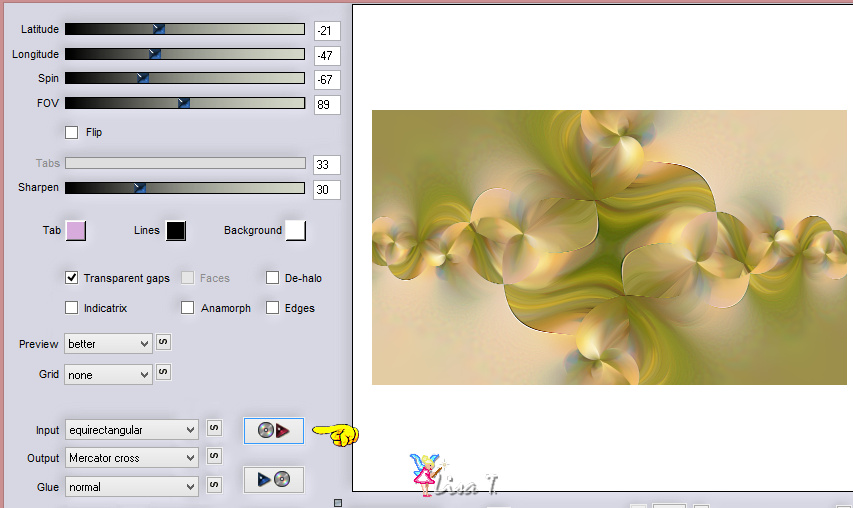
17
opacity of the layer : 50%
18
layers -> merge -> merge visible
19
effects -> plugins -> Unlimited 2 / Simple / Half
Wrap
20
selections -> load-save selection -> from disk / Nature_Tine
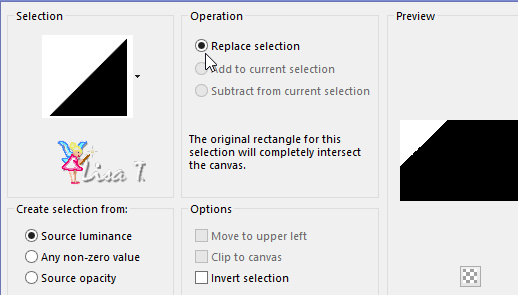
21
selections -> promote selection to layer
22
selections -> select none
23
effects -> plugins -> Unlimited 2 / Simple / Top
Left Mirror
24
activate Magic Wand Tool and select the middle (one click)
25
selections -> invert
26
effects -> plugins -> Carolaine and Sensibility /
CS_LDots

27
adjust -> shrapness -> high pass sharpen
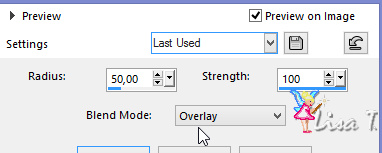
28
effects -> 3D effects -> drop shadow -> 0 / 0
/ 80 / 50 / black
29
selections -> select none
30
highlight layer « merged »
31
copy / paste CAL’s tube as new layer
don’t move it
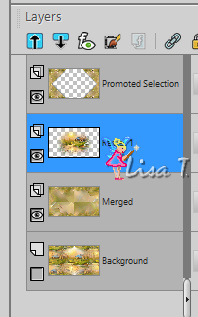
your layers palette should look like this
32
highlight bottom layer (Background)
33
layres -> view -> all
34
adjust -> blur -> gaussian blur / 30
35
edit -> COPY
36
image -> add borders -> check « symmetric » -> 2
pixels white
37
selections -> select all
38
image -> add borders -> check « symmetric » -> 35
pixels black
39
selections -> invert
40
edit -> paste into selection
41
effects -> plugins -> Unlimited 2 / Graphic Plus
/ Cross Shadow
change only the last two settings -> Intensity :
93 / Brightness : 118
42
selections -> promote selection to layer
43
selections -> invert
44
effects -> 3D effects -> drop shadow -> 0 / 0
/ 80 / 50 / black
45
selections -> select none
46
effects -> plugins -> AAA Frames / Texture Frame

47
open tube « texte_jewel_modifié » (original
Work art is provided if you wnat to use it)
48
copy / paste as new layer
49
place it wher you like
50
image -> add borders -> check « symmetric » -> 1
pixel white

Your tag is finished.
Thank you for following this tutorial
Don’t forget to sign (to avoid plagiarism) and save
file as… type JPEG

Don’t hesitate to send your creations
to Tine

It will be a real pleasure for her to show them in the
gallery at the bottom of the tutorial page
Don’t forget to indicate her your name and the adress
of your blog or site if you have one
If you want to receive Tine’s Newsletter, sign up
...


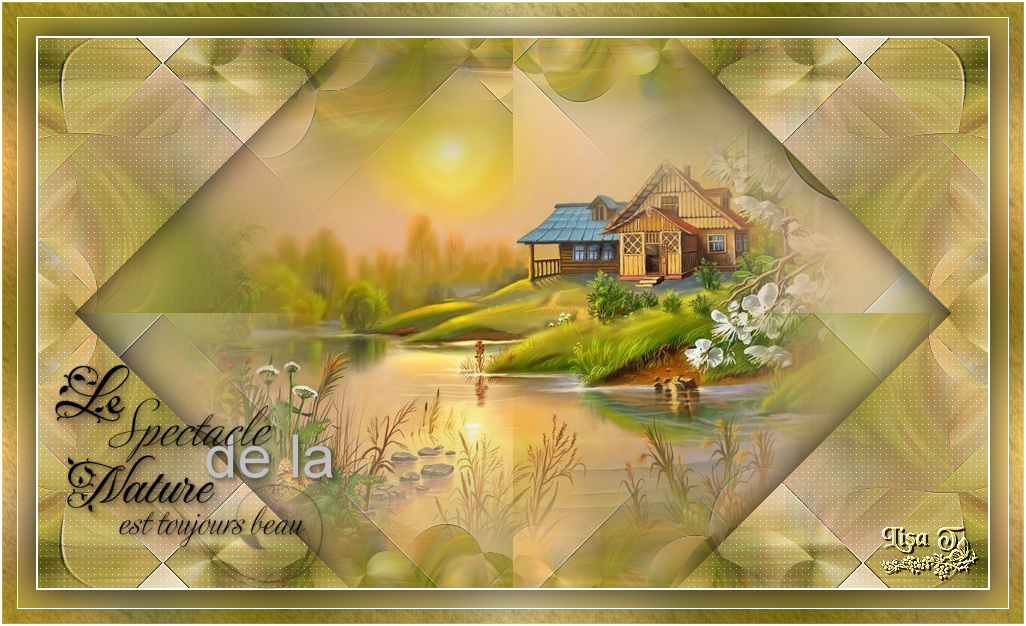
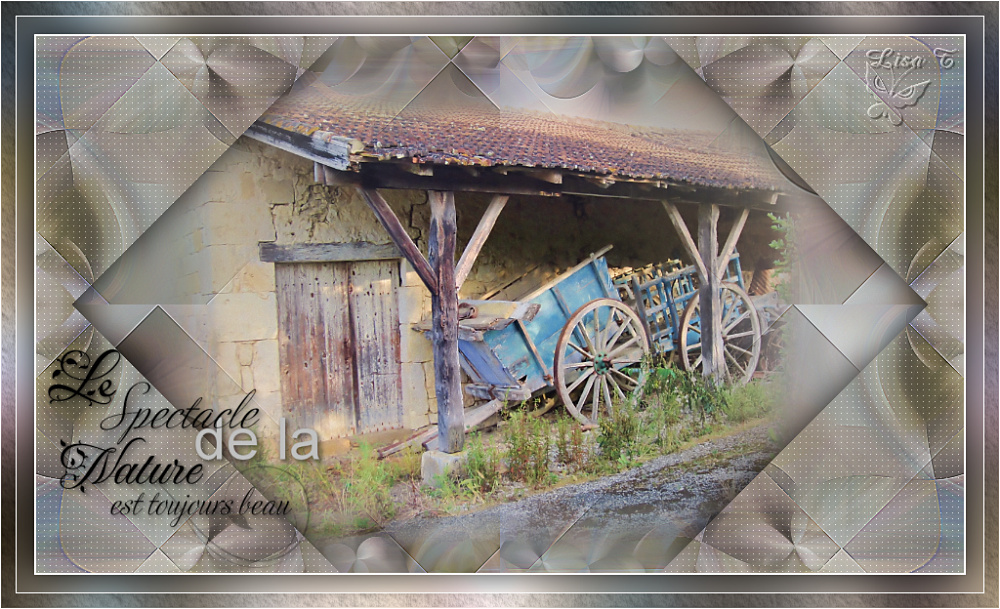
My tag with my misted landscape (©personal image)
Back to the boards of Tine’s tutorials
Board 1  Board
2 Board
2  board
3 board
3 

|