Lucia
I'm member of Tutorial Writers Inc

You can find the original tutorial HERE

Conditions of use of elements and tubes supplied
It is forbidden to modify or change the name, to take off the watermark or alter the tubes.
It is forbidden to share them in groups or to offer them on your site, blog or forum.
If you want to use them to create your tutorials, ask for the authorization to the authors.

The english translation is realized with PSP12

Filters used
Simple -> import in Unlimited
Penta.com -> import in Unlimited
Xero
All filters can be found HERE

Material
The color palette, the image -> open it in PSP
The mask -> open it in PSP and reduce it
2 selections -> Copy and paste in the selections file of “my PSP files”
The mask was created by Lula

The picture was found on the web
The selections are created by Tine
Color palette

Use the dropper tool to install the color directly in the material palette
Foreground color -> left click
Use the paintbrush to follow the steps
Grab it with the left click of your mouse

|
Step 1
File/new -> 900 X 500 pixels -> raster background, enable transparent
Selections / select all
Activate picture -> 08a745bd
Edit / copy / -> back on the tag -> Edit / paste into selection
Step 2
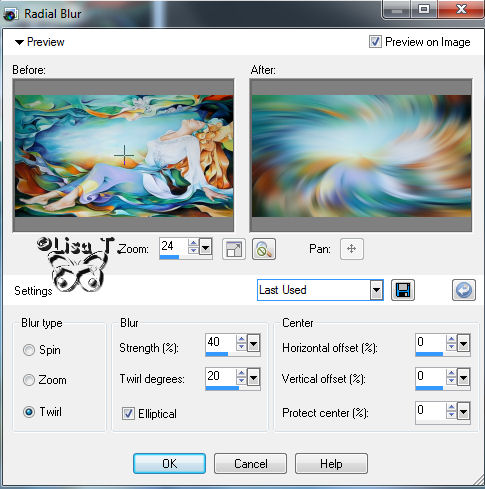
Adjust / blur / radial blur
Effects / image effects / seamless tiling

Layers / duplicate
Image / resize -> 85% -> disable : resize all layers
Edit / copy
Edit / paste as a new image
You can reduce the packground, wa are now going to work on a new image.
Step 3
Layers / new raster layer
Flood fill tool /fill with foreground color
Layer / new mask layer / from image
Find the mask -> mod_article 46299074_lula
Do not check the box : invert mask data
Layers / merge group
Effects / edge effects / enhance more
Image / add borders / 2 pixels / foreground color / symmetric checked
EDIT / COPY
You can reduce this file
Step 4
Activate the background image
Make sure to be placed àon the layer : Copy of raster 1
Layers / delete, answer YES to the question
Step 5
Effects / plugins / Unlimited / Simple -> diamonds
Effects / edge effects / enhance more
Step 6
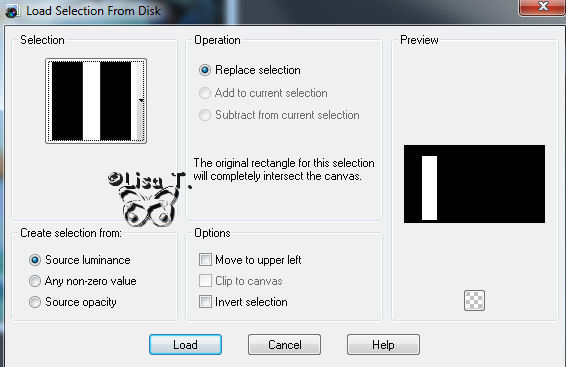
Selections / load / load selection from disk, and find the selection -> tine1_tag43_lucia
Selections / promote selection to layer
Selections / select none
Step 7
Effects / plugins / Unlimited / Penta.com -> color dot -> default regulations : 90-2-255-255-255
Effects / 3D effects / drop shadow -> black
Layers / duplicate
Image / mirror
Layers / merge down
Step 8
Edit / merge as a new layer
(The clipboard contains the image with the mask you copied on step 3)
Layers / arrange / move down
Effects / 3D effects / dropshadow
Vertical and horizontal : 0
Opacity : 100
Blur : 50
Color : black
Step 9
Layers / new raster layer
Selections / load / load selection from disk / find the selection : tine2_tag43_lucia
Activate the image 08a745bd
Edit / copy -> back on the tag -> Edit / paste into selection
Selections / select none
Adjust / brightness and contrast / clarify

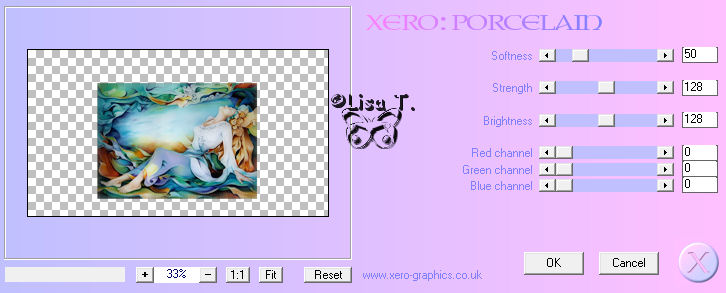
Effects / plugins / xero -> porcelain
Step 10
Image / add borders / 2 pixels / white color / symmetric checked
Image / add borders / 5 pixels / foreground color / symmetric checked
Selections / select all
Selections / modify / contract -> 7 pixels
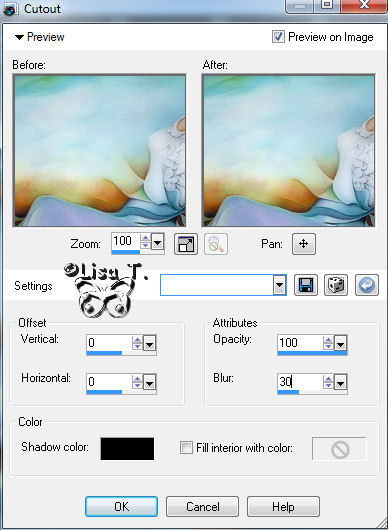
Effects / 3D effects / cutout
Selections / modify / expand -> 2 pixels
Selections / invert
Effects / edges effects /enhance more
Your tag is now finished ! Thank you for having realized it.
Don’t forget to sign. File / save as… / type : choose JPEG

Don’t hesitate to send your realizations to Tine

It will be a great pleasure for her to post them in her gallery

Don’t forget to leave your name, and the adress of your site or blog if you have one.
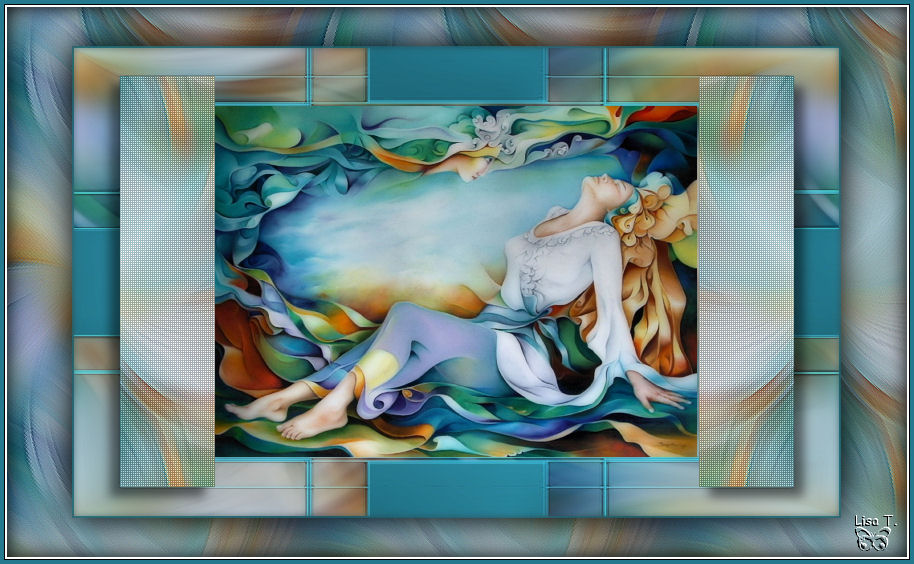
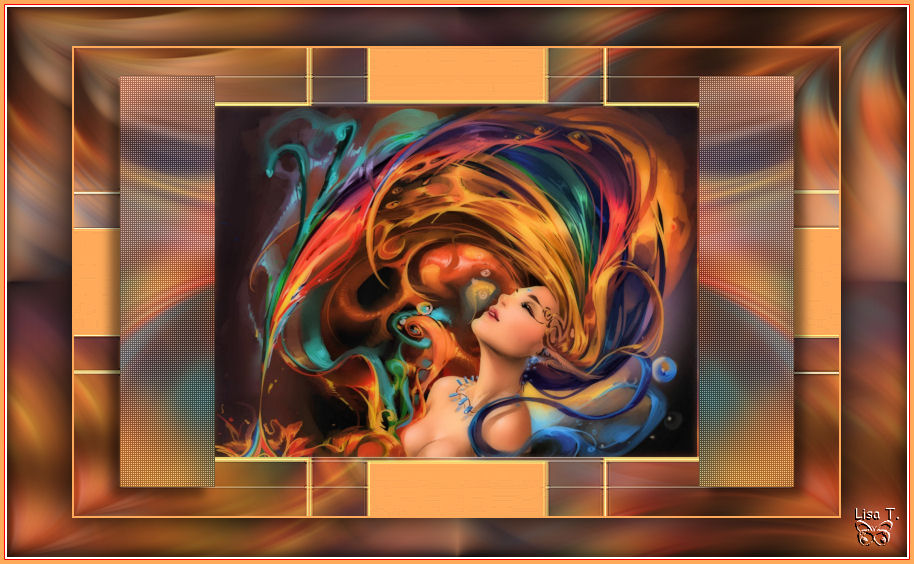
And here is my try with my tubes and pictures
Back to the boards of Tine's tutorials
board 1   board 2 board 2 

|