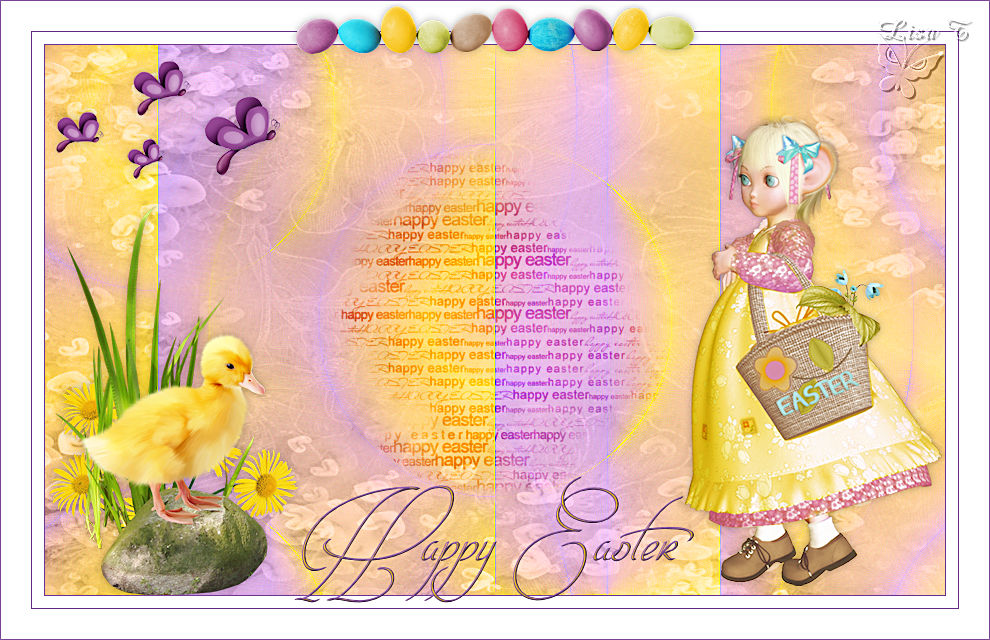
Happy
Easter
The original tutorial can be found HERE
Conditions of use of the material provided
It is forbidden to modifiy, change the name, take off the
watermarks or alter the tubes.
It is forbidden to share them in groups or offer them on
your site, blog or forum.
If you want to use them to create a tutorial, you must ask
the permission to the authors.

Material
5 tubes - 1 image - 1 selection (copy / paste into the folder « selections » of « Corel
PSP folder)
1 font - 1 color palette

scrap elements by Angie - Thank you
other tubes offered in sharing groups

Filters Used
Unlimited 2


translator’s note
I use PSPX9 to create my tag and write my translation
but this tutorial can be realized with another version
according to the version of PSP you use, the results might
be slightly differents
don’t hesitate to change the blend modes of the layers
according to your tubes and colors

Colors
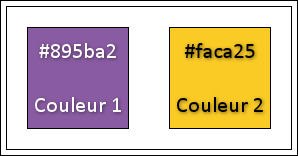
color 1 --> foreground color --> FG --> left click
--> #895ba2
color 2 --> background color --> BG --> right click
--> #faca25

Use this pencil to follow the steps
hold down left click to grab it and move it


Realization
1
in the materials palette, prepare a radial gradient
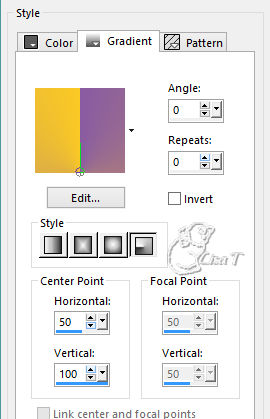
open a new transparent image 900 * 550 pixels
2
flood fill with the gradient
3
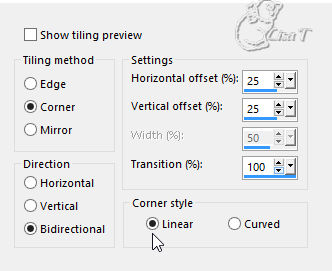
effects -> image effects -> seamless tiling
4
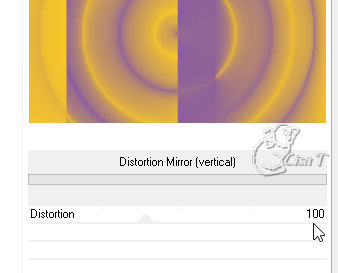
effects -> plugins -> Ulimited 2 -> Tile & Mirror
/ Distortion Mirror (vertical)
5
effects -> image effects -> seamless tiling as before
(don’t change the settings)
6
effects -> edge effec ts -> enhance more
7
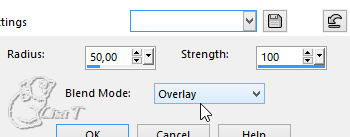
adjust -> sharpness -> high pass sharpen
8
layers -> new raster layer
9
selections -> select all
10
open the Image
11
copy / paste into selection
12
selections -> select none
13
blend mode of the layer : Luminance (Legacy) - opacity :
78%
14
adjust -> sharpness -> unsharp mask

15
selections -> load-save selection -> from disk -> Happy_Easter_Tine

17
activate the tube « Freebie_Easter »
18
copy / paste into selection
19
effects -> image effects -> offset

20
blend mode of the layer : Overlay
21
layers -> duplicate
22
layer’s opacity : 70%
23
selections -> select none
24
highlight the tube « scrapangie_easter_secret_ele174 » (duck)
25
copy / paste as new layer on your work
26
effects -> image effectgs -> offset -> -322 /
-81 - custom and transparent checked
27
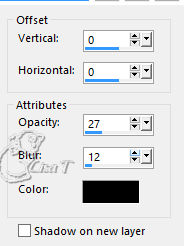
effects -> 3D effects -> drop shadow -> 0 / 0
/ 27 / 12 / black
28
highlight « scrapangie_easter_secret_ele150 » (character)
29
copy / paste as new layer on your work
30
effects -> image effects -> offset -> 319 / -30
31
effects -> 3D effects -> drop shadow -> 0 / 0
/ 27 / 12 / black
32
highlight Butterflies tube
33
copy / paste as new layer on your work
34
effects -> image effects -> offset -> -327 / 200
35
effects -> 3D effects -> drop shadow -> 0 / 0
/ 27 / 12 / black
36
image -> add borders ->...
1 pixel color 1
12 pixels color white
1 pixel color 1
30 pixels color white
1 pixel color 1
37
highlight « scrapangie_easter_secret_ele300 » (eggs)
38
copy / paste as new layer on your work
39
effects -> image effects -> offset -> 0 / 290
40
effects -> 3D effects -> drop shadow -> 0 / 0
/ 27 / 12 / black
41
in materials palette, set colors 1 and 2 as FG and BG colors
activate Text Tool

write « Happy Easter » (or another
text of your choice)
42
layers -> convert to raster layer
43
move this text where you like
44
effects -> 3D efects -> inner bevel

45
layers -> merge -> merge all (flatten)

Your tag is finished.
Thank you for following this tutorial
Don’t forget to sign (to avoid plagiarism) and save
file as… type JPEG

Don’t hesitate to send your creations
to Tine

It will be a real pleasure for her to show them in the
gallery at the bottom of the tutorial page
Don’t forget to indicate her your name and the adress
of your blog or site if you have one
If you want to receive Tine’s Newsletter, sign up
...


My tag with my tubes


Back to the boards of Tine’s tutorials
Board 1  Board 2 Board 2  board 3 board 3 

|