

The original tutorial can be found HERE

Conditions of use of the material provided
It is forbidden to modifiy, change the name, take off the
watermarks or alter the tubes.
It is forbidden to share them in groups or offer them on
your site, blog or forum.
If you want to use them to create a tutorial, you must ask
the permission to the authors.

Material
2 tubes - 2 fonts (first letter with « BrodkScript
and other letters with « Delicatta-Regular »)
1 mask - 2 selections

copy / paste selections into the folder « selections » of
Corel PSP folder
open the mask and minimze it to tray
duplicate the tubes and work with the copies
don’t hesitate to change the blend modes and the
opacities of the layers according to the colors you choose
snowman tube by Cal
cake by Tatie (no
sharing allowed)
selections - texts and mask by Tine
Hints and Tips
TIP 1 -> if you don’t
want to install a font -->
open it in a software as « Nexus Font » (or
other font viewer software of you choice)
as long as both windows are opened (software and font), your
font will be available in your PSP
TIP 2 -> from PSPX4,
in the later versions of PSP the functions « Mirror » and « Flip » have
been replaced by -->
« Mirror » --> mirror -> mirror horizontal
« Flip » --> mirror -> mirror vertical
Filters Used
- Mehdi -
* Seamless Border 2 *
* Edges FX *
* Sorting Tiles *
* Weaver *
- Carolaine and Sensibility -
* CS-HLines *
* CS-DLines *

Colors
colors 1 -> #5d7291
color 2 -> #c1dff9
colors 3 -> #f1f1f1
prepare ar sunburst gradient into the materials palette
color 1 as FG color and color 2 as BG color

translator’s note
Tine used PSPX2 to create this tutorial and her tag
I used PSP2018 to create my tag and write my translation
but this tutorial can be realized with another version
according to the version of PSP you use, the results might
be slightly differents
don’t hesitate to change the blend modes of the layers
according to your tubes and colors
Use the pencil to follow the steps
hold down left click to grab it and move it
 |
Realization
1
open a new transparent image 900 * 550 pixels
2
flood fill with the gradient
3
effects -> plugins -> Mehdi -> Seamless Border
2

4
effects -> plugins -> Mehdi -> Edges FX / color
3

5
adjust -> sharpness -> sharpen more
6
layers -> duplicate
7
effects -> plugins -> Mehdi -> Sorting Tiles

8
adjust -> sharpness -> sharpen
9
effects -> plugins -> Mehdi -> Weaver

10
effects -> edge effects -> enhance
11
blend mode of the layer : Soft Light
12
highlight Raster 1
13
layers -> new raster layer
14
set color 1 as FG color into the materials palette
15
flood fill layer with color 1
16
layers -> new mask layer -> from image
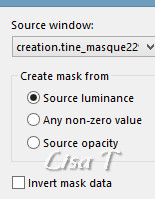
17
layers -> merge -> merge group
18
blend mode of the layer : Multiply
19
highlight Raster 1
20
selections -> load/save selection -> from disk -> « Noël
Gourmand 1 »
21
selections -> promote selection to layer
22
effects -> plugins -> Carolaine and Sensibility /
CS-HLines --> 3 / 0 / 10
23
adjust -> sharpness -> high pass sharpen

24
selections -> select none
25
effects -> image effects -> seamless tiling / default
settings

26
edit -> copy specila -> copy merged
27
image -> add borders -> tick « symmetric » -> ...
1 pixels color 1
2 pixels white
1 pixels color 1
28
selections -> select all
29
image -> add borders -> UNtick « symmetric » -> ...

30
selections -> invert
31
edit -> paste into selection
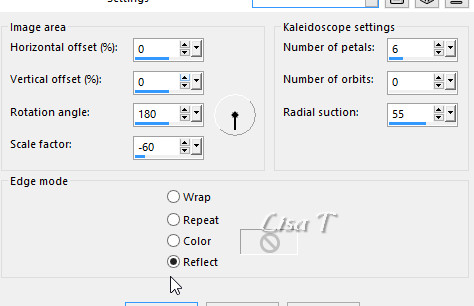
32
effects -> reflection effects -> Kaleidocope
33
selections -> invert
34
effects -> 3D effects -> drop shadow -> 0 / 0
/ 100 / 65 / color 2
35
selections -> select none
36
image -> add borders -> tick « symmetric » -> 1
pixels color 1
37
selections -> load/save selection -> from disk -> « Noël
Gourmand 2 »
38
effects -> plugins -> Carolaine and Sensibility /
CS-DLines --> 15 / 5
39
sqelections -> promote selection to layer
40
effects -> 3D effects -> outer bevel

41
effects -> 3D effects -> drop shadow -> 0 / 0
/ 50 / 25 / color 1
42
selections -> select none
43
open the tube « CAL-064-1222815 redimensionné »
44
copy / paste as new layer
45
enable the Pick Tool (key « K » on
your keyboard) -> mode Scale

hit key « M » to disable the tool
(or tick on Pan tool )
46
effects -> 3D effects -> drop shadow -> 2 / 15
/ 50 / 25 / black
47
open the tube « Tatie_242146_ce4 redimensionné »
48
copy / paste as new layer
49
erase the watermark
50
enable the Pick Tool -> Position X : 669 / Position
Y : 295

disable the Tool
51
effects -> 3D effects -> drop shadow -> 2 / 15
/ 50 / 25 / black
52
copy / paste the texts tubes and place them where you like
note : to change White to Black -> image -> negative
image
53
layers -> merge -> merge down
54
effects -> 3D effects -> drop shadow -> 1 / -1
/ 65 / 22 / black
55
layers -> merge -> merge all (flatten)
My tag with my tubes

Your tag is finished.
Thank you for following this tutorial
Don’t forget to sign (to avoid plagiarism) and save
file as… type JPEG
Don’t hesitate to send your creations
to Tine

It will be a real pleasure for her to show them in the
gallery at the bottom of the tutorial page
Don’t forget to indicate her your name and the adress
of your blog or site if you have one
If you create a version using tubes under license, pleas
add on your tag the artit’s name, his(her) web site’s
adress
and your license number
If you want to receive Tine’s Newsletter, sign up
...

Back to the boards of Tine’s tutorials
Board 1  Board
2 board
3 Board
2 board
3

|