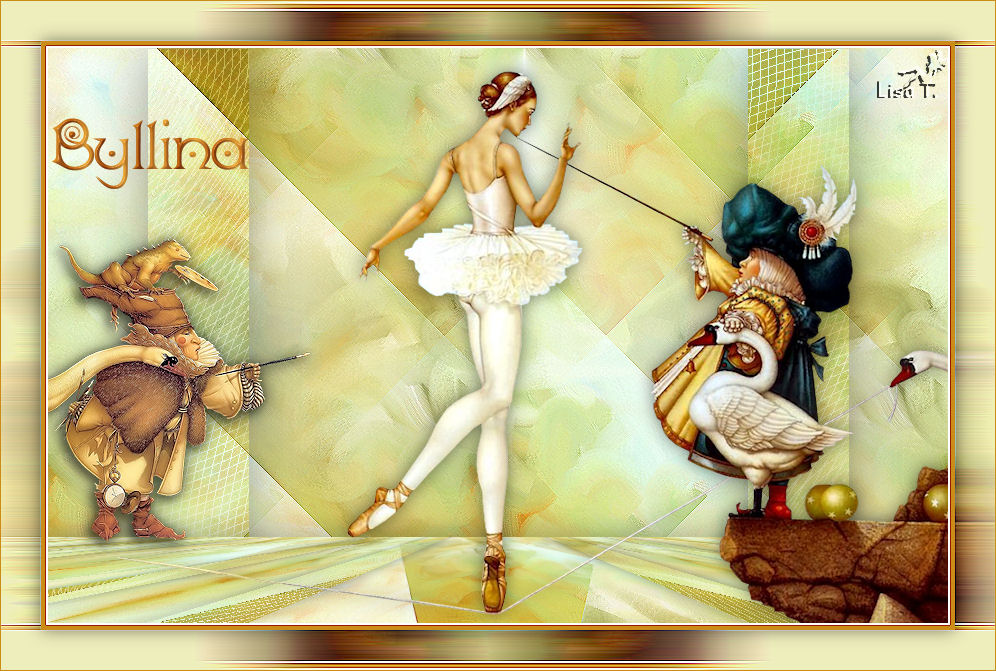
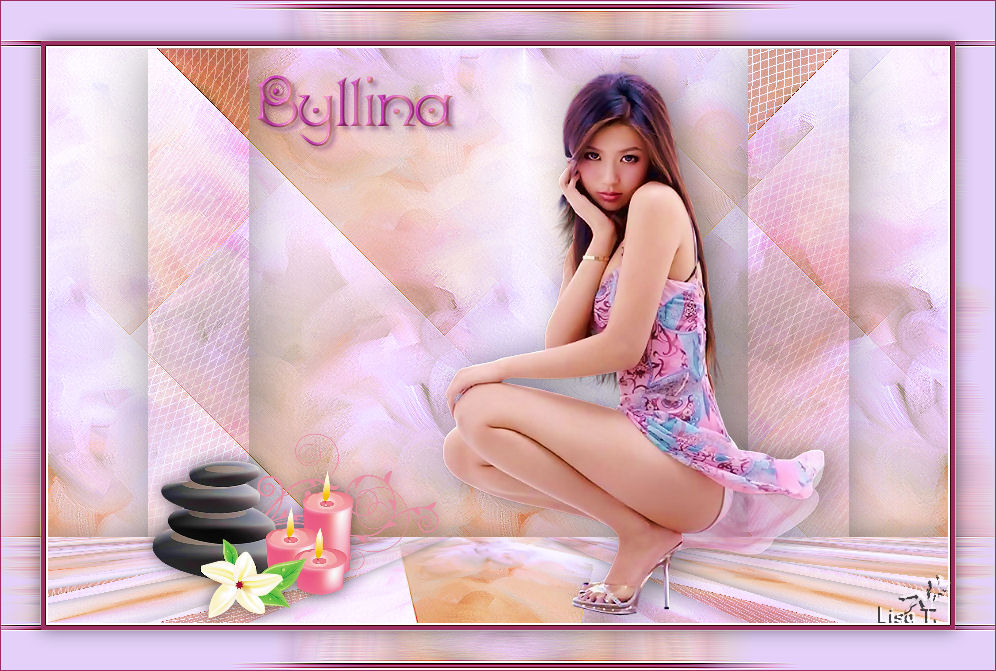
Byllina
The original tutorial can be found HERE
Tine wishes to Thank Byllina for her translations in spanish

I am member of TWInc
This tutorial is protected

Conditions of use of the material provided
It is forbidden to modifiy, change the name, take off the watermarks or alter the tubes.
It is forbidden to share them in groups or offer them on your site, blog or forum.
If you want to use them to create a tutorial, you must ask the permission to the authors.
Material
1 colors palette
4 tubes/duplicate them and close the originals
1 background
1 selection/copy it into the special folder “selections” of “My PSP Files”

the tube “fantasia197” was created by Claudia Viza

the tube « fantaisie » was found on the web
Tine does not know who created it
the 2 tubes “text” and the selection were created by Tine
the background wad found on the web
Thank you to the tubers
Filters Used
Simple/import in Unlimited 2
Background Designers/import in Unlimited 2
Tramages/import in Unlimited 2
Mura’s Meister

Use the paintbrush to follow the steps
left click to grab it
 |

use the dropper tool to place the color directly in the materials palette
color 1 -> foreground -> #cc8d18 -> left click
color 2 -> background -> #eeeebc ->right click
color 3 -> #ffffff, will be used when adding borders
Step 1
open the background (fond_Bylinna)
effects/plugins/Unlimited/Simple/Diamonds
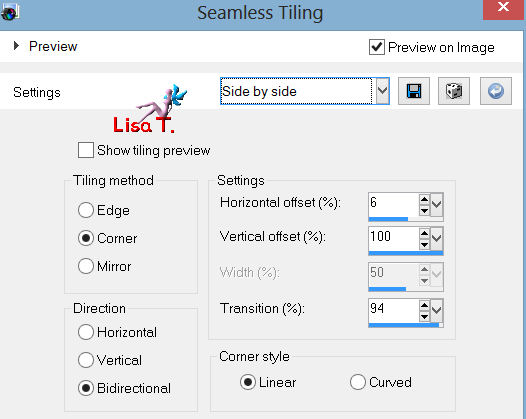
effects/image effects/seamless tiling/side by side
effects/edge effects/enhance
Step 2
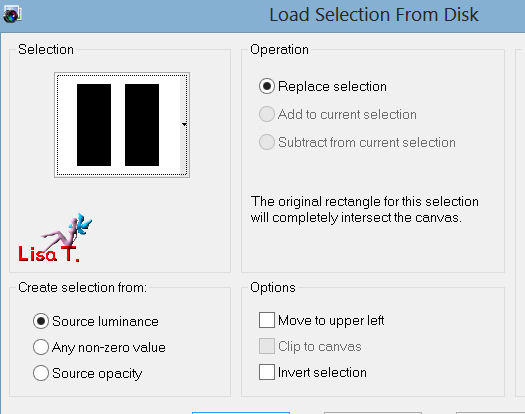
selections/load-save selection/from disk
find “tine-byllina”
selections/promote selection to layer
selections/select none
Step 3
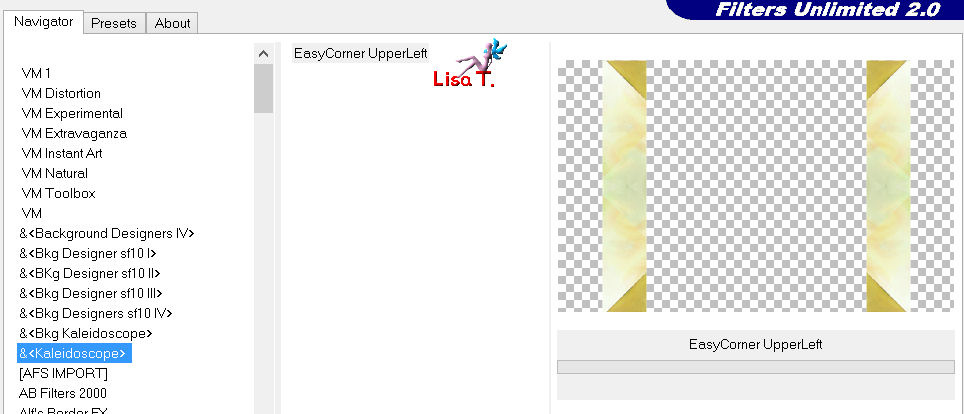
effects/plugins/Unlimited/&<Kaleidoscope>/EasyCorner UpperLeft
effects/plugins/Unlimited/Tramages/Wire Mesh
settings -> 237 / 227 / 179 / 26
layers/properties : blend mode->Multiply
effects/3D effects/drop shadow/black
layers/merge/merge visible
Step 4
layers/duplicate
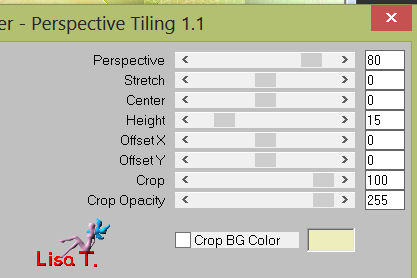
effects/plugins/Mura’s Meister/Perspective Tiling/height->15
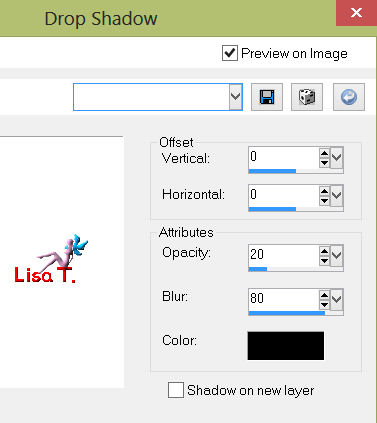
effects/3D effects/drop shadow
0 / 0 / 35 / 50 / black
Step 5
activate the tube (tubeclaudiaviza-fantasia197)
edit/copy – back on your work – edit/paste as a new layer
image/resize/disable “resize all layers”/85%

effects/image effects/offset
effects/3D effects/drop shadow
0 / 0 / 50 / 25 / black
Step 6
activate the tube “fantaisie”
edit/copy – back on your work – edit/paste as a new layer
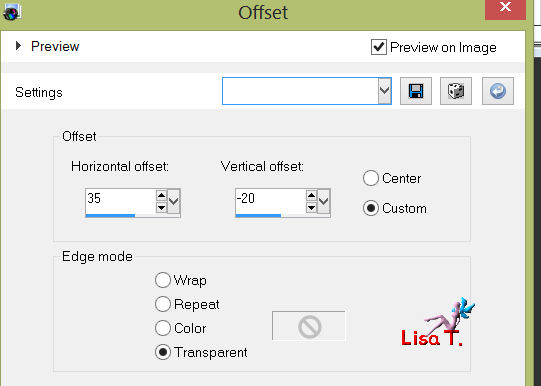
effects/image effects/offset
horizontal -> -317
vertical -> -58
enable custom and transparent
effects/3D effects/drop shadow
0 / 0 / 50 / 25 / black
Step 7
image/add borders/enable symmetric
2 pixels color 3
5 pixels color 1
activate the magic wand tool

select the white border
effects/edge effects/enhance
selections/select none
Step 8
image/add borders/enable symmetric
40 pixels color 2
select that border with the magic wand
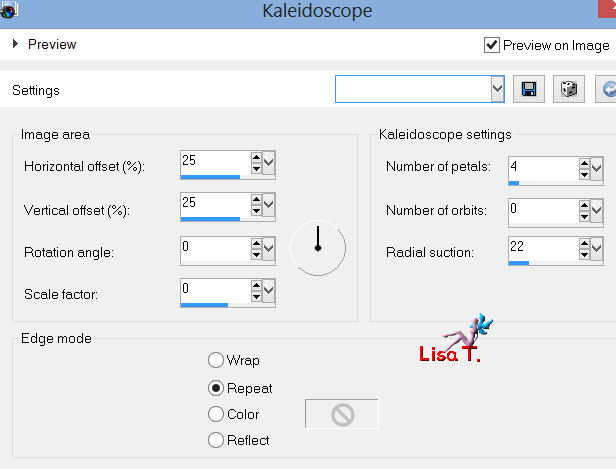
effects/reflection effects/kaleidoscope
Step 9
keep the selection active
effects/distortion effects/wind/from the right/100
and again but from the left
effects/edge effects/enhance
Step 10
selections/invert
effects/3D effects/drop shadow
0 / 0 / 50 / 25 / black
selections/select all
image/add borders/enable symmetric
1 pixel color 1
selections/select none
Step 11
if you work with a version earlier than PSPX2,
skip step 11 and go to step 12
activate the tube (texte1_byllina)
edit/copy – back on your work – edit/paste as a new layer
layers/properties/click on the tab “layer styles”
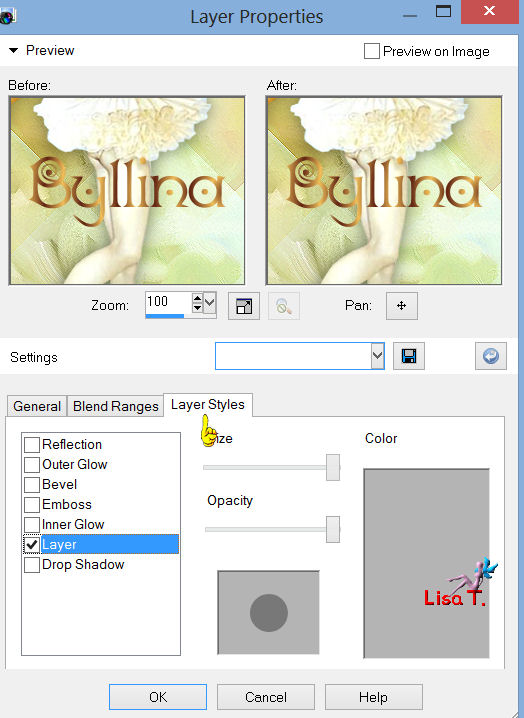
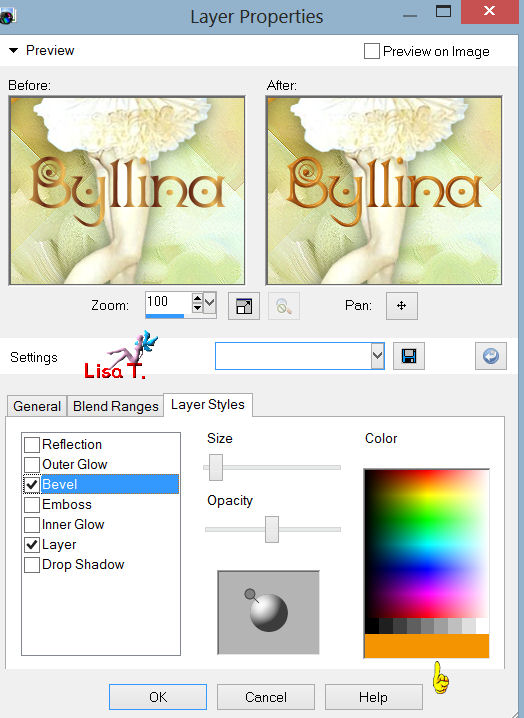
check “bevel” then select a color
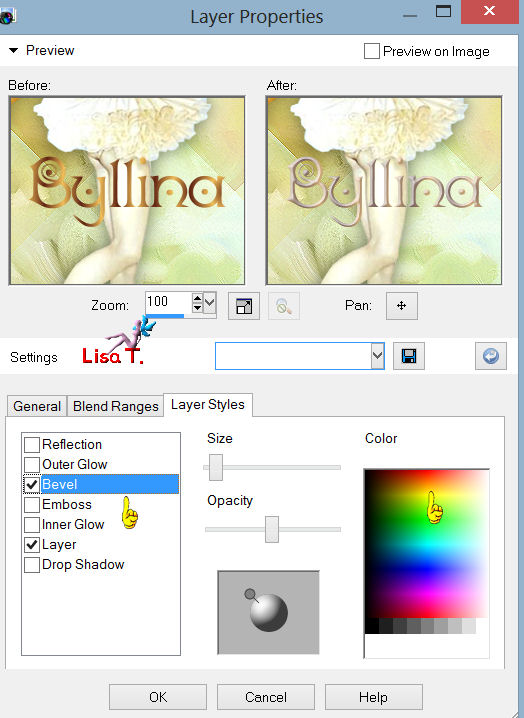
the chosen color bar will appear at the bottom
effects/3D effects/drop shadow
4 / 4 / 30 / 7 / black
apply the same shadow once more
move the text where you like
layers/merge/merge all (flatten)
Step 12
only if you skipped step 11
activate the tube “text2_byllina”
edit/copy – back on your work – edit/paste as a new layer
effects/3D effects/drop shadow
4 / 4 / 30 / 7 / black (twice)
move the text where you like
layers/merge/merge all (flatten)

Your tag is now finished.
Thank you for having realized it
Don’t forget to sign and save file as… type JPEG
Don’t hesitate to send your creations to Tine

It will be her pleasure to show them in the gallery at the bottom of the tutorial page
Don’t forget to indicate her your name and the adress of your blog or site if you have one
If you want to be informed about Tine's new tutorials
join her newsletter

My try with my tubes
Back to the boards of Tine's tutorials
board 1   board 2 board 2

|