Animabelle

The original tutorial can be found HERE

This tutorial is dedicated to Chatal, owner of the site Animabelle

I am member of TWInc
This tutorial is protected

Conditions of use of the material provided
It is forbidden to modifiy, change the name, take off the watermarks or alter the tubes.
It is forbidden to share them in groups or offer them on your site, blog or forum.
If you want to use them to create a tutorial, you must ask the permission of the authors.
Material
1 colors palette
3 tubes/duplicate them and close the originals
1 mask/open it with PSP and reduce it
1 background
1 gradient/copy and paste into the special folder of “My PSP Files”
a font, used to write the text : Collective O (BRK)

the tubes “oiseau baroque” and “souricette” were created by Animabelle

the mask, the gradient ant the tube “text” were created by Tine
the background was found on the Net
Thank you to the tubers
Filters Used
Unlimited 2
Mura’s Meister
Filter Factory Gallery E (import in Unlimited)
click on the banner to see Tine's Filters

Use the paintbrush to follow the steps l
Left click to grab it
 |
Colors used

use the dropper tool to place the colors directly in the materials palette
color 1 -> #a1571e color 2 -> #7f7323 color 3 -> #f6eab4 color 4 -> #ffffff (white)
Step 1
activate the background “fond_animabelle”
adjust/sharpness/unsharp mask

step 2
open the materials palette, gradient tab
look for “degrade_animabelle”
settings : linear – angle 135 – repeats 2

Step 3
layers/new raster layer
flood fill tool/paint with the gradient
adjust/blur/radial blur

Step 4
layers/new mask layer/from image
find “creation.tine_masque104”
enable “source luminance”
effects/image effects/seamless tiling

Step 5
effects/plugins/<I.CNET Software>Filters Unlimited 2.0/Convolutions Filters/Emboss (strong)/
206 (default settings)
layers/merge/merge group
effects/texture effects/weave

Step 6
activate the linear gradient
change fot radial style
angle 0 - repeats 0
horizontal : 50 and vertical : 100

layers/new raster layer
flood fill tool/paint with the gradient
effects/plugins/Unlimited 2/Filter Factory Gallery E/Gradient-->Spokes Ratio Maker/107
Step 7
layers/properties
blend mode : Multiply opacity : 35
adjust/sharpness/sharpen more
effects/distortion effects/polar coordinates
enable “rectangular to polar”, ans “repeat”

Step 8
layers/duplicate
set the blend mode on Normal and the opacity on 50
effects/plugins/Mura’s Meister/Perspective Tiling/Height on 20

effects/3D effects/drop shadow -> 0 / 0 / 75 / 35 / black
Step 9
your layers palette should be like that

activate the layer “raster 1”
effects/distortion effects/polar coordinates
enable “rectangular to polar” and “wrap”
Step 10
Activate the first layer (copy of raster 1)
layers/new raster layer
selection tool/custom selection


open the radial gradient and check the box “invert”
flood fill tool/paint the selection with the gradient
Step 11
selections/modify/contract/15
edit/cut
selections/invert
selections/float
adjsut/blur/gaussian blur/5
keep the selection active
Step 12
selections/modify/select selection borders
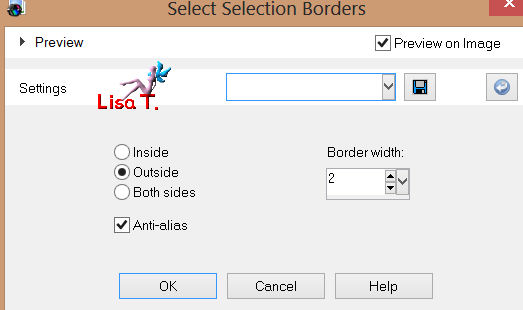
in the materials palette, set background color on color 4
flood fill tool/paint the selection (right click) with that color
selections/select none
Step 13
selections/select all
selections /float
selections/defloat
effects/3D effets/drop shadow -> 0 / 0 / 45 / 30 / black
selections/select none
Step 14
activate the tube “9_baroque_animabelle”
edit/copy – back on your tag – edit/paste as a new layer
image/mirror
image/resize/disable “resize all layers”/50%
effects/image efects/offset/ -237 / 67

efects/3D effects/drop shadow -> 0 / 0 / 35 / 20 / black
Step 15
activate the tube “souricette_tine_par_animabelle”
edit/copy – back on your tag – edit/paste as a new layer
image/resize/70%
effects/image effects/offset/ 225 / 30
enable “custom” and “transparent”
effects/3D effects/drop shadow/ 0 / 0 / 35 / 20 / black
Step 16
activate the tube “souricette” again and select raster 2 (butterfly)
edit/copy – back on your tag – edit/paste as a new layer
effects/iamge effects/offset/ -325 / 145
enable “custom” and “transparent”
effects/3D effects/drop shadow -> 3 / -2 / 67 / 14 / black
Step 17
activate the tube “texte_animabelle”
edit/copy – back on your tag – edit/paste as a new layer
place the image at your convenience
effects/3D effects/drop shadow/ 1 / 1 / 85 / 2 / black
Step 18
image/add borders/enable symmetric
10 pixels color 4 (white)
5 pixels black color
activate the magic wand tool with the following settings

select the black border
flood fill tool/paint with the radial gradient
adjust/sharpness/sharpen more
selections/select none
Step 19
image/add borders/enable symmetric
20 pixels -> white
select that border
effects/3D effects/drop shadow/ 0 / 0 / 74 / 19 / black
adjust/sharpness/sharpen more
selections/select none
Step 20
image/add borders/enable symmetric
5 pixels -> black
select that border
activate the radial gradient, and uncheck the box “invert”
flood fill tool/paint with the gradient
adjust/sharpness/sharpen more
effects/3D effects/drop shadow/ 0 / 0 / 74 / 19 / black
selections/select none

Your tag is now finished.
Thank you for having realized it
Don’t forget to sign and save file as… type JPEG
Don’t hesitate to send your creations to Tine

It will be her pleasure to show them in the gallery at the bottom of the tutorial page
Don’t forget to indicate her your name and the adress of your blog or site if you have one
if you want to be informed about Tine’s new tutorials
 join her newsletter join her newsletter

My try with one of my tubes (the cat)
and a tube created by Animabelle (the mouse)

Back to the boards of Tine's tutorials
board 1   board 2 board 2

|