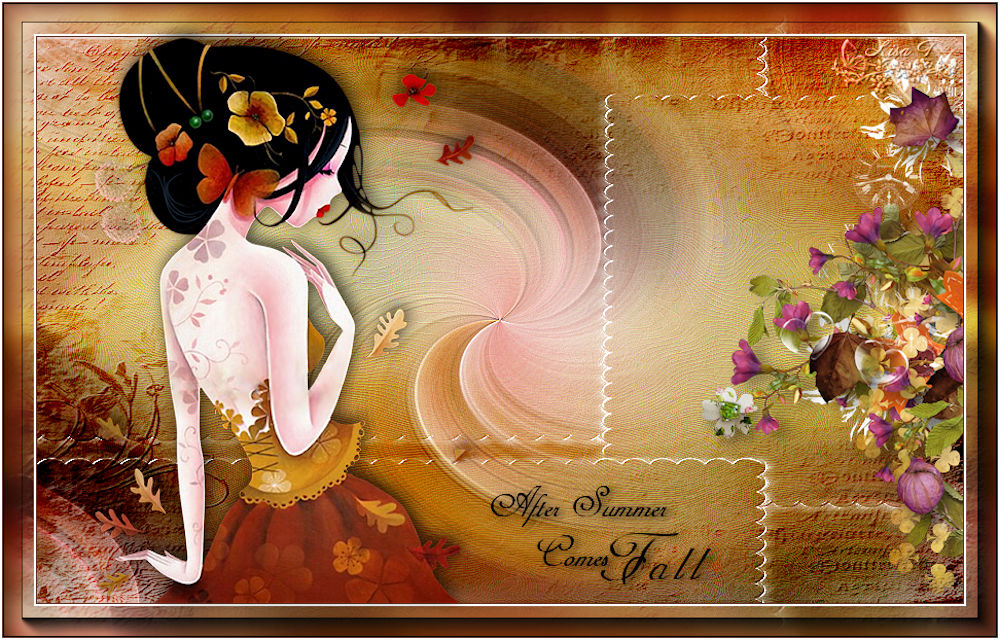
After
Summer comes Fall

The original tutorial can be found HERE


Conditions of use of the material provided
It is forbidden to modifiy, change the name, take off the
watermarks or alter the tubes.
It is forbidden to share them in groups or offer them on
your site, blog or forum.
If you want to use them to create a tutorial, you must ask
the permission to the authors.

Material
1 color palette - 1 backgroune - 4 tubes - 2 masks
tubes
character tube by Cal

border flowers by Florju
thank you to the tubers

Filters Used
AAA Frames / Foto Frame


translator’s note
I use PSPX9 to create my tag and write my translation
but this tutorial can be realized with another version
according to the version of PSP you use, the results might
be slightly differents
don’t hesitate to change the blend modes of the layers
according to your tubes and colors
save your work often
duplicate the tubes, misted images, backgrounds... and work
with the copies
open the masks and minimize them to tra y
Colors

color 1 --> foreground color --> FG --> left click
--> #ffffff
color 2 --> background color --> BG --> right click
--> #5c2a1a
don’t hesitate to change colors and blend mode or opacities
of your layers, to match with your tubes

Material


Use the pencil to follow the steps
hold down left click to grab it and move it


Realization
1
open « Belscrap_Little witch_Pap II »
note : if you use another image,
resize to 900 * 550 pixels
adjust -> blur -> gaussian blur -> 12
effects -> edge effects -> enhance more
edit -> repeat « enhance more »
2
copy / paste as new layer « CAL-995-062016 »
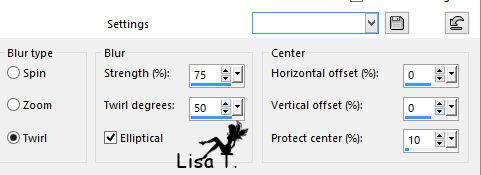
adjust -> blur -> radial blur

effects -> image effects -> seamless tiling / default
settings
effects -> edge effects -> enhance more
3
layers -> new raster layer
flood fill with color 1
layers -> new mask layer -> from image -> mask
165 -> check « invert mask data »

adjust -> sharpness -> unsharp mask

layers -> merge -> merge group
4
layers -> new raster layer
flood fill with color 2
layers -> new mask layer -> from image -> uncheck « invert
mask data » -> choose mask « creation.tine_masque164 »
adjust -> sharpness -> high pass sharpen

layers -> merge -> merge group
blend mode of the layer : burn
5
image -> add borders -> 1 pixel color 2 -> check « symmetric »
edit -> copy
image -> add borders -> 2 pixels color 1 -> check « symmetric »
selections -> select all
6
image -> add borders -> 30 pixels color 2 -> check « symmetric »
selections -> invert
edit -> paste into selection
selections -> promote selection to layer
7
keep selection active
adjust -> blur -> gaussian blur / 12
effecvts -> plugins -> AAA Frames / Foto Frame

adjust -> sharpness -> high pass sharpen as
before (don’t change settings)
selections -> select none
image -> add borders -> 1 pixel color 2
image -> add borders -> 2 pixels color 1
8
copy / paste as new layer « CAL-995-062016 »
image -> mirror
image -> resize -> uncheck « resize all
layers »

9
effects -> image effects -> offset

erase the watermark with the eraser tool

adjust -> sharpness -> sharpen
effects -> 3D effects -> drop shadow -> -5 / 3
/ 70 / 22 / black
10
copy / paste as new layer « florju_warmautumn_border(2) »
effects -> image effects -> offset -> 321 / -6
copy / paste as new layer the text tube (choose the one
you like best)
place it where you want
layers -> merge -> merge all (flatten)

Your tag is finished.
Thank you for following this tutorial
Don’t forget to sign (to avoid plagiarism) and save
file as… type JPEG
if you create a tag with a licensed tube
thank you to indicate the © name of the tuber, the
link to his(her) site and your license number

Don’t hesitate to send your creations
to Tine

It will be a real pleasure for her to show them in the
gallery at the bottom of the tutorial page
Don’t forget to indicate her your name and the adress
of your blog or site if you have one


If you want to receive Tine’s Newsletter, sign up
...


Back to the boards of Tine’s tutorials
Board 1  Board 2 Board 2  board 3 board 3 

|