Tutorial
91

You will find the original tutorial Here
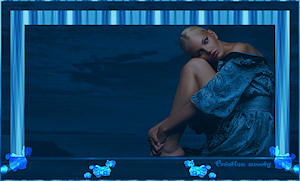

Sweety received the permission of the tubers to use their
tubes.
You can find the banners of these tubers in the left column
of her blog, under the heading "autorisations"

some of the tubes Sweety uses were received in sharing groups
or found on the web
if one of them is your property, please let us know
a link to your site will be added
they are provided as « single-use » for
this tutorial
you are not allowed to share or used them for another purpose.
you are not allowed to present it on your site, blog or forum
This tutorial is a personal creation,
any resemblance with another one would be pure coincidence
without the permission of Sweety

Thank you to the tubers for their great job
they make our creations possible

translator’s note : This translation is my property,
it is strictly forbidden to copy or distribute it on the
Net
Thanks to Sweety for her kind permission
Sweety works with PSPX2, I work with PSPX9, but it is possible
to use another version.
I never use tubes without the tuber‘s signature !!
they are ALWAYS stolen tubes
Please respect the tuber ‘s work, and do like
me. Thank you !
have fun !!

Material
1 color palette - 7 selections (place them in the foder « selections » of
your PSP folder)
2 decoration tubes (type .psp and .png)
not provided : a landscape image
a character tube and a decoration tube (tubes used by sweety
is signed by Logane)


Plugins
Simple - AP 01 [Innovations] - Bordure Mania - Unplugged
X (VanDerLee) - AAA Frames

Thank you to Tine for her permission to use her filters page


Colors
foreground color -> FG -> color 1 -> #debea8
background color -> BG-> color 2 -> #be71a2
Pick up in your landscape tube 2 colors you like
you will need about 1 hour to create your tag (not counting
the time to choose your tubes)
according to the version of PSP you use, you might obtain
results slightly different from the example

Use the pencil to follow the steps
hold down left click of your mouse to grab it and move it


Realization
1
open a new transparent image 900 * 600 pixels
selections -> select all
copy / paste into selection the landscape tube
selections -> select none
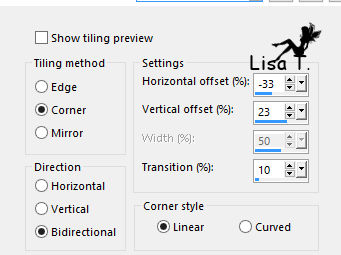
effects -> image effects -> seamless tiling
adjust -> blur -> radial blur

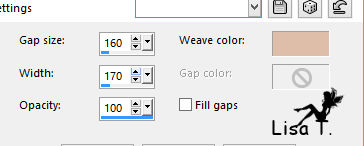
effects -> terxture effects -> wave
effects -> edge effects -> enhance
2
effects -> Simple -> Blintz
layers -> duplicate - image -> mirror
-> mirror horizontal
opacity of the layer : 50%
layers -> merge -> merege down
layers -> duplicate - image -> mirror -> vertical
mirror
blend mode of the layer : overlay
3
selections -> load selection -> from disk -> selection
#1
effects -> plugins ->
ap 01[Innovations] / Lines Silverlining
settings RGB as you like (matching your colors)

effects -> 3D effects -> drop shadow -> 0 / 0
/ 60 / 10 / black
selections -> select none
selection tool / custom selection -> T : 160 /
L : 238 / B : 440 / R : 658

layers -> new raster layer
flood fill with color 1
selections -> modify -> contract -> 5 pixels
DELETE
selections -> modify -> contract -> 10 pixels
flood fill with color 1
selections -> modify -> contract -> 5 pixels
DELETE
keep selection active
4
layers -> new raster layer
copy / paste into selection the landscape image
layers -> arrange -> move down
effects -> 3D effects -> drop shadow -> 0 / 0
/ 60 / 20 / black
selections -> select none
highlight Raster 2
layers -> merge -> merge down
layers -> new raster layer
selections -> load selection -> from disk -> selection
#2
flood fill selection with color 1
selections -> select none
5
your layers palette looks like this

Raster 2 is highlighted
selections -> load selection -> from disk -> selection
#3
DELETE
layers -> arrange -> move down
selections -> select none
copy / paste as new layer « Deco 1 »
don’t move it
colorize according to your own colors if necessary
a tip to colorize :
at the begining, your tube looks like this
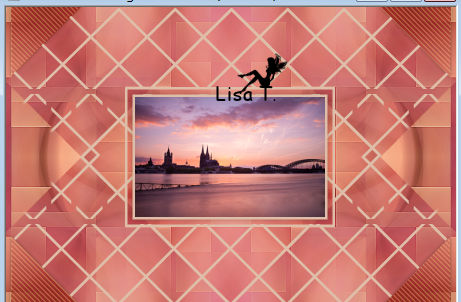
activate the « color changer tool » and
pick a color in any art of your tube
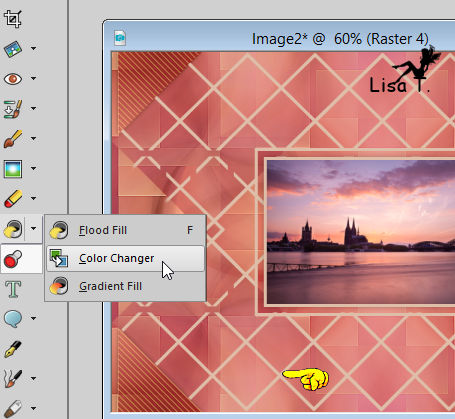
(Sweety didn’t change her colors of course)
layers -> arrange -> move down
6
your work and your layers palette look like this

Raster 4 is highlighted
selections -> load selection -> from disk -> selection
#3
DELETE
selections -> select none
7
layers -> new raster layer
selections -> load selection -> from disk -> selection
#4
copy / paste into selection the landscape image
selecitons -> modify -> select selection borders
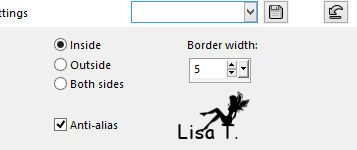
flood fill selection with color 1
selections -> select none
selections -> load selection -> from disk -> selection
#5
effects -> 3D effects -> drop shadow -> 0 / 0
/ 60 / 20 / black
selections -> select none
8
your tag and your layers palette look like this

Raster 5 is highlighted
activate the layer underneath (Raster 2)
right click on the layer and choose « delete »

your layers palette looks like this

Raster 5 is highlighted
highlight Raster 4
effects -> 3D effects -> drop shadow -> 0 / 0
/ 20 / 5 / black
drop the same shadow on Raster 5 and Raster 3
9
top layer is highlighted (Raster 3)
copy / paste as new layer « deco 2)
don’t move it
colorize if necessary
layers -> new raster layer
layers -> arrange -> move down 4 times (under Raster
1)
selections -> select all
copy / paste into selection the landscape image
selections -> select none
effects -> image effects -> seamless tiling
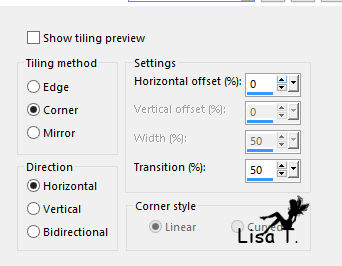
opacity of the layer : 50%
blend mode : Multiply
layers -> duplicate
image -> mirror -> mirror horizontal
layers -> merge -> merge down
opacity of the layer : 60%
if you wish, according to your colors, blend mode :
multiply (or other)
keep landscape layer highlighted
selections -> load selection -> from disk -> selection
#1
DELETE
selections -> select none
selections -> load selection -> from disk -> selection
#6
DELETE
selections -> select none
10
image -> add borders -> 3 pixels color 1
image -> add borders -> color 1
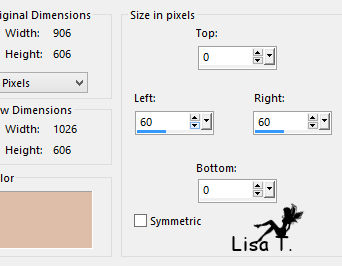
effects -> image effects -> seamless tiling

selections -> invert
selections -> promote selection to layer
selecitons -> select none
selection tool / custom selection -> T : 0 / L : 962
/ B : 605 / R : 1026

DELETE
selections -> select none
layers -> duplicate
image -> mirror -> mirror horizontal
layers -> merge -> merge down
effects -> 3D effects -> drop shadow -> 0 / 0
/ 60 / 30 / black
layers ->merge -> merge all (flatten)
11
right click on the layer -> promote background layer
effec ts -> plugisn -> Bordure Mania (NVR) 3D color
1
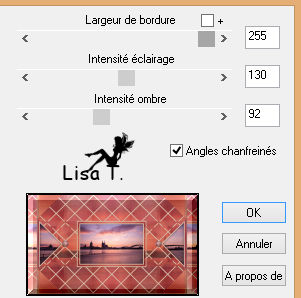
edit -> COPY
image -> canvas size
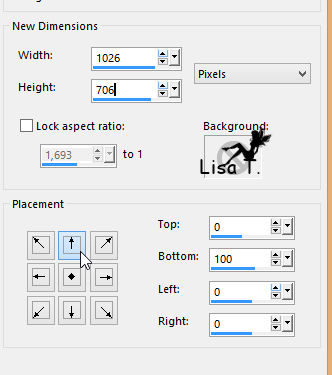
with the magic wand tool, select the transparent part at
the bottom
layers -> new raster layer
edit -> paste into selection
effects -> geometric effects -> perspective vertical
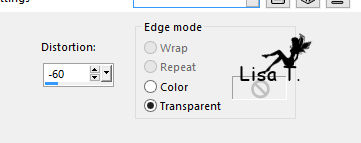
selections -> invert
effects -> 3D effects -> drop shadow -> 0 / 0
/ 100 / 50 / black
selecitons -> select none
12
selections -> select all
image -> add borders -> chekc « symmetric » -> 50
pixels color 1
edit -> COPY
selections -> invert
selections -> modify -> contract -> 5 pixels
edit -> paste into selection
adjust -> blur -> gaussian blur : 10
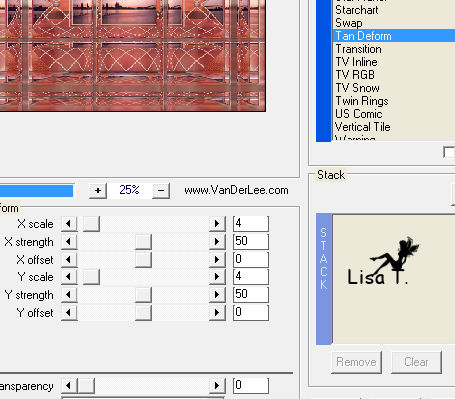
effects -> plugins -> Unpluged X -> VanDerLee
-> Tan Deform
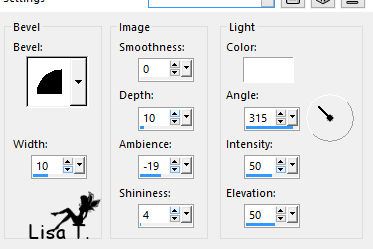
effects -> 3D effects -> inner bevel
13
edit -> COPY
selections -> select all
image -> add borders -> 50 pixels color 1
selections -> invert
edit -> paste into selection
selections -> select none - selections -> select
all
selections -> modify -> contract / 50 pixels
selections -> invert
selections -> promote selection to layer
selections -> select none
selections -> load selection -> from disk -> selection
#7
effects -> plugins ->AAA Frames / Texture Frame
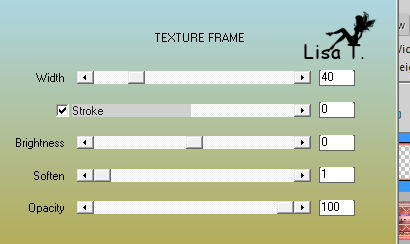
selections -> select none
14
copy / paste as new layer the character tube
place it where you like and drop a shadow of your choice
Sweety dropped this shadow -> 0 / 0 / 60 / 30 / black
add a decoration if you like
Sweety added a decoration created by Logane
drop a shadow of your choice
Sweety dropped this shadow -> 0 / 0 / 60 / 30 / black
final step
layers -> merge -> merge all (flatten)
effects -> plugins -> Bordure Mania (NVR) 3D color
1 (as in step 11)
apply your watermark
resize if necessary (Sweety resized to 950 pixels :
width)
file -> save as... type .jpeg
your tag is finished

To write to Sweety

don’t hesitate to send her your creation, she will
be very glad to see it and present it


my tag with my tubes

Back
to the board of Sweety’s tutorials
board 1  board
2 board
2  board
3 board
3 

|