Tutorial 75

You will find the original tutorial Here


Sweety received the permission of the tubers to use their tubes.
You can find the banners of these tubers in the left column of her blog, under the heading "autorisations"

some of the tubes Sweety uses were received in sharing groups
or found on the web
if one of them is your property, please let us know
a link to your site will be added
they are provided as « single-use » for this tutorial
you are not allowed to share or used them for another purpose.
This tutorial is a personal creation,
any resemblance with another one would be pure coincidence
you are not allowed to share it or present it on your site, blog or forum
without the permission of Sweety

Thank you to the tubers for their great job
they make our creations possible

translator’s note : This translation is my property,
it is strictly forbidden to copy or distribute it on the Net
Thanks to Sweety for her kind permission
Sweety work with pSP 12, I work with PSP18, but it is possible to use another version.
have fun

Material
8 Sélections
5 personal decorations (psp an png types) - 1 landscape (211248 not provided)
1 mask
1 face tube misted: « merydesign-femme 1597 » (not provided)
1 man tube (not provided)
1 chat tube (notprovided)
1 preset « Extrude » for Alien Skin Eye Candy 5 Impact

Open the tubes, duplicate them and work with the copies
copy the selections and paste them into the folder « Selections » of « My PSP Files »
open the mask and minimize it
double click on the presets to install them in the good plugin


Filters
VM Toolbox : (Zoom Blur) – Alien Skin Eye Candy 5 Impact (Extrude)
Graphics plus : (cross shadow) – AAAFrames : (texture Frame)

Thank you to Tine for her permission to use her filters page


Colors
foreground color -> FG -> color 1 -> #3d4f5f
background color -> BG -> color 2 -> # f8e09e
color 3 -> #8e393f
you will need about 1 hour to create your tag (not counting the time to choose your tubes)
medieum difficulty

Use the pencil to follow the steps
left click to grab it


Realization
Step1
choose a landscape image, and pick up your 3 colors
-> FG : dark – BG : light and a third color matching the other colors
open a new transpparent raster layer 900 * 550 pixels selections > select all
copy/paste into selection the landscape image
selections > select none
effects > image effeccts > seamless tiling
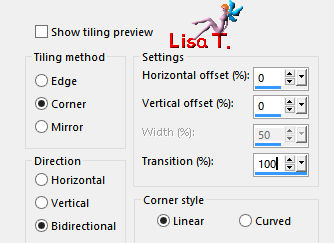
effects > plugins > VM Toolbox > Zoom Blur

layers > duplicate – image > mirror > mirror horizontal
opacity > 50%
layers > merge > merge down
Step 2
layers > new raster layer > flood fill with FG color
layers > new mask layer > from image
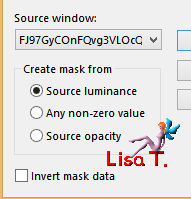
effects > edge effects > enhance
layers > merge > merge group
selections > load-save selection > from disk > selection 1
selections > promote selection to layer
activate Raster 2
DELETE
layers > new raster layer
copy/paste into selection the landscape image
opacity : 60%
selections > select none
Step 3
your tag and your layers palette look like this
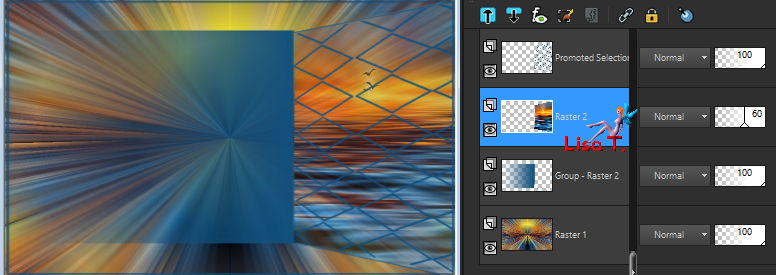
Raster 2 is the active layer
edit > copy special > copy merged
selections tool > custom selection
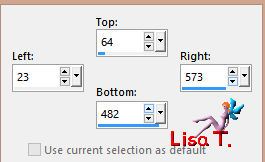
layers > new raster layer
edit > paste into selection
selections > select none
layers > arrange > move down
image > mirror > mirror horizontal
effects > image effects > offset> H : -286 / V : 0 > check « custom » and « transparent »
Step 4
activate « Group Raster 2 »
right click on this layer, choose « delete » then « yes »
« Raster 1 » is now the active layer
selections > select all
selections > modify > contract 2 pixels
selections > modify > select selection borders
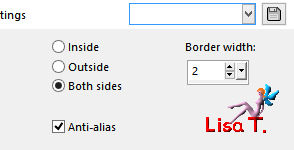
flood fill tool , match mode « none », flood fill with the selection with FG color
selections > promote selection to layer
selections > select none
Step 5
your tag and your layers palette look like this
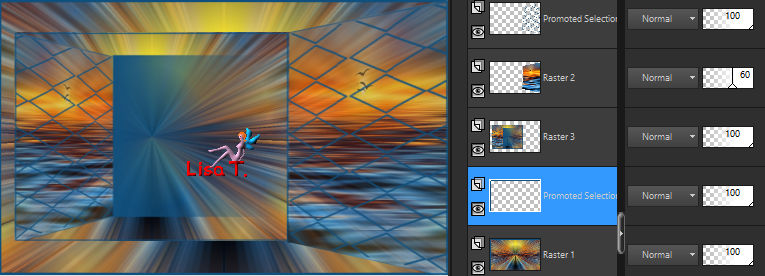
« promoted selection 1 » is the active layer
acivate « Raster 3 »
selections > load-save selection > from disk > selection 2
selections > modify > select selection borders
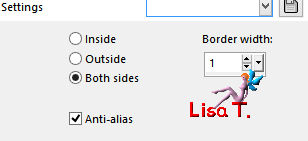
flood fill with FG color
selections > select none
copy/paste as new layer the decoration tube 1
effects > image effects > offset > H : -145 / V : 0
layers > new raster layer
selections > load-save selection > from disk > selection 3
layers > rrange > move down
flood fill the selection with FG color
selections > select none
layers > merge > merge down
Step 6
your ta and your layers palette look like this
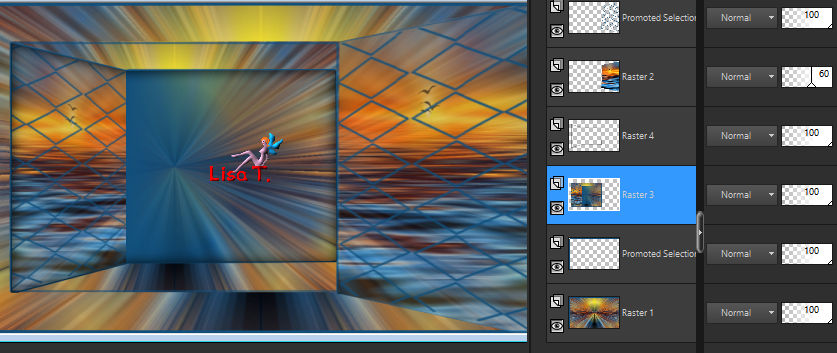
Raster 3 is the active layer
selections tool > custom selection
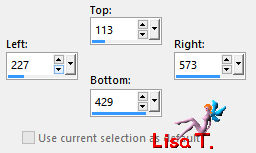
layers > new raster layer
copy/paste into selection the landscape image
effects > plugins > VM Toolbox > zoom Blur as in step 1

layers > duplicate
selections > select none
image > mirror > mirror horizontal
edit > cut
selections > custom selection (don't change the settings already written)
edit > paste into selection - opacity 50%
layers > merge > merge down
selections > select none
image > mirror > mirror vertical
edit > cut
selections > custom selection (don't change the settings)
edit > paste into selection
keep the selection active
Step 7
layers > new raster layer
copy/paste into selection the misted face
adjust > sharpness > sharpen
layers > new raster layer
effects > 3D effects > cutout > 0 / 0 / 85 / 75 / black / uncheck the inside color
selections > select none
acitvate the bottom layer « promoted selection »
selections > load-save selection > from disk > selection 4
flood fill the selection with FG color – several clicks might be necessary
selections > select none
selections > load-save selection > from disk > selection 5
copy/paste into selection the decoration tube 2
selections > select none
Step 8
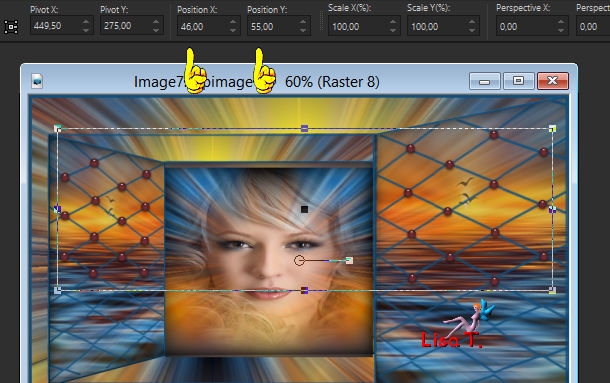
copy/paste as new layer the decoration tube 3
activate the pick tool and change the settings as shown below (horizontal 46 and vertical 55)
your layers palette looks like this
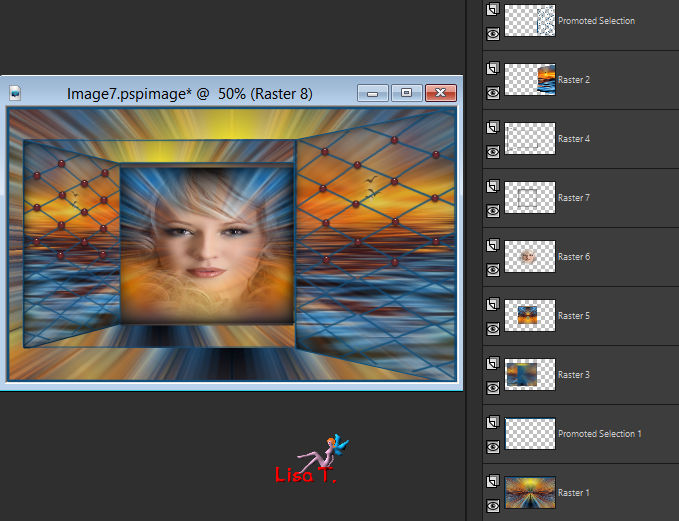
close the visibility of Raster 1
activate any othe layer
layers > merge > merge visible
acitvate the bottom layer (Raster 1)
open the visibility – image > mirror > mirror vertical
acitvate the merged layer – effects > 3D effects > drop shadow > 0 / 0 / 60 / 10 / black
Step 9
image > add borders > 2 pixels BG coloredit > COPY
selections > select all
image > add borders > 50 pixels contrasting color
selections > invert
edit/paste into selection
effects > plugins > VM Toolbox > Zoom Blur as in step 1
selections > promote selection to layer
selections > select none
image > mirror > mirror horizontal
opacity 50%
layers > merge > merge down
Step 10
selections > select all
selections > modify > contract 50 pixels
selections > invert – selections > promote selection to layer
selections > select none
effects > geometric effects > pespective vertical
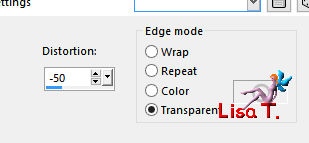
selection tool > custom selection
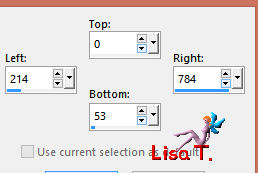
DELETE
selections > select none
layers > duplicate - image > mirror > mirror vertical
selection tool > custom selection
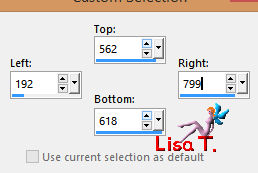
DELETE
selections > select none
layesr > merge > merge down
Step 11
effects > plugins > Alien Skin Eye Candy 5-Impact > Extrude (preset provided)
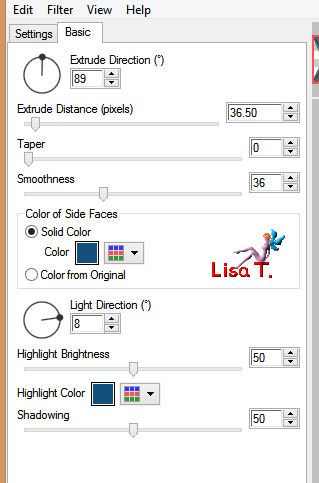
selections > load-save selection > from disk > selection 6
effects > plugins > Graphic Plus > Cross Shadow
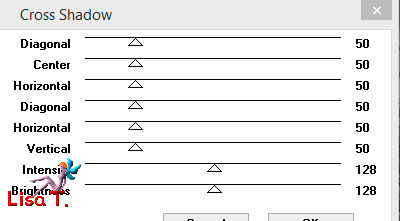
selections > select none
Step 12
selections > load-save selection > from disk > selection 7
selections > modify > select selection borders
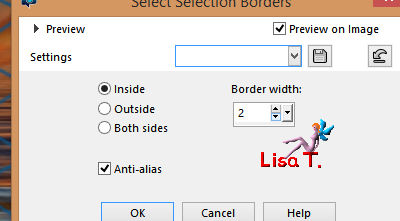
flood fill the selection with FG color – several clicks might be necessary – zoom in to see the effect
effects > 3D effects > inner bevel
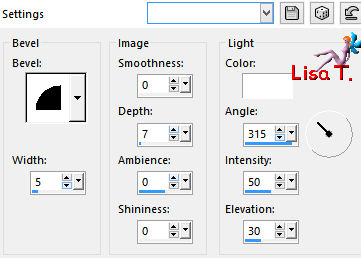
selections > load-save selection > from disk > selection 7
effects >3D effects > drop shadow > 0 / 0 / 100 / 30 / black
selections > sleect none
Step 13
selections > load-save selection > from disk > selection 8
activate the bottom layer (Background)
effects > plugins > VM Toolbox > Zoom Blur as in step 1
selections > select none
copy/paste as new layer the decoration tube 4
don’t move it
layers > arrange > bring to top
copy/paste as new layer the decoration tube 5
activate the Pick too and move the layer as shown
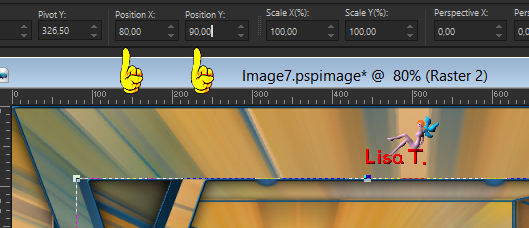
Step 14
selections tool > custom selection
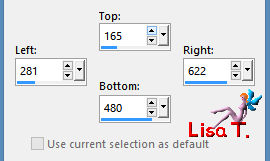
layers > new raster layer
copy/paste into selection the decoration tube 6
colorize in necessary
selections > select none
you can lower the opacity of this layer if you wish – Sweety chose 80%, I chose 70%
image > add borders > 2 pixels FG color
selections > select all - selections > modify > contract 50 pixels
selections > modify > select selection borders
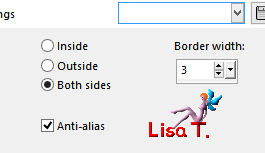
layers > new raster layer
flood fill the selection with FG color
selections > select none
effects > 3D effects > drop shadow > 0 / 0 / 60 / 10 / black
layers > merge > merge down
Step 15
selections > select all – selections > modify > contract 45 pixels
selections > invert
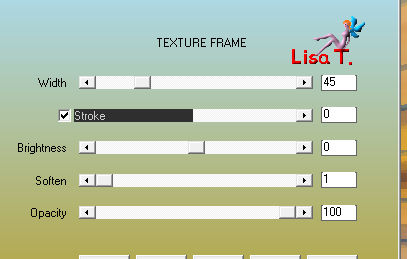
effects > plugins > AAAFrames> Texture Frame
effects > 3D effects > drop shadow > 0 / 0 / 75 / 30 / black
selections > select none
copy/paste as new layer the character tube, move it to the right, resize if necessary
effects > 3D effects > drop shadow > 0 / 0 / 75 / 35 / black
copy/paste as new layer a decoration of your choice (Sweety chose the cat) and drop a shadow
Final Step
image > add borders > 2 pixels BG color
apply your watermark
layers > merge > merge all (flatten)
image > resize to 950 pixels width
save your work as .... type jpeg
your tag is finished
Thank you to have realized it

To write to Sweety

don't hesitate to send your creations to Sweety. It will be a great pleasur for her to see theù
and to present them in the gallery of this tutorial


Back to the board of Sweety’s tutorials
board 1  board 2 board 2 

|