Tutorial 62

You will find the original tutorial Here
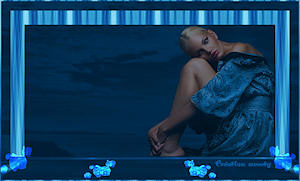

Sweety received the permission of the tubers to use their tubes.
You can find the banners of these tubers in the left column of her blog, under the heading "autorisations"

some of the tubes Sweety uses were received in sharing groups
or found on the web
if one of them is your property, please let her know
a link to your site will be added
they are provided as « single-use » for this tutorial
you are not allowed to share or used them for another purpose.
This tutorial is a personal creation,
any resemblance with another one would be pure coincidence
you are not allowed to share it or present it on your site, blog or forum
without the permission of Sweety

Thank you to the tubers for their great job
they make our creations possible

translator’s note : This translation is my property,
it is strictly forbidden to copy or distribute it on the Net
Thanks to Sweety for her kind permission
Sweety work with pSP 12, I work with PSP17, but it is possible to use another version.
have fun

Material
4 selections - 1 tube «rose » - 1 color palette - 1 tube landscape - 2 tubes «character » and «cat » (not provided) I used one of my tubes, you will find it page 3 of "children tubes"
2 decoration tubes
Open the tubes, duplicate them and work with the copies
copy the selections and paste them into the folder « Selections » of « My PSP Files »


Filters
Simple : (centre tile - Blintz)- VM distorsion : (mosaic ripple) - Cybia : (ScreenWorks) –
AAAFrame : (foto frame ) – Mura’s meister : (perspective tiling) -
Plungin galaxy : (instant mirror) – filters unlimited 2.0 : &<BKg Designer sf10II (fan blades)

Thank you to Tine for her permission to use her filters page


Colors
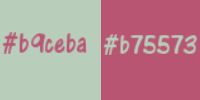
foreground color -> color 1 -> #9bceba
background color -> color 2 -> #b75573

Use the pencil to follow the steps
left click to grab it


Realization
Step1
open a new transparent raster layer 900 * 600 pixels
flood fill with color 1
selections/select all
layers/new raster layer
copy/paste into selection the « rose » tube
selections/select none
image/resize/uncheck « resize all layers »/85%
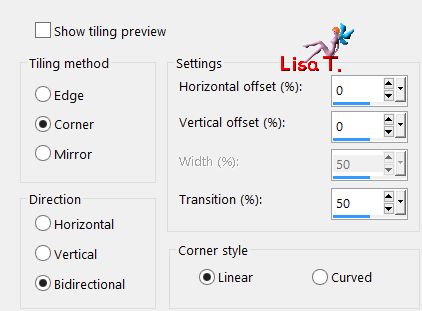
effects/image effects/seamless tiling/default settings
adjust/blur/radial blur

layers/merge/merge visible
Step 2
effects/plugins/Simple/Centre Tile
effects/plugins/VM Distortion/Mosaic Ripple/default settings

layers/duplicate - image/mirror/mirror horizontal - image/mirror/mirror vertical
opacity : 50%
layers/merge/merge visible
effects/edge effects/enhance
Step 3
layers/new raster layer
selections/load selection/from disk/selection #1
flood fill the selection with color 1
selections/modify/ontract/10 pixels
edit/clear (delete)
selections/select none
effects/reflection effects/feedback
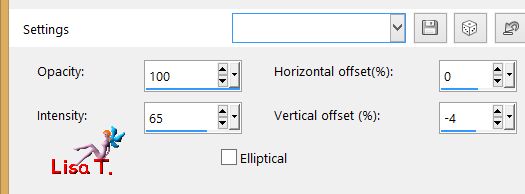
layers/duplicate - image/mirror/mirror horizontal
layers/merge/merge down
selections/load selection/from disk/selection #2
selections/modify/expand/2 pixels
layers/new raster layer
layers/arrange/move down
copy/paste into selection the landscape tube
copy/paste into selection the personal decoration tube 1
selections/select none
Step 4
your tag and your layers palette look like this
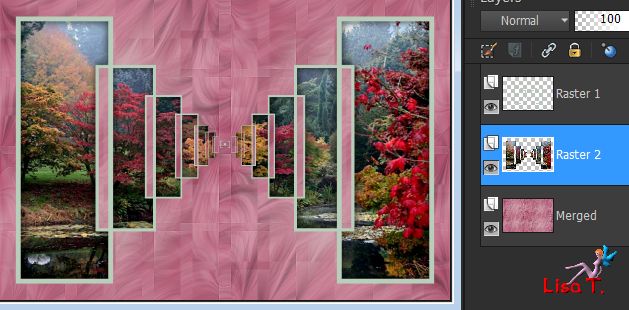
Raster 2 is the active layer
opacity : + ore - 60%
adjust/sharpness/sharpen
activate RAster 1
selection tool/custom selection (key S) : top : 262 / left : 431 / bottom : 320 / right : 470
edit/clear (delete)
selections/select none
activate the bottom layer (Merged)
selections/load selection/from disk/selection #3
selections/promote selection to layer
effects/plugins/Cybia/Screen Works/Fine Rule
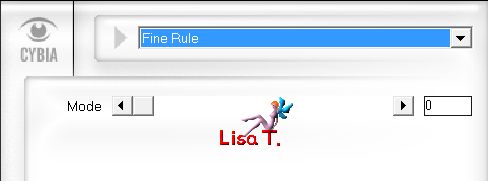
opacity : + / - 70%
selections/select none
copy/paste as new layer the personal decoration 2
layers/arrange/move down
Step 5
your tag and your layers palette look like this
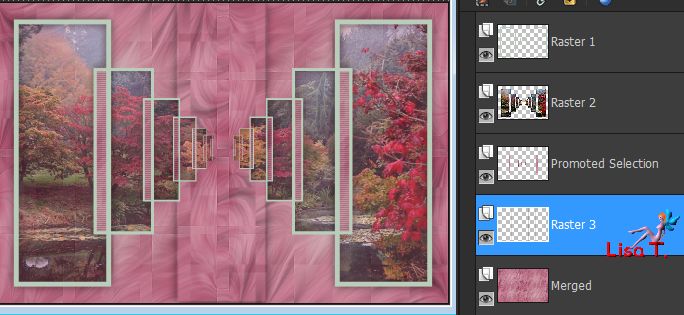
Raster 3 is the active layer
layers/new raster layer
selections/load selection/from disk/selection #4
flood fill the selection with color 1 (several clicks are necessary)
effects/plugins/Cybie/Screen Works/same settings as before
selections/select none
effects/distortion effects/wave

layers/duplicate - image/mirror/mirror horizontal
layers/merge/merge down
effects/image effects/offset/ H : 0 / V : -35 / check « custom » and « transparent »
layers/arrange/move down
layers/duplicate - image/mirror/mirror vertical
layers/merge/merge down
effects/3D effects/drop shadow/ 1 / 1 / 60 / 10 / black *** -1 / -1 / 60 / 10 / black
Step 6
your tag and your layers palette look like this
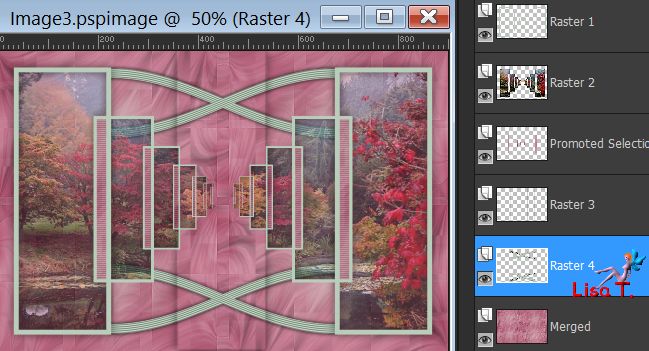
Raster 4 is the active layer
acitvate Raster 1 (top layer)
selection tool/custom selection/ top : 250 / left : 417 / bottom : 331 / right : 483
edit/clear (delete)
keep the selection active
activate Raster 2 and hit the delete key
keep the selection active
layers/new raster layer
layers/arrange/move down 3 times
flood fill with color 1
selections/modify/contract/5 pixels
edit/clear (delete)
layers/new raster layer
layers/arrange/move down
copy/paste into selection the landscape tube
selections/invert
effects/3D effects/drop shadow/ 3 / 3 / 30 / 3 / black * -3 / -3 / 30 / 3 / black
selection/invert and keep selection active
Step 7
effects/plugins/AAA Frame/Foto Frame
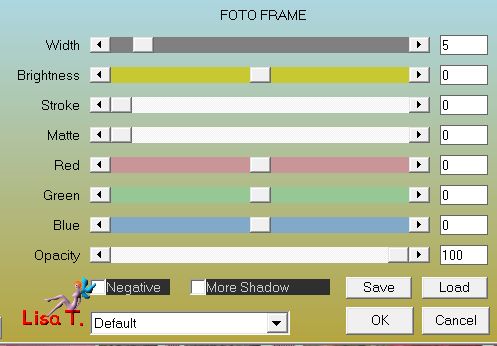
selections/modify/contract/5 pixels
selections/modify/select selection borders
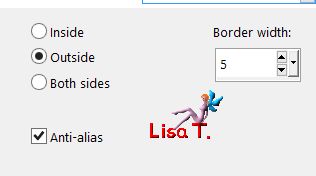
flood fill with color 2
effects/plugins/Cybia/Screen Works/same settings as before
selections/select noneactivate Raster 5
selection tool/custom selection : top : 250 / left : 417 / bottom : 331 / right : 483
selections/modigy/contract/5 pixels
selections/invert
effects/3D effects/drop shadow as in step 6 (with 3 and -3)
selections/select none - opacity between 70% and 75%
layers/merge/merge down
Step 8
your tag and your layers palette look like this
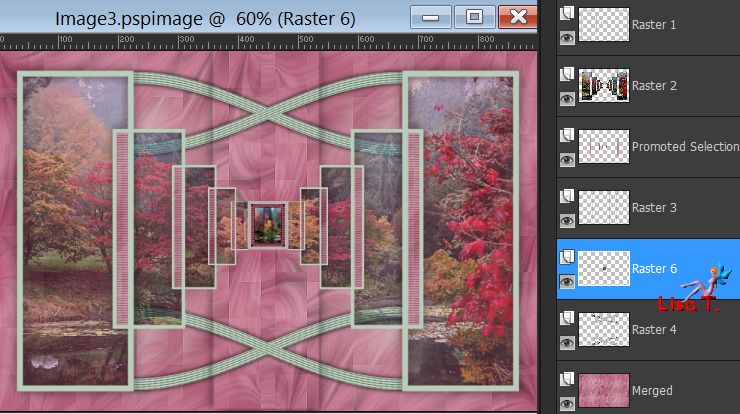
Raster 6 is the active layer
layers/duplicate
effects/reflection effects/feedback

selection tool/custom selection -> top : 250 / left : 417 / bottom : 331 / right : 483
edit/clear (delete)
selections/select none
acitvate Raster 6 - layers/duplicate
effects/reflection effects/feedback

selection tool/custom selection -> top : 250 / left : 417 / bottom : 331 / right : 483
edit/clear (delete)
selections/select none
layers/arrange/move up
layers/merge/merge down twice
layers/arrange/move down
effects/3D effects/drop shadow : 1 / 1 / 60 / 10 / black ** -1 / -1 / 60 / 10 / black
Step 9
activate Raster 4
selections/load selection/from disk/selection #2
edit/clear (delete) - selections/select none
activate Raster 6 -> edit/copy and paste as new image
set aside for later use
close the eye of the bottom layer (Merged)
activate any othe lyer and merge visible
acitvate the bottom layer and open the eye
layers/duplicate
your tag and your layers palette look like this
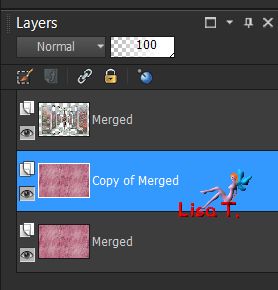
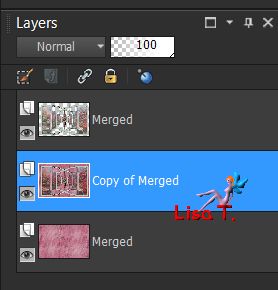
activate the top layer (Merged) - layers/duplicate
layers/arrange/move down
layers/merge/merge down
your layers palette looks like this
Step 10
layers/arrange/bring to top
effects/plugins/Mura’s Meister/Perspective Tiling
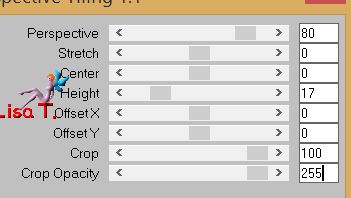
acitvate the layer below (Merged)
effects/plugins/Galaxy/Instant Mirror
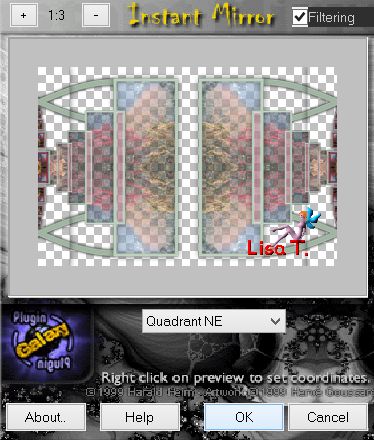
copy/paste as new layer the image set aside in step 9
effects/image effects/offset/ H : 0 / V : 18
image/add borders/2 pixels color 1
Step 11
layers/promote background layer
image/canvas size
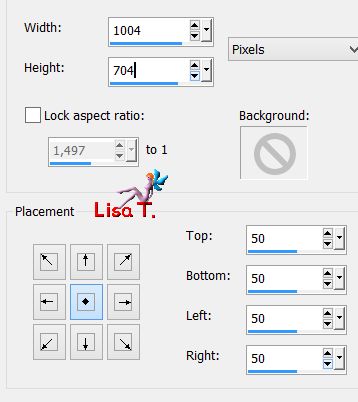
click in the transparent part with the magic wand (default settings)
layers/new raster layer
flood fill the selection with color 2
layers/arrange/send to bottom
selections/select none
activate Raster 1 - layers/duplicate
effects/plugins/Simple/Blintz
selection tool/custom selection -> top : 78 / left : 0 / bottom : 704 / right : 1004
edit/clear (delete) - selections/select none
layers/duplicate - image/mirror/mirror horizonta
selection tool/custom selection -> top : 0 / left : 0 / bottom : 77 / right : 417
edit/clear (delete) - selections/select none
layer/merge/merge down
Step 12
your tag and your layers palette look like this
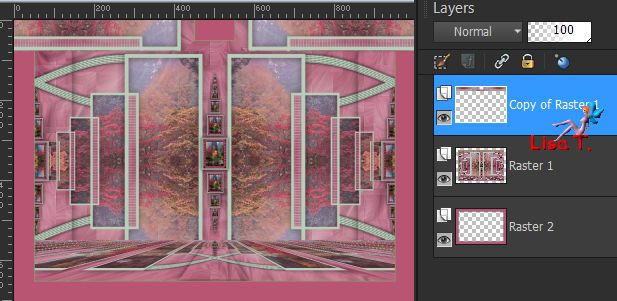
Raster 1 is the active layer - layers/duplicate - image/mirror/mirror vertical
layers/merge/merge down
effects/3D effects/drop shadow/ 0 / 0 / 80 / 40 / black
drop the same shadow on Raster 1
layers/duplicate - image/resize/uncheck « resize all layers »/103%
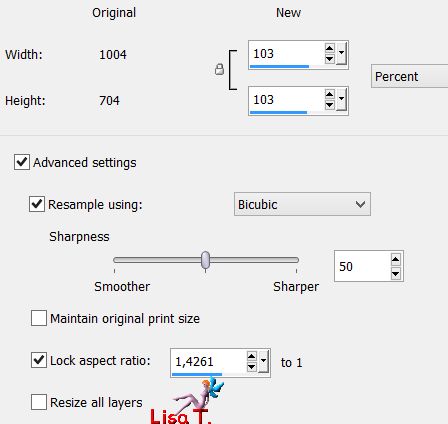
layers/arrange/move down
layers/duplicate
image/resize/uncheck « resize all layers »/103%
layers/arrange/move down
layers/duplicate
image/resize/uncheck « resize all layers »/103%
layers/arrange/move down
your tag and your layers palette look like this
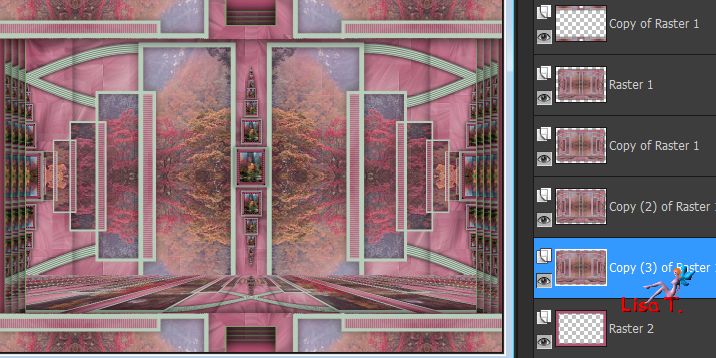
Step 13
activate « copy of Raster 1 » (third layer from the top)
layers/merge/merge down twice
adjust/blur/gaussian blur/5 pixels
efects/plugins/Unlimited2/&<BKg Designers sfI0II/Fan Blades
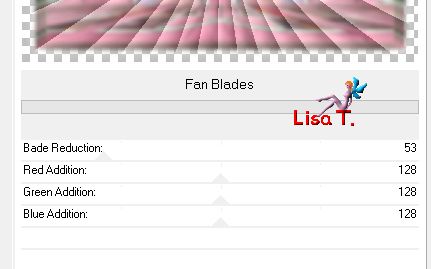
blend mode : Luminande (Legacy)
activate RAster 2
effects/plugins/Unlimited 2//&<BKg Designers sfI0II/Fan Blades/default settings
Decoration
copy/paste the character tube as new layer
Swetty used « yurippe-render By Iso », found on Render Graphics (not provided)
resize eventually and move where you like
drop a shadow of your choice
copy/paste your decoration tube
(Sweety used a cat tube, not provided)
resize and drop a shadow
Final step
apply your signature
image/add borders/2 pixels color 1
layers/merge/merge all (flatten)
image/resize 950 pixels wide
file/save as... type jpeg

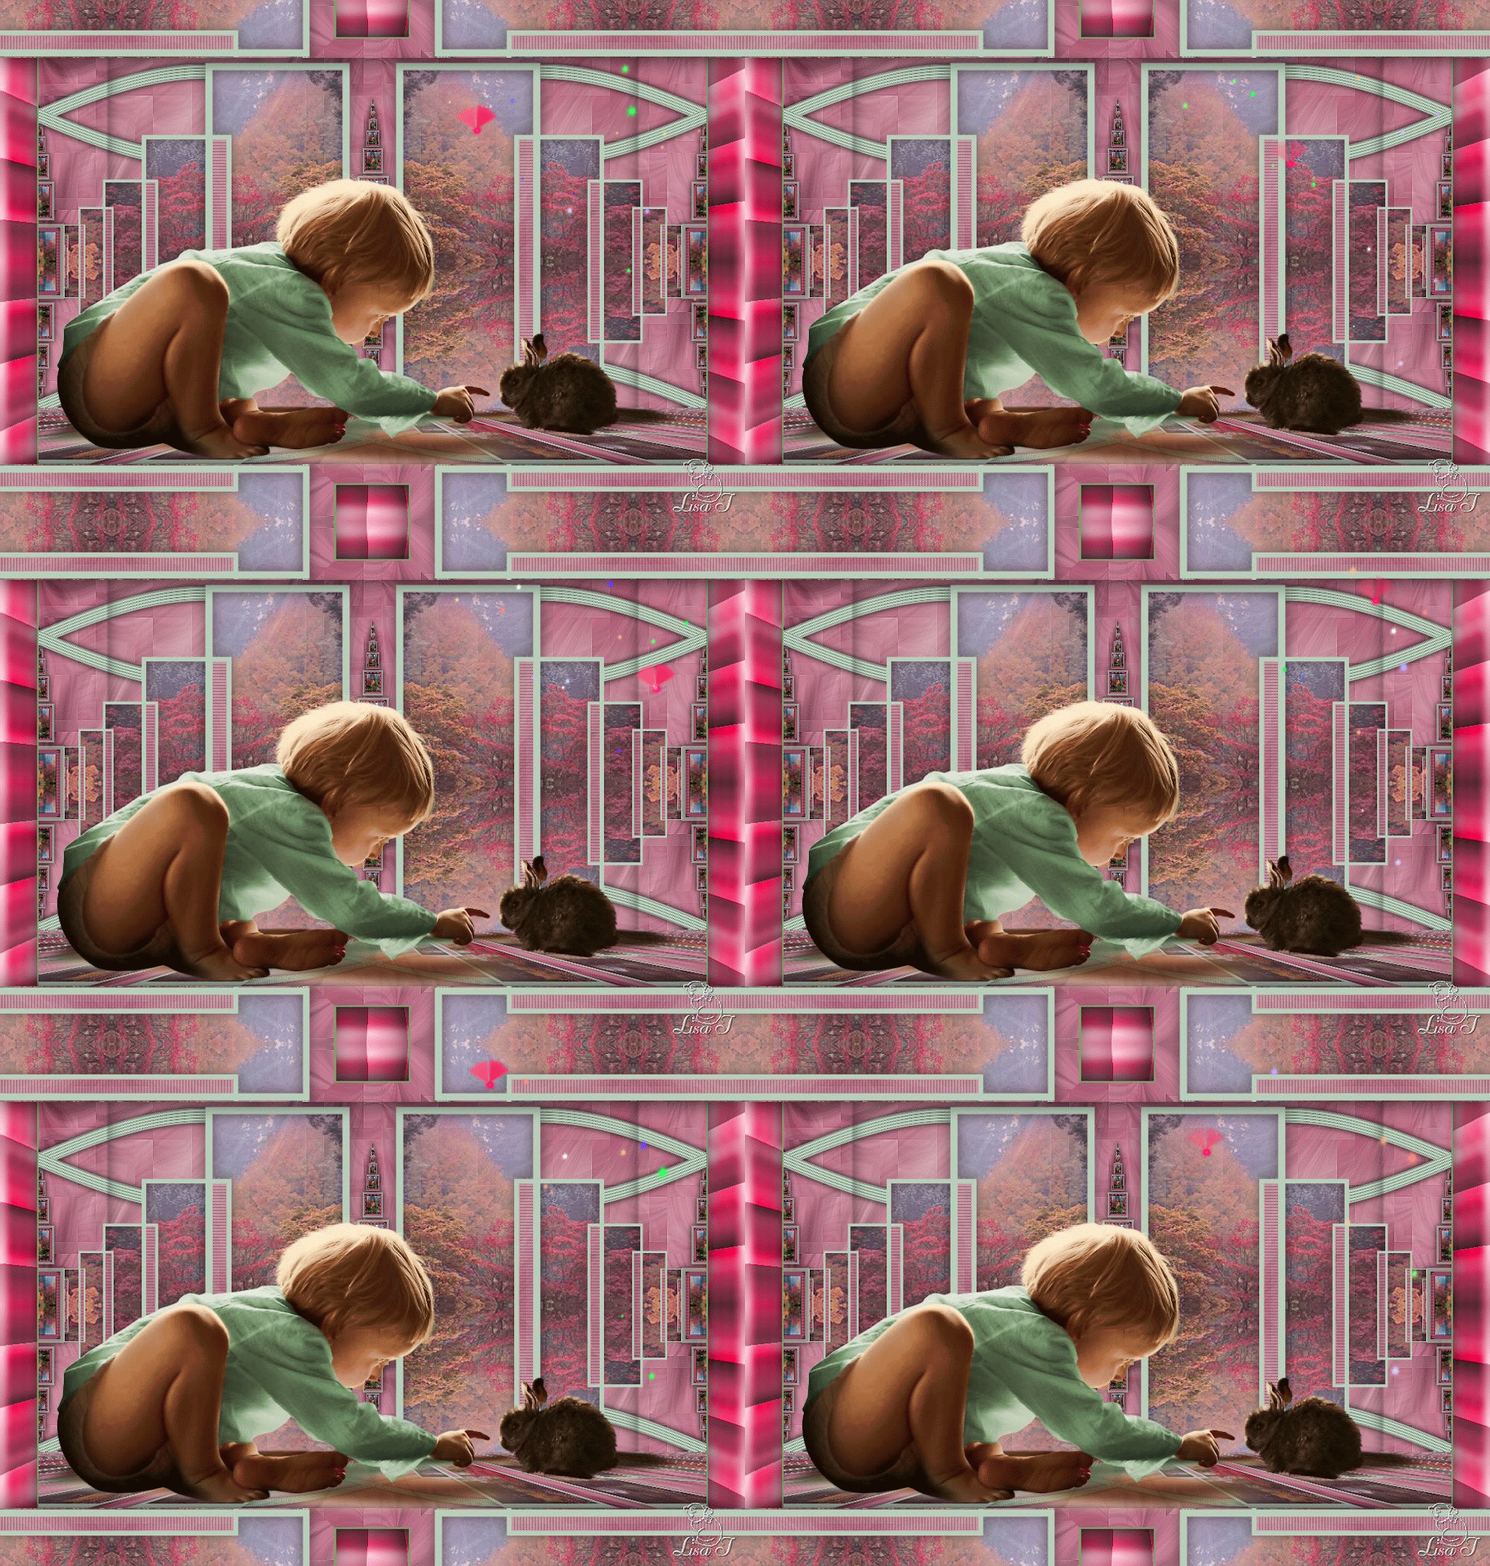
your tag is finished
Thank you to have followed this tutorial

To write to Sweety


your creations here


My tag with an animation by Scrappy bit of fun HERE
Back to the board of Sweety’s tutorials
board 1  board 2 board 2 

|