Tutorial 59
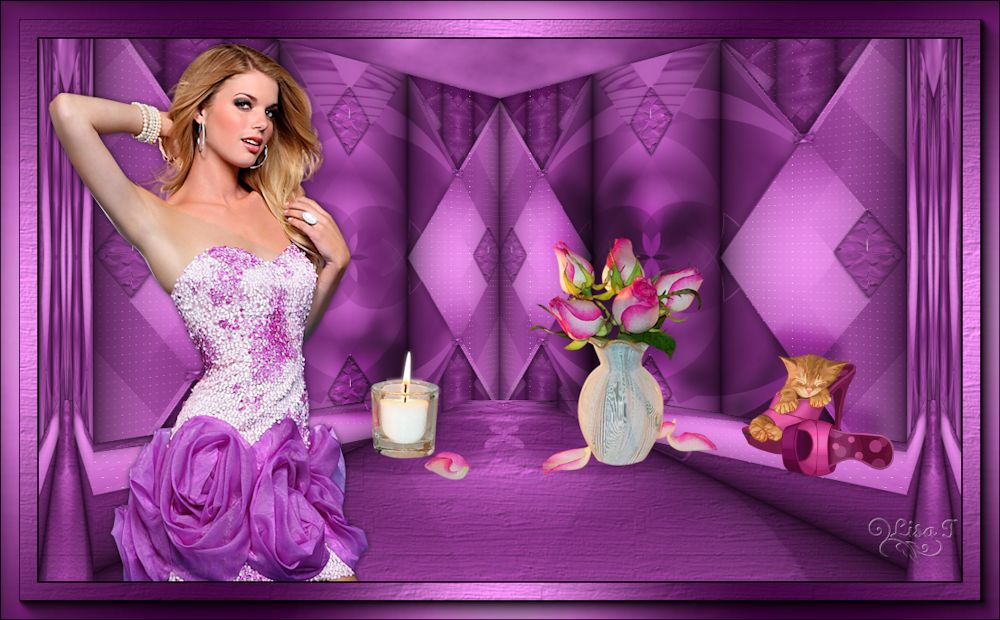
You will find the original tutorial Here

Sweety received the permission of the tubers to use their tubes.
You can find the banners of these tubers in the left column of her blog, under the heading "autorisations"

some of the tubes Sweety uses were received in sharing groups
or found on the web
if one of them is your property, please let us know
a link to your site will be added
they are provided as « single-use » for this tutorial
you are not allowed to share or used them for another purpose.
This tutorial is a personal creation,
any resemblance with another one would be pure coincidence
you are not allowed to share it or present it on your site, blog or forum
without the permission of Sweety

Thank you to the tubers for their great job
they make our creations possible

translator’s note : This translation is my property,
it is strictly forbidden to copy or distribute it on the Net
Thanks to Sweety for her kind permission
Sweety work with pSP 12, I work with PSP17, but it is possible to use another version.
have fun

Material
1 color palette - selecitons - tubes and decorations - 1 texture
some tubes are not provided. Sweety received them in sharing groups
Open the tubes, duplicate them and work with the copies
copy the selections and paste them into the folder « Selections » of « My PSP Files »
copy/paste the texture into the folder « texture » of « My PSP Files »


Filters
Mehdi - AP01 [Lines] - Toadies - Mura’s Seamless - Andromeda - Mura’s Meister - AAA Frames
Thank you to Tine for her permission to use her filters


Colors
foreground color -> color 1 -> #460746
background color -> color 2 -> #ec8ced
color 3 ->#000000 color 4 -> #ffffff

you will need about 1 hour to create your tag, not counting the time to find your tubes
medium difficulty

Use the paint brush to follow the steps
left click to grab it


Realization
Step1
open a new transparent raster layer 900 * 600 pixels
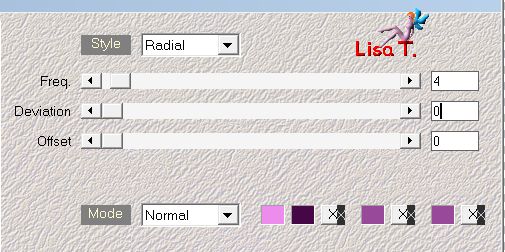
effects/plugins/Mehdi/Wavy Lab 1.1/Radial
adjust/blur/gaussian blur/25
effects/plugins/Mehdi/Sorting Tiles
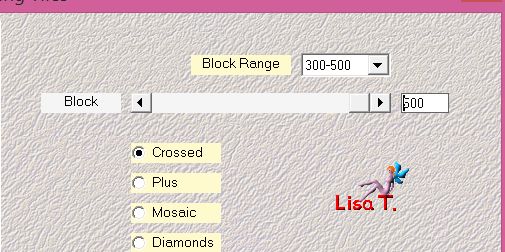
effects/plugins/Medhi/Sorting Tiles
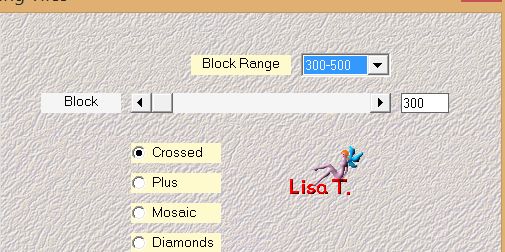
layers/duplicate - image/mirror/mirror horizontal
opacity : 50%
layers/merge/merge down
layers/duplicate - image/mirror/mirror vertical
opaciy : 50%
layers/merge/merge down
adjust/sharpness/sharpen
Step 2
selections/load selection from disk/selection 1
selections/promote selection to layer
effects/plugins/AP 01[Lines]/Dotty Grid
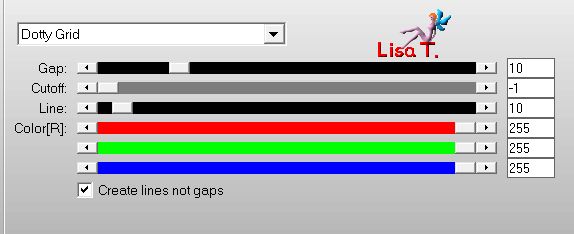
selections/select none
layers/duplicate
effects/plugins/Toadies/What Are You ?...

layers/arrange/move down
effects/edge effects/enhance
blend mode : Screen (or other)
Step 3
activate the bottom layer (Raster 1)
selections/load selection from disk/selection 2
selections/promote selection to layer
effects/plugins/AP 01[Lines]/Dotty Grid/same settings as in step 2
selections/select none
your tag and you layers palette look like this
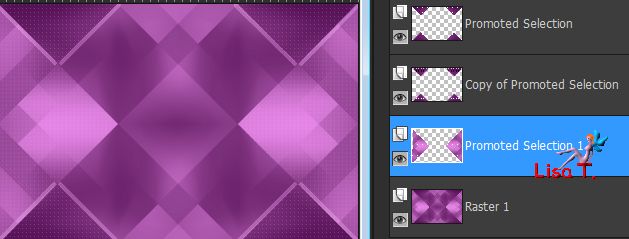
Step 4
copy/pastethe tube « deco perso 4 » as new layer
don’t move it
copy/paste the tube « deco perso 3 » as new layer
effects/image effects/offset ( H : 4 / V : -150 )/check « custom » and « transparent »
copy/paste the tube « deco perso 5 » as new layer
layers/arrange/bring to top
effects/image effects/offset ( H : 0 / V : 78 )
effects/3D effects/drop shadow/ 0 / 0 / 60 / 10 / black
copy/paste the tube « deco perso 1 » as new layer
don’t move it
Step 5
your tag and your layers palette look like this
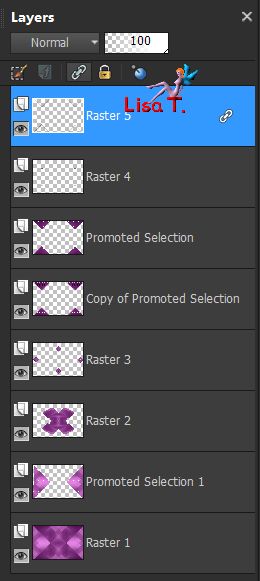 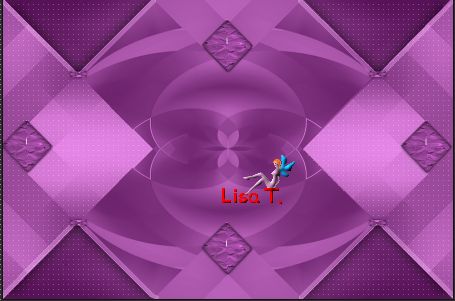
activate the bottom layer (Raster 1)
close the eye of this layer and activate the layer just above (Promoted selection 1)
layers/merge/merge visible
open the eye of the bottom layer but keep the top layer active (Merged)
layers/duplicate
effects/plugins/Mura’s Seamless/Stripe of Cylinder
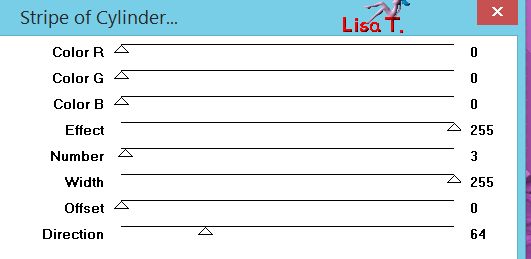
opacity : 80% (or other)
Step 6
copy/paste the tube « deco perso 6 » as new layer
don’t move it
opacity : 50%
selections/load selection from disk/selection 2
effects/3D effects/drop shadow/ 0 / 0 / 100 / 30 / black
selections/select none
activate the second layer from the bottom (Merged)
opacity : 50% / blend mode : Dodge (or other)
adjust/sharpness/sharpen more
Step 7
your tag and your layers palette look like this
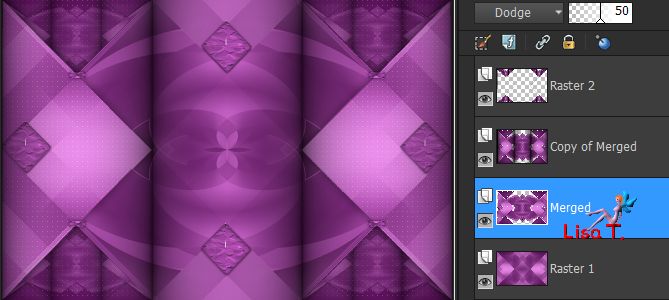
activate the top layer (Raster 2)
copy/paste the tube « deco perso 7 » as new layer and move it as shown
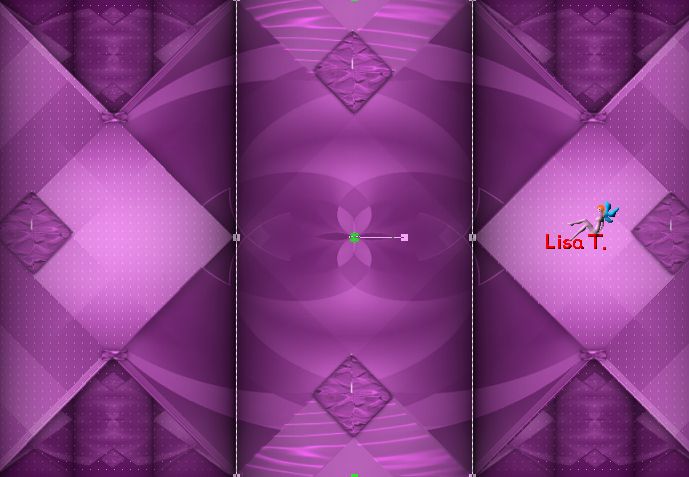
blend mode : Multiply
layers/merge/merge all (flatten)
in the layers palette, right click on the layer and choose : promote background layer
layers/duplicate, keep this layer active (copy of Raster 1)
Step 8
effects/plugins/Andromeda/Perspective
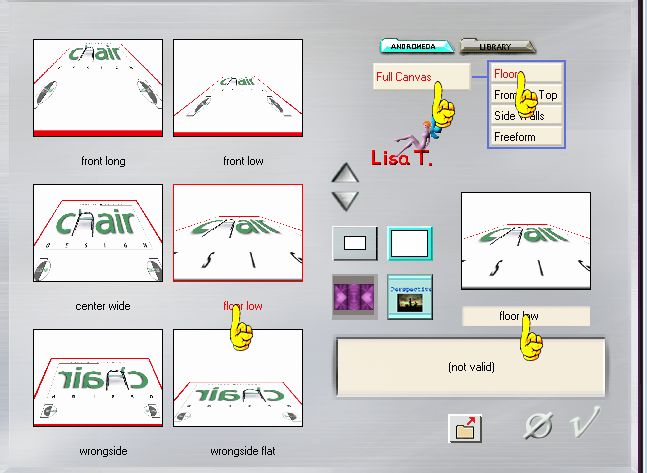
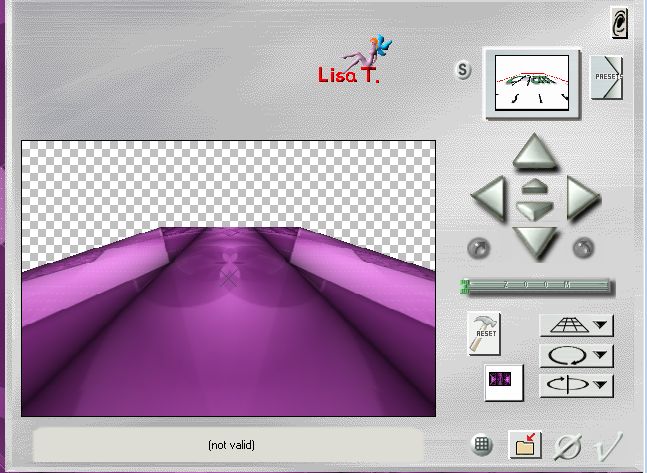
close the eye of this layer and activate the bottom layer (Raster 1)
effects/plugins/Andromeda/Perspective
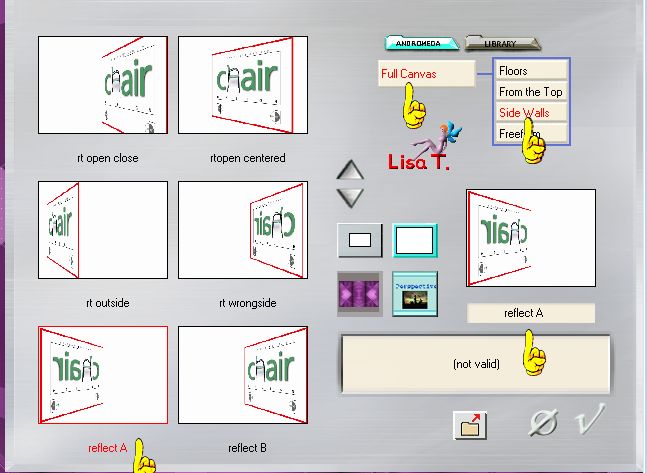
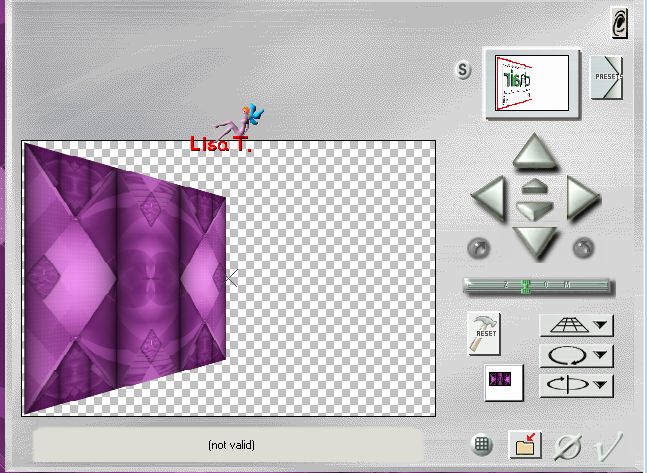
activate the Pick tool and bring the layer nearby the left edge
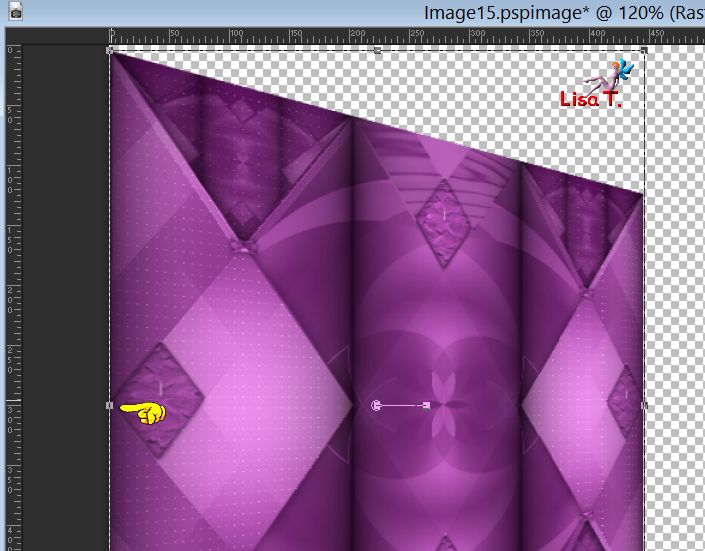
then stretch to the right on 450
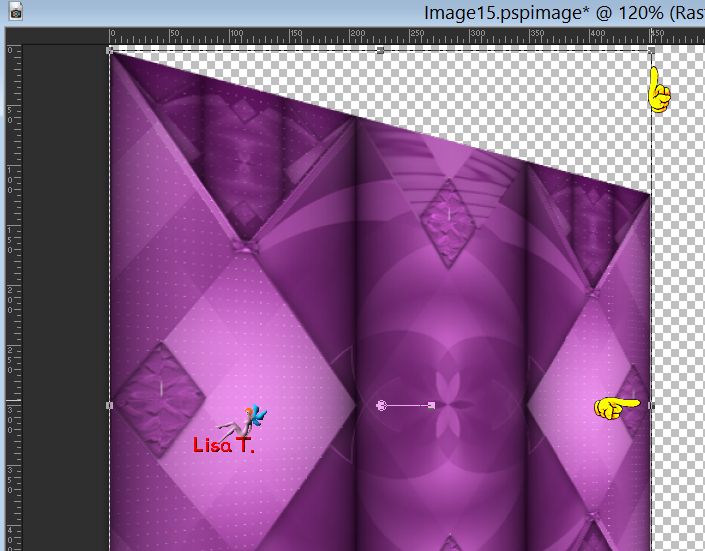
layers/duplicate - image/mirror/mirror horizontal
layers/merge/merge down
effects/image effects/offset/ ( H : 0 / V : 58 )
Step 9
layers/new raster layer
effects/plugins/Mura’s Meister/Cloud
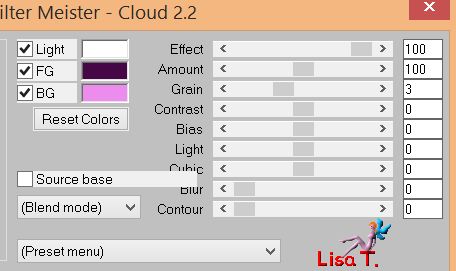
layers/arrange/send to bottom
activate the layer above (Raster 1) apply effects/3D effects/drop shadow/ 0 / 0 /60 / 10 / black
activate the top layer (Copy of Raster 1), open the eye of this layer
view/rulers and activate the Pick Tool
lower the top handle to 400 pixels
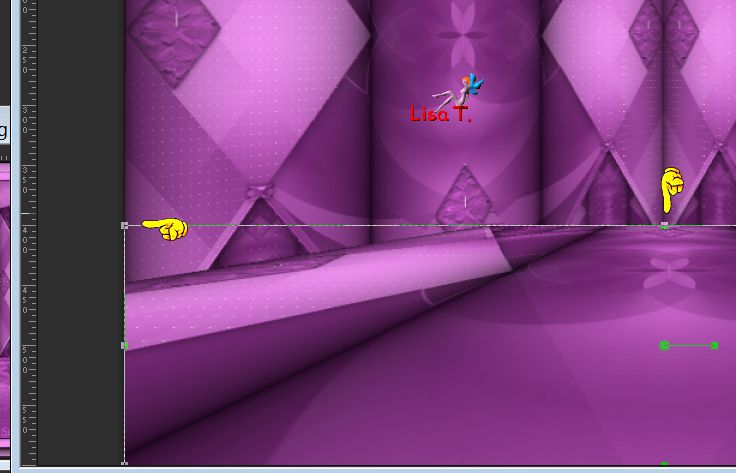
disable the rulers and the tool
selections/load selection 3 from disk
edit/clear (delete)
selections/select none
Step 10
your tag and your layers palette look like this
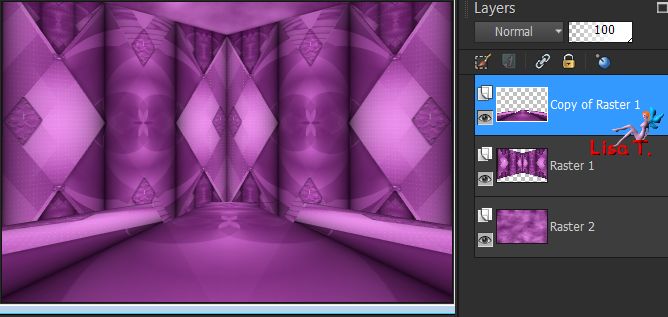
selections/load selection 4 from disk
effects/texture effects/choose the texture provided
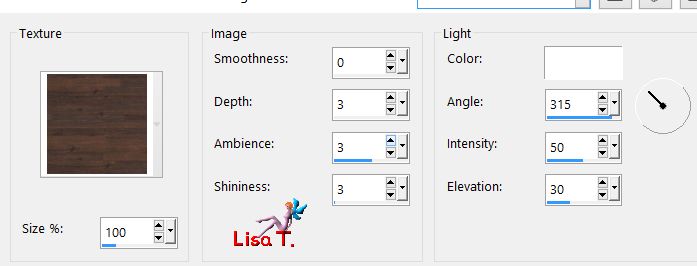
selections/select none
layers/merge/merge all (flatten)
edit/COPY
image/add borders/uncheck « symmetric »
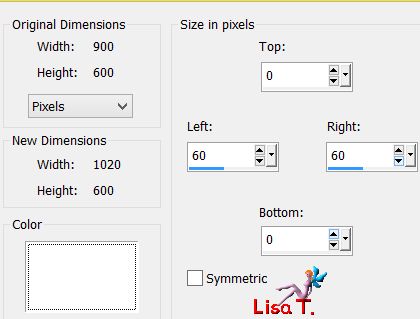
with the magic wand tool, tolerance 0, select the left white part
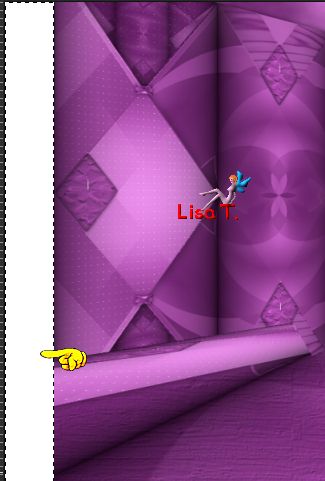
edit/paste into selection
selections/promote selection to layer
selections/select none
layers/duplicate - image/mirror/mirror horizontal
layers/merge/merge all (flatten)
Decoration
copy/paste the character tube as new layer
Sweety used a tube by T.Radyga (not provided) resized to 70%
move it where you like
effects/3D effects/drop shadow/ 0 / 0 / 60 / 10 / black
add all the elements you wish ; Sweety added a vase flower and resized it to 60%
layers/arrange/move down
she applied --> effects/image effects/offset ( H : 136 / V : -51 )
and she dropped a shadow
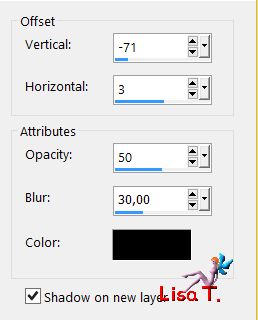
blend mode : Dodge (translator’s note : I chose Overlay) - opacity : 75%
Decoration 2
Sweety moved the candle opposite to the vase, and resized it to 60%
drop a shadow
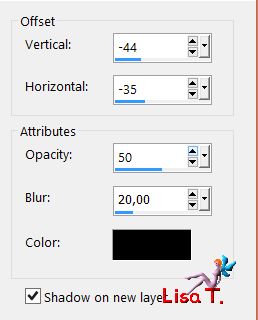
blend mode : Dodge (translator’s note : I chose Overlay) - opacity 75%
your tag and your layers palette look like this
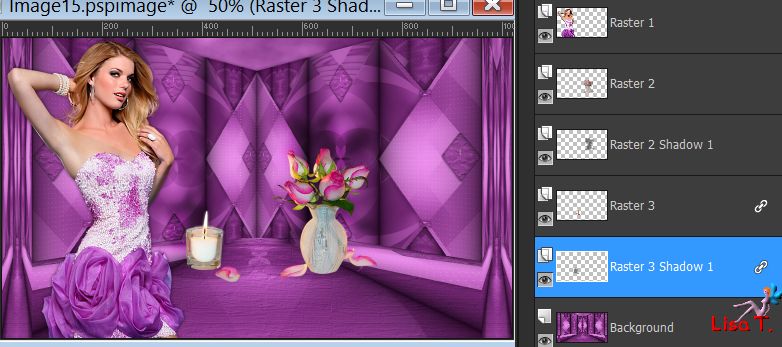
activate the top layer (Raster 1)
image/add borders/check « symmetric »/2 pixels black
selections/select all
image/add borders/41 pixels/white
selections/invert
effects/plugins/MehdiWavy Lab 1.1, same settings as in step 1 (still in memory)
effects/texture effects/as in step 10 (still in memory)
effects/plugins/AAA Frames/Foto Frame
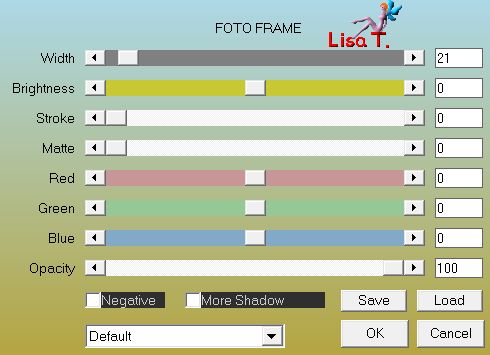
selections/invert
effects/3D effects/drop shadow/ 0 / 0 / 60 / 10 / black / uncheck « shadow on new layer »
selections/select none
Final step
apply your signature
image/add borders/2 pixels black
layers/mege/merge all (flatten)
image/resize/width 950 pixels (or other)
file/save as... type jpeg

your tag is finished
Thank you to have realized it

To write to Sweety


you can send your creations to Sweety, she will be very happy to them
and to present them in the Gallery of the tutorial


Back to the board of Sweety’s tutorials
board 1  board 2 board 2 

|