tutorial 31

You will find the original tutorial Here
I am member of TWInc
this translated tutorial is protected


The tubes Sweety uses were received in sharing groups
or found on the web
if one of them is your property, please let us know
a link to your site will be added
they are provided as « single-use » for this tutorial
you are not allowed to share or used them in any other way.
This tutorial is a personal creation,
any resemblance with another one would be pure coincidence
you are not allowed to share it or present it on your site, blog or forum
without the permission of Sweety

Thank you to the tubers for their great job
they make our creations possible
This translation is my property,
it is strictly forbidden to copy or distribute it on the Net
Thanks to Sweety for her kind permission
I work with PSP12, but it is possible to use another version.
have fun
Use the paint brush to follow the steps
left click to grab it
 |
Material
4 tubes
Open them, duplicate them and work with the copies
1 preset BFM (double click on it to install it in the good plugin)
4 selections (copy them and paste them into the folder “selections” of My PSP Files

Filters
Unlimited 2/&<Bkg Designers sf10 II>/Hinzeberg’s Mirror 02
&<Bkg Kaleidoscope>/@BlueberryPie
Simple/Center Tile/Top Left Mirror
AAA Frames/Foto Frame
Alien Skin Eye Candy 5/Textures/Weave
AP Gradient/Gradient (Pyramid)
Graphic Plus/Cross Shadow
with the kind permission of Tine

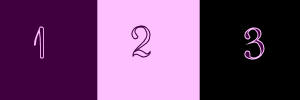
Colors
color 1 -> foreground color -> #40003f
color 2 -> background color -> #fec0ff
color 3 -> #000000 (black)
Use the paint brush to follow the steps
Realization
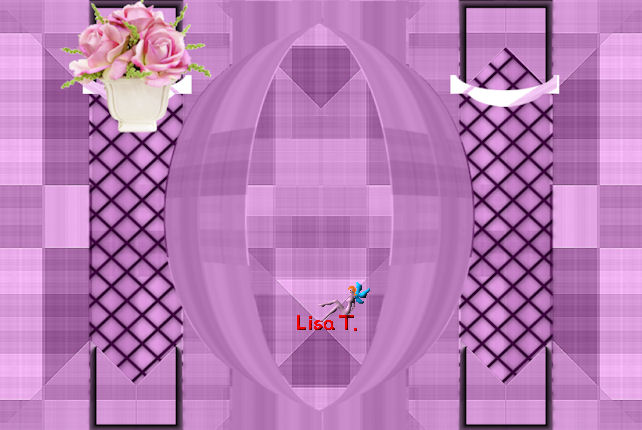
Step1
open a new transparent raster layer 900 *600 pixels
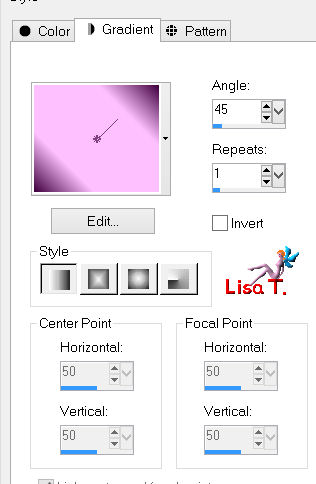
fill with a linear gradient ( 45 / 1 )
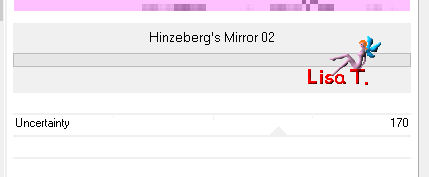
effects/plugins/Unlimited 2/&<Bkg Designers sf10 II>/Hinzebergs Mirror 02/Uncertainty/170
layers/duplicate - image/mirror
in the layers palette, set the opacity on 50%
layers/merge/merge down
Step 2
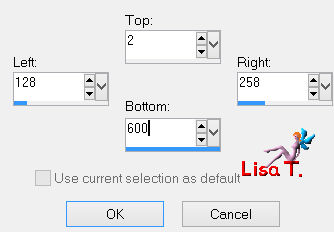
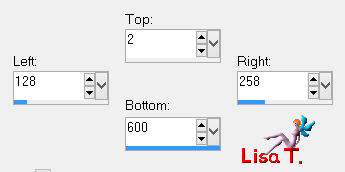
activate the Selection Tool/custom selection/top 2/left 128/bottom 600/right 258
selections/promote selection to layer
selections/select none
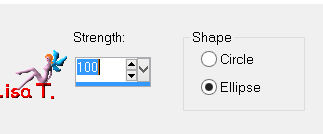
effects/geometric effects/Spherize (strength100 - check Ellipse)
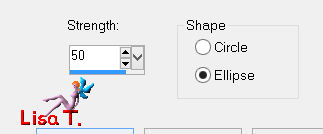
apply the same effects once more, changing the settings
Step 3
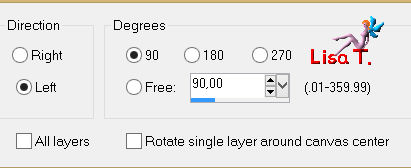
image/free rotate/left/90°/boxes unchecked
effects/image effects/offset (H : 300 / V : -67)
edit/copy- edit/paste as new image and set aside, you will need it later
back to your work (promoted selction still active)
layers/duplicate - image/flip
in the layers palette, close the visibility toggle of the bottom layer (Raster1)
effects/image effects/offset/ ( H : 0 / V : 75 )
layers/merge/merge down
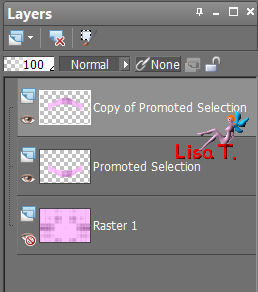
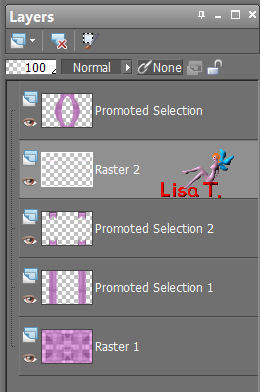
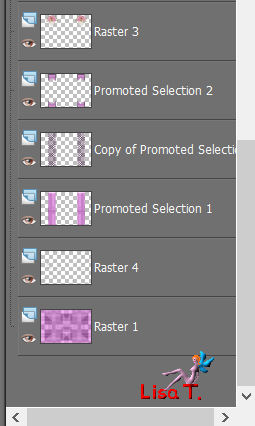
Step 4
your layers palette looks like this
open the visibility toggle of the bottom layer but keep the top layer active
effects/image effects/offset (H : 0 / V : -27 )
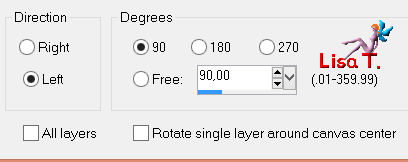
Step 5
image/free rotate/left/90°
effects/image effects/offset ( H : 0 / V : -11 )
activate the image you set aside in step 3
edit/copy - back to your work - edit/paste as new layer
image/resize/uncheck “resize all layers”/20%
in the layers palette, set the blend mode on “Multiply”
effects/image effects/offset/ ( H : -257 / V : 174 )/check “custom” and “transparent”
acitvate the Pick tool (Press key D or K of your keyboard)
stretch slightly to the left and the right
press the M key of your keyboard to disable the tool
layers/duplicate - image/mirror
layers/merge/merge down
Step 6
make sure the top layer (Raster 2) is active
set the blend mode of this layer on “normal”
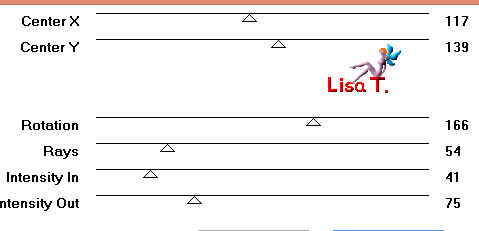
effects/plugins/VM Natural/Lightsplash
117 / 139 / 166 / 54 / 41 / 75
layers/duplicate - image/mirror
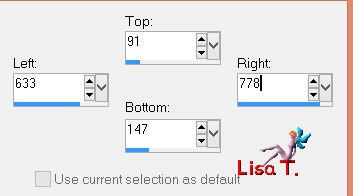
activate the selection tool/custom selection/top 91 / left 633 / bottom 147 / right 778
press the delete key of your keyboard
selections/select none
layers/merge/merge down
Step 7
in the layers palette, activate the bottom layer (Raster 1)
acitvate the selection tool/custom selection/top 2 / left 128 / bottom 600 / right 258
seletions/promote selection to layer
selections/select none
layers/duplicate - image/mirror
layers/merge/merge down
in the layers palette, activate the bottom layer (Raster1)
effects/plugins/Simple/Top Left Mirror
Step 8
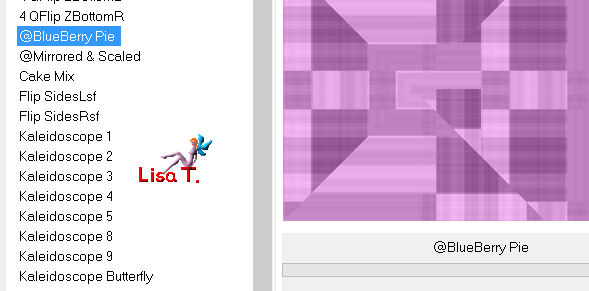
effects/plugins/Unlimited 2/&<Bkg Kaleidoscope>/@BlueberryPie
layers/duplicate - image/mirror
in the layers palette, set the opacity on 50%
layers/merge/merge down
Step 9
effects/edge effects/enhance
selections/load-save selection/from disk/selection 1
selections/promote selection to layer
effects/plugins/AAA Frame/Foto Frame/10/0/0/0/0/0/0/100

selections/select none
layers/duplicate - image/mirror
effects/image effects/offset/H : -770 / V : 0
Step 10
activate the selection tool/custom selection/top 491 / left 64 / bottom 600 / right 132
edit/clear/delete
selections/select none
layers/merge/merge down
layers/duplicate - image/flip
layers/merge/merge down
layers/arrange/move up
effects/image effects/offset/ (H : 128 V : 0 )
layers/duplicate - image/mirror
layers/merge/merge down
Step 11
in the layers palette, activate the top layer ( Raster2 )
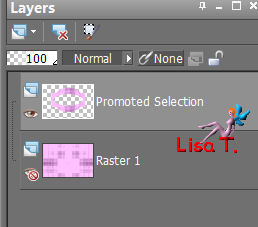
layers/arrange/move down
your layers palette looks like this
Step 12
in the layers palette, activate the second layer from the bottom (promoted selection 1)
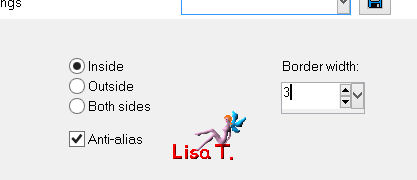
effects/3D effects/inner bevel

Step 13
layers/duplicate
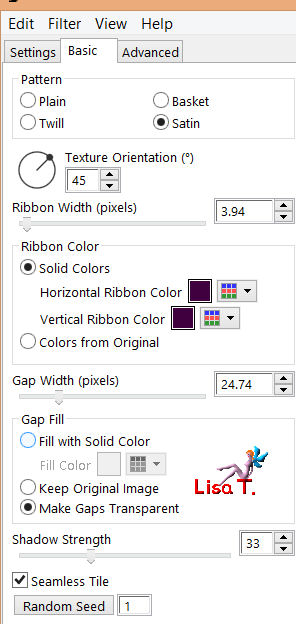
effects/plugins/Alien Skin Eye Candy 5/Textures/Weave
in the tab, choose BFM31 (preset provided)
in the tab “basic” check solid color and choose color 3
effects/3D effects/drop shadow/ 1 / 1 / 60 / 10 / black
in the layers palette, activate the top layer
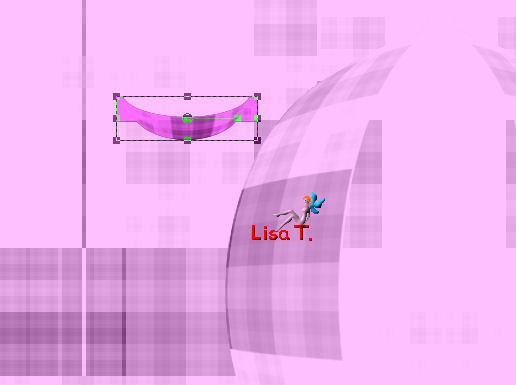
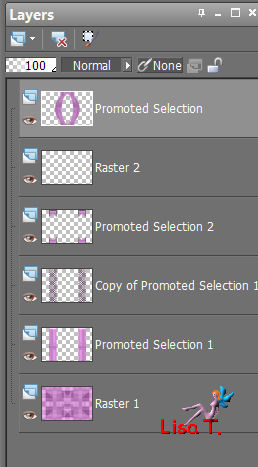
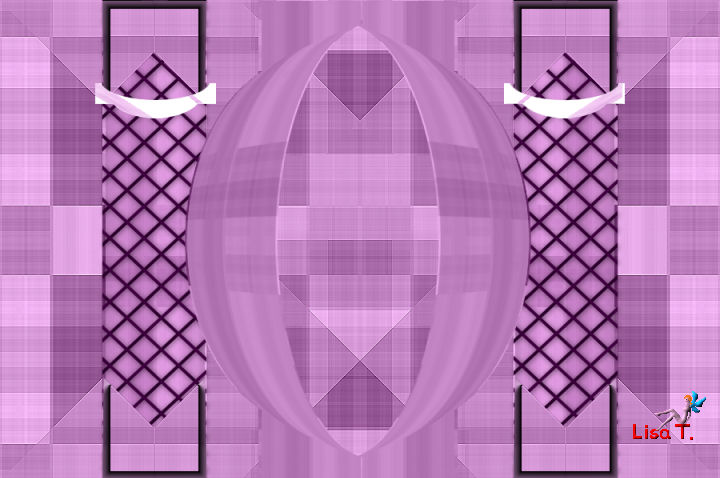
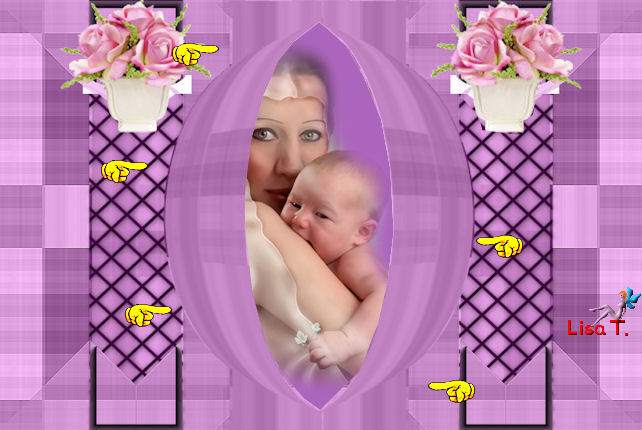
Step 14
your layers palette looks like this
and you work looks like this
activate the tube of the flower pot “5104e5ce”
edit/copy - back to your work - edit/paste as new layer
image/resize/uncheck “resize all layers”/45%
move it as shown on the final result
layers/arrange/move down 2 times
layers/duplicate - image/mirror
layers/merge/merge down
effects/3D effects/drop shadow/ 1 / 1 / 100 / 1 / black
and again drop shadow / -1 / -1 / 100 / 1 / black
Step 15
in the layers palette, activate the bottom layer (Raster1)
selections/select all
layers/new raster layer
activate the tube “c47cc087”
edit/copy - back to your work - edit/paste into selection
selections/select none
effects/image effects/seamless tiling/default settings
in the layers palette, set the blend mode on “dodge”
effects/edge effects/enhance
Step 16
make sure Raster 4 is still active
selections/load selection from disk/selection 2
edit/cut
selections/select none
in the layers palette, activate the top layer (promoted selection)
selections/select all - selections/float - selections/defloat
layers/new raster layer
edit/paste into selection
in the layers, set the blend mode on “dodge”, opacity on 40%
effects/edge effects/enhance
selections/select none
Step 17
acitvate the tube mothe/child “7497300da97cea”
layers/arrange/move down 2 times
move it properly and erase the parts of the tube that exceed
Step 18
activate the tube of the branch of rose
edit/copy - back to your work - edit/paste as new layer
layers/arrange/bring to top
effects/image effects/offset/ ( H -132 / V 20 )
layers/duplicate - image/mirror
layers/merge/merge down
selections/load selection/from disk/selections 3
press the delete key of your keyboard
selections/select none
Step 19
in the layers palette, activate the promoted selection (third from the top)
selections/select all - selections/float - selections/defloat
activate the top layer (raster 7)
selections/promote selection to layer
acitvate the layer below (raster 7)
press the delete key of your keyboard
acitvate the top layer (promoted selection 3)
set the blend mode of the layer on “dodge” and the opacity between 30% and 35%
selections/select none
Step 20
your layers palette looks like this

activate the promoted selection (fourth from the top)
effects/3D effects/drop shadow/ 0 / 0 / 60 / 15 / black
layers/merge/merge all (flatten)
selections/select all
effects/3D effects/cutout/ 0 / 0 / 100 / 30 / black/uncheck “fill interior with color”
selections/select none
image/add borders/check “symmetric”/3 pixels/color 1
edit/COPY
selections/select all
image/add borders/60 pixels/black/check “symmetric”
selections/invert/fill the selection wit color 1
Step 22
selections/promote selection to layer
fill with color 2
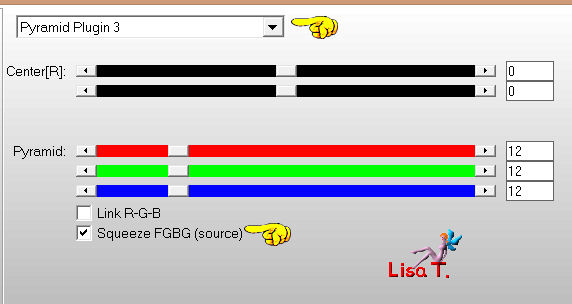
effects/plugins/AP Gradient/Gradient/Pyramid
in the drop down menu, find Pyramid Plugin 3
Center 0/0 pyramid 12 /12 /12 check Squeeze FGBG (source)
note of Sweety : for those who have problems with this plugin
the effect is provided in the material, you just have to copy it and paste it in the selection
eventually, colorize it with your color. Then continue to follow the steps normally
set the blend mode of the layer on “Luminance (Legacy)
adjust/sharpness/sharpen
selections/select none
Step 23
layers/duplicate - image/mirror
in the layers palette, set the opacity on 50%
layers/merge/merge down
selections/loard selection from disk/selection 4
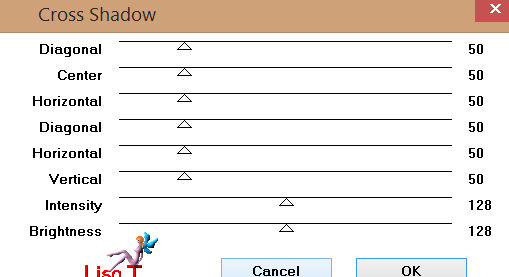
effects/plugins/Graphic Plus/Cross Shadow/ 71/50/50/50/50/50/50/128
Step 24
keep the selection active
layers/merge/merge down
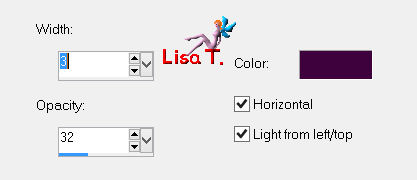
effects/texture effects/blinds/color 1
keep the selection active
layers/new raster layer
activate the tube “c47cc087”
edit/copy - back to your work - edit/paste into selection
selections/select none
layers/duplicate - image/mirror
layers/merge/merge down
in the layers palette, set the blend mode on “dodge” and the opacity between 60% and 65%
layers/merge/merge all (flatten)
Step 25
selections/select all
selections/modify/contract/30 pixels
selections/modify/select selection borders/3 pixels
layers/new raster layer
fill the selection with color 2
selections/select none
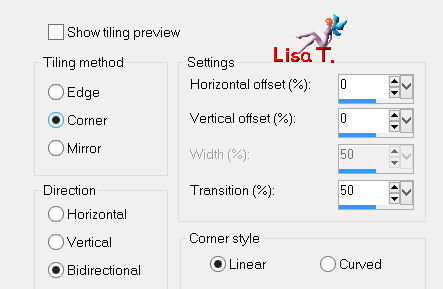
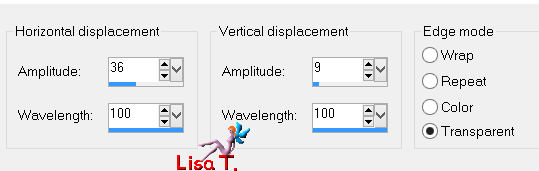
effects/distortion effects/wave
layers/duplicate - image/mirror
layers/merge/merge down
in the layers palette, set the blend mode on “dodge” and the opacity on 50%
image/add borderscheck “symmetric”/2 pixels/color 1
image/add borderscheck “symmetric”/1 pixel/color 3
Step 26
apply your signature
layers/merge all (flatten)
image/resize/width 900 pixels
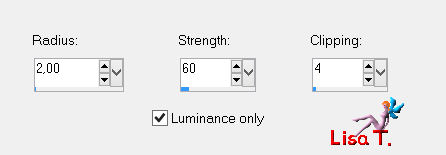
adjust/sharpness/unsharp mask
File/save as.... type jpeg
Apply your signature
save as… type jpe
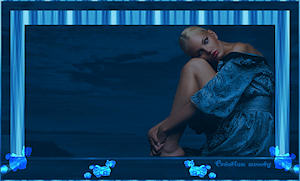
your tag is finished
Thank you to have realized it
To write to Sweety

if you want to be informed about Sweety's new tutorials, subscribe to her newsletter
the link is on her home page.

Back to the board of Sweety’s tutorials
board 1  board 2 board 2

|