

You will find the original tutorial Here
Sweety has the permission of the tubers to use their tubes.
You can find the banners of these tubers in the left column
of her blog, under the heading "autorisations"

some of the tubes Sweety uses were received in sharing
groups
or found on the web
if one of them is your property, please let us know
a link to your site will be added
they are provided as « single-use » for
this tutorial
you are not allowed to share or use them for another purpose.
you are not allowed to present them on your site, blog
or forum
This tutorial is a personal creation,
any resemblance with another one would be pure coincidence

Thank you to the tubers for their great job
they make our creations possible
translator’s note : This translation is my property,
it is strictly forbidden to copy or distribute it on the Net
Thanks to Sweety for her kind permission
Sweety works with PSPX2, I work with PSP2018, but it is possible to use
another version.
tubes without tuber‘s watermark are ALWAYS stolen tubes
Please respect the tuber ‘s work
do like me : choose tubes with a watermark and give credit to the tuber
Thank you ! have fun....
Material
color palette - election - decoration tubes

landscape image and other tubes not provided
Plugins
Simple : (4WayAverage) - Andrew’s Filters 51 : (Straight
Line 234) –
AAAFrames : (Foto Frame) -
Thank you to Tine for her permission to use her filters
page

Colors

you will need about 1 hour1/2 to
create your tag (not counting the time to choose your tubes)
according to the version of PSP you use, your tag might
be slightly different from the example
Use the pencil to follow the steps
hold down left click of your mouse to grab it and move
it

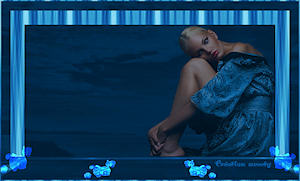
Realization
1
pick up two colors into your landscape image
FG color -> dark color
BG color -> light color
open a new transparent image 950 * 550 pixels
selections -> select all
copy / paste into selection the landscape iamge
selections -> select none
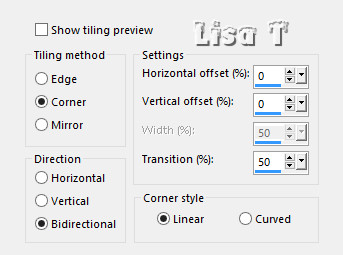
effects -> image effects -> seamless tiling
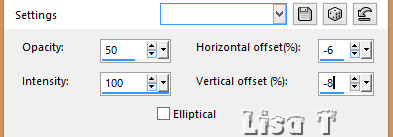
adjust -> blur -> radial blur
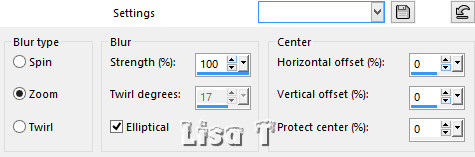
optional
layers -> new raster layer
layers -> arrange -> send to bottom
flood fill with FG or BG color (as you like)
highlight top layer and set the blend mode on « Luminance » or
other of your choice
layers -> merge -> merge down
2
selections -> select all
selections -> modify -> contract / 22 pixels
selections -> promote selection to layer
copy / paste the landscape into selection
selections -> invert
highlight Raster 1
effects -> plugins -> Andrew’s Filter 51 -> Straight
Line 234
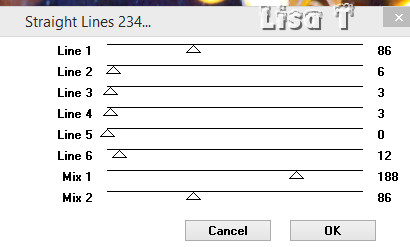
adjust -> sharpness -> sharpen
highlight layer above (promoted selection)
optional
effects -> image effects -> seamless tiling as in
step 1
selections -> invert
effects -> relection effects -> feed back
selections -> select none
layers -> duplicate
image -> mirror -> mirror horizontal
opacity of the layer : 50%
layers -> merge -> merge down
adjust -> sharpness -> sharpen
3
copy / paste as new layer decoration 1
don’t move it
you may change the blend mode if you want (Multiply - Luminance
(Legacy) - or other)
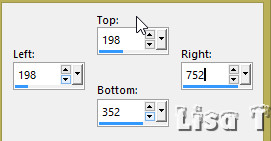
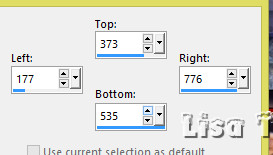
enable selection tool -> rectangle -> custom selection
layers -> new raster layer
copy / paste into selection the landscape image
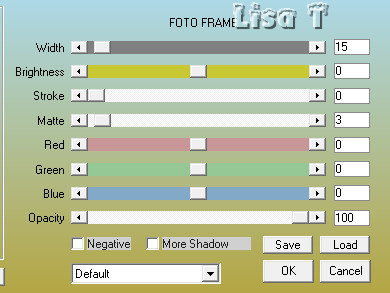
effects -> plugins -> AAA Frames / Foto Frame
selections -> invert
effects -> 3D effects -> drop shadow -> 0 / 0
/ 100 / 50 / black
selections -> select none
4
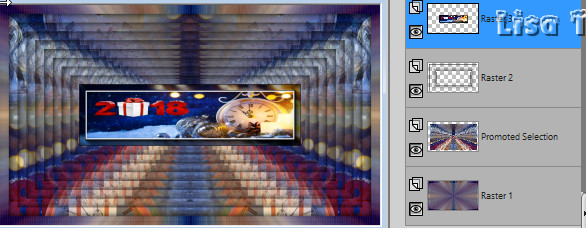
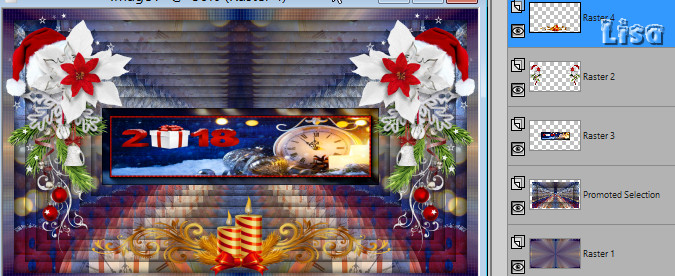
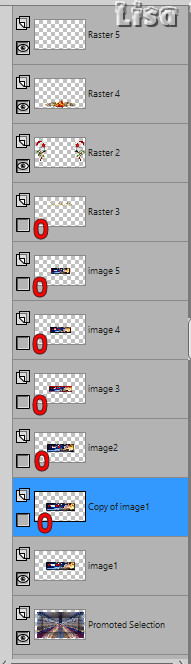
your tag and you layers palette look like this
selections -> load selection -> from disk -> selection
1
flood fill selection with color 3
effects -> artstic effects -> Halftone
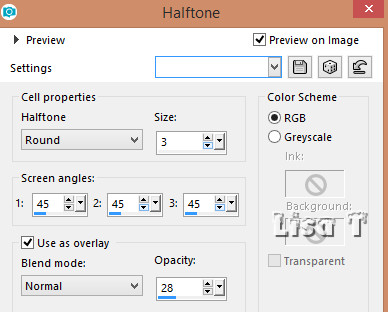
selections -> select none
highlight Raster 2 (underneath)
layers -> merge -> merge down
5
highlight top layer
copy / paste as new layer the corner tube (or other)
resize if necessary, and move it to the left
layers -> duplicate
iamge -> mirror -> mirror horizontal
layers -> merge -> merge down
optional
layers -> new raster layer
enable selection tool -> rectangle -> custom selection
copy / paste the decoration into selection
selections -> select none
6
your tag and you layers palette look like this
top layer is highlighted (Raster 4)
highlight the layer in the middle of the stack ( landscape,
raster 3)
layers -> duplicate
*** image -> resize -> untick « resize
all layers » -> 90% ***
redo from *** to *** 3
more times
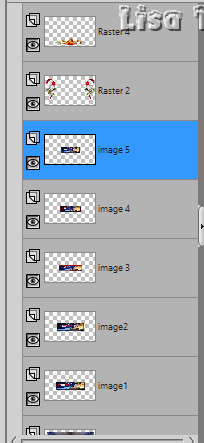
rename these 5 layers « image 1 » « image
2 » ..... « image 5 » as
shown below
your work looks like this
copy / paste as new layer the decoration 2 (text)
effects -> image effects -> offset -> H :
80 / V : 154
apply your watermark
7
if you don’t want to animate your tag ->
layers -> merge all (flatten)
save your work as... type .jpeg
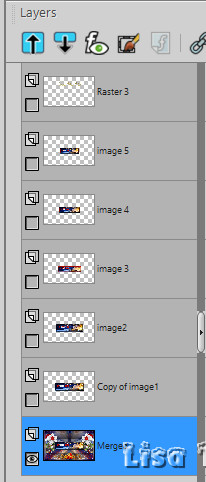
if you wish to animate your creation -> highlight « image
1 » (third layer from the bottom)
layers -> duplicate
close the eye of this layer, as well as the eyes of the
5 layers above it
highlight any opened layer -> layers -> merge -> merge
visible
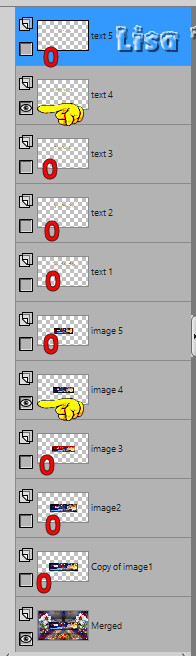
your layers palette looks like this
8
highlight top layer (text)
*** open the eye -
layers -> duplicate and resize to
90% *** -> 4 times
you now have 5 layers of the text tube
rename them « text 1 » « text
2 »....... « text 5 »
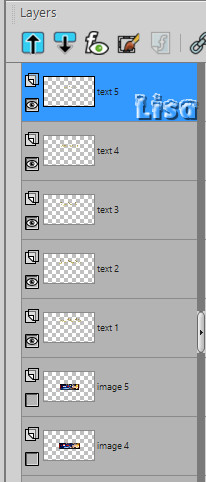
top layer is highlighted
close the eyes of the 4 layers underneath but keep top
layer highlighted
open the eye of « image 5 »
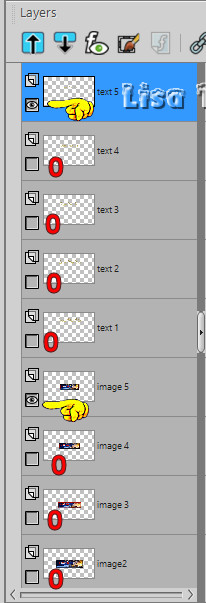
9
edit -> copy special -> copy merged
open Animation Shop (AS) and paste as new animation
back into PSP
close the eye of « text 5 » as well
as the eye of « image 5 »
open the eye of « text 4 » and « image
4 »
edit -> copy special -> copy merged
into AS -> paste after current frame
back into PSP
close the eyes of « text 4 » and « image
4 »
open the eyes of « text 3 » and « image
3 »
edit -> copy special -> copy merged
into AS -> paste after current frame
back in to PSP
do the same thing two more times with texts 2 and 1 and
images 2 and 1
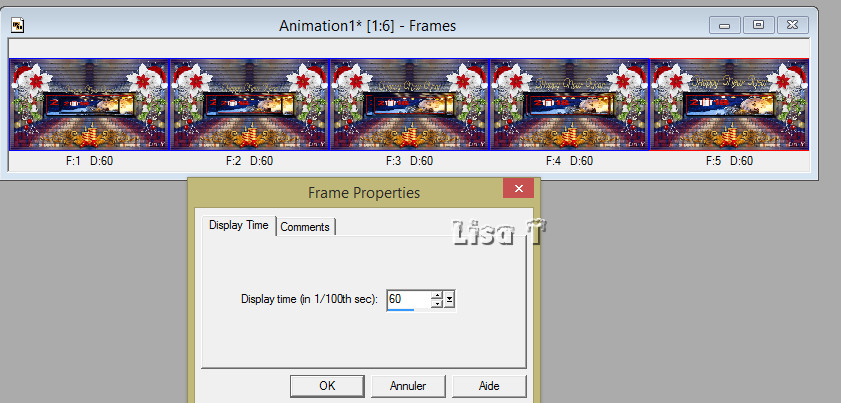
you must have 5 frames into the animation (Animation Shop)
10
edit -> select all
animation - > image property -> 60
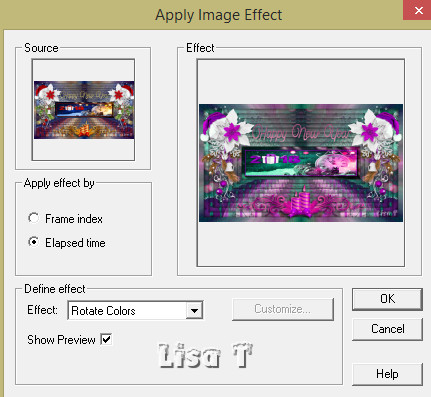
effects -> click on « apply image effect » and
choose « rotate colors »
view your animation
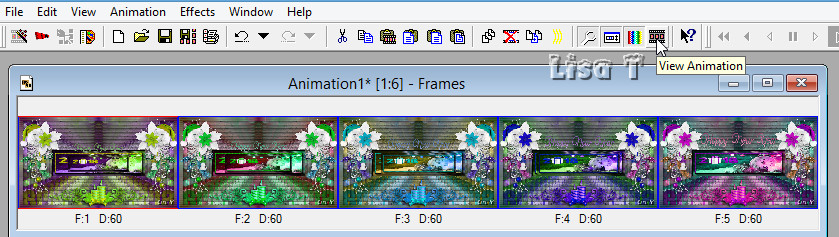
if you are satisfied, save as... type .gif
To write to Sweety

Another result (created with Ulead Gif Animator
- 10 frames)

another Result with other tubes and effects with UGA
Poinsettias by Bonni S - 2018 by Cal - Thank you

Your creations on Sweety's site
don't hesitate to send her your creations

Back to the boards of Sweety’s tutorials
board 1  board 2 board 3 board 2 board 3

|