Sweet Poppy

Original tutorial can be found HERE

I am member of TWInc
This translation is protected


Filter used
Factory 1/Weave
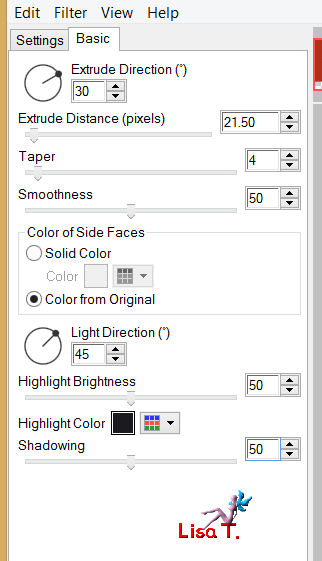
alien skin IMpact/Extrude
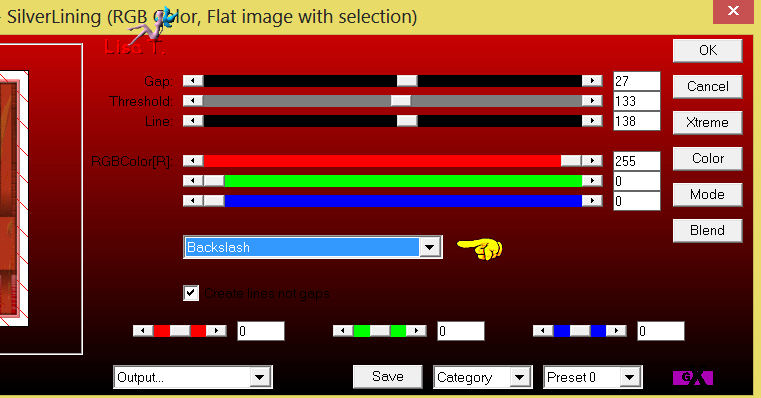
AP Innovations/Lines Silverlining/Backlash
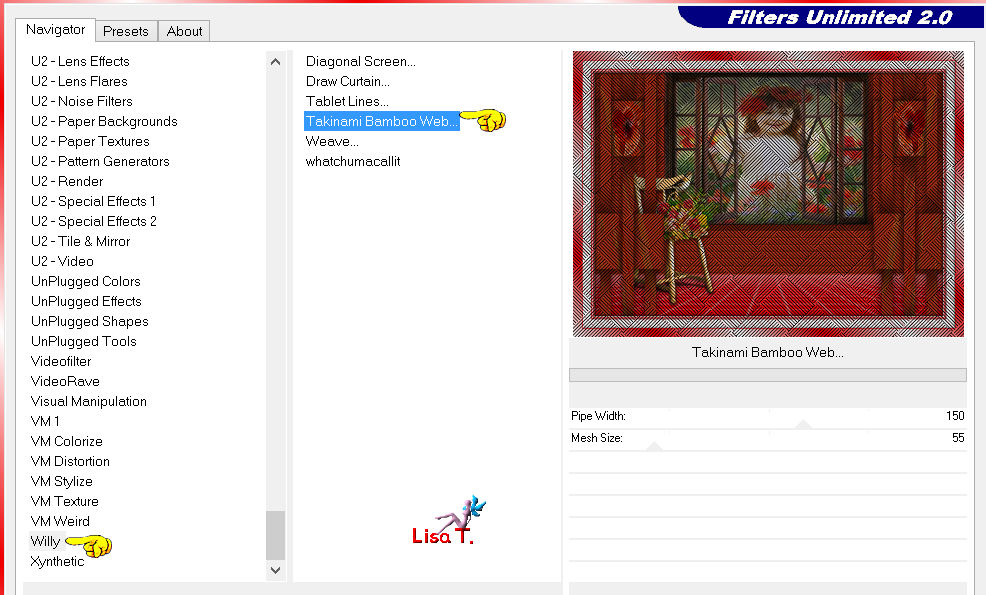
Unlimited 2/Willy/Takinami Bamboo Web

Material

Colors
foreground color : #ffffff / color 1
background color : #ed0002 / color 2
#af3219 / color 3
Realization
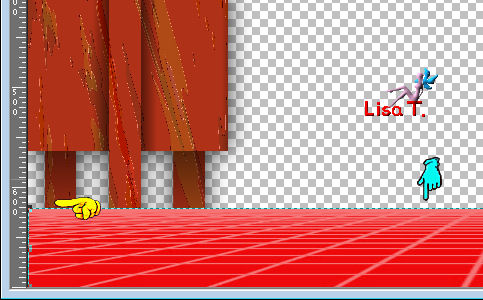
Use the paintbrush to follow the steps
left click to grab it
 |
Step 1
activate the alpha layer « alpha-coquelicots »
window/duplicate. Always work on the copy
Step 2
selections/select all
Step 3
activate the image “coquelicot 1”
edit/copy - back on your work - edit/paste into selection
selections/select none
Step 4
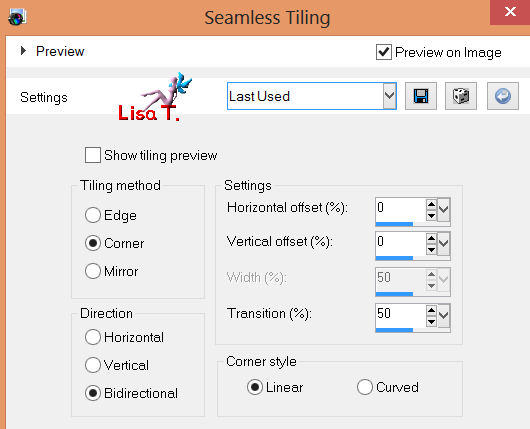
effects/image effects/seamless tiling
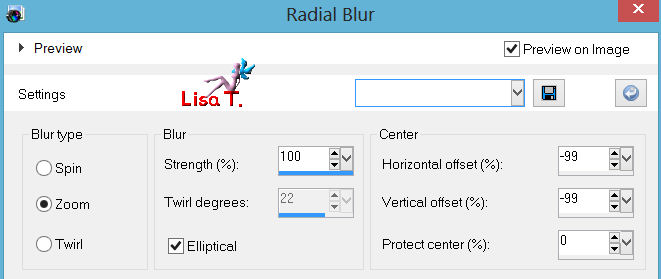
adjust/blur/radial blur
Step 5
layers/duplicate - image/mirror - image/flip
set the opacity of the layer on 50% and merge down
effects/edge effects/enhance more
Step 6
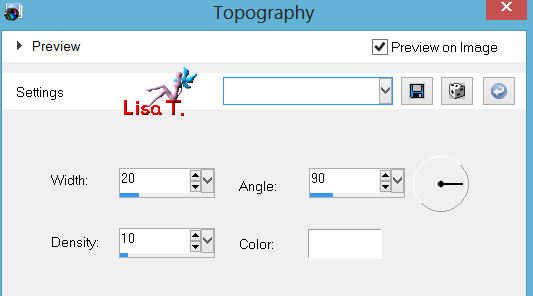
effects/artistic effects/topography
Step 7
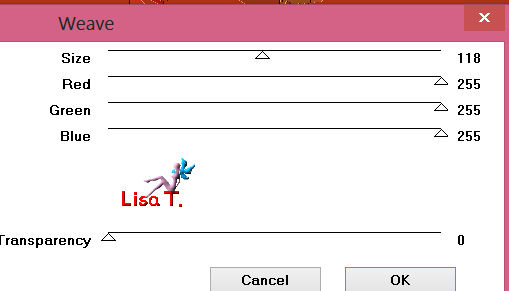
effects/plugins/Filter Factory A/Weave
Step 8
activate the pick tool (K)
view/check rulers
push to the left (until the number 200)
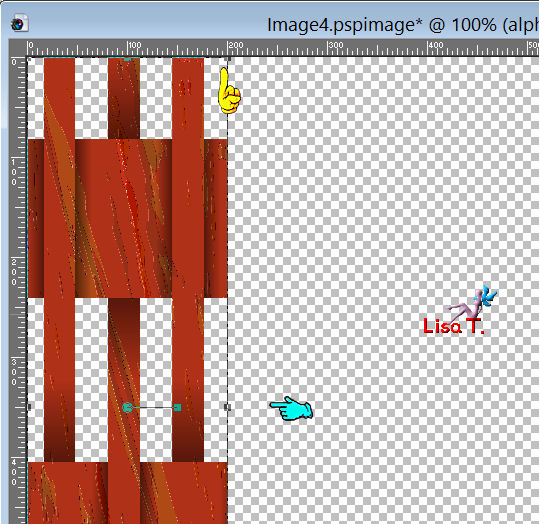
press the M key of your keyboard to disable the pick tool
layers/duplicate - image/mirror
layers/merge/merge down
effects/3D effects/drop shadow / 0 / 0 / 80 / 35 / black
Step 9
layers/new raster layer
paint with color 1
Step 10
layers/new raster layer
paint with color 2
Step 11
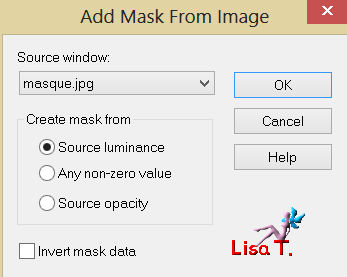
open the mask and reduce it
laeyrs/new mask layer/from image
layers/merge/merge group
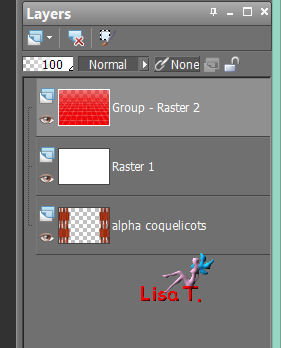
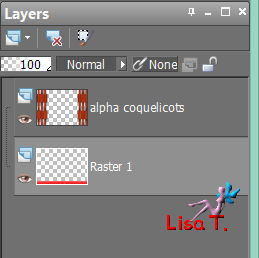
Step 12
your layers palette must be like this
Step 13
activate the top layer “group –raster 2”
layers/merge/merge down
Step 14
activate the pick tool (K)
pull this layer down until number 620
press key M to disable the pick tool
Step 15
layers/arrange/move down
your layers palette must be like this
Step 16
close the visiblity toggle of the layer “alpha coquelicot”
activate raster 1
layers/new raster layer
selections/load-save selection/from alpha channel/selection #1
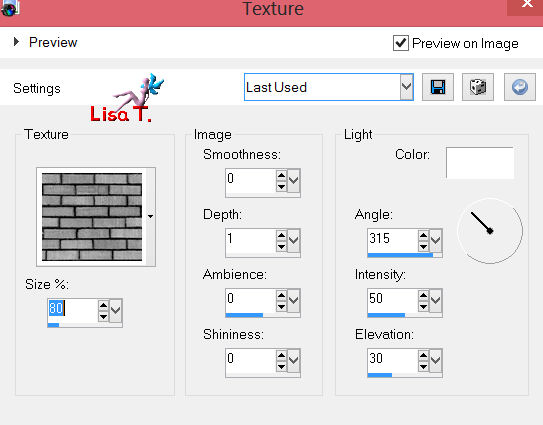
paint with color 3
effects/texture effects/texture
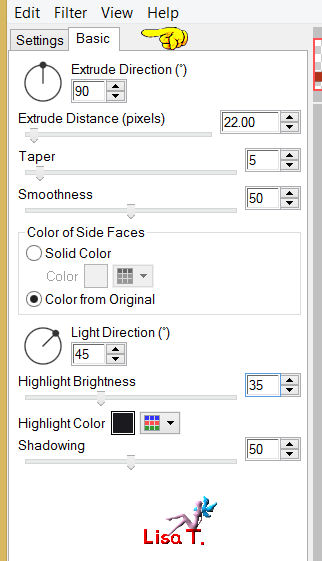
effects/plugins/Alien Skin Impact/Extrude
selections/select none
effects/3D effects/drop shadow/ 0 / 0 / 100 / 45 / black
layers/arrange/move down
Step 17
layers/new raster layer
selections/load-save selection/from alpha channel/selection 2#
activate the tube “coquelicot 2”
edit/copy - back on your work - edit/paste into selection
activate the tube “tube-jacotte-575” (the girl)
copy and paste into selection
selections/select none
layers/arrange/send to bottom
Step 18
keep the layer active
layers/new raster layer
selections/load-save selection/from alpha channel/selections #3
paint with color 3
effects/textures effects/texture brick as before (step 16)
effects/Alien Skin Impact/Extrude
selections/select none
Step 19
layers/duplicate - image/mirror
Step 20
activate the tube of the window (fenetre)
edit/copy - boack on your work - edit/paste as a new layer
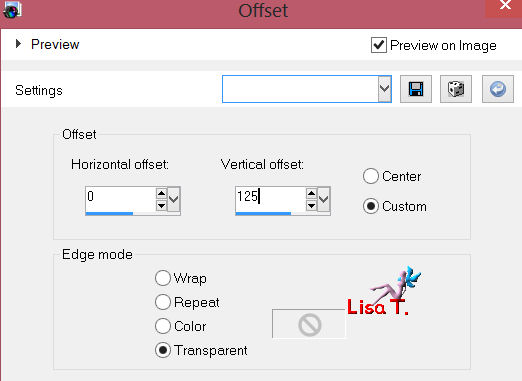
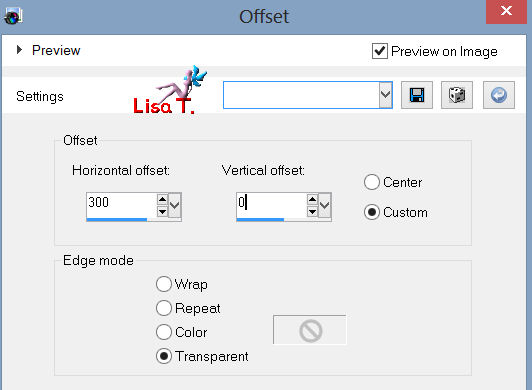
effcts/image effects/offset
layers/arrange/move down
Step 21
activate your work (5 layers)
Step 22
activate the top layer (alpha coquelicots)
copy the tube of the chair and paste as a new layer
layers/arrange/move down
move the tube as shown on the final result
drop shadow as you like (a very light shadow)
Step 23
activate the alpha layer (the gates)
selections/load-save selection/from alpha channel
layers/new raster layer
acivate the tube of the poppy (coquelicot3)
edit/copy - back on your work - edit/paste into selection
selections/select none
effects/edge effects/enhance
layers/duplicate - image/mirror
layers/merge/merge down
Step 24
open the visibility toggle of the layer “alpha coquelicots”
layers/merge/merge all (flatten)
Step 25
image/add borders/check symmetric
2 pixels color 1
2 pixels color 2
2 pixels color 1
2 pixels color 2
Step 26
selections/select all
selections/modifiy/contract/8
selections/invert
effects/3D effects/inner bevel

effects/3D effects/drop shadow/ 5 / 5 / 60 / 8 / black
and with -5 / -5 / 60 / 8 / black
selections/select none
Step 27
image/add borders/25 pixels/color 1
select thiat border
effects/plugins/AP Innovation/Line SilverLining
effects/3D effects/inner bevel as in step 26
selections/select none
Step 28
image/add borders/2 pixels/color 2
Step 29
image/add borders/25 pixels/color 1
select that border
paint with a linear gradient ( 45/7 ) (uncheck invert)
with colors 1 and 2
effects/plugins/Unlimited 2/Willy/Takinami Bamboo Web
effects/3D effects/inner bevel (as before)
selections/select none
Step 30
image/add borders/2 pixels/color 1
Step 31
activate the tube of the lady
copy and paste as a new layer
effects/image effects/offset
Step 32
effects/3D effects/drop shadow
47 / 53 / 20 / 10 / black
Step 33
image/add borders/2 pixels/color 2
Step 34
iamge/resize to 900 pixels width
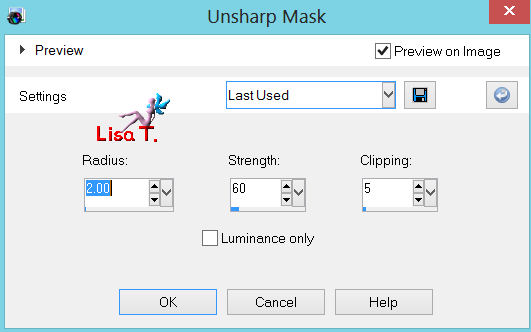
adjust/sharpness/unsharp mask
Step 35
apply your signature, and save as... type jpeg
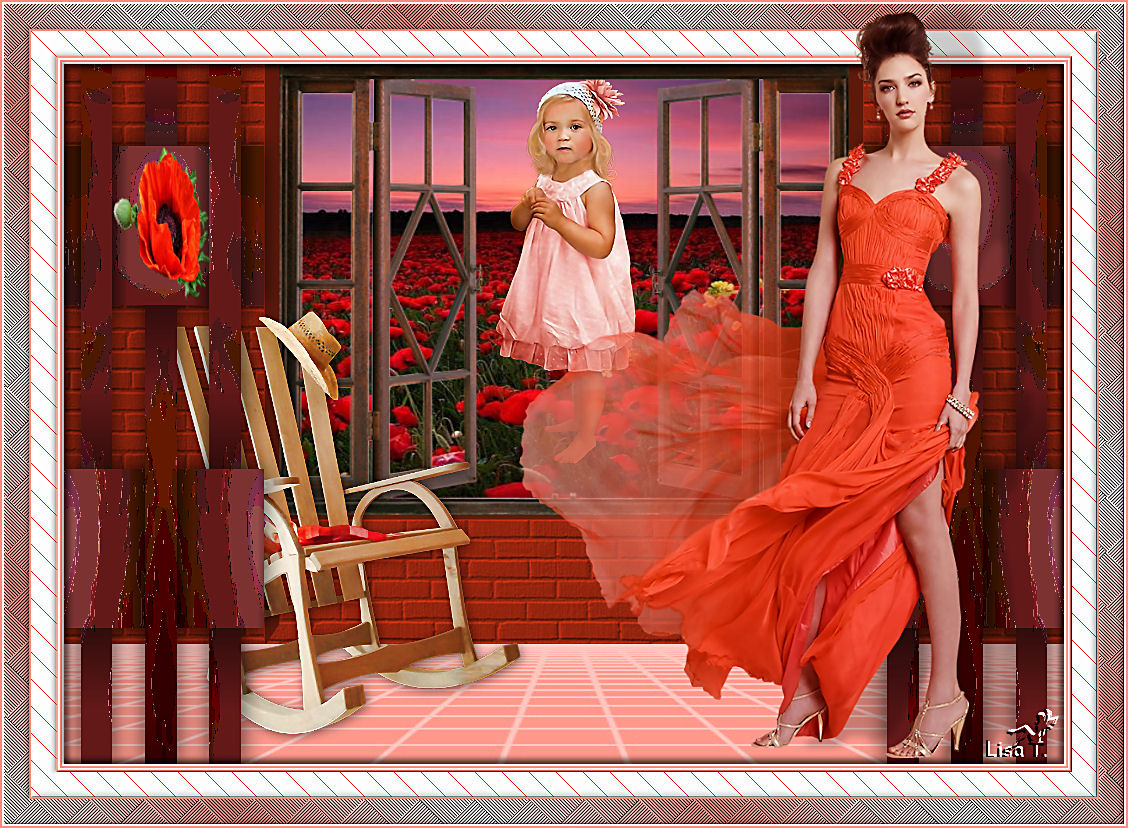
Your tag is now finished

Thank you to have realized this tutorial
Do not hesitate to send your tags to Jacotte

she will be very glad to see it
and to present it on her site, with your permission of course.

If you want to be informed about Jacotte’s latest tutorials
join her NewsLetter

My try with my tubes
Back to the boards of Jacotte's tutorials
board 1  board 2 board 2

|