Summer is ending

You will find the original tutorial here :


This tutorial is a personal creation.
Any resemblance with another one would be only pure coincidence.
It is stricly forbidden to modify images, to change their name or take off the matermarks,
To present them on your sites or blog,
To share them in groups,
to make a bank of images, or to use them on lucrative purposes.

Thank you to respect Animabelle’s work and the tubers work.
Don’t hesitate to warn her if you have any trouble with this tutorial.


Material
tubes and a mist created by Animabelle (not provided)
1 mask – Aditas
1 font
1 decoration tube by Aimabelle
1 color palette
1 text tube

Animabelle’s important note
Tubers have been warned that disrespectful and dishonest bloggers come steeling our tubes
they grab them into the folders of material we use to provide for our tutorials.
These people rename and convert the tubes to png type,
and then they offer them for download in their blogs, pretending they have done the work.

To protect my work, I am therefore forced to no longer provide my tubes with the material.
Honest people will understand my way of doing, I hope.
I thank them for their understanding.
Very important Tip:
never take your tubes on these blogs, because most of the time all of these tubes are stolen tubes.
Always make sure that the tubes you take have been signed by their authors !
Thank you.
|
Filters used
Mehdi
FunHouse
User defined filter
Mura's Seamless
Tramages
Mura's Meister
&BKG Kaleidoscope

“Renée Graphisme” filters, with her kind permission


translator’s note : I use PSP18, but this tutorial can be realized with another version.
I translate exactly the indications of Animabelle

Colors used
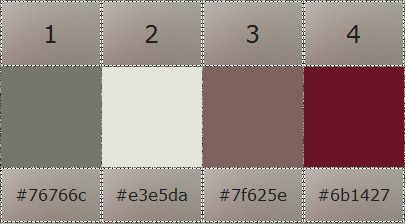
Don't hesitate to change the colors and the blend mode of the layers, and the shadows,
according to your tubes and images.

Important
Open all images in PSP, duplicate them and close the originals.
work with the copies
open the mask and minimize it to tray

use the pencil to follow the steps
left click to grab it
Ce pinceau vous aidera à vous repérer dans le tutoriel
un clic gauche pour le déplacer

|

Execution
Step 1
open a new transparent raster layer : 900 X 600 pixels
FG color n° 1 and BG color n°2
effects/plugins/Mehdi/Wavy Lab 1,1
color 3 on the right, as shown below
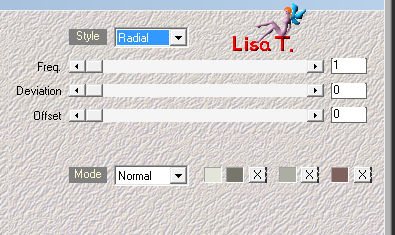
effects/plugins/FunHouse/Radial Moirror

effects/user defined filter/Emboss 3
Step 2
layers/duplicate
image/mirror/mirror vertical
layers/new mask layer/from image
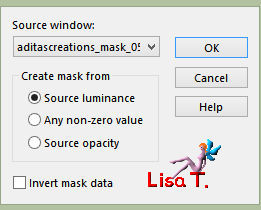
layers/merge/merge group
effects/image effects/seamless tiling/default settings
effects/3D effects/drop shadow/white
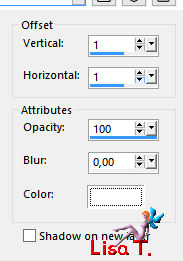
effects/Mura's Seamless/Shift at Arch
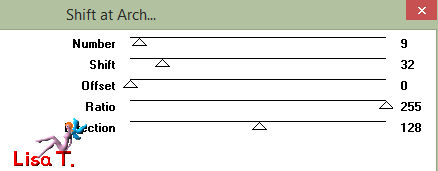
effects/user defined filter/emboss 3
layers/merge/merge visible
Step 3
activate the selection tool/custom selection

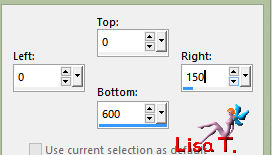
selection/promote selection to layer
selections/select none
effects/plugins/Tramages/Gradient/Spokes Ratio Maker

Step 4
activate the selection tool/rectangle/custom selection
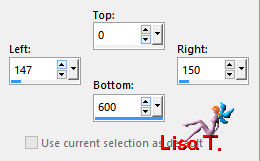
paint with the following gradient (colors 3 and 1)
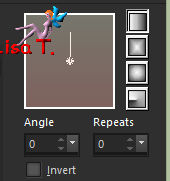
selections/select none
effects/3D effects/drop shadow : 0 / 15 / 50 / 20 / black
layers/duplicate
image/mirror/mirror horizontal
image/mirror/mirror vertical
layers/merge/merge down
Step 5
activate the bottom layer (merged)
copy and paste the misted landscape as a new layer
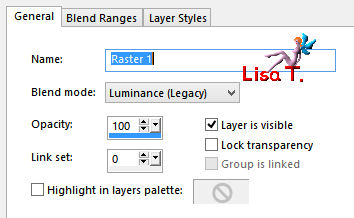
layers/properties/blend mode : « luminance (legacy) »
(optional, according to your colors and tubes)
Step 6
layers/new raster layer
activate the selection tool/rectangle/custom selection
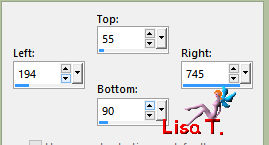
flood fill white
selections/select none
effects/distortion effects/wave

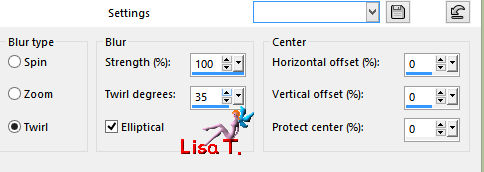
adjust/blur/radial blur
Step 7
activate the upper layer (promoted selection)
copy the character tube and paste as new layer
image/resize : 80% (disable « resize all layers »)
to make your appearance of the tube softer, proceed as below :
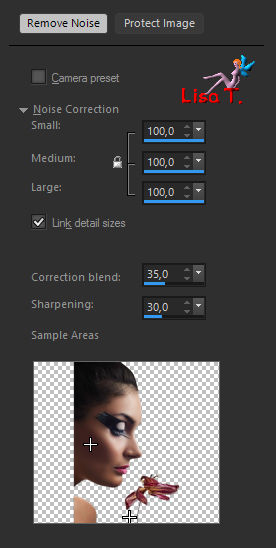
adjust/digital camera noise removal
don't do it with your personal tubes, except if it is really necessary
improve your image if necessary
then move the tube to the left (see final result)
effects/3D effects/drop shadow
0 / 15 / 50 / 40 / black
Step 8
copy the Decoration tube and paste as new layer
image/resize : 10 % (disable « resize all layers »)
adjust/sharpness/unsharp mask

effects/3D effects/inner bevel
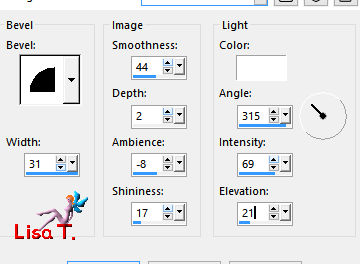
effects/image effects/offset
horizontal : 330 / vertical : 250 /custom / transparent
Step 9
effects/Mura's Meister/Copies
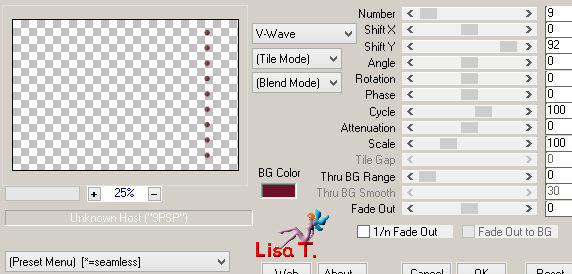
effects/3D effects/drop shadow
(-5) / 5 / 40 / 20 / black
layers/merge/merge visible
window/duplicate (set aside for a later use)
Step 10
back on your work (merged)
image/add borders/check « symmetric »
3 pixels color 4
50 pixels color 2
select the large border with the magic wand (enable « inside »)
copy the image duplicated the step before and paste into selection
image/mirror/mirror horizontal
adjust/blur/radial blur
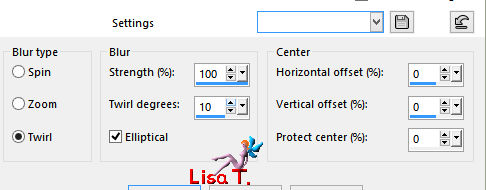
effects/plugins/<&Bkg Kaleidoscope/4QFlip ZBottomL
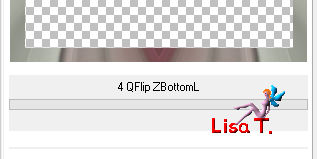
selections/select none
Step 11
layers/duplicate
selections/select all
selections/modify/contract : 15 pixels
selections/invert
edit/cut
selections/invert
selections/modify/contract : 15 pixels
edit/cut
selections/select none
effects/3D effects/inner bevel

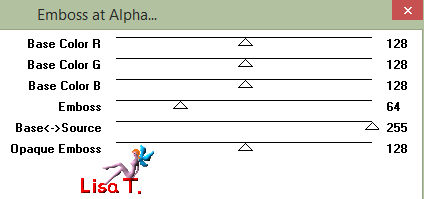
effects/plugins/Mura's Seamless/Emboss at Alpha
Step 12
image/add borders/3 pixels/color 4
choose the font you like and write your text with color 4
I wrote « summer is ending », (100 pixels)
you will find the font Animabelle used in the material provided
drop the shadow you like (a light shadow gives good results)
layers/merge/merge all
apply your signature and saver your work as ... type jpeg

Don't hesitate to write to Animabelle if you have any trouble with her tutorial
To be informed about her new tutorials, join her NewsLetter

If you created a tag with her tutorial and wish it to be shown,
send it to Animabelle !
It will be her pleasure to add it to the gallery at the end of the tutorial
don’t resize your tag under 800 pixels width if you want her to present your tag


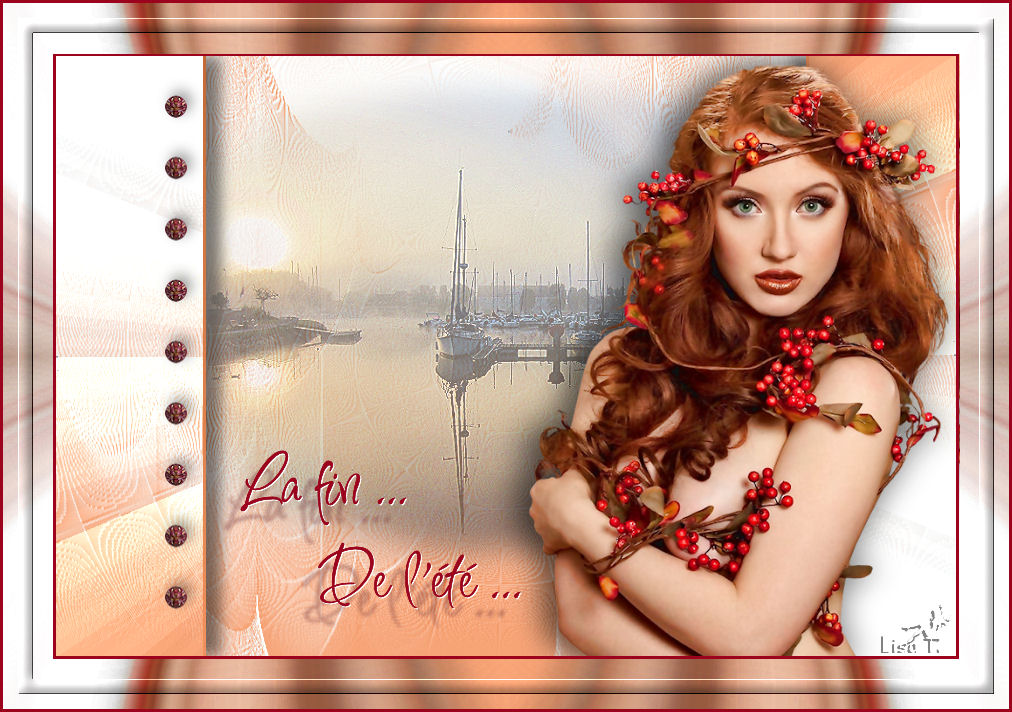
My tag with my tubes
Back to the board of Animabelle's tutorials


|