

You will find the original tutorial here :
This tutorial is a personal creation.
Any resemblance with another one would be only pure
coincidence.
It is stricly forbidden to modify tubes, to change
their name or take off the matermarks,
To present them on your sites or blog,
To share them in groups,
to make a bank of images, or to use them on lucrative purposes.

Thank you to respect Shawnee’s work and the tubers
work.
Don’t hesitate to warn me if you have any trouble
with this translation,
and I’ll try to fix the problem as quickly as I can

I used PSP 2020 to create my tag and make the translation
you can follow this tutorial with another version
of PSP, but the result might be slightly different

Supplies and hints
tubes – palette - Shawnee’s watermark – alpha
layer (selections included in the alpha channel)

TIP 1 -> if you don’t want to install a font -->
open it in a software as « Nexus Font » (or
other font viewer software of you choice)
as long as both windows are opened (software and font),
your font will be available in your PSP
TIP 2 -> from PSPX4, in the later versions of PSP the
functions « Mirror » and « Flip » have
been replaced by -->
« Mirror »has become --> image => mirror => mirror
horizontal
« Flip » has become --> image => mirror => mirror
vertical

Plugins needed
Mehdi>Sorting Tiles
Andromeda>Perspective
Mura's Meister>Copies
Mura's Meister>Perspective
ICNET>Unlimited>VM>Visual Manipulation
ICNET>Unlimited>Factory GalleryF>Instant Tiles
AAA Frame>Foto Frame
Thank you Renée Salon for sharing your plugins page


Use the pencil to mark your place
along the way
hold down left click to grab and move it
 |

Prepare your work !
duplicate all the tubes and work with the copies to preserve originals
save your work often in case of problems with your
psp
use the Dropper tool to pick up your colors into
your tubes and misted images
Shawnee chose these :
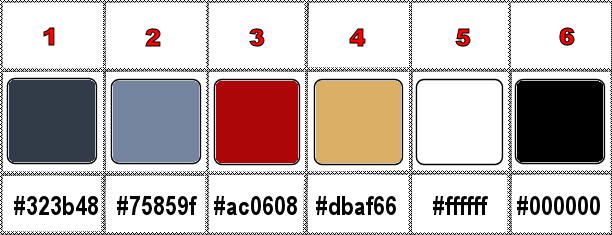
don’t hesitate to change blend modes and opacities
of the layers to match your personal colors and tubes
1
open the alpha layer (copy)
selections => select all
copy / paste « P150-Buste Africain » into
selection
selections => select none
effects => image effects => seamless tiling => default
settings
adjust => blur => gaussian blur => 30
layers => merge => merge all (flatten)
2
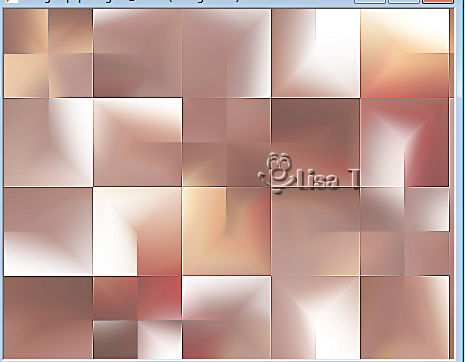
effects => plugins => Mehdi => Sorting Tiles => 150
/ 300 / 178 / tick « Plus »
opacity of the layer : 70%
layers => merge => merge all (flatten)
3
effects => edge effects => enhance more
layers => duplicate
image => resize => untick « resize all layers » => 70%
effects => 3D effects => drop shadow => 0 / 0
/ 100 / 25 / black
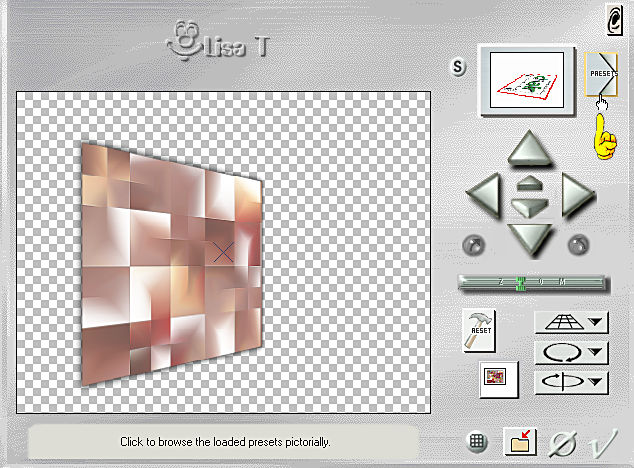
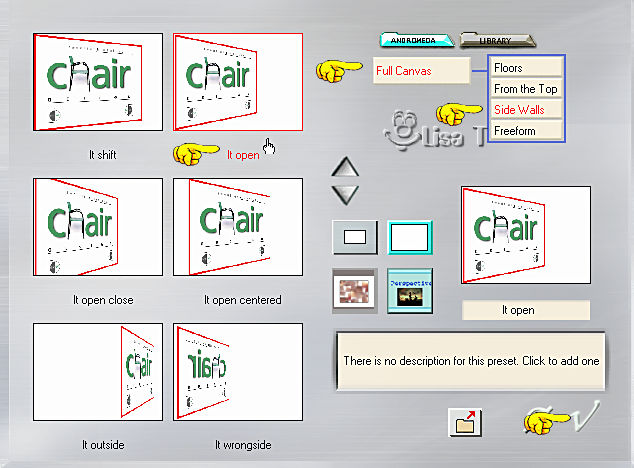
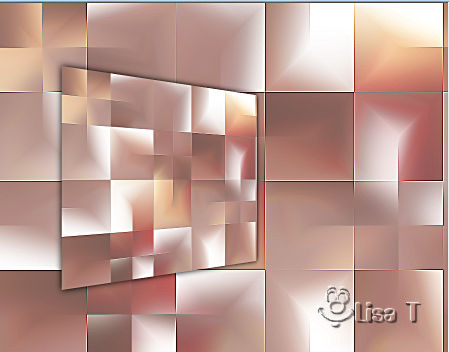
effects => plugins => Andromeda => Perspective
Full Canvas / Side Walls / it open
4
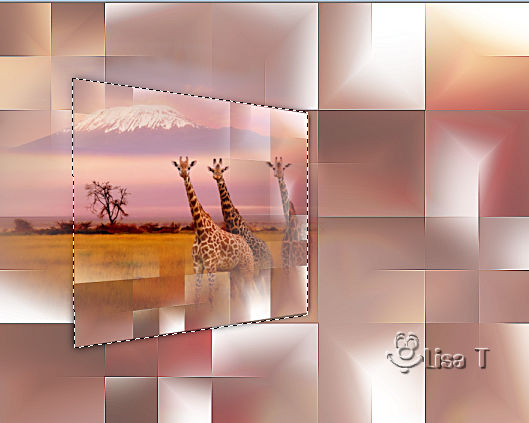
selections => load-save selection => from alpha channel
=> selection # 1
copy / paste « Mist MP 001 – Afrique » as
new layer
image => resize => untick « resize all layers » => 105%
place into selection
selections => invert
hit the DELETE key of your keyboard
selections => select none
layers => merge => merge down
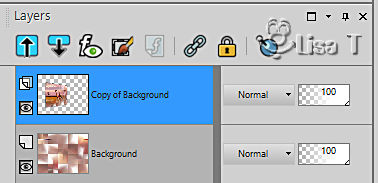
your layers palette looks like this
5
enable the Pick tool with the following settings, to move
the layer acurately => position X : -19 / position
Y : -20
hit the « M » key of your keyboard to disable
the tool
layers => duplicate
image => mirror => mirror horizontal
6
layers => duplicate
effects => plugins => Mura’s Meister => Copies
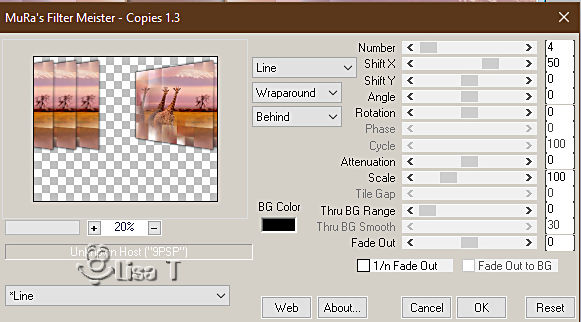
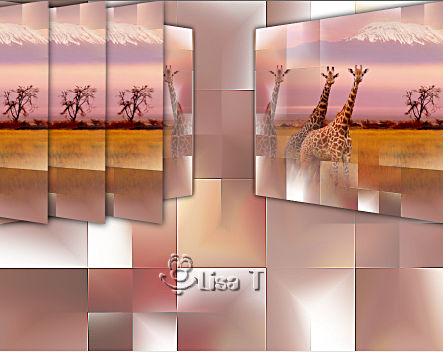
highlight middle layer
enable the Pick tool with the following settings, to move
the layer acurately => position X : 311/ position Y
: -21
hit the « M » key of your keyboard to disable
the tool
layers => merge => merge down
7
layers => duplicate
effects => plugins => Mura’s Meister => Perspective
Tiling
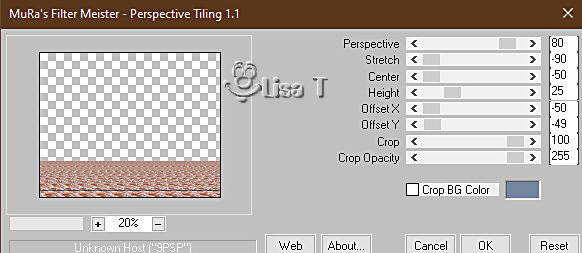
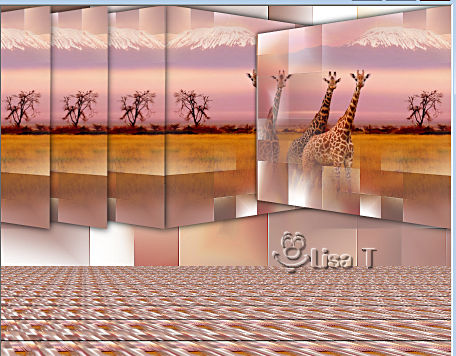
effects => 3D effects => drop shadow => 0 / 0
/ 100 / 30 / black
8
highlight top layer
copy / paste « tube P150 - Buste africain » as
new layer
image => mirror => mirror horizontal
enable the Pick tool with the following settings, to move
the layer acurately => position X : 354/ position Y
: 130
hit the « M » key of your keyboard to disable
the tool
selections => load-save selection => from alpha channel
=> selection # 2
hit the DELETE key of your keyboard
selections => select none
9
copy / paste « tube P150 - Buste africain » as
new layer
image => mirror => mirror horizontal
image => resize => untick « resize all layers » => 70%
enable the Pick tool with the following settings, to move
the layer acurately => position X : 221/ position Y
: 229
selections => load-save selection => from alpha channel
=> selection # 3
hit the DELETE key of your keyboard
selections => select none
10
layers => duplicate
enable the Pick tool with the following settings, to move
the layer acurately => position X : 103/ position Y
: 229
layers => duplicate
enable the Pick tool with the following settings, to move
the layer acurately => position X : -7/ position Y
: 229
layers => merge => merge down TWICE
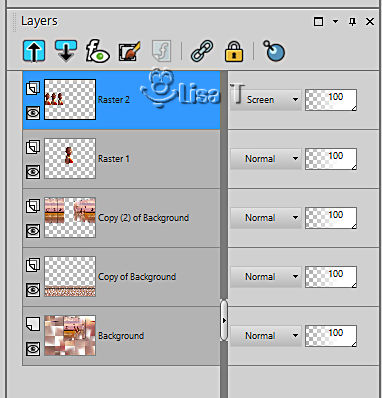
blend mode of the layer : Screen
your layers palette looks like this
11
highlight layer below (the african buste)
effects => 3D effects => drop shadow => -10 /
-8 / 65 / 10 / black
highlight top layer
copy / paste « Ob016-tambourins africains » as
new layer
image => resize => untick « resize all layers » => 75%
enable the Pick tool with the following settings, to move
the layer acurately => position X : 35 / position Y
: 430
12
copy / paste « Ob017-tambourins africains » as
new layer
image => resize => untick « resize all layers » => 75%
enable the Pick tool with the following settings, to move
the layer acurately => position X : 250 / position
Y : 437
layers => merge => merge down
effects => 3D effects => drop shadow => -5 / -8
/ 65 / 10 / black
13
copy / paste « Ob010-gamelles africaines » as
new layer
enable the Pick tool with the following settings, to move
the layer acurately => position X : 620 / position
Y : 292
effects => 3D effects => drop shadow => -5 / -8
/ 65 / 10 / black
14
copy / paste « TxT T20 Terre d’Afrique » as
new layer
enable the Pick tool with the following settings, to move
the layer acurately => position X : 570 / position
Y : 37
effects => 3D effects => drop shadow => 2 / 2
/ 100 / 5 / color 1
15
image => add borders => tick « symmetric » => ...
2 px color 3
2 px color 5
2 px color 2
edit => copy
selections => select all
16
image => add borders => tick « symmetric » => 50
px white
selections => invert
edit => paste into selection
effects => plugins => Unlimited 2 => VM Visual
Manipulation => XMirror => 161 / 255
effects => plugins => Unlimited 2 => Filter Factory
Gallery F / Instant Tiles / default settings
selections => invert
effects => 3D effects => drop shadow => 0 / 0
/ 100 / 30 / color 1
selections => select none
17
effects => plugins => AAA Frames => Foto Frame
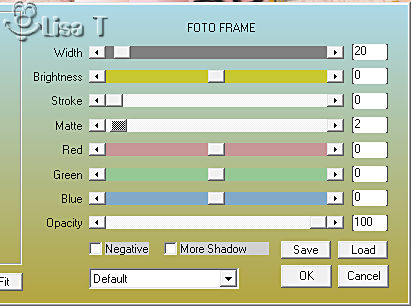
image => add borders => tick « symmetric » => 2
px color 3
18
apply your watermark or signature on a new layer
write your licence number if you used a licenced tube
apply Shawnees’s watermark
layers => merge => merge all (flatten)
image => resize => tick « resize all layers » => 800
px width (or other size if you prefer)

Another version with
my tubes and misted image


Don't hesitate to write to me if you have any trouble
with this tutorial
If you create a tag (using other tubes than those provided)
with this tutorial
and wish it to be shown, send it to Shawnee !
It will be a real pleasure for her to add it to the gallery
at the end of the tutorial


back to the boards of Shawnee’s tutorials
20 tutorials on each board
board 1 => 
at the bottom of each board you will find the arrows
allowing you to navigate from one board to another


|