

You will find the original tutorial here :
This tutorial is a personal creation.
Any resemblance with another one would be only pure
coincidence.
It is stricly forbidden to modify tubes, to change
their name or take off the matermarks,
To present them on your sites or blog,
To share them in groups,
to make a bank of images, or to use them on lucrative purposes.

Thank you to respect Shawnee’s work and the tubers
work.
Don’t hesitate to warn me if you have any trouble
with this translation,
and I’ll try to fix the problem as quickly as I can

I used PSP 2020 to create my tag and make the translation
you can follow this tutorial with another version
of PSP, but the result might be slightly different

Supplies
1 palette
1 selection > T23-sel1
1 mist MP054
1 background bleu
1 tube P259
1 text Txt Juan
1 font CeltGael
Shawnee’s watermark

TIP 1 -> if you don’t want to install a font -->
open it in a software as « Nexus Font » (or
other font viewer software of you choice)
as long as both windows are opened (software and font),
your font will be available in your PSP
TIP 2 -> from PSPX4, in the later versions of PSP the
functions « Mirror » and « Flip » have
been replaced by -->
« Mirror »has become --> image => mirror => mirror
horizontal
« Flip » has become --> image => mirror => mirror
vertical

Plugins needed
Mehdi > Wave Lab 1.1
Mehdi > Sorting Tiles
Alien Skin 5 Impact > Glass
Thank you Renée Salon for sharing your plugins page


Use the pencil to mark your place
along the way
hold down left click to grab and move it
 |

Prepare your work !
duplicate all the tubes and work with the copies
to preserve originals
save your work often in case of problems with your psp
use the Dropper tool to pick up your colors into your tubes
and misted images
Shawnee chose these :
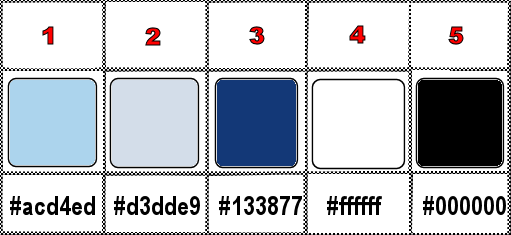
don’t hesitate to change blend modes and opacities
of the layers to match your personal colors and tubes
place the selection into the dedicated folder of My Corel
PSP General folder
1
open a new image => transparent => 900 * 650
px
effects => plugins => Mehdi => Wavy Lab 1.1 => colors 2
/ 1 / white / 2
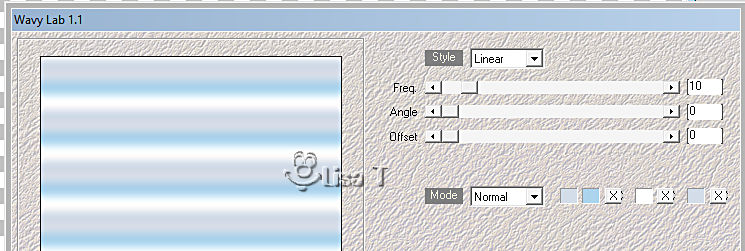
effects => plugins => Mehdi => Sorting Tiles
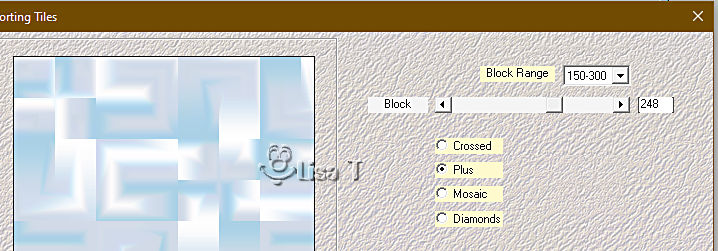
effects => edge effects => enhance
2
copy / paste the Mist « MP054 » as new layer
blend mode of the layer : Luminance (Legacy)
image => mirror => mirror horizontal
3
copy / paste the Text tube (font provided if you want to
type another text) as new layer
enable the Pick tool with the following settings, to move
the layer acurately => position X : 405 / position
Y : 525
4
layers => new raster layer
selections => load-save selection => from disk => selection
#1
copy / paste « fond bleu » into selection
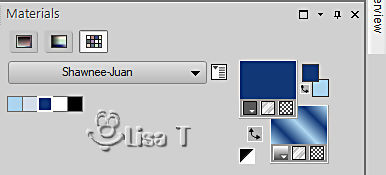
prepare a linear gradient in materials palette => colors
1 and 3
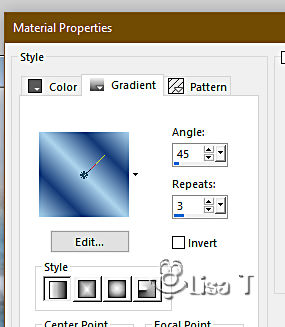
selections => modify => expand => 4 px
selections => modify = > select selection borders
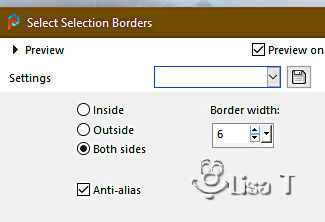
flood fill selection with the gradient
effects => 3D effects => Inner Bevel
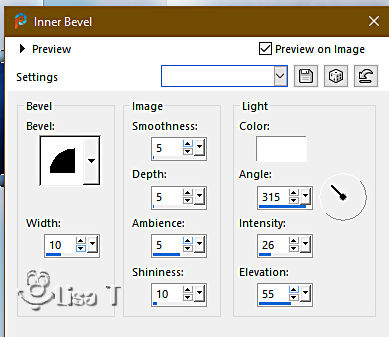
selections => load-save selection => from disk => selection
#1 (again)
copy / paste « MP054 » into selection
selections => modify => expand => 8 px
effects => plugins => Alien Skin Eye Candy 5 Impact
/ Glass / preset « Clear »
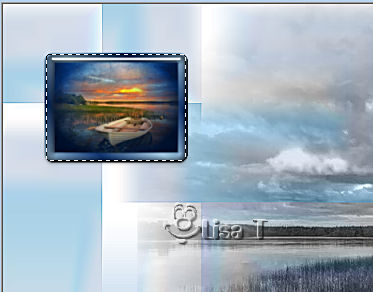
selections => select none
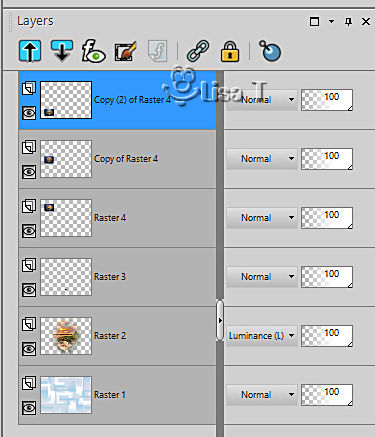
layers => duplicate TWICE
Raster 4 =>...
enable the Pick tool with the following settings, to move
the layer acurately => position X : 47 / position Y
: 58
1st copy => ...
enable the Pick tool with the following settings, to move
the layer acurately => position X : 47 / position Y
: 264
2nd cpopy => ...
enable the Pick tool with the following settings, to move
the layer acurately => position X : 47 / position Y
: 468
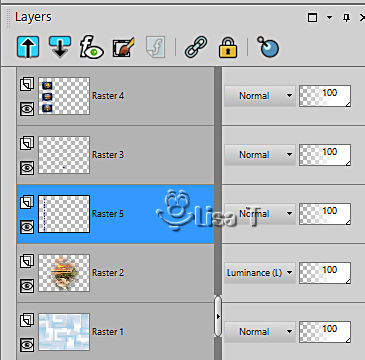
your layers palette looks like this
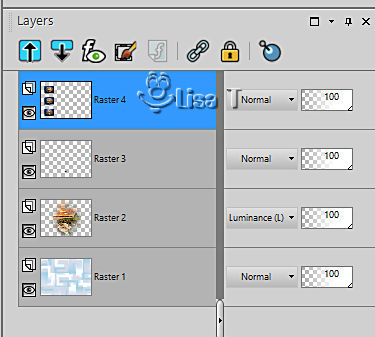
layers => merge => merge down TWICE
your layers palette looks like this
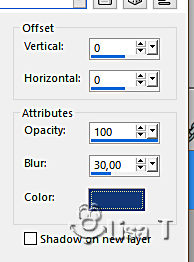
effects => 3D effects => drop shadow => 0 /
0 / 100 / 30 / color 3
5
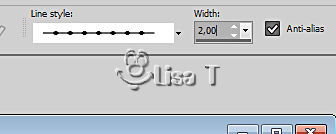
enable the pen tool => styled line « Barbaedwire2-kris » /
2px
set color 3 as FG color
draw a vertical line as shown below
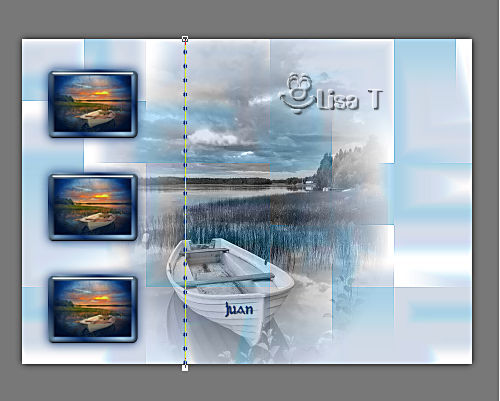
layers => promote background layer
view => rulers, place this line under the horizontal
marker 90
layers => duplicate
place this line under the horizontal marker 185
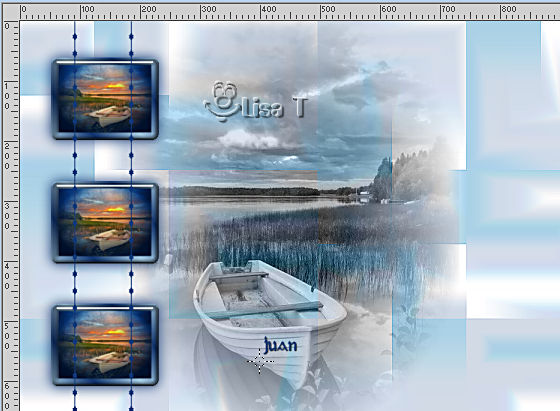
layers => merge => merge down
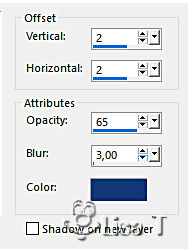
effects => 3D effects => drop shadow => 2 / 2
/ 65 / 3 / color 3
layers => arrange => move down twice
6
image => add borders => tick « symmetric » => ...
1 px color 3
5 px color 1
select the 5 px border with the Magic Wand tool
flood fill selection with the gradient
effects => 3D effects => Inner Bevel

selections => select none
image => resize => tick « resize all layers » => 800
px width
selections => select all
image => add borders => tick « symmetric » => 50
px white
selections => invert
copy / paste « fond bleu » into selection
selections => select none
image => add borders => tick « symmetric » => 5
px color 1
select the 5 px border with the Magic Wand tool
flood fill selection with the gradient
effects => 3D effects => Inner Bevel

selections => select none
copy / paste « P259 » as new layer
enable the Pick tool with the following settings, to move
the layer acurately => position X : 523 / position
Y : 97
effects => 3D effects => drop shadow => 26 / 30
/ 45 / 45 / black (or other)
apply your watermark or signature
write your licence number if you used a licenced tube
apply Shawnee’s watermark
layers => merge => merge all (flatten)
image => resize => tick « resize all layers » => 800
px width (or other)

Another version with my tube and misted image


Don't hesitate to write to me if you have any trouble
with this tutorial
If you create a tag (using other tubes than those provided)
with this tutorial
and wish it to be shown, send it to Shawnee !
It will be a real pleasure for her to add it to the gallery
at the end of the tutorial


back to the boards of Shawnee’s tutorials
20 tutorials on each board
board 2 => 
at the bottom of each board you will find the arrows
allowing you to navigate from one board to another


|