

You will find the original tutorial here :

This tutorial is a personal creation.
Any resemblance with another one would be only pure
coincidence.
It is stricly forbidden to modify tubes, to change
their name or take off the matermarks,
To present them on your sites or blog,
To share them in groups,
to make a bank of images, or to use them on lucrative purposes.

Thank you to respect Shawnee’s work and the tubers
work.
Don’t hesitate to warn me if you have any trouble
with this translation,
and I’ll try to fix the problem as quickly as I can

I used PSP 2020 to create my tag and make the translation
you can follow this tutorial with another version
of PSP, but the result might be slightly different

Supplies
1 palette
1 sélection T22 sélection #1
1 sélection T22 sélection#2
1 tube P244 doll
1 tube P250 gothique romantic doll
1 deco 12 - Volutes
1 deco by Noisette

TIP 1 -> if you don’t want to install a font -->
open it in a software as « Nexus Font » (or
other font viewer software of you choice)
as long as both windows are opened (software and font),
your font will be available in your PSP
TIP 2 -> from PSPX4, in the later versions of PSP the
functions « Mirror » and « Flip » have
been replaced by -->
« Mirror »has become --> image => mirror => mirror
horizontal
« Flip » has become --> image => mirror => mirror
vertical

Plugins needed
Unlimited > Andrews 54 > Opheus Song
Unlimited > Factory Gallery J > Blast Em Blur
Mura's Meister > Copies
Thank you Renée Salon for sharing your plugins page


use the pencil
................................................

Prepare your work !
duplicate all the tubes and work with the copies
to preserve originals
save your work often in case of problems with your psp
use the Dropper tool to pick up your colors into your tubes
and misted images
Shawnee chose these :
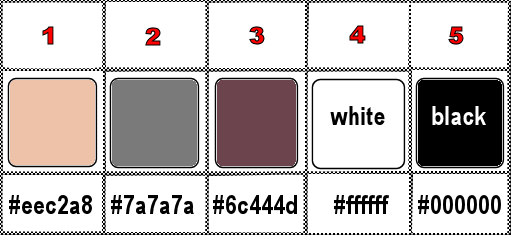
don’t hesitate to change blend modes and opacities
of the layers to match your personal colors and tubes
place the texture into the dedicated folder of My Corel
PSP General folder
1
open a new image => transparent => 900 * 650
px
prepare a linear gradient => Angle 50 / Repeats 3 /
untick « invert »
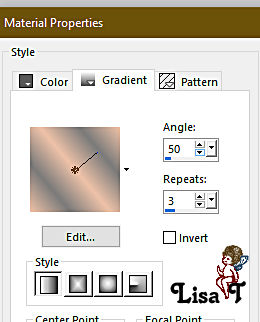
flood fill layer with the gradient
2
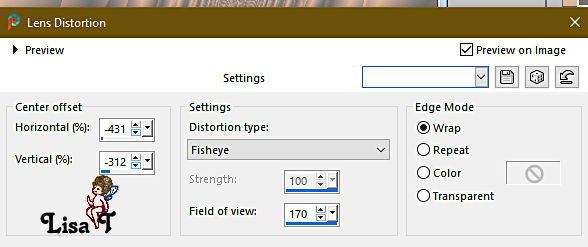
effects => distortion effects => Len Distortion => -431
/ -312 / fisheye / 170 / wrap
3
layers => duplicate
image => mirror => mirror horizontal
opacity of the layer : 50%
layers => merge => merge down
layers => duplicate
image => resize => untick « resize all layers » => 40%
selections => select all / selections => float /
selections => defloat
selections => modify = > select selection borders
/ inside / 10 / tick « anti-alias »
flood fill selection with the gradient
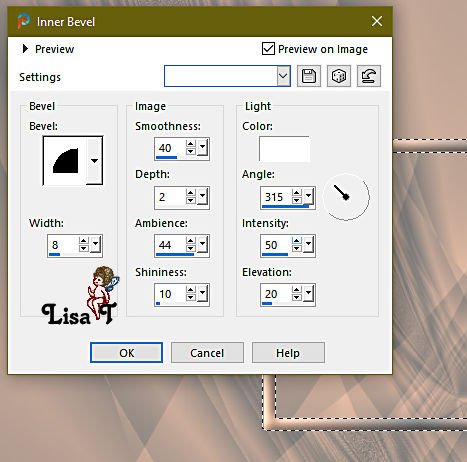
effects => 3D effects => Inner Bevel
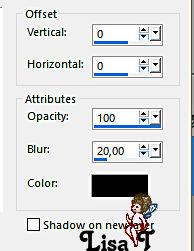
effects => 3D effects => drop shadow => 0 /
0 / 100 / 20 / black
selections => select none
4
selections => load-save selection => from disk => selection
#1
adjust => blur => gaussian blur => 20
selections => select none
5
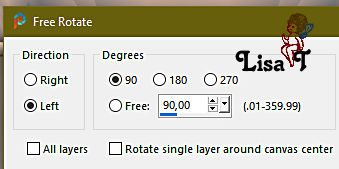
image => free rotate => Left
layers => duplicate
image => resize => untick « resize all layers » => 90%
layers => merge => merge down
enable the Pick tool with the following settings, to move
the layer acurately => position X : 35 / position Y
: 27
hit the « M » key do disable the
tool
6
selections => load-save selection => from disk => selection
#2
copy / paste tube P250 as new layer
image => resize => untick « resize all layers » => 60%
place as shown on final result (inside the selection)
selections => invert
hit the DELETE key of your keyboard
selections => select none
7
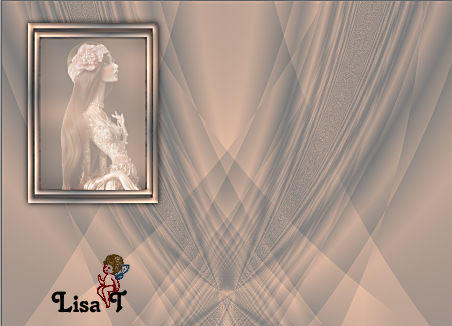
highlight the character layer « Raster 2 »
effects => 3D effects => drop shadow => 0 / 0
/ 100 / 20 / black
blend mode of the layer : Screen
layers => merge => merge down
8
effects => plugins => Mura’s Meister => Copies
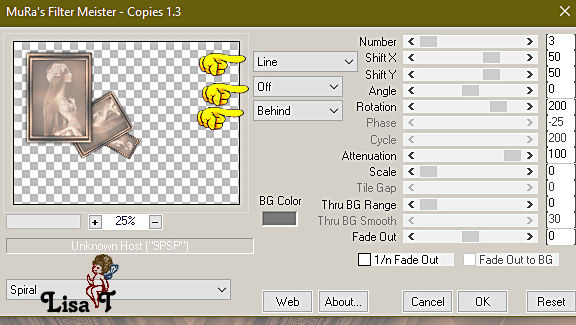
effects => 3D effects => drop shadow => 0 / 0
/ 100 / 20 / white
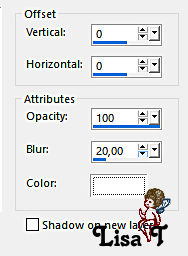
layers => merge => merge visible
9
edit => COPY
image => add borders => tick « symmetric » => 2
px color 3
selections => select all
image => add borders => tick « symmetric » => 50
px white
selections => invert
edit => paste into selection
10
effects => plugins => Unlimited 2 => Andrew’s
Filter Collection 54 / Opheus Song
change the settings according to your colors (Red Green
Blue values)
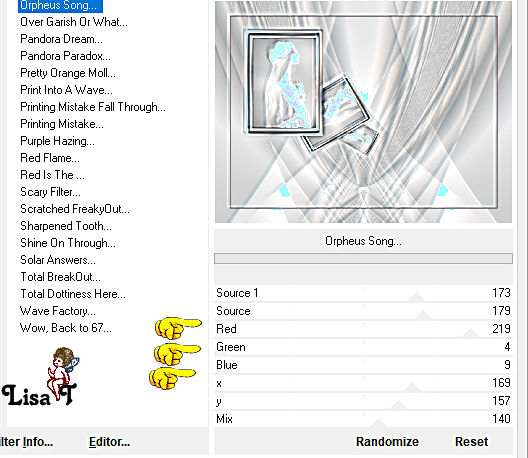
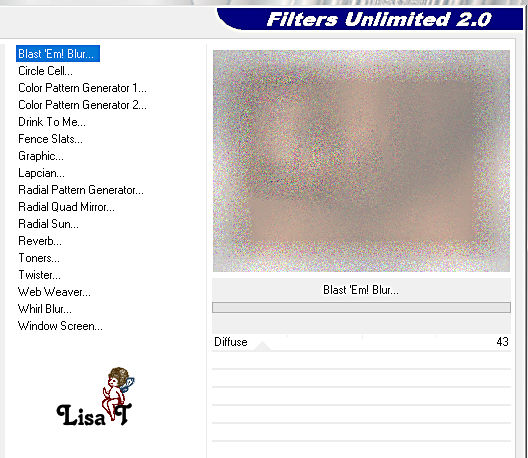
effects => plugins => Unlimited 2 => Filter
Factory Gallery J / Blast Em Blur / 43
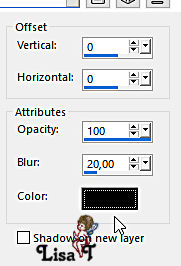
effects => 3D effects => drop shadow => 0 / 0
/ 100 / 20 / BLACK
11
image => add borders => tick « symmetric » => 2
px color 3
selections => select none
12
copy / paste Deco12 as new layer
image => resize => untick « resize all layers » => 40%
enable the Pick tool with the following settings, to move
the layer acurately => position X : 827 / position
Y : 579
adjust => hue and saturation => colorize / 255 /
41 (according to your colors)
adjust => Brightness and Contrast => Brightness/Contrast
/ 2 / 0 / tick « Linear »
layers => duplicate TWICE
on the first copy => image => mirror => mirror
vertical
on the second copy => image => mirror => mirror
horizontal
close the eye of bottom layer
layers => merge => merge visible
open the eye of bottom layer
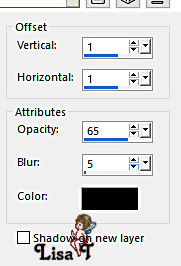
effects => 3D effects => drop shadow => 1 / 1
/ 65 / 5 / BLACK
13
copy / paste tube P244 as new layer
image => mirror => mirror horizontal
enable the Pick tool with the following settings, to move
the layer acurately => position X : 545 / position
Y : 148
effects => 3D effects => drop shadow => 18 / 20
/ 45 / 45 / BLACK (or other)
14
copy / paste Noisette’s decoration as new layer
enable the Pick tool with the following settings, to move
the layer acurately => position X : 49 / position Y
: 15
15
layers => duplicate
image => free rotate => Right / 90°
enable the Pick tool with the following settings, to move
the layer acurately => position X : 12 / position Y
: 49
layers => merge => merge down
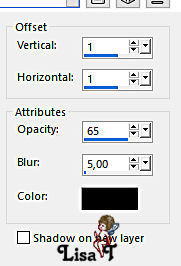
effects => 3D effects => drop shadow => 1 / 1
/ 65 / 5 / BLACK
16
apply Swhanee’s watermark
layers => merge => merge all (flatten)
apply your watermark or signature
write your licence number if you used a licenced tube
image => resize => tick « resize all layers » => 800
px width (or another size if you prefer)

Another version with
my tubes


Don't hesitate to write to me if you have any trouble
with this tutorial
If you create a tag (using other tubes than those provided)
with this tutorial
and wish it to be shown, send it to Shawnee !
It will be a real pleasure for her to add it to the gallery
at the end of the tutorial


back to the boards of Shawnee’s tutorials
20 tutorials on each board
board 2 => 
at the bottom of each board you will find the arrows
allowing you to navigate from one board to another


|