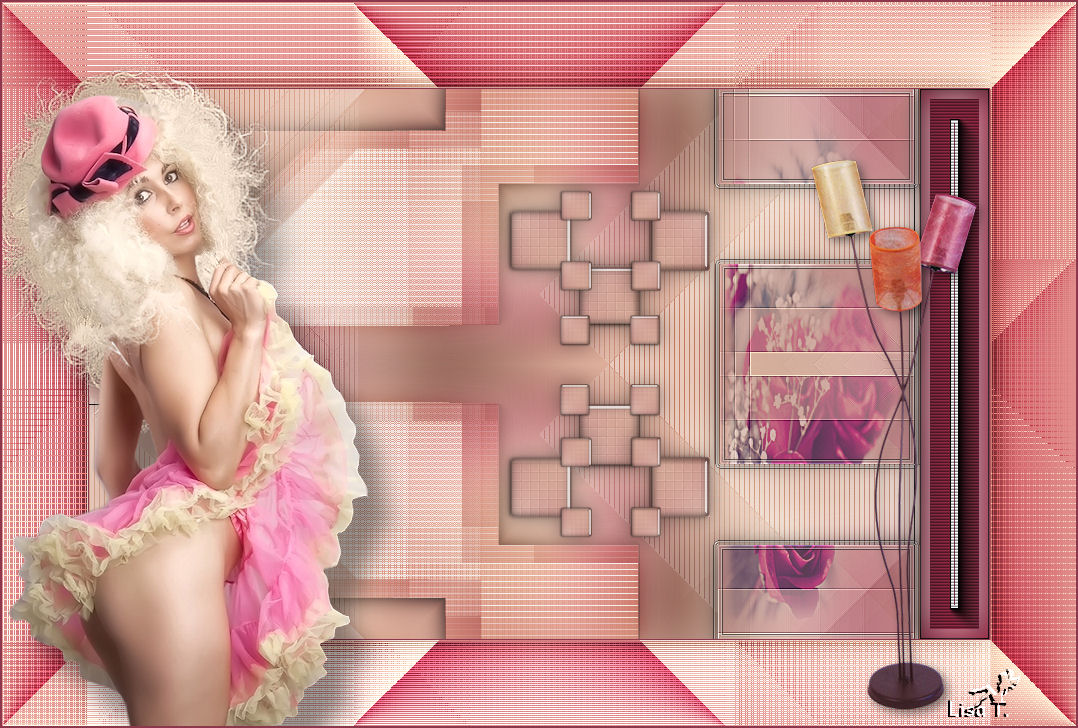
Sexy Girl
I'm member of Tutorial Writers Inc

original can be found Here

Material
(tubes – alpha layer – preset Eye Candy 5 Impact)
Double click on the plugin preset and it will be recorded in the good file
open all the elements in PSP
Thank you to the tubers : Hébé – Logane - Maryse
Filters used
AAA Frames
Filter Factory Gallery M
AP Utility
Xero
Simple
BKG Kaleidoscope
Italian Effects
Tramages
Eye Candy 5 IMpact
Colors palette

Use the paintbrush to follow the lines
Grab it with the left click of your mouse
 |
Execution
open the alpha layer “sexy girl”, window/duplicate, and close the original
we always work on the copy
in the main tube, choose 2 colors
(light color as foreground (1), and dark color as background (2))
and prepare a radial gradient as follows
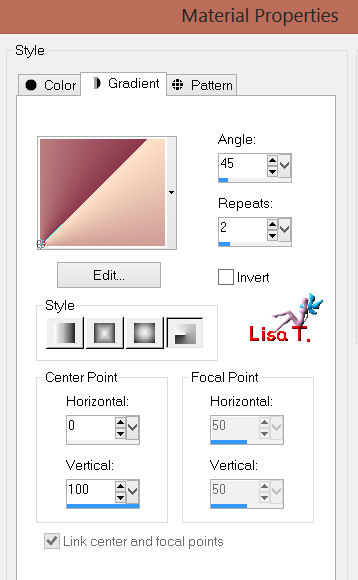
paint the layer with the gradient and select all
activate the tube “woman 313by Hebe”, copy and paste into selection
selections/select none
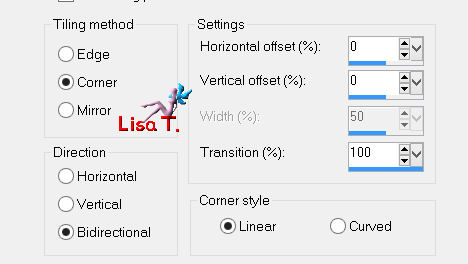
effects/image effects/seamless tiling
adjust/blur/gaussian blur = 35
effects/plugins/Simple/Blintz (apply twice)
effects/image effects/seamless tiling as before
adjust/sharpness/sharpen more
effects/plugins/AAA Frames/Foto Frame
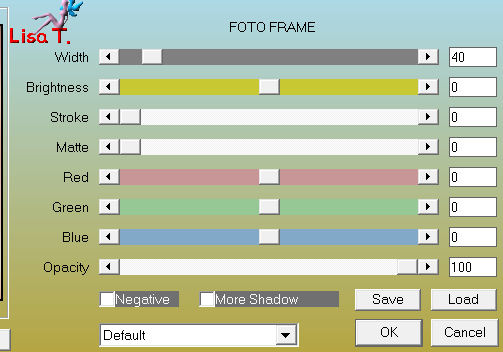
effects/image effects/semaless tiling as before
effects/reflection effects/rotating mirror
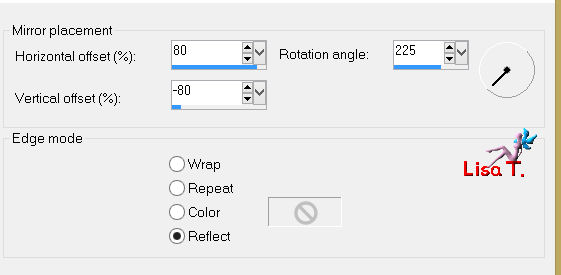
effects/plugins/AP Utility/Reflections/Mirror 3
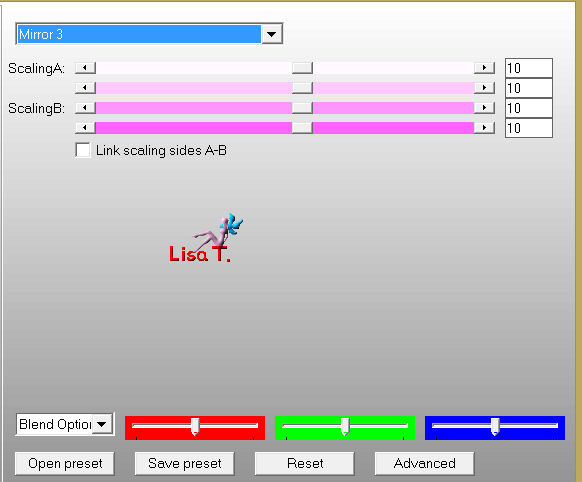
selections/load-save selection/from alpha channel : selection 1
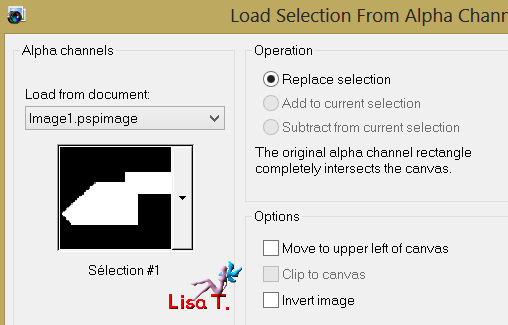
selections/promote selection to layer
effects/plugins/Filter Factory Gallery M/Loom
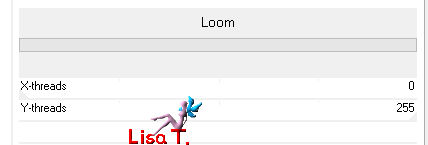
effects/plugins/It@lian Editors Effects/Effeto Fantasma

selections/select none
in the layers palette, set the blend mode to “overlay” (or other according to your colors)
and lower opacity to 85%
effects/3D effects/drop shadow : 0 / 0 / 40 / 30 / black
layer/duplicate – image/flip
activate the background layer (raster 1)
selections/load selection from alpha channel : selection 2
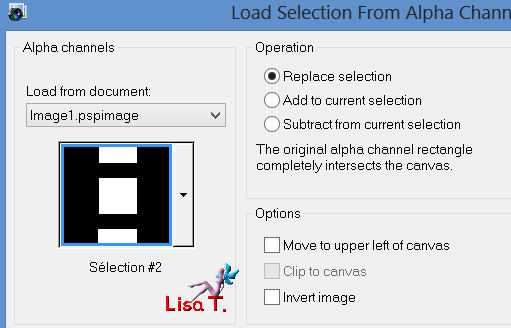
selections/promote selection to layer
effects/plugins/Itali@an Editors Effects/Effeto Fantasma

effects/plugins/apply the same plugin with the same settings once more and select none
rename this layer “fantasma”
effects/edge effects/enhance
layers/duplicate
activate the layer “fantasma”
image/mirror
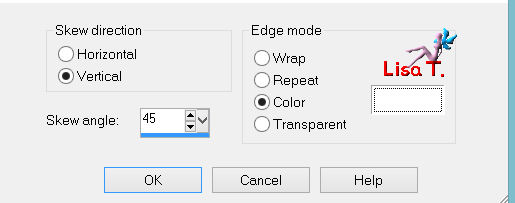
effects/geometric effects/skew/white color
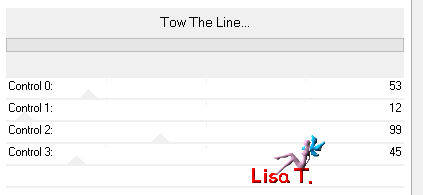
effects/plugins/Tramages/Tow the Line
effects/plugins/BKG Kaleidoscope/Kaleidoscope 5
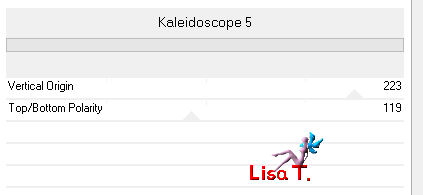
in the layers palette, set the blend mode to “soft light” and the opacity to 85%
effects/edge effects/enhance
selections/load selection from alpha channel : selection 2
edit/cut

layers/new raster layer
activate the tube “Logan misted composition 2”, copy and paste into selection
adjust/sharpness/sharpen more
layers/new raster layer
layers/arrange/bring to top
effects/plugins/Eye Candy 5 Impact/Gradient glow/ preset “sexy girl”
effects/3D effects/drop shadow as before and select none
layers/merge/merge visible
selections/load selection from alpha channel : selection 3
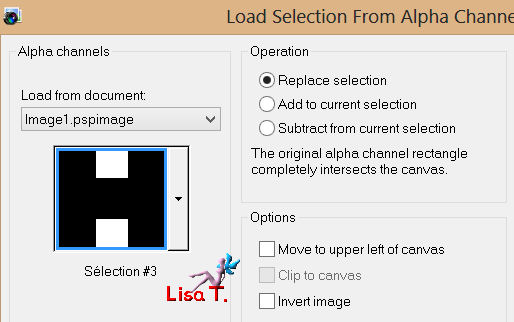
selections/promote selection to layer
adjust/blur/gaussian blur : 4
effects/plugins/Xero/Fritillary
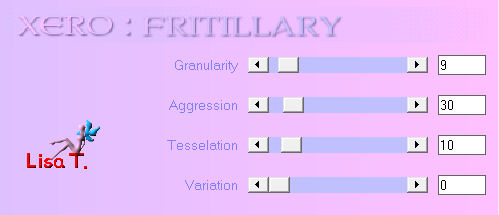
efects/plugins/Eye Candy 5 Impact/Glass
in the settings, choose the preset “Clear” and select none
layers/duplicate
image/resize/50% (disable “resize all layers”)
layers/duplicate
effects/image effects/offset
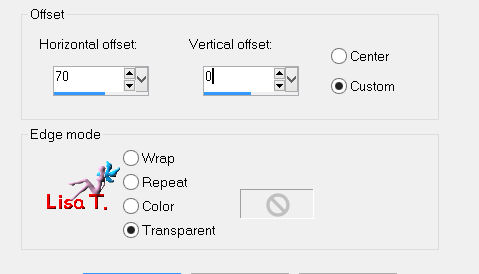
layers/merge/merge down (2 times)
effects/3D effects/drop shadow as before
layers/duplicate
image/free rotate

effects/image effects/offset
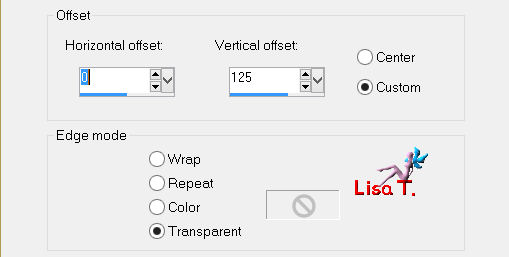
layers/duplicate
image/flip
layers/new raster layer
selections tool/rectangle/custom selection
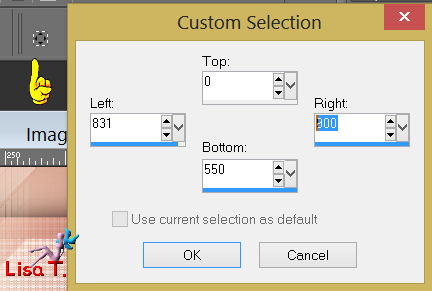
paint with color 2
effects/plugins/AAA Frames/Foto Frame
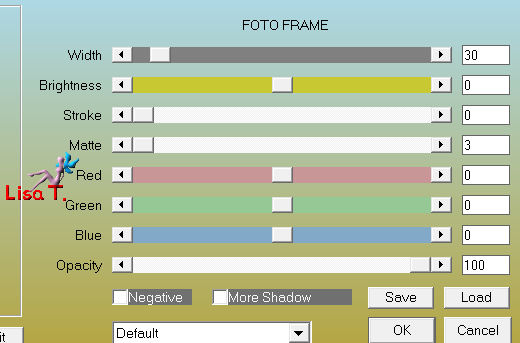
selections/modify/contract : 10 pixels
effects/texture effects/blinds (black)
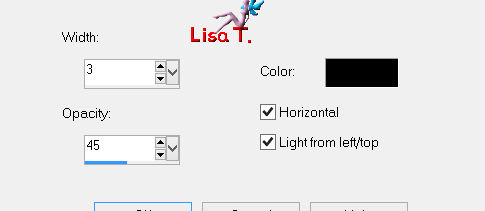
effects/3D effects/drop shadow : 0 / 0 / 65 / 45 / white and select none
effects/3D effects/drop shadow : 0 / 0 / 60 / 30 / black
layers/merge/merge all (flatten)

image/add borders/1 pixel color 2
image/add borders/1 pixel color 1
image/add borders/85 pixels color 2
with the magic wand (default settings), select the large border
paint with the radial gradient prepared at the begining

effects/plugins/Simple/Pizza Slice Mirror
selections/invert
effects/3D effects/drop shadow : 0 / 0 / 70 / 40 / black

selections/invert
promote selection to layer
effects/plugins/Filter Factory Gallery M/Loom : 0 / 255

in the layers palette, set the blend mode on “darken more” or “overlay”
(or other according to your colors, and find the good opacity)
selections/select none

activate the tube “woman 313 by hebe”, resize to 70%
copy and paste as a new layer
move to the left (see final result)
adjust/sharpness/sharpen
effects/3D effects/drop shadow : 30 / 24 / 40 / 31 / black

activate the tube “Mr Luminaires” and resize to 70%
copy and paste as a new layer and move to the right
adjust/sharpness/sharpen
effects/3D effects : 4 / 4 / 50 / 15 / black
layers/new raster layer for your watermark
layuers/merge/merge all (flatten)
iamge/add borders/2 pixels/color 2

resize if necessary, save as... type JPEG
  
You can send your creation to Vivi,
it will be her pleasure to present it in the gallery at the end of her tutorial

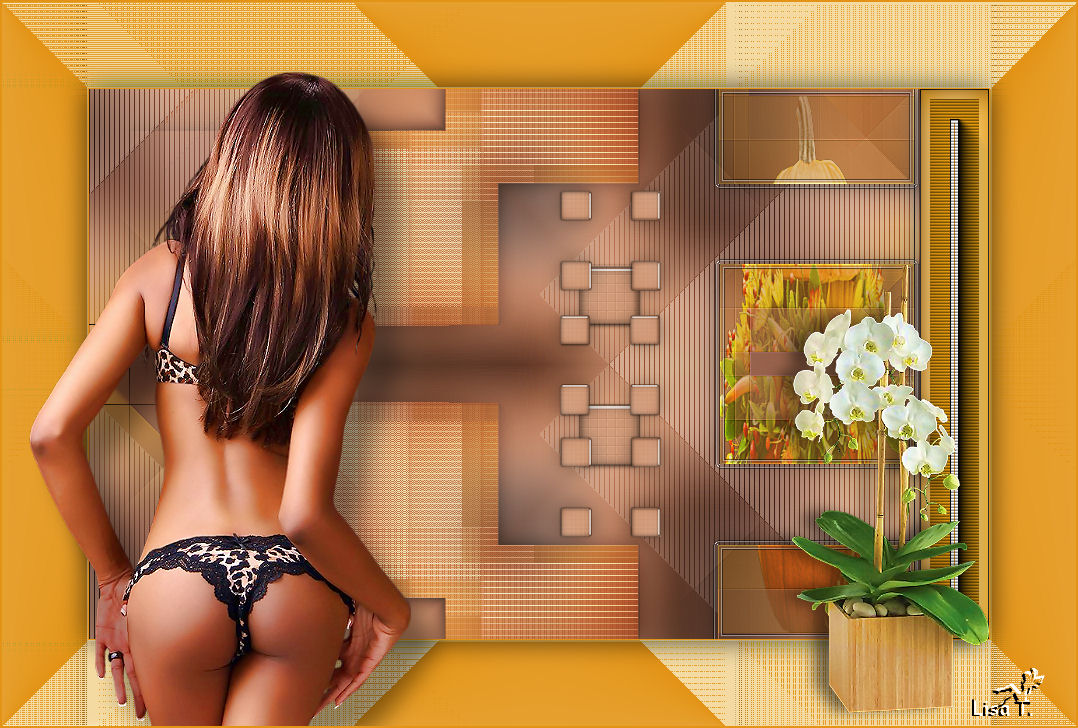
Here is my try with my tubes
Back to the boards of Vivi's Tutorials
board 1  board 2 board 2 

|