

You will find the original tutorial here :

This tutorial is a personal creation.
Any resemblance with another one would be only pure coincidence.
It is stricly forbidden to modify tubes, to change their name or take off the matermarks,
To present them on your sites or blog,
To share them in groups,
to make a bank of images, or to use them on lucrative purposes.

Thank you to respect Nicole’s work and the tubers work.
Don’t hesitate to warn me if you have any trouble with this translation,
and I’ll try to fix the problem as quickly as I can

I translated this tutorial with Photoshop 2018
Some filters are not available with the CC versions of photoshop
you will have to work with PSP if you want to apply these filters
be careful ! the effects (fx) must be rasterized before sending to PSP
otherwise they will be removed from your creation
if you must "paste the layer effect " after rasterizing =>
return to the step where the effect was created to see the settings, and apply them manually again
Supplies
alpha layer - tube - brushes - gradients
woman tubes created by Maryse HERE

open the tubes, duplicate, close the originals, and work with the copies to preserve original files
if you are missing something, don't hesitate to ask Nicole. (eMail adress at the end of this translation)
to install brushes, gradients and styles =>...
you go to : program files (x86) / Adobe / Photoshop(number of you version) / Presets
and you place your brushes/gradients/styles... into the dedicated folder
Plugins needed
Unlimited 2 / Simple
colors
don’t hesitate to change blend modes and opacities of the layers to match your personal colors
Use the pencil to mark your place
along the way
hold down left click to grab and move it
 |
open the alpha layer / duplicate / close the original and work with the copy
Realization
enable the gradient tool / choose one you like into the 208 provided (or another gradient of you choice)
darker color on the left

draw a linear gradient from top left to top right
(hint => if you want to draw an absolutely straight line, hold down the shift key while you draw)
filter => Unlimited 2 / Simple
1st => Diamonds / 2nd => Blintz / 3d => Top Left Mirror
2
select => load selection / choose Alpha 1
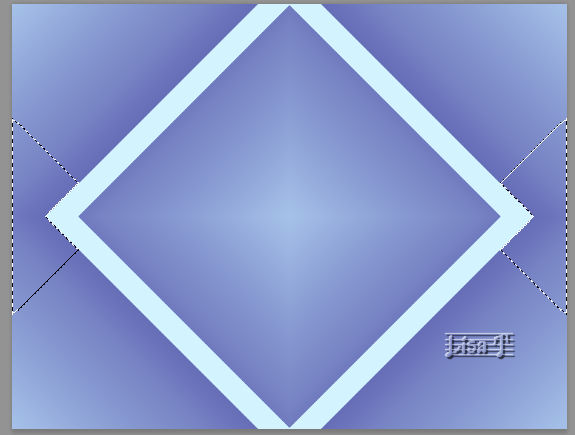
layers => new layer via copy (Ctrl + J)
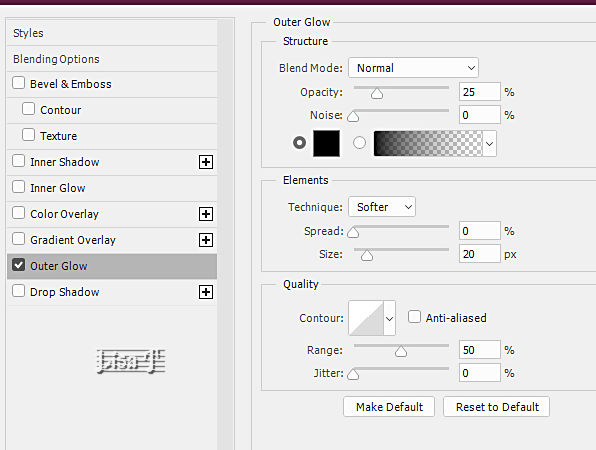
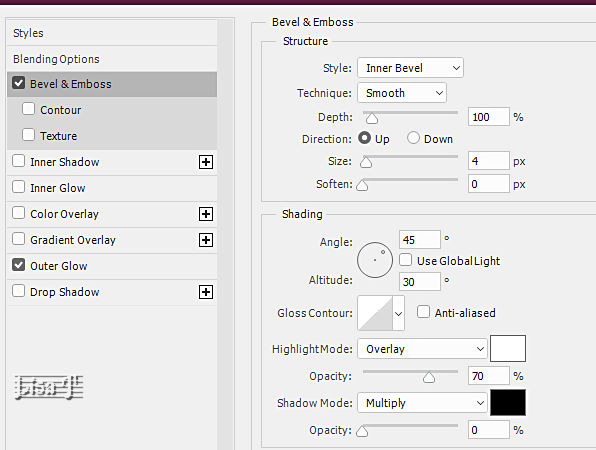
layers style (fx) => apply the following style

note => the gradient must be the same as the one you applied on your background
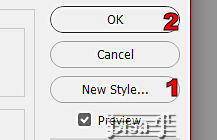
click on « New Style » => OK / and name it « surrealism »
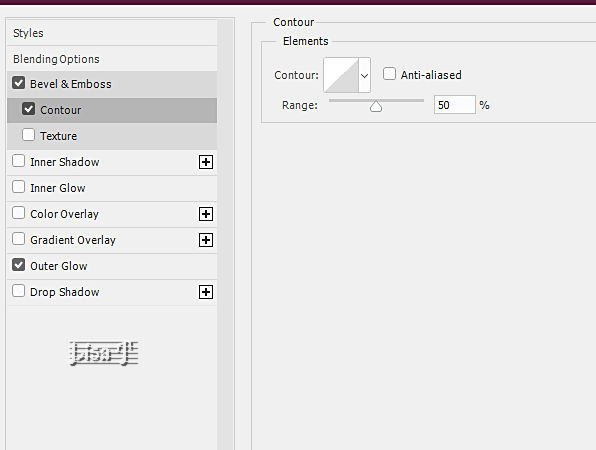 
of course you can modify this style later with your personal gradients, bevel ....
3
highlight background layer
select => load selection / choose Alpha 2
layers => new layer via copy (Ctrl + J)
right click on layer 1 in the layers palette => copy layer style
right click on layer 2 in the layers palette => paste layer style
layer => arrange => bring to front
your tag must look like this

4
highlight Layer 1
create a new layer
invert colors (X) => white is now FG color and black BG color
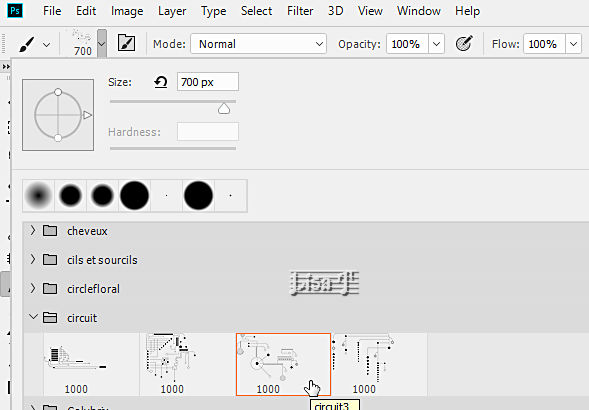
enable the Brush tool / brush provided (circuit)
Nicole chose the third one / size => 700 / 730 px
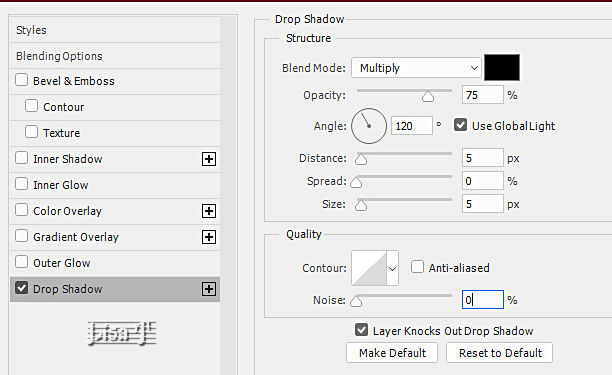
add a layer style => drop shadow
enable the move tool
place in the middle of your tag =>
select all (Ctrl + A) / click on « align vertical centers » and « align horizontal centers » / Deselect (Ctrl + D)

your layers palette looks like this (I renamed the layers to make them easier to find)

open your character tube (don’t forget to erase the watermark)
select => select all / copy
back to your work => highlight top layer => paste
resize if necessary => edit => free Transform (Ctrl + T) => hold down the Shift key and handle the knots
apply
OR
resize => click on the chain link to « maintain aspect ratio » and choose a percentage
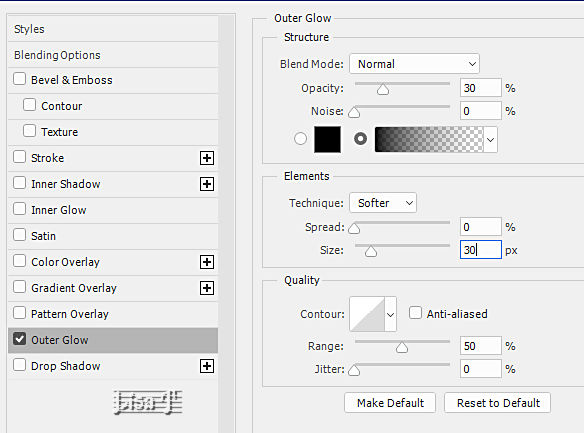
add a layer style => outer glow (or other of your choice)
place where you like
add a layer style => outer Glow
5
create a new layer
edit => stroke
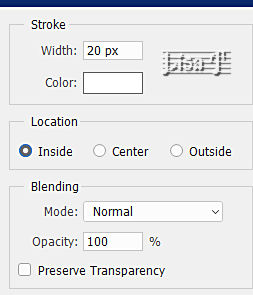
select => Deselect
apply the Layer Style created at the begining
TN => I arranged my character tube on top of the stak in the layers palette
layer => flatten image
apply your watermark or signature
write your licence number if you used a licenced tube
save your work as... type .jpeg
My tag with one of my tubes

don’t hesitate to send your creations to Nicole
it will be a real pleasure for her to see them and show them in the dedicated gallery
back to the boards of Nicole’s Photoshop tutorials
board 1


|