

You will find the original tutorial here :

This tutorial is a personal creation.
Any resemblance with another one would be only pure coincidence.
It is stricly forbidden to modify tubes, to change their name or take off the matermarks,
To present them on your sites or blog,
To share them in groups,
to make a bank of images, or to use them on lucrative purposes.

Thank you to respect Nicole’s work and the tubers work.
Don’t hesitate to warn me if you have any trouble with this translation,
and I’ll try to fix the problem as quickly as I can

I translated this tutorial with Photoshop 2018
Nicole created this tutorial with the ancient version 7 of Photoshop
Some filters are not available with the CC versions of photoshop
you will have to work with PSP if you want to apply these filters
be careful ! the effects (fx) must be rasterized before sending to PSP
otherwise they will be removed from your creation
if you must "paste the layer effect " after rasterizing =>
return to the step where the effect was created to see the settings, and apply them manually again

Supplies
textures - brushes - tubes - images
woman tube created by Lisa T HERE not provided / do not share the tube

open the tubes, duplicate, close the originals, and work with the copies to preserve original files
if you are missing something, don't hesitate to ask Nicole. (eMail adress at the end of this translation)
to install brushes, gradients and styles =>...
you go to : program files (x86) / Adobe / Photoshop(number of you version) / Presets
and you place your brushes/gradients/styles... into the dedicated folder
elements can be replaced of course, acccording to your feelings
no plugin needed

Use the pencil to mark your place
along the way
hold down left click to grab and move it
 |

Realization
1
file => new => 800 x 600 px => 72 px/inch => Background contents : White
open the Texture « MetalWelds0007_S » provided and stretch to cover the layer
flatten image
rename the layer « Texture »
2
layers => new => layer
rename the layer « Clouds »
hit the D key of your keyboard to reset colors to default (black and white)
filter => render => clouds
blend mode => Hard Light
3
layers => new => layer
rename the layer « checkerboard »
edit => fill => pattern => choose « damier_120 » in the Gothic patterns provided
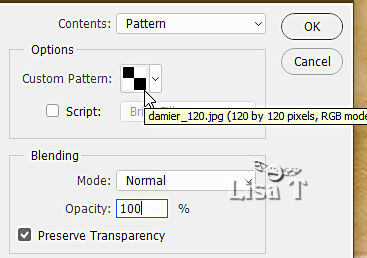
view => new guide => horizontal / 445
edit => free Transform (Ctrl + T)
lower the layer under the texture bar
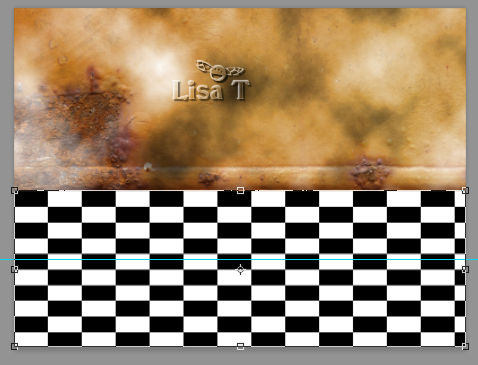
4
edit => transform => perspective
stretch this way
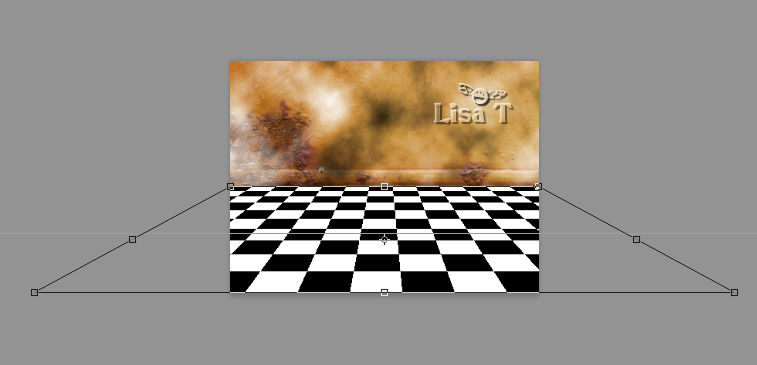
don’t hit the ENTER key
right click on layer and choose => free transform
lower to the blue guide
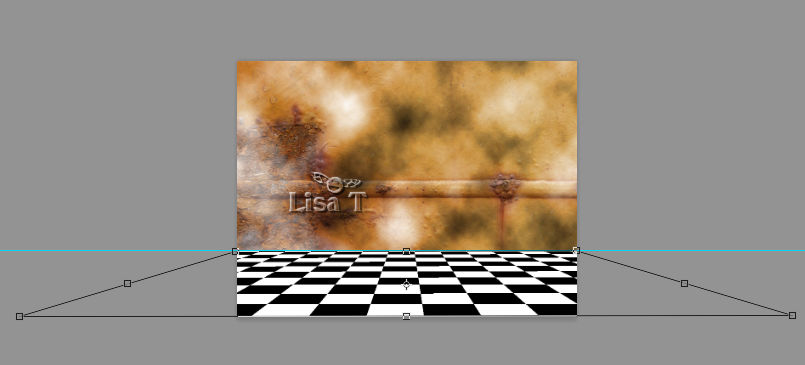
don’t hit the ENTER key
right click on layer and choose => perspective again
drag the upper checkerboards on the guide
add a layer style => pattern overlay => choose « etang_2008 » provided
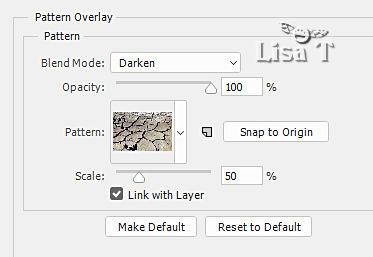
blend mode => Darken
then hit the ENTER key !!
5
layers => new => layer
rename the layer « Color »
set color # 0e205b as ForeGround color
flood fill layer => blend mode => Overlay
view => new guide => horizontal / 320
layers => new => layer
rename the layer « boards »
enable the rectangular marquee tool (M) => fixed size => 800 x 125

place the selection between the two guides
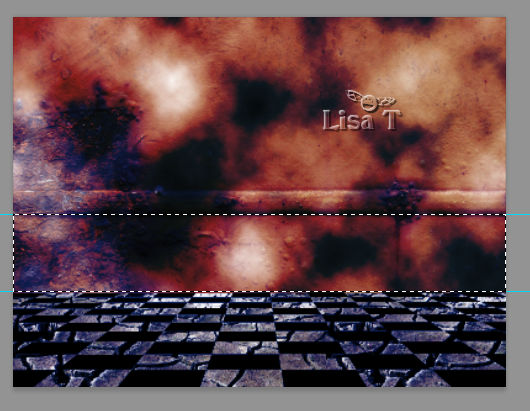
flood fill selection with any color
filter => render => clouds
select => Deselect
layer style => pattern overlay => WoodPlanksClean0068 » => blend mode => Multiply / scale 45
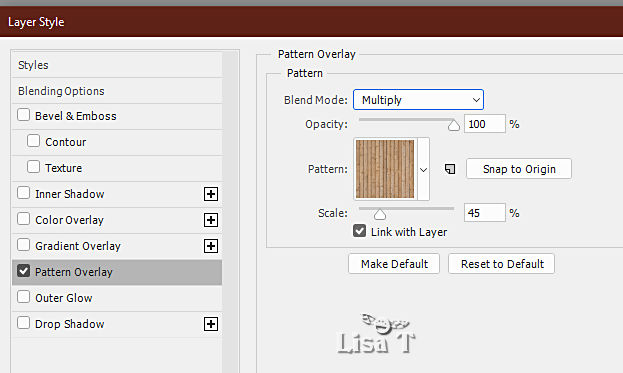
don't close the dialog box
layers style (fx) => color overlay / color #3a1716 / blend mode => Soft Light
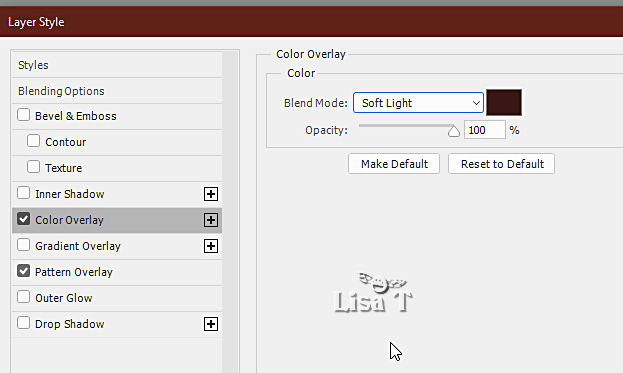
hit the ENTER key
your layers palette must look like this
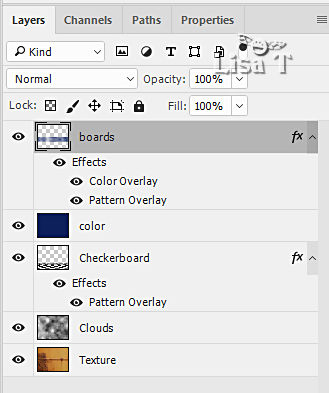
view => clear guides
your work must look like this
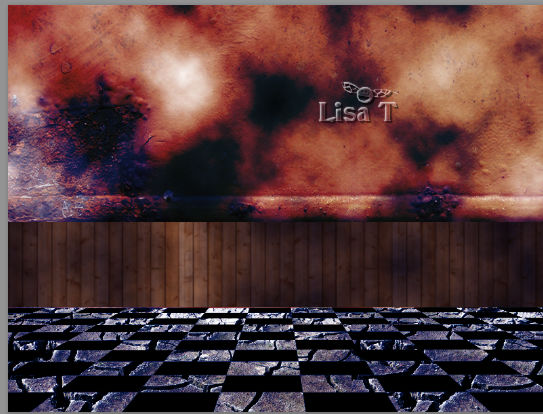
6
blend mode => Linear Dodge / opacity : 60%
highlight layer « checkerboard »
blend mode => Overlay
your work must look like this
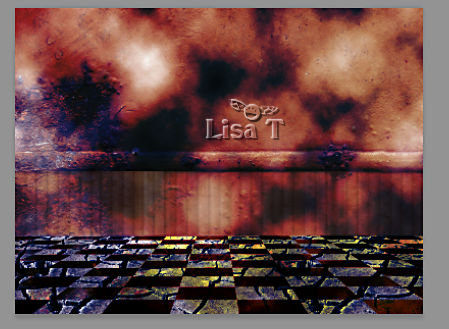
view => new guide => vertical / 597
view => new guide => vertical / 741
view => new guide => horizontal / 585
highlight top layer
open the cylinder tube => drag and drop on you work
place between the guides
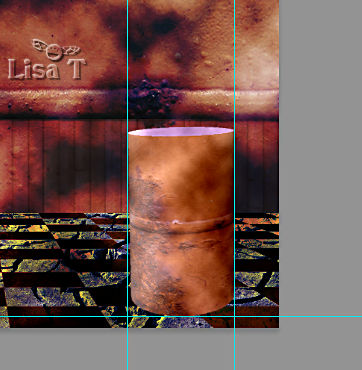
layers style (fx) => drop shadow
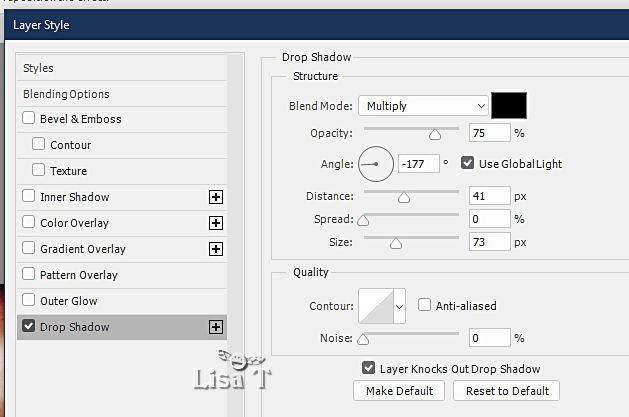
resize if necessary
to resize keeping ratio, do this way

another way to resize keeping ratio => edit => free Transform (Ctrl + T) => hold down the « shift » key while operating
view => clear guides
7
now you will add the elements to decorate tour tag =>
open the pentacle tube => drag and drop on you work
place top left => blend mode => Overlay (or other)
open the frame tube => drag and drop on you work
resize if necessary
edit => transform => rotate 90° if necessary, according to the image you want to place inside
place to the right of the tag => see final result
8
enable the magic wand tool, select inside the frame
select => modify => expand => 1 px
open the landscape image
select => select all
edit => copy
back to your work => edit => paste special => paste into
edit => free Transform (Ctrl + T) and adapt the image to fit the selection
in the layers palette, right click on mask sticker and apply the mask
9
highlight the Texture layer
select => select all
edit => copy
select => select none
highlight the Frame layer (Layer 3)
enable the magic wand tool / select inside the frame
select => modify => expand => 1 px
highlight « layer 4 » => edit => paste special => paste into
blend mode => Vivid light
in the layers palette, right click on mask sticker and apply the mask
your tag must look like this
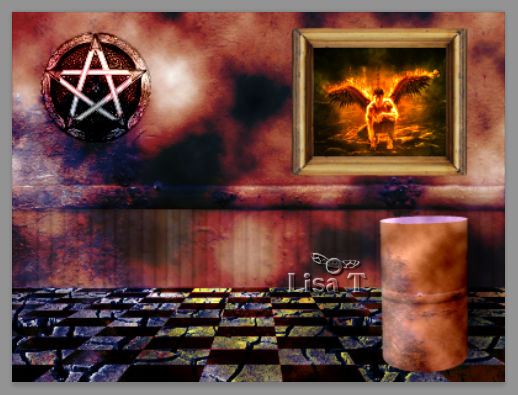
select layers 5 - 4 - 3 and merge together (CTRL+E)
add a layer style => drop shadow
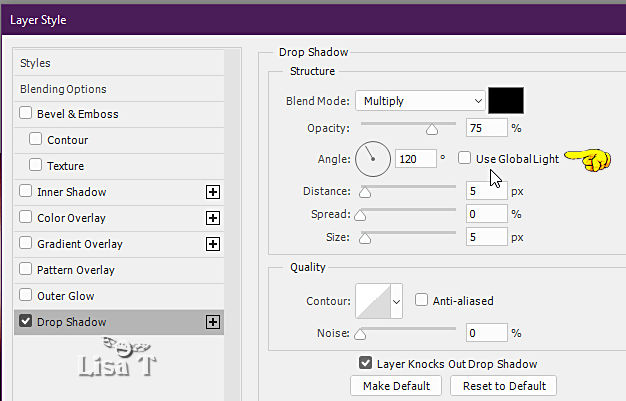
10
open the crow tube => drag and drop on you work
resize to 40% / keeping ratio
edit => transform => flip Horizontal
place on the cylinder
add a layer style => drop shadow => default settings / untick « use global light »
add the character tube, resize if you like, drop a shadow
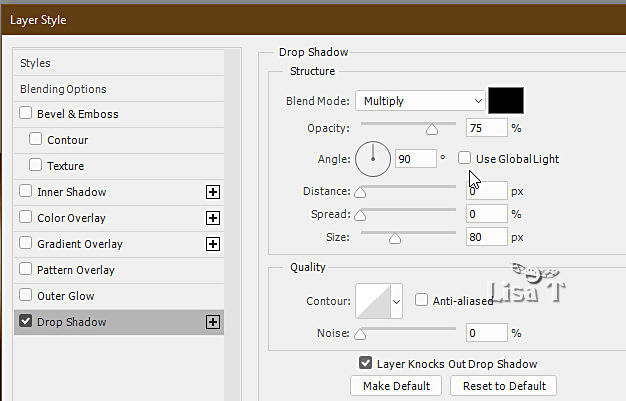
enable the Brush tool => « JS_Gothicswirls » provided
choose a shape (shape 12 for instance) / size 100 / color #6a06026
and apply on the cylinder (see final result)
apply your watermark or signature
write your licence number if you used a licenced tube
save your work as... type .jpeg
optional
filter => camera raw filter => Temperature
TN => I set on 35, you see what you prefer
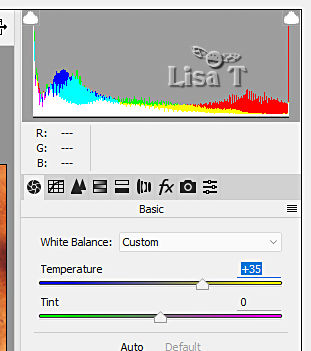
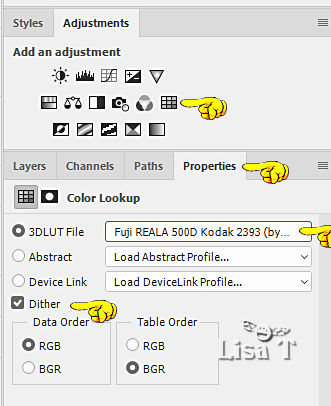
this filter is not availbale with ancient versions, so you can do this way =>...
layer => new adjustement layer => color Lookup

don’t hesitate to send your creations to Nicole
it will be a real pleasure for her to see them and show them in the dedicated gallery

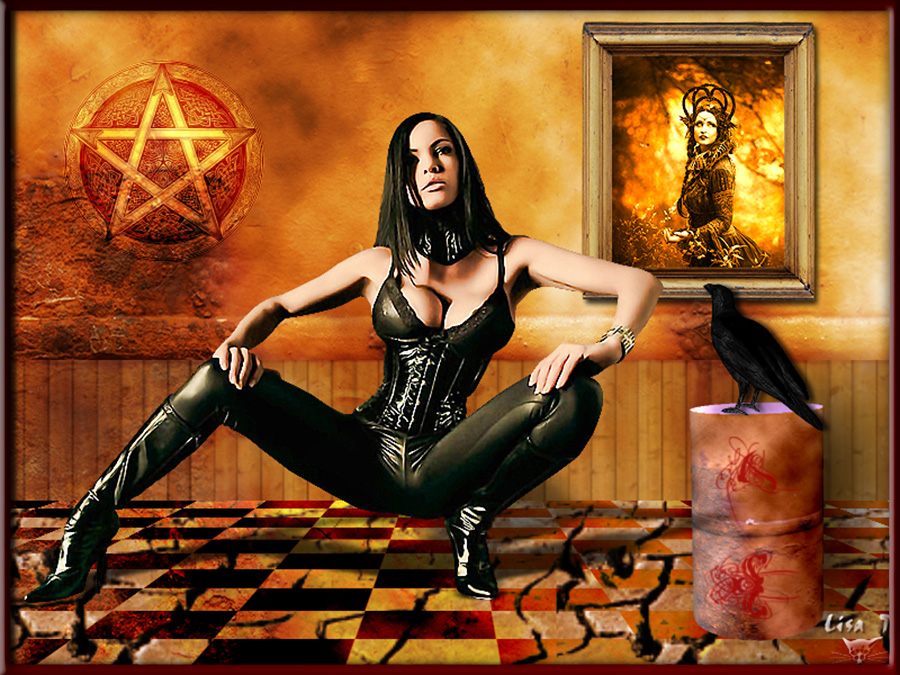
My tag with one of my tubes

back to the boards of Nicole’s Photoshop tutorials
board 1


|