

You will find the original tutorial here

This tutorial is a personal creation.
Any resemblance with another one would be only pure coincidence.
It is stricly forbidden to modify tubes, to change their name or take off the matermarks,
To present them on your sites or blog,
To share them in groups,
to make a bank of images, or to use them on lucrative purposes.

Thank you to respect Nicole’s work and the tubers work.
Don’t hesitate to warn me if you have any trouble with this translation,
and I’ll try to fix the problem as quickly as I can
I translated this tutorial with Photoshop 2018
Some plugins are not available with the CC versions of photoshop
you will have to work with PSP if you want to apply these filters
be careful ! the effects (fx) must be rasterized before sending to PSP
otherwise they will be removed from your creation
if you must "paste the layer effect " after rasterizing =>
return to the step where the effect was created to see the settings, and apply them manually again
Supplies

open the tubes, duplicate, close the originals, and work with the copies to preserve original files
if you are missing something, don't hesitate to ask Nicole. (eMail adress at the end of this translation)
to install brushes, gradients and styles =>...
you go to : program files (x86) / Adobe / Photoshop(number of you version) / Presets
and you place your brushes/gradients/styles... into the dedicated folder
hint => to get the selection back => highlight the layer concerned => select all (Ctrl+A) and press the Ctrl key while clicking on the sticker in the layers palette => the shape is selected..
Plugins needed
no plugin needed
Use the pencil to mark your place
along the way
hold down left click to grab and move it
 |
Realization
1
file => new => 800 x 600 px => 72 px/inch => Background contents : White
file => open => « Vintage_Cloud_by_Ashwings »
drag and drop on you white layer
edit => free Transform (Ctrl + T) => stretch to cover the layer
hit the ENTER key of your keyboard
layer => flatten image
double-click on the layer in the layers palette => OK (Layer 0)
opacity of the layer => 70%
create a new layer
flood fill with color #310101
image => adjustments => Shadows / Highlights
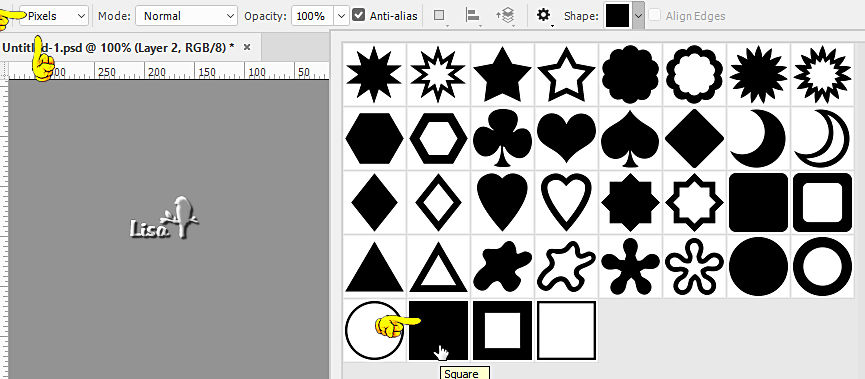
image => adjustments => Levels (Ctrl+L)
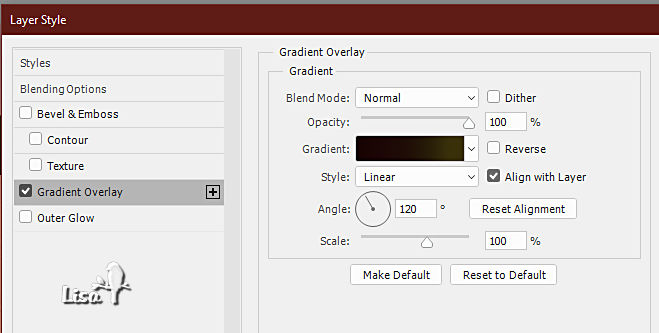
image => adjustments => Photo Filter
move Layer 1 under Layer 0
2
highlight top layer (Layer 0)
set default colors (black and white) into the colors palette (D)
enable the Custom Shape tooll => choose the square black frame

path options => fixed sized => 330x330
create a new layer ane place the shape where you like
edit => transform => rotate => 45° / Enter
enable the magic wand tool and select the black square shape
select => modify => contract => 40 px
hit the DELETE key of your keyboard
select => Deselect
3
in the layers palette => click on fx at the bottom (add a layer style) => gradient overlay
colors #070707 and #484848
don't close the dialog box
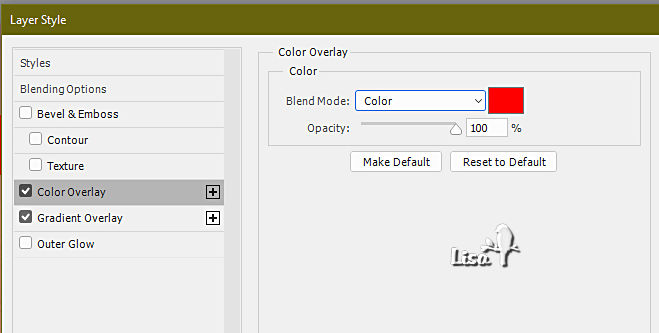
add a layer style => color overlay color #ff0000
click on OK
layer => duplicate
in the layers palette, right click on this copy and choose « clear layer style => the shape becomes black again
edit => free Transform (Ctrl + T)
click on the link to lock aspect ratio and choose 95% => hit the « enter » key
move the black layer under the colored one
merge the two squares together
duplicate and rename the copy « square2 » (you will need it for a later use), close the eye of this copy
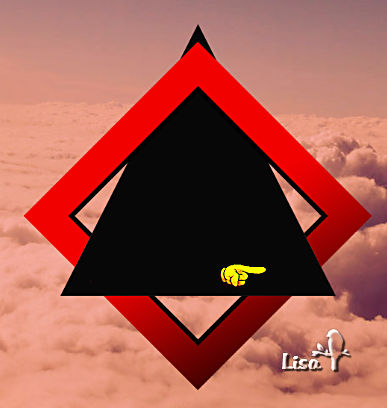
4
layer => new => layer
draw a triangle => fixed sized => 369 x 364 and place under the square layer
enable the eraser tool => shape : square, and erase the parts of the square to give the above/below illusion
TN => get the selection of the triangle back , highglight the square layer, and you can erase very easily
deselect when finished
do the same on the other angle
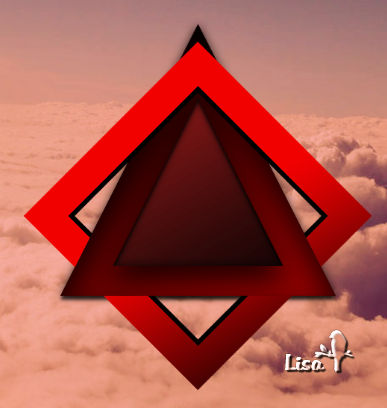
select the triangle shape in the layers palette and apply the ABSTRAIT 2 CARRE from MES STYLES 4 provided
in the layers palette, right click on this copy and choose « clear layer style => the shape becomes black again
get the selection back => select => modify => contract => 40 px
hit the DELETE key of your keyboard
deselect
apply the ABSTRAIT 2 from MES STYLES 4 provided
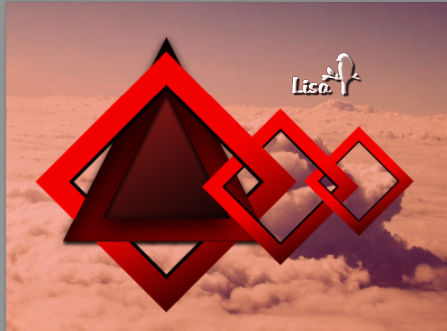
5
highlight the layer « square 2 » created in step 3, open the eye
edit => free Transform (Ctrl + T)
click on the link to lock aspect ratio and choose 60% => hit the « enter » key
place under the big square and move it to the right
layer => duplicate / place unde the medium square
edit => free Transform (Ctrl + T)
click on the link to lock aspect ratio and choose 70% => hit the « enter » key
use the erase tool to create the above/below illusion as in step 4
your tag must look like this
6
enable the brush tool, color #b31010
choose a brush you like int he brushes « Pagan Symbols » provided
Nicole chose « Spiral Triskelion » / size 110
apply on a new layer above the full triangle layer, under the hollowed-out triangle
rename the layers this way
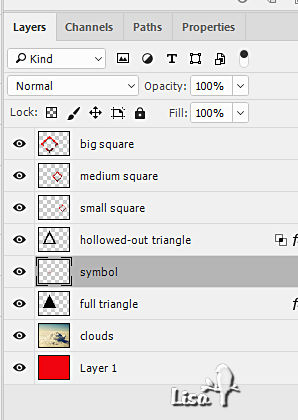
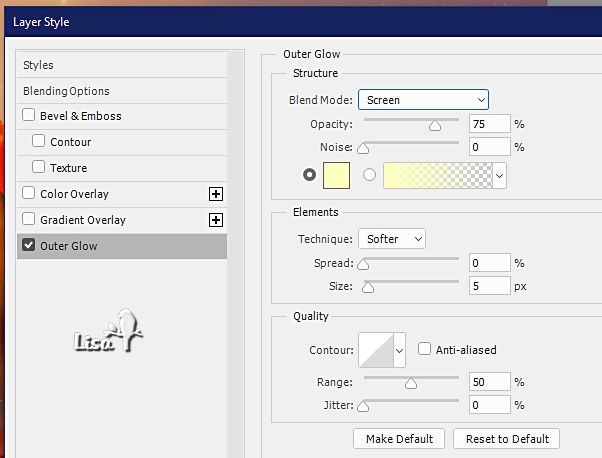
layer style => outer glow / color #ffffbe
highlight top layer
file => open « christmas_nebula_ws_by_casperium-d2eweha »
drag and drop on you work
edit => free Transform (Ctrl + T)
stretch to cover the layer => hit the ENTER key of your keyboard
right click on layer => rasterize layer
blend mode => Screen / opacity : 70%
layer => layer mask => reveal all
choose a round blurred brush and erase the parts hiding the symbol

7
open the raven tube => drag and drop on you work
resize to 70% and place properly
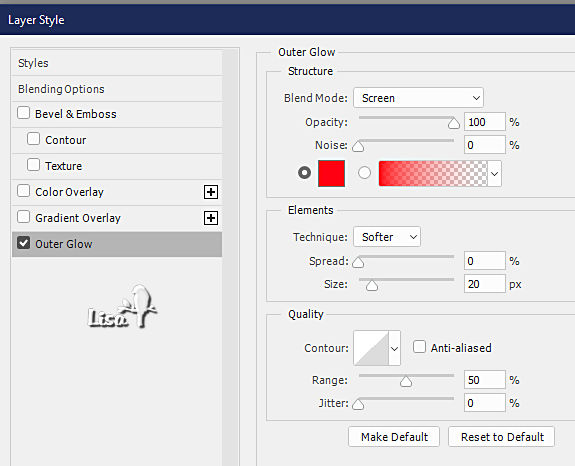
layer style => outer glow / color #ff0012
decorate, finish to your likings
layer => flatten image
apply your watermark or signature
write your licence number if you used a licenced tube
save your work as... type .jpeg
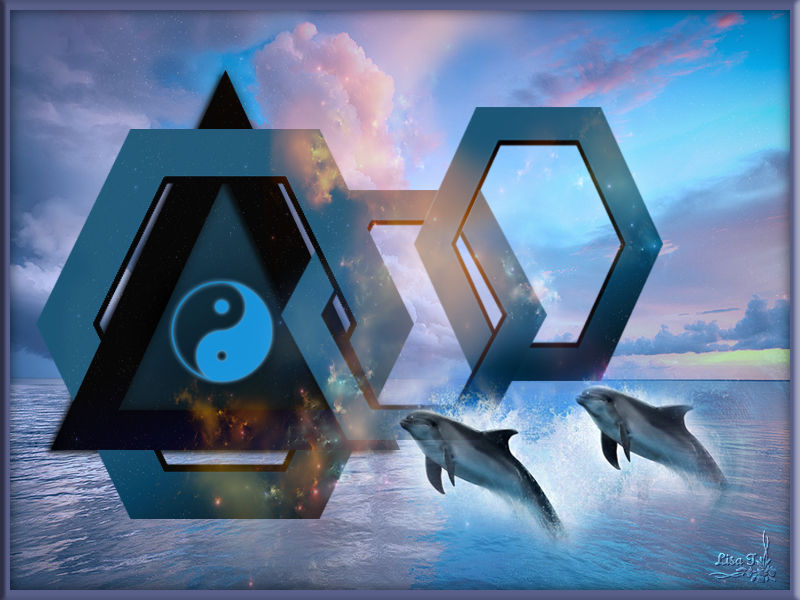
My tag with one of my misted images
( no effect style on the triangle)
don’t hesitate to send your creations to Nicole
it will be a real pleasure for her to see them and show them in the dedicated gallery
back to the boards of Nicole’s Photoshop tutorials
board 1


|