Charmed

first tutorial created by Odette
easy to follow, quickly made, even for beginners
Conditions of use of the material provided
It is forbidden to modifiy, change the name, take off the watermarks or alter the tubes.
It is forbidden to share them in groups or offer them on your site, blog or forum.
If you want to use them to create a tutorial, you must ask the permission of the authors.

Odette has the permission of the creators to use their tubes, masks and decorations
Thank you to all of them.
Without their beautiful creations, no tutorials could be written.
Odette and I use PSPX8 to create the tags of her tutorials
but you can realized these tutorials with any other version of PSP
translator's note : I present my version of this tutorial, the misted image and the tube are available on my site
Matérial
1 mask - 1 misted image and one tube (Lisa T)

open all tubes
window/duplicate. Close the originals and work with the copies
open the mask and minimize it to tray
Plugins
Graphic Plus > Quick Tile II
FM Tile Tools > Blend Emboss > default settings
AAA-Frames > Foto Frame
Colors palette
foreground color -> color 1 -> #d7f2ce
background color -> color 2 -> #4932a8
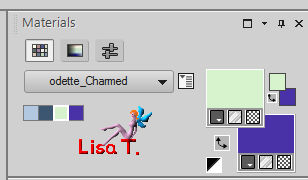
you can choose other colors of course
*************************************************
use the pencil to follow the steps
Left click to grab it

**************************************************
Realization
Step 1
open a new raster layer > 800 ** 500 pixels
open the mask and minimize it to tray for a later use
if you choose another tube than the one provided, choose a lignt color ad FG (1) color
and a dark color av BG (2) color
flood fill the layer with color 1
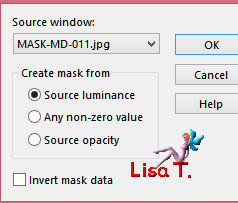
layers > new mas layer > from image
layers > merge > merge group
Step 2
layers > new raster layer
flood fill with color 2
layers > new mask layer > from image as in step 1
image > mirror > mirror vertical
layers > merge > merge down
adjust > sharpness > sharpen more
Step 3
layers > new raster layer
flood fill with color 1
layers > arrange > move down
layers > merge > merge visible
adjust > sharpness > shrpen
Step 4
image > add borders > 1 pixel > color 2
image > add borders > 2 pixels > color 1
image > add borders > 1 pixel > color 2
effects > 3D effects > buttonize > H : 20 / V : 20 / opacity : 75 / transparent / color 1
Step 5
layers > duplicate
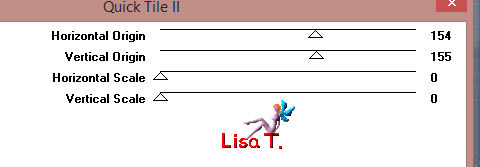
effects > plugins > Graphic Plus > Quick Tile II
adjust > sharpness > sharpen
effects > 3D effects > buttonize > H : 20 / V : 20 / opacity : 75 / transparent / color 1
effects > plugins > FM Tile Tools > Blend Embos > default settings
image > add borders > 1 pixel > color 2
image > add borders > 25 pixels > color 1
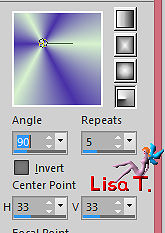
in the materials palette, prepare a radial gradient
select the large border with the magic wand tool (tolerance and feather : 0)
flood fill the selection with the gradient
effects > plugins > Graphic Plus > Quick Tile II as before (don’t change the settings)
selections > invert
effects > 3D effects > cutout
selections > select none
Step 6
copy / paste as new layer the landscape tube
move it slightly to the left (see final result) (I moved it to the right)
adjust > sharpness > sharpen
copy / paste as new layer the character tube and move it to the right (I moved it to the left)
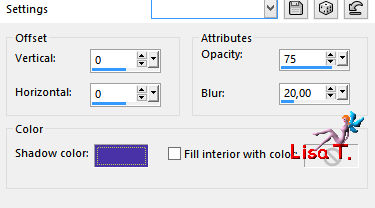
effects > 3D effects > drop shadow to your likings
apply your signature and merge all layer
resize if necessary
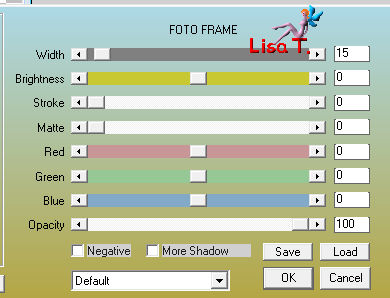
effects > plugins > AAA Frames > Foto Frame
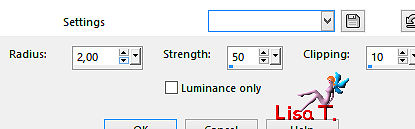
adjust > sharpness > unsharp mask
your tag is finished
Odette hopes you enjoyed following this tutorial
which is the first one she created
She’s are looking forward to see your creations
Thank you to have chosen to try my work
Odette
don’t hesitate to send me your creations
it will be a real pleasure to present them at the end of this tutorial

Gallery
Back to the board of Odette’s Tutorials


|