

click on the flag to find the french tutorial


Conditions of use of the material provided
It is forbidden to modify, change the name, take off the
watermarks or alter the tubes.
It is forbidden to share them in groups or offer them on
your site, blog or forum.
If you want to use them to create a tutorial, you must
ask the permission of the authors.
Odette has the permission of the creators to use their
tubes, masks and decorations
Thank you to all of them.
Without their beautiful creations, no tutorials could be
written.
Odette uses PSPX8 and I use PSP2018 to create the tags
of her tutorials
but you can follow this tutorials with any other version
of PSP
according to the version you use, the result might be slightly
different
Matérial

open all tubes
window/duplicate. Close the originals and work with the
copies to preserve the originals
don’t forget to erase tubers’ watermarks before
using them
open the mask(s) and minimize it(them) to tray
install all plugins needed
install gradients, patterns.... into the dedicated folders
into PSP general folder
Hints and Tips
TIP 1 -> if you don’t
want to install a font -->
open it in a software as « Nexus Font » (or
other font viewer software of you choice)
as long as the software’s windows is opened,
your font will be available in your PSP
TIP 2 -> from PSPX4, in the later versions of PSP the
functions « Mirror » and « Flip » have
been replaced by -->
« Mirror » --> image
-> mirror -> mirror
horizontal
« Flip » --> image -> mirror -> mirror
vertical
Plugins
Unlimited 2 - Mura’s Meister - Distort - AAA Frames
Colors palette
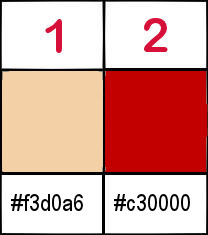
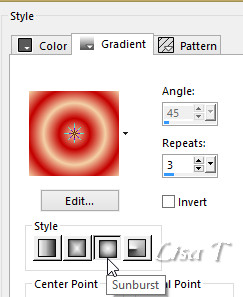
prepare a sunburst gradient -> repeats 3 / into
the FG box
use the pencil to follow the steps
hold down Left click to grab it and move it

Realization
1
open a new transparent image 900 / 700 pixels
selections -> select all
2
copy / paste into selection the Baby tube
selections -> select none
3
image --> seamless tiling -> default settings
4
layers -> merge -> merge all
5
adjust -> blur -> gaussian blur / 40
6
image --> seamless tiling -> default settings
7
layers -> duplicate
8
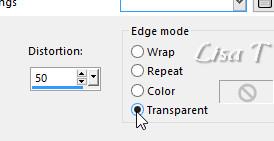
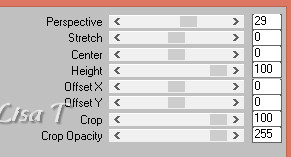
effects -> geometric effects -> perspective vertical
/ distortion 50
9
adjust -> sharpness -> sharpen more
10
layers -> duplicate
image -> mirror -> mirror vertical
11
layers -> merge -> merge down
12
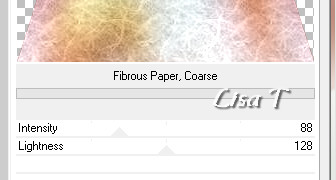
effects -> plugins -> Unlimited 2 -> Paper Textures
-> Fibrous Paper Coarse
13
image -> mirror -> mirror vertical
14
view -> rulers
enable selection tool -> rectangle
select the bottom part of your tag, from 500 pixels
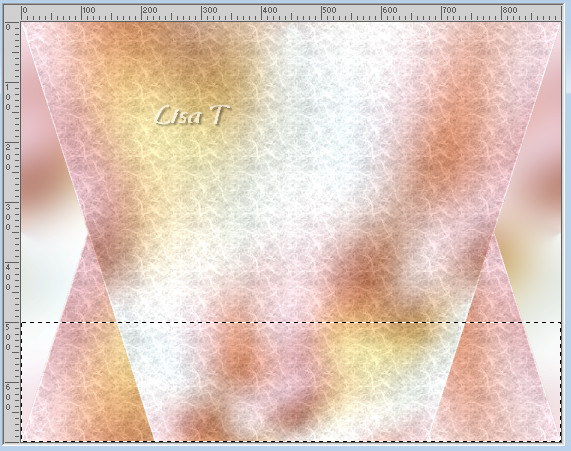
untick « rulers » into the « view » menu
15
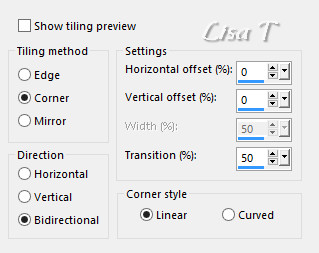
effects -> plugins -> Mura’s Meister / Perspective
Tiling
16
selections -> select none
17
open the baby tube -> resize to 80% (untick « resize
all layers »)
copy / paste as new layer -> don’t move it
18
effects -> 3D effects -> drop shadow -> 1 / 1
/ 50 / 1 / black
19
adjust -> sharpness -> sharpen
20
layers -> merge -> merge down
21
effects -> 3D effects -> drop shadow -> 1 / 1
/ 50 / 1 / black
22
highlight bottom layer (Background)
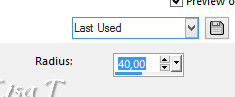
23
effects -> plugins -> Distort -> Radial Zigzag

24
image --> seamless tiling -> default settings
25
adjust -> sharpness -> sharpen more
26
layers -> merge -> merge all (flatten)
27
image -> add borders -> tick « symmetric » -> 2
pixels color 2 (dark color)
28
image -> add borders -> 25 pixels white
29
select the large border with the magic wand tool
flood fill selection with the gradient
30
effects -> plugins -> Distort -> Radial Zigzag
same settings as before
31
selections -> invert
effects -> 3D effects -> cutout
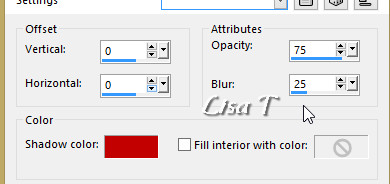
32
effects -> plugins -> AAA Frames -> Foto Frame
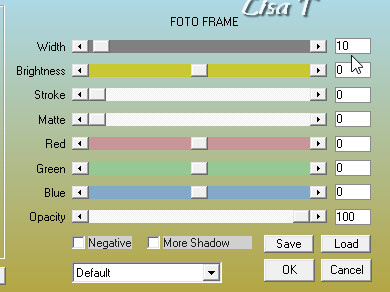
selections -> select none
copy / paste as new layers all the decorations you like
apply a text if you wish
don’t forget to apply your watermark
your tag is finished
Thank you for following this tutorial
save as... type .jpeg
if you have any problem,
or to show her your creations,
Don’t hesitate to write to Odette

It will be a real pleasure for her to present them at the
end of this tutorial
Back to the boards of Odette’ s tutorials
board 1 

|